2017 NISSAN ARMADA key battery
[x] Cancel search: key batteryPage 195 of 614
3-34Pre-driving checks and adjustments
LOCK position.
The driver’s seat and steering wheel will return
to the previous positions when the ignition
switch is pushed to the ACC position.
The driver’s seat will not return to the previous
positions if the seat or steering adjusting switch
is operated when the seat is at the exit position.
Cancel or activate entry/exit function
The shift lever must be in the P (Park) position
with the ignition switch in the OFF position.
The entry/exit function can be activated or
canceled by pressing and holding the SET
switch for more than 10 seconds.
The entry/exit function can also be activated or
canceled if the “Lift Steering Wheel on Exit” key
or “Slide Driver Seat Back on Exit” key is turned
to ON or OFF in the “Comfort” settings. (See
“How to use SETTING button” (P.4-13) .)
Initialize entry/exit function
If the battery cable is disconnected, or if the fuse
opens, the entry/exit function will not work
though this function was set on before. In such
a case, after connecting the battery or replacing
with a new fuse, open and close the driver’s
door more than two times after the ignition
switch is turned from the ON position to the
LOCK position. The entry/exit function will beactivated.
MEMORY STORAGE
Two positions for the driver’s seat, steering
column and outside mirrors can be stored in the
automatic drive positioner memory. Follow these
procedures to use the memory system.
1. Move the shift lever to the P (Park) position.
2. Adjust the driver’s seat, steering column and
outside mirrors to the desired positions by
manually operating each adjusting switch.
For additional information, see “Seats” (P.1-
2) and “Tilt/telescopic steering” (P.3-29)
and “Outside mirrors” (P.3-31) .
3. Push the SET switch and, within 5 seconds, push the memory switch (1 or 2) fully for at
least 1 second.
The indicator light for the pushed memory
switch will stay on for approximately 5
seconds after pushing the switch.
When the memory is stored in the memory
switch (1 or 2) , a buzzer will sound.
If memory is stored in the same memory
switch, the previous memory will be deleted.
Linking Intelligent Key to a stored mem-
ory position
The Intelligent Key can be linked to a stored
memory position with the following procedure.
1. Follow the steps for storing a memoryposition.
2. While the indicator light for the memory switch being set is illuminated for 5 sec-
onds, push the
button on the Intelligent
Key. If the indicator light blinks, the Intelli-
gent Key is linked to that memory setting.
Push the ignition switch to the OFF position, and
then push the
button on the Intelligent Key.
The driver’s seat, steering wheel and outside
mirrors will move to the memorized position.
Confirming memory storage
. Push the ignition switch to the ON position
and push the SET switch. If the main
memory has not been stored, the indicator
light will come on for approximately 0.5
second. When the memory has stored in
position, the indicator light will stay on for
approximately 5 seconds.
. If the battery cable is disconnected, or if the
fuse opens, the memory will be canceled. In
this case, reset the desired position using
the previous procedure.
Page 269 of 614
4-72Monitor, heater, air conditioner, audio, phone and voice recognition systems
tions.
.NO SIGNAL (No signal is received while the
SAT tuner is connected.)
. OFF AIR (Broadcasting signed off)
. CHECK ANTENNA (Antenna connection
error)
. LOADING (When the initial setting is
performed)
. UPDATING (When the satellite radio sub-
scription is not active)
. INVALID CH (Invalid channel is received.)
SCAN tuning:
Push the SCAN tuning button to tune from low
to high frequencies and stop at each broad-
casting station/channel for 5 seconds. Pushing
the button again during this 10 seconds period
will stop SCAN tuning and the radio will remain
tuned to that station/channel.
If the SCAN tuning button is not pushed within 5
seconds, SCAN tuning moves to the next
station/channel.
*1to*6Station memory operations:
12 stations/channels can be set for the FM band
(6 each for FM1 and FM2) , 18 for SiriusXM
Satellite Radio (6 each for XM1, XM2 and XM3)
and 6 stations can be set for the AM band. 1. Choose the radio band using the radio band
select button.
2. Tune to the desired station/channel using the SEEK·CAT, TRACK, SCAN button or the
radio TUNE knob.
3. Push and hold the desired station preset button
*1to*6until the radio mutes.
4. The station indicator will then come on and the sound will resume. Memorizing is now
complete.
5. Other buttons can be set in the same manner.
If the battery cable is disconnected, or if the fuse
opens, the radio memory will be erased. In that
case, reset the desired stations/channels.
Menu (SiriusXM Satellite Radio):
When the “Menu” key on the display is selected
while the SiriusXM Satellite Radio is being
played, the menu list will be displayed.
The following items are available.
. Preset List
Displays the preset channel list. If 1 of the 6
preset stations listed is touched and held,
the current station will be stored as the new
preset.
. Customize Channel List
Selects specific channels to skip while using the TUNE, SEEK·CAT or Menu-Categories
feature.
. Favorite Artists & Songs
Stores the current artist or song that is being
played. Touch the “Alert” key to be reminded
when the stored artist or song is playing on a
station while listening to SiriusXM Satellite
Radio.
. Categories
Selecting a category will go to the first
channel in that category as defined by
SiriusXM Satellite Radio.
. Direct Tune
Inputs the channel number by using a
keypad.
Compact Disc (CD) player operation
Push the ignition switch to the ACC or ON
position and insert the Compact Disc (CD) into
the slot with the label side facing up. The CD will
be guided automatically into the slot and start
playing.
After loading the CD, the number of tracks on
the CD and the play time will appear on the
display.
If the radio is already operating, it will auto-
matically turn off and the CD will play.
If the system has been turned off while the CD
was playing, pushing the ON·OFF button will
Page 342 of 614
5 Starting and driving
Precautions when starting and driving ................................ 5-4Exhaust gas (carbon monoxide) ...................................... 5-4
Three-way catalyst .............................................................. 5-4
Tire Pressure Monitoring System (TPMS) .................... 5-5
Avoiding collision and rollover ......................................... 5-8
On-pavement and off-road driving precautions .......... 5-9
Off-road recovery ................................................................ 5-9
Rapid air pressure loss ...................................................... 5-9
Drinking alcohol/drugs and driving .............................. 5-10
Driving safety precautions .............................................. 5-10
Push-button ignition switch ................................................. 5-12 Operating range for engine start function ................. 5-13
Push-button ignition switch positions ......................... 5-14
Emergency engine shut off ............................................ 5-14
Intelligent Key battery discharge .................................. 5-15
Before starting the engine ................................................... 5-15
Starting the engine ................................................................ 5-16 Remote start (if so equipped) ....................................... 5-16
Driving the vehicle ................................................................. 5-17 Engine protection mode ................................................. 5-17
Automatic transmission ................................................... 5-18
Parking brake ........................................................................\
.. 5-22
Lane Departure Warning (LDW)/Lane Departure
Prevention (LDP) (if so equipped) .................................... 5-23 LDW system operation ................................................... 5-24 Turning the LDW system ON/OFF ............................ 5-25
How to enable/disable the LDW system ................. 5-26
LDP system operation .................................................. 5-26
Turning the LDP system ON/OFF ............................. 5-28
How to enable/disable the LDP system .................. 5-28
LDW/LDP system limitations ...................................... 5-29
System temporarily unavailable .................................. 5-31
System malfunction ....................................................... 5-32
System maintenance ..................................................... 5-32
Blind Spot Warning (BSW) (if so equipped) ................ 5-33
BSW system operation ................................................ 5-35
Turning the BSW system ON/OFF ........................... 5-36
How to enable/disable the BSW system ................ 5-36
BSW system limitations ............................................... 5-37
BSW driving situations ................................................. 5-38
System temporarily unavailable .................................. 5-41
System malfunction ....................................................... 5-41
System maintenance ..................................................... 5-42
Blind Spot Intervention
�Š(BSI) (if so equipped) ........... 5-43
BSI system operation .................................................... 5-45
Turning the BSI system ON/OFF ............................... 5-46
How to enable/disable the BSI system ................... 5-47
BSI system limitations ................................................... 5-47
BSI driving situations .................................................... 5-49
System temporarily unavailable .................................. 5-54
Page 354 of 614
SSD0436
OPERATING RANGE FOR ENGINE
START FUNCTION
The operating range for starting the engine
inside the vehicle
*1is shown in the illustration.
. If the Intelligent Key is on the instrument
panel, cargo area, inside the glove box or
door pocket, or the corner of interior
compartment, it may not be possible to start
the engine.
. If the Intelligent Key is near the door or door
glass outside the vehicle, it may be possible
to start the engine.
SSD1021
When the ignition switch is pushed without
depressing the brake pedal, the ignition switch
position will change as follows:
.Push center once to change to ACC.
. Push center two times to change to ON.
. Push center three times to change to OFF.
(No position illuminates.)
. Push center four times to return to ACC.
. Open or close any door to return to LOCK
during the OFF position.
The ignition lock is designed so that the ignition
switch position cannot be switched to LOCK
until the shift lever is moved to the P (Park)
position. When the ignition switch cannot be pushed
toward the LOCK position, proceed as follows:
1. Move the shift lever into the P (Park)
position.
2. Push the ignition switch to the OFF position. The ignition switch position indicator will not
illuminate.
3. Open the door. The ignition switch will change to the LOCK position.
The shift lever can be moved from the P
(Park) position if the ignition switch is in
the ON position and the brake pedal is
depressed.
If the battery of the vehicle is discharged,
the push-button ignition switch cannot be
turned from the LOCK position.
Some indicators and warnings for operation are
displayed on the vehicle information display
between the speedometer and tachometer.
(See “Vehicle information display” (P.2-20) .)
Starting and driving5-13
Page 355 of 614
5-14Starting and driving
PUSH-BUTTON IGNITION SWITCH
POSITIONS
LOCK (Normal parking position)
The ignition switch can only be locked in this
position.
The ignition switch will be unlocked when it is
pushed to the ACC position while carrying the
Intelligent Key.
ACC (Accessories)
This position activates electrical accessories
such as the radio, when the engine is not
running.
ACC has a battery saver feature that will turn the
ignition switch to the OFF position after a period
of time under the following conditions:
.all doors are closed.
. shift lever is in P (Park) .
. turn signal/hazard indicator lights are not
flashing.
The battery saver feature will be cancelled if any
of the following occur:
. any door is opened.
. shift lever is moved out of P (Park) .
. ignition switch changes position.
ON (Normal operating position)
This position turns on the ignition system and
electrical accessories.
ON has a battery saver feature that will turn the
ignition switch to the OFF position, if the vehicle
is not running, after some time under the
following conditions:
.all doors are closed.
. shift lever is in P (Park) .
. turn signal/hazard indicator lights are not
flashing.
The battery saver feature will be cancelled if any
of the following occur:
. any door is opened.
. shift lever is moved out of P (Park) .
. ignition switch changes position.
OFF
The engine can be turned off in the position.
The ignition lock is designed so that the ignition
switch cannot be switched to the LOCK position
until the shift lever is moved to the P (Park)
position.
CAUTION
Do not leave the vehicle with the push-
button ignition switch in ACC or ON
positions when the engine is not run-
ning for an extended period. This can
discharge the battery.
EMERGENCY ENGINE SHUT OFF
To shut off the engine in an emergency situation
while driving, perform the following procedure:
.Rapidly push the push-button ignition switch
3 consecutive times in less than 1.5
seconds, or
. Push and hold the push-button ignition
switch for more than 2 seconds.
Page 356 of 614
JVS0404X
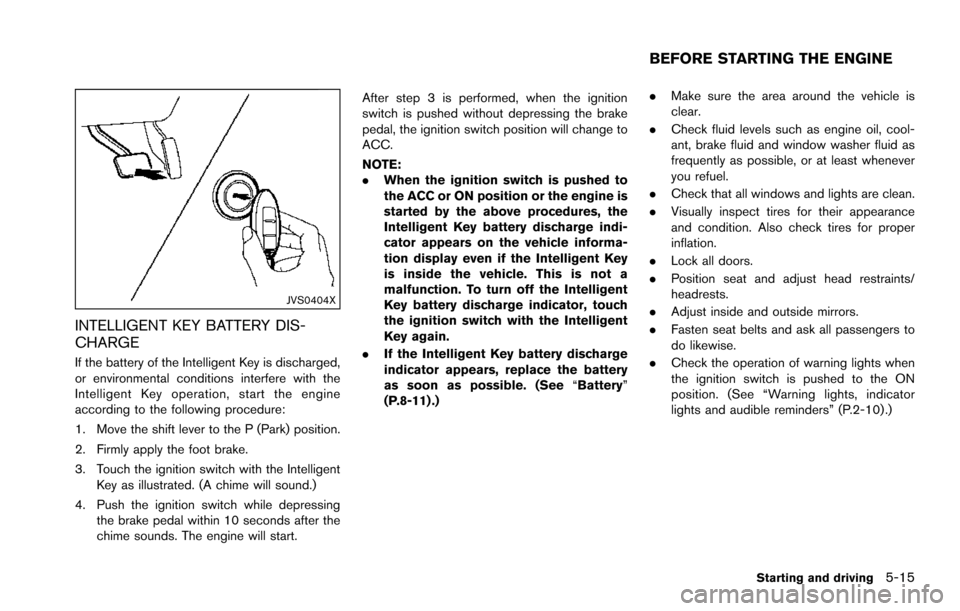
INTELLIGENT KEY BATTERY DIS-
CHARGE
If the battery of the Intelligent Key is discharged,
or environmental conditions interfere with the
Intelligent Key operation, start the engine
according to the following procedure:
1. Move the shift lever to the P (Park) position.
2. Firmly apply the foot brake.
3. Touch the ignition switch with the IntelligentKey as illustrated. (A chime will sound.)
4. Push the ignition switch while depressing the brake pedal within 10 seconds after the
chime sounds. The engine will start. After step 3 is performed, when the ignition
switch is pushed without depressing the brake
pedal, the ignition switch position will change to
ACC.
NOTE:
.
When the ignition switch is pushed to
the ACC or ON position or the engine is
started by the above procedures, the
Intelligent Key battery discharge indi-
cator appears on the vehicle informa-
tion display even if the Intelligent Key
is inside the vehicle. This is not a
malfunction. To turn off the Intelligent
Key battery discharge indicator, touch
the ignition switch with the Intelligent
Key again.
. If the Intelligent Key battery discharge
indicator appears, replace the battery
as soon as possible. (See “Battery”
(P.8-11) .) .
Make sure the area around the vehicle is
clear.
. Check fluid levels such as engine oil, cool-
ant, brake fluid and window washer fluid as
frequently as possible, or at least whenever
you refuel.
. Check that all windows and lights are clean.
. Visually inspect tires for their appearance
and condition. Also check tires for proper
inflation.
. Lock all doors.
. Position seat and adjust head restraints/
headrests.
. Adjust inside and outside mirrors.
. Fasten seat belts and ask all passengers to
do likewise.
. Check the operation of warning lights when
the ignition switch is pushed to the ON
position. (See “Warning lights, indicator
lights and audible reminders” (P.2-10) .)
Starting and driving5-15
BEFORE STARTING THE ENGINE
Page 481 of 614
5-140Starting and driving
SIC4455
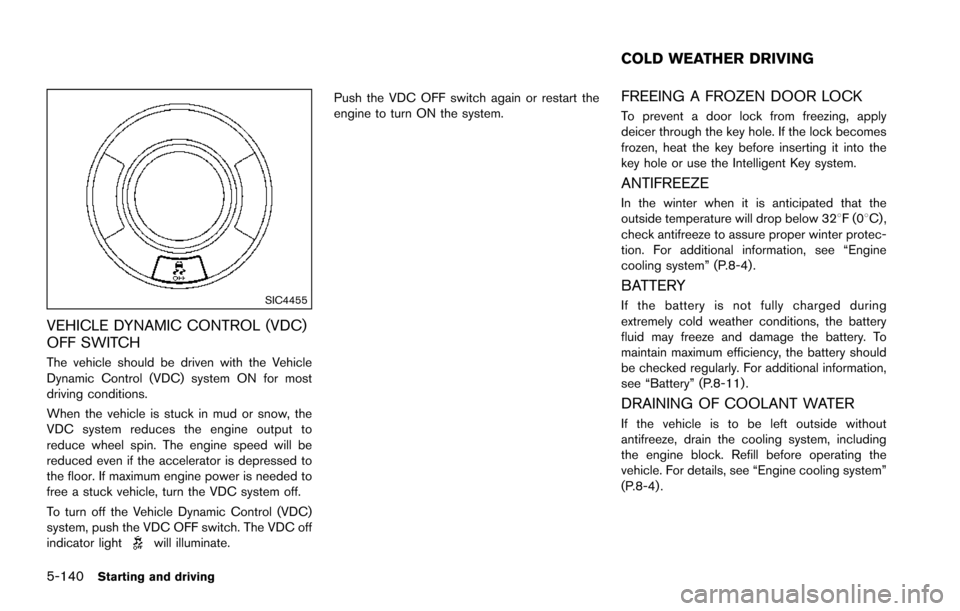
VEHICLE DYNAMIC CONTROL (VDC)
OFF SWITCH
The vehicle should be driven with the Vehicle
Dynamic Control (VDC) system ON for most
driving conditions.
When the vehicle is stuck in mud or snow, the
VDC system reduces the engine output to
reduce wheel spin. The engine speed will be
reduced even if the accelerator is depressed to
the floor. If maximum engine power is needed to
free a stuck vehicle, turn the VDC system off.
To turn off the Vehicle Dynamic Control (VDC)
system, push the VDC OFF switch. The VDC off
indicator light
will illuminate.Push the VDC OFF switch again or restart the
engine to turn ON the system.
FREEING A FROZEN DOOR LOCK
To prevent a door lock from freezing, apply
deicer through the key hole. If the lock becomes
frozen, heat the key before inserting it into the
key hole or use the Intelligent Key system.
ANTIFREEZE
In the winter when it is anticipated that the
outside temperature will drop below 328F(0
8C) ,
check antifreeze to assure proper winter protec-
tion. For additional information, see “Engine
cooling system” (P.8-4).
BATTERY
If the battery is not fully charged during
extremely cold weather conditions, the battery
fluid may freeze and damage the battery. To
maintain maximum efficiency, the battery should
be checked regularly. For additional information,
see “Battery” (P.8-11) .
DRAINING OF COOLANT WATER
If the vehicle is to be left outside without
antifreeze, drain the cooling system, including
the engine block. Refill before operating the
vehicle. For details, see “Engine cooling system”
(P.8-4) .
COLD WEATHER DRIVING
Page 516 of 614
8 Do-it-yourself
Maintenance precautions ........................................................ 8-2
Engine compartment check locations .................................. 8-3VK56VD engine ................................................................... 8-3
Engine cooling system ............................................................. 8-4 Checking engine coolant level ......................................... 8-5
Changing engine coolant .................................................. 8-5
Engine oil ........................................................................\
............ 8-6 Checking engine oil level .................................................. 8-6
Changing engine oil and filter .......................................... 8-6
Automatic Transmission Fluid (ATF) ..................................... 8-8
Power steering fluid .................................................................. 8-8
Brake fluid ........................................................................\
........... 8-9
Window washer fluid ............................................................ 8-10
Battery ........................................................................\
............... 8-11 Jump starting ..................................................................... 8-13
Variable voltage control system .......................................... 8-13
Drive belts ........................................................................\
........ 8-13
Spark plugs ........................................................................\
..... 8-14 Replacing spark plugs .................................................... 8-14
Air cleaner ........................................................................\
........ 8-15 Windshield wiper blades ..................................................... 8-16
Cleaning ........................................................................\
... 8-16
Replacing ........................................................................\
. 8-16
Rear window wiper blades ................................................. 8-17
Brakes ........................................................................\
.............. 8-17 Self-adjusting brakes .................................................... 8-17
Brake pad wear warning .............................................. 8-17
Brake booster ................................................................. 8-18
Fuses ........................................................................\
................ 8-18 Engine compartment ..................................................... 8-19
Passenger compartment .............................................. 8-20
Intelligent Key battery replacement ................................... 8-21
Lights ........................................................................\
................ 8-24
Headlights ........................................................................\
8-25
Exterior and interior lights ............................................ 8-26
Wheels and tires ................................................................... 8-30
Tire pressure ................................................................... 8-30
Tire labeling ..................................................................... 8-34
Types of tires ................................................................... 8-36
Tire chains ....................................................................... 8-36
Changing wheels and tires .......................................... 8-37