2017 NISSAN ARMADA radio
[x] Cancel search: radioPage 219 of 614
4-22Monitor, heater, air conditioner, audio, phone and voice recognition systems
CAUTION
Do not scratch the camera lens when
cleaning dirt or snow from the front of
camera.
The RearView Monitor system automatically
shows a rear view of the vehicle when the shift
lever is placed in the R (Reverse) position.
The radio can still be heard while the RearView
Monitor is active.
JVH1395X
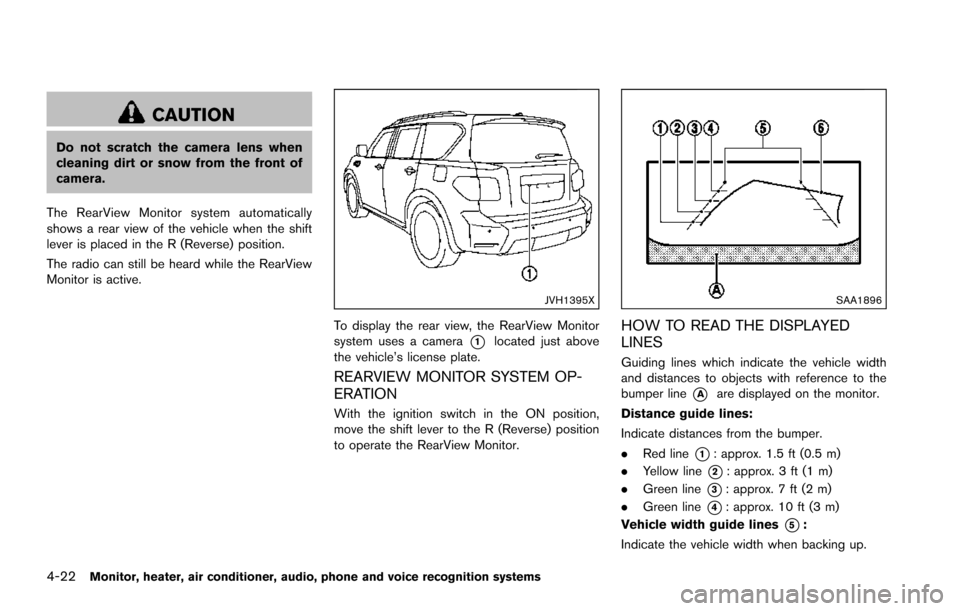
To display the rear view, the RearView Monitor
system uses a camera
*1located just above
the vehicle’s license plate.
REARVIEW MONITOR SYSTEM OP-
ERATION
With the ignition switch in the ON position,
move the shift lever to the R (Reverse) position
to operate the RearView Monitor.
SAA1896
HOW TO READ THE DISPLAYED
LINES
Guiding lines which indicate the vehicle width
and distances to objects with reference to the
bumper line
*Aare displayed on the monitor.
Distance guide lines:
Indicate distances from the bumper.
. Red line
*1: approx. 1.5 ft (0.5 m)
. Yellow line
*2: approx. 3 ft (1 m)
. Green line
*3: approx. 7 ft (2 m)
. Green line
*4: approx. 10 ft (3 m)
Vehicle width guide lines
*5:
Indicate the vehicle width when backing up.
Page 256 of 614
AUDIO OPERATION PRECAUTIONS
Radio
Push the ignition switch to the ACC or ON
position and push the radio band select button
to turn on the radio. If you listen to the radio with
the engine not running, the ignition switch
should be pushed to the ACC position.
Radio reception is affected by station signal
strength, distance from radio transmitter, build-
ings, bridges, mountains and other external
influences. Intermittent changes in reception
quality normally are caused by these external
influences.
Using a cellular phone in or near the
vehicle may influence radio reception
quality.
Radio reception:
Your NISSAN radio system is equipped with
state-of-the-art electronic circuits to enhance
radio reception. These circuits are designed to
extend reception range, and to enhance the
quality of that reception.
However there are some general characteristics
of both FM and AM radio signals that can affect
radio reception quality in a moving vehicle, even
when the finest equipment is used. These
characteristics are completely normal in a given
reception area, and do not indicate any mal-function in your NISSAN radio system.
Reception conditions will constantly change
because of vehicle movement. Buildings, terrain,
signal distance and interference from other
vehicles can work against ideal reception.
Described below are some of the factors that
can affect your radio reception.
Some cellular phones or other devices may
cause interference or a buzzing noise to come
from the audio system speakers. Storing the
device in a different location may reduce or
eliminate the noise.
SAA0306
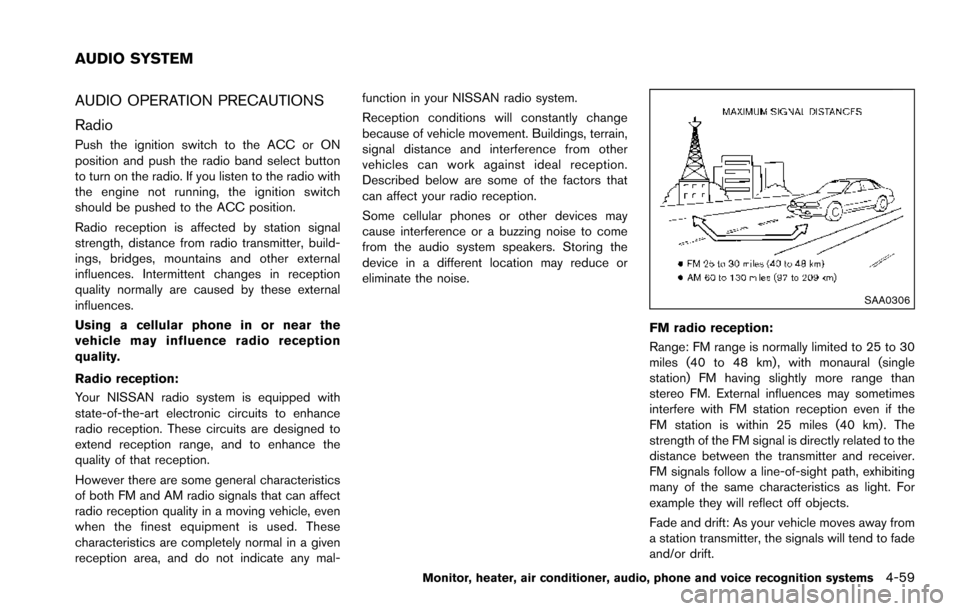
FM radio reception:
Range: FM range is normally limited to 25 to 30
miles (40 to 48 km) , with monaural (single
station) FM having slightly more range than
stereo FM. External influences may sometimes
interfere with FM station reception even if the
FM station is within 25 miles (40 km). The
strength of the FM signal is directly related to the
distance between the transmitter and receiver.
FM signals follow a line-of-sight path, exhibiting
many of the same characteristics as light. For
example they will reflect off objects.
Fade and drift: As your vehicle moves away from
a station transmitter, the signals will tend to fade
and/or drift.
Monitor, heater, air conditioner, audio, phone and voice recognition systems4-59
AUDIO SYSTEM
Page 257 of 614
4-60Monitor, heater, air conditioner, audio, phone and voice recognition systems
Static and flutter: During signal interference from
buildings, large hills or due to antenna position,
usually in conjunction with increased distance
from the station transmitter, static or flutter can
be heard. This can be reduced by lowering the
treble setting to reduce the treble response.
Multipath reception: Because of the reflective
characteristics of FM signals, direct and re-
flected signals reach the receiver at the same
time. The signals may cancel each other,
resulting in momentary flutter or loss of sound.
AM radio reception:
AM signals, because of their low frequency, can
bend around objects and skip along the ground.
In addition, the signals can be bounced off the
ionosphere and bent back to earth. Because of
these characteristics. AM signals are also
subject to interference as they travel from
transmitter to receiver.
Fading: Occurs while the vehicle is passing
through freeway underpasses or in areas with
many tall buildings. It can also occur for several
seconds during ionospheric turbulence even in
areas where no obstacles exist.
Static: Caused by thunderstorms, electrical
power lines, electric signs and even traffic lights.Satellite radio reception:
When the satellite radio is used for the first time
or the battery has been replaced, the satellite
radio may not work properly. This is not a
malfunction. Wait more than 10 minutes with the
satellite radio ON and the vehicle outside of any
metal or large building for the satellite radio to
receive all of the necessary data.
The satellite radio mode requires an active
SiriusXM Satellite Radio subscription. The sa-
tellite radio is not available in Alaska, Hawaii and
Guam.
The satellite radio performance may be affected
if cargo carried on the roof blocks the satellite
radio signal.
If possible, do not put cargo near the satellite
antenna.
A build up of ice on the satellite radio antenna
can affect satellite radio performance. Remove
the ice to restore satellite radio reception.
SAA0480
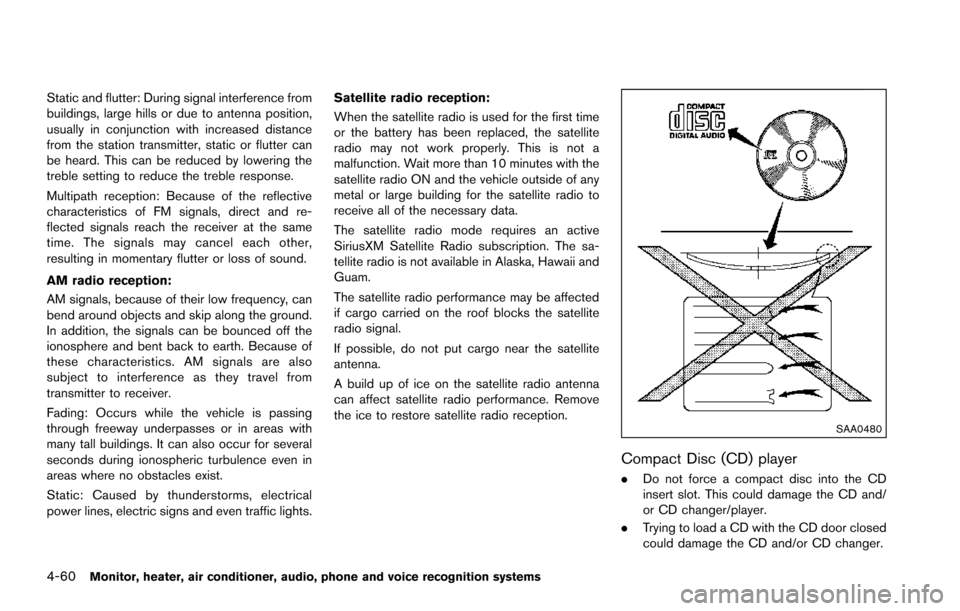
Compact Disc (CD) player
.
Do not force a compact disc into the CD
insert slot. This could damage the CD and/
or CD changer/player.
. Trying to load a CD with the CD door closed
could damage the CD and/or CD changer.
Page 267 of 614
4-70Monitor, heater, air conditioner, audio, phone and voice recognition systems
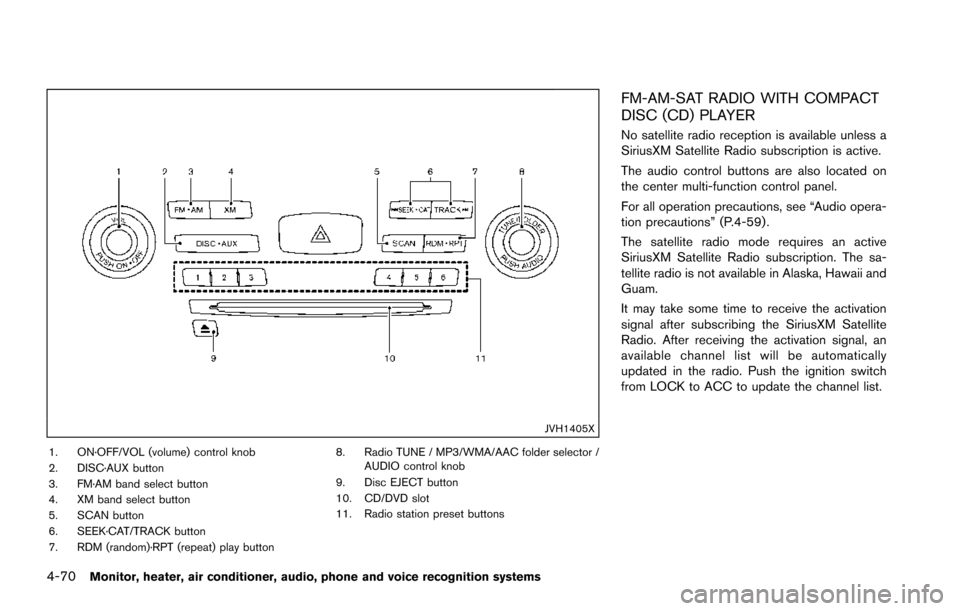
JVH1405X
1. ON·OFF/VOL (volume) control knob
2. DISC·AUX button
3. FM·AM band select button
4. XM band select button
5. SCAN button
6. SEEK·CAT/TRACK button
7. RDM (random)·RPT (repeat) play button8. Radio TUNE / MP3/WMA/AAC folder selector /
AUDIO control knob
9. Disc EJECT button
10. CD/DVD slot
11. Radio station preset buttons
FM-AM-SAT RADIO WITH COMPACT
DISC (CD) PLAYER
No satellite radio reception is available unless a
SiriusXM Satellite Radio subscription is active.
The audio control buttons are also located on
the center multi-function control panel.
For all operation precautions, see “Audio opera-
tion precautions” (P.4-59) .
The satellite radio mode requires an active
SiriusXM Satellite Radio subscription. The sa-
tellite radio is not available in Alaska, Hawaii and
Guam.
It may take some time to receive the activation
signal after subscribing the SiriusXM Satellite
Radio. After receiving the activation signal, an
available channel list will be automatically
updated in the radio. Push the ignition switch
from LOCK to ACC to update the channel list.
Page 268 of 614
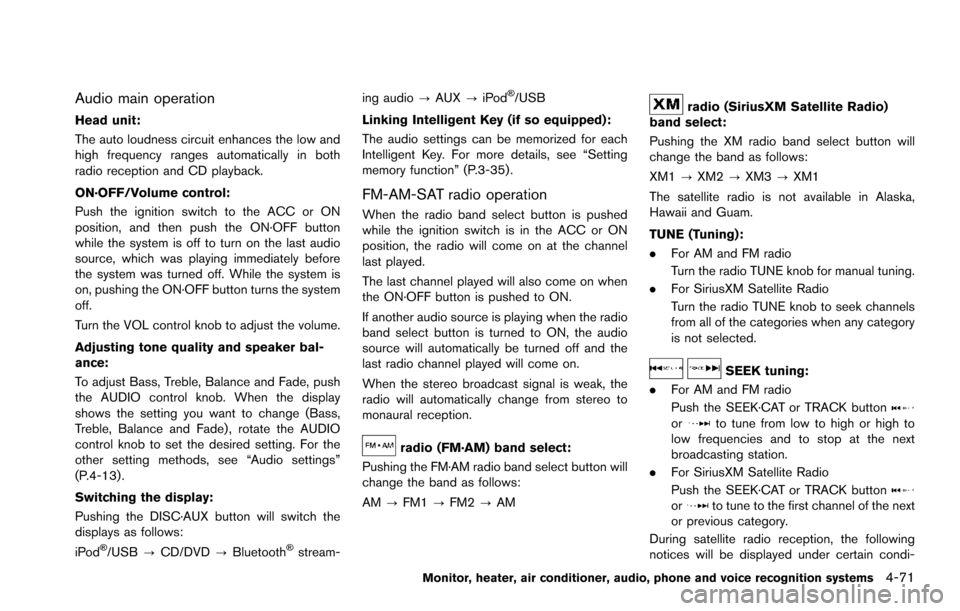
Audio main operation
Head unit:
The auto loudness circuit enhances the low and
high frequency ranges automatically in both
radio reception and CD playback.
ON·OFF/Volume control:
Push the ignition switch to the ACC or ON
position, and then push the ON·OFF button
while the system is off to turn on the last audio
source, which was playing immediately before
the system was turned off. While the system is
on, pushing the ON·OFF button turns the system
off.
Turn the VOL control knob to adjust the volume.
Adjusting tone quality and speaker bal-
ance:
To adjust Bass, Treble, Balance and Fade, push
the AUDIO control knob. When the display
shows the setting you want to change (Bass,
Treble, Balance and Fade) , rotate the AUDIO
control knob to set the desired setting. For the
other setting methods, see “Audio settings”
(P.4-13) .
Switching the display:
Pushing the DISC·AUX button will switch the
displays as follows:
iPod
�Š/USB?CD/DVD ?Bluetooth�Šstream- ing audio
?AUX ?iPod
�Š/USB
Linking Intelligent Key (if so equipped):
The audio settings can be memorized for each
Intelligent Key. For more details, see “Setting
memory function” (P.3-35) .
FM-AM-SAT radio operation
When the radio band select button is pushed
while the ignition switch is in the ACC or ON
position, the radio will come on at the channel
last played.
The last channel played will also come on when
the ON·OFF button is pushed to ON.
If another audio source is playing when the radio
band select button is turned to ON, the audio
source will automatically be turned off and the
last radio channel played will come on.
When the stereo broadcast signal is weak, the
radio will automatically change from stereo to
monaural reception.
radio (FM·AM) band select:
Pushing the FM·AM radio band select button will
change the band as follows:
AM ?FM1 ?FM2 ?AM
radio (SiriusXM Satellite Radio)
band select:
Pushing the XM radio band select button will
change the band as follows:
XM1 ?XM2 ?XM3 ?XM1
The satellite radio is not available in Alaska,
Hawaii and Guam.
TUNE (Tuning):
. For AM and FM radio
Turn the radio TUNE knob for manual tuning.
. For SiriusXM Satellite Radio
Turn the radio TUNE knob to seek channels
from all of the categories when any category
is not selected.
SEEK tuning:
. For AM and FM radio
Push the SEEK·CAT or TRACK button
orto tune from low to high or high to
low frequencies and to stop at the next
broadcasting station.
. For SiriusXM Satellite Radio
Push the SEEK·CAT or TRACK button
orto tune to the first channel of the next
or previous category.
During satellite radio reception, the following
notices will be displayed under certain condi-
Monitor, heater, air conditioner, audio, phone and voice recognition systems4-71
Page 269 of 614
4-72Monitor, heater, air conditioner, audio, phone and voice recognition systems
tions.
.NO SIGNAL (No signal is received while the
SAT tuner is connected.)
. OFF AIR (Broadcasting signed off)
. CHECK ANTENNA (Antenna connection
error)
. LOADING (When the initial setting is
performed)
. UPDATING (When the satellite radio sub-
scription is not active)
. INVALID CH (Invalid channel is received.)
SCAN tuning:
Push the SCAN tuning button to tune from low
to high frequencies and stop at each broad-
casting station/channel for 5 seconds. Pushing
the button again during this 10 seconds period
will stop SCAN tuning and the radio will remain
tuned to that station/channel.
If the SCAN tuning button is not pushed within 5
seconds, SCAN tuning moves to the next
station/channel.
*1to*6Station memory operations:
12 stations/channels can be set for the FM band
(6 each for FM1 and FM2) , 18 for SiriusXM
Satellite Radio (6 each for XM1, XM2 and XM3)
and 6 stations can be set for the AM band. 1. Choose the radio band using the radio band
select button.
2. Tune to the desired station/channel using the SEEK·CAT, TRACK, SCAN button or the
radio TUNE knob.
3. Push and hold the desired station preset button
*1to*6until the radio mutes.
4. The station indicator will then come on and the sound will resume. Memorizing is now
complete.
5. Other buttons can be set in the same manner.
If the battery cable is disconnected, or if the fuse
opens, the radio memory will be erased. In that
case, reset the desired stations/channels.
Menu (SiriusXM Satellite Radio):
When the “Menu” key on the display is selected
while the SiriusXM Satellite Radio is being
played, the menu list will be displayed.
The following items are available.
. Preset List
Displays the preset channel list. If 1 of the 6
preset stations listed is touched and held,
the current station will be stored as the new
preset.
. Customize Channel List
Selects specific channels to skip while using the TUNE, SEEK·CAT or Menu-Categories
feature.
. Favorite Artists & Songs
Stores the current artist or song that is being
played. Touch the “Alert” key to be reminded
when the stored artist or song is playing on a
station while listening to SiriusXM Satellite
Radio.
. Categories
Selecting a category will go to the first
channel in that category as defined by
SiriusXM Satellite Radio.
. Direct Tune
Inputs the channel number by using a
keypad.
Compact Disc (CD) player operation
Push the ignition switch to the ACC or ON
position and insert the Compact Disc (CD) into
the slot with the label side facing up. The CD will
be guided automatically into the slot and start
playing.
After loading the CD, the number of tracks on
the CD and the play time will appear on the
display.
If the radio is already operating, it will auto-
matically turn off and the CD will play.
If the system has been turned off while the CD
was playing, pushing the ON·OFF button will
Page 270 of 614
start the CD.
PLAY:
When the DISC·AUX (CD play) button is
pushed with the system off and the CD loaded,
the system will turn on and the CD will start to
play.
When the DISC·AUX button is pushed with the
CD loaded and the radio playing, the radio will
automatically be turned off and the CD will start
to play.
Menu:
When the “Menu” key on the display is selected
while the CD is being played, the menu screen
will be displayed. The following menu options
are available.
. Folder List (for CD with compressed audio
files)
Displays the folder list.
. Track List
Displays the track list.
. Play Mode
Select a play mode from the following items.
— Normal
— 1 Folder Repeat (for CD with com-
pressed audio files) — 1 Track Repeat
— 1 Disc Random
— 1 Folder Random (for CD with com-
pressed audio files)
Next/Previous Track and Fast
Forward/Rewind:
When the
orbutton is pushed for more
than 1.5 seconds while the CD is being played,
the CD will play while fast forwarding or
rewinding. When the button is released, the
CD will return to normal play speed.
When the
orbutton is pushed for less
than 1.5 seconds while the CD is being played,
the next track or the beginning of the current
track on the CD will be played.
When the rewind button is pushed for less than
1.5 seconds within 3 seconds after the current
track starts playing, the previous track will be
played.
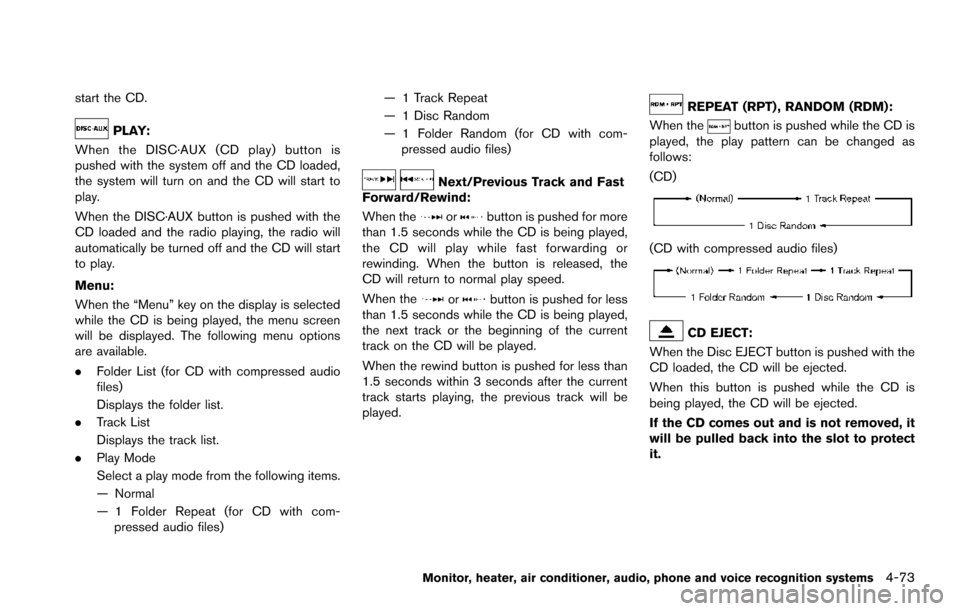
REPEAT (RPT) , RANDOM (RDM):
When the
button is pushed while the CD is
played, the play pattern can be changed as
follows:
(CD)
(CD with compressed audio files)
CD EJECT:
When the Disc EJECT button is pushed with the
CD loaded, the CD will be ejected.
When this button is pushed while the CD is
being played, the CD will be ejected.
If the CD comes out and is not removed, it
will be pulled back into the slot to protect
it.
Monitor, heater, air conditioner, audio, phone and voice recognition systems4-73
Page 288 of 614
STEERING-WHEEL-MOUNTED CON-
TROLS FOR AUDIO
Menu control switch
While the display is showing a MAP, STATUS or
Audio screen, tilt the switch upward or down-
ward to select a station, track, CD or folder. For
most audio sources, tilting the switch up/down
for more than 1.5 seconds provides a different
function than tilting up/down for less than 1.5
seconds.
AM and FM radio:
.Tilting up/down for less than 1.5 seconds
will increase or decrease the preset station.
. Tilting up/down for more than 1.5 seconds
will seek up or down to the next station.
. Pushing the menu control switch will show
the list of preset stations.
SiriusXM Satellite Radio:
. Tilting up/down for less than 1.5 seconds
will increase or decrease the preset channel.
. Tilting up/down for more than 1.5 seconds
will go to the next or previous category.
. Pushing the menu control switch will show
the XM Menu.
iPod
�Š:
. Tilting up/down for less than 1.5 seconds
will increase or decrease the track number. .
Tilting up/down for more than 1.5 seconds
will skip to the next or previous index.
. Pushing the menu control switch will show
the iPod Menu.
CD:
. Tilting up/down for less than 1.5 seconds
will increase or decrease the track number.
. Tilting up/down for more than 1.5 seconds
will increase/decrease the folder number (if
playing compressed audio files) .
. Pushing the menu control switch will show
the CD Menu.
DVD:
. Tilting up/down for less than 1.5 seconds
will increase or decrease the track number.
. Tilting up/down for more than 1.5 seconds
will increase or decrease the title number.
. Pushing the menu control switch will select
an item from the DVD display.
. When the transparent operation menu ap-
pears, the switch will control the menu.
USB:
. Tilting up/down for less than 1.5 seconds
will increase or decrease the track number.
. Tilting up/down for more than 1.5 seconds
will increase/decrease the folder number .
Pushing the menu control switch will show
the USB Menu.
Bluetooth
�Šstreaming audio:
. Tilting up/down for less than 1.5 seconds
will increase or decrease the track number.
Back switch
Push this switch to go back to the previous
screen or cancel the selection if it is not
completed.
Volume control switches
Push the + or �íside of the switch to increase or
decrease the volume.
SOURCE select switch
Push the SOURCE select switch to change the
mode to available audio source.
Monitor, heater, air conditioner, audio, phone and voice recognition systems4-91