2017 NISSAN ALTIMA light
[x] Cancel search: lightPage 13 of 36
11
TRUNK LID RELEASE
To open the trunk, press the trunk lid release button 5 for more
than 1 second.
The trunk lid r elease button will not operate when the ignition switch
is in the ON position.
PANIC ALARM
The Intel ligent Key can also be used to activate the panic alarm by pressing and
holding the button 6 for more than 0.5 seconds. Once activated, the panic
alarm and headlights will stay on for a period of time.
INTELLIGENT KEY BATTERY DISCHARGE
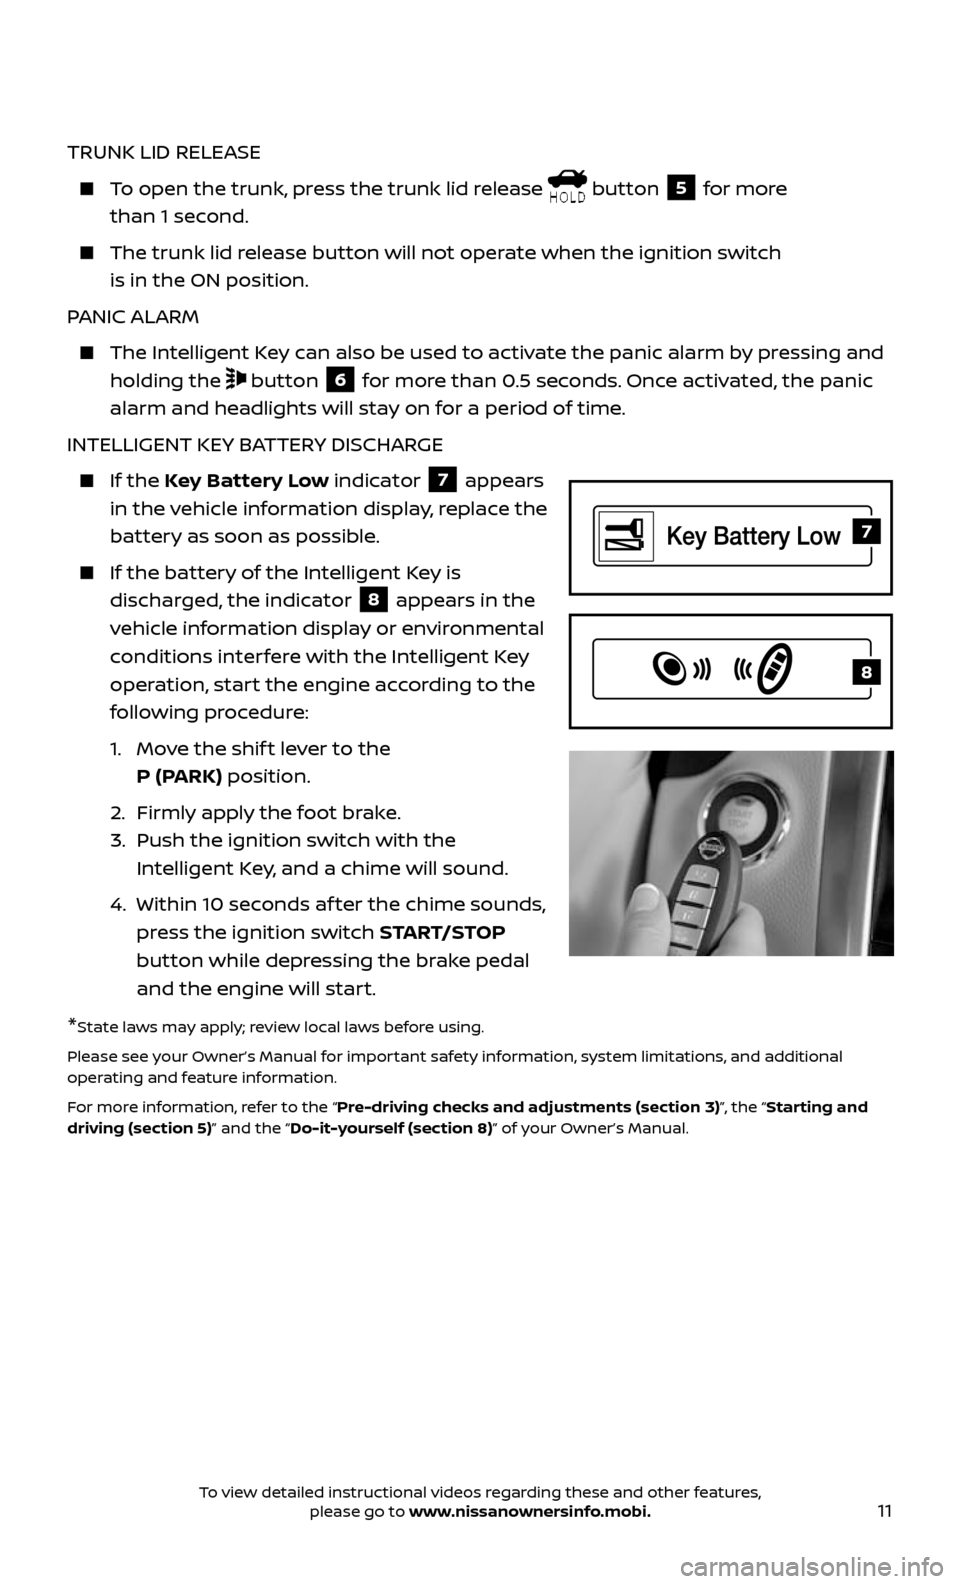
If the Key Battery Low indicator 7 appears
in the vehicle information display, replace the
battery as soon as possible.
If the bat tery of the Intelligent Key is
discharged, the indicator 8 appears in the
vehicle information display or environmental
conditions interfere with the Intelligent Key
operation, start the engine according to the
following procedure:
1. Move the shif t lever to the
P (PARK) position.
2. Firml y apply the foot brake.
3. Push the ignition switch with the
Intelligent Key, and a chime will sound.
4. Within 10 sec onds af ter the chime sounds,
press the ignition switch START/STOP
button while depressing the brake pedal
and the engine will start.
*State laws may apply; review local laws before using.
Please see your Owner’s Manual for important safety information, system limitations, and additional
operating and feature information.
For more information, refer to the “Pre-driving checks and adjustments (section 3)”, the “Starting and
driving (section 5)” and the “Do-it-yourself (section 8)” of your Owner’s Manual.
7
8
To view detailed instructional videos regarding these and other features, please go to www.nissanownersinfo.mobi.
Page 16 of 36
14
HEADLIGHT CONTROL SWITCH
HEADLIGHT CONTROL
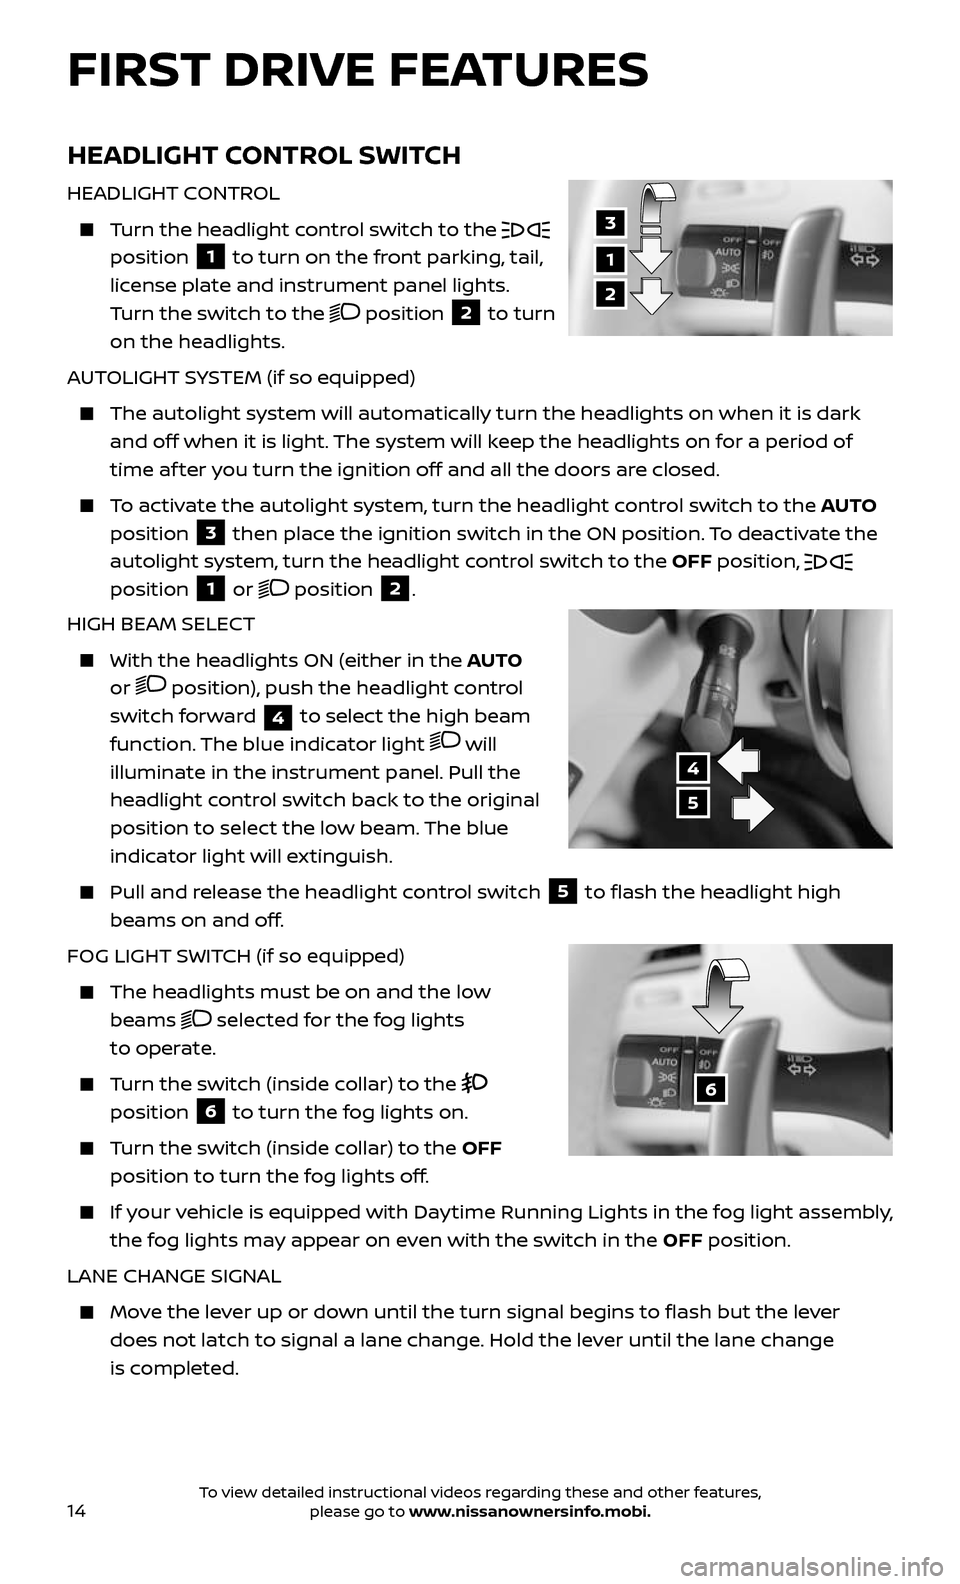
Turn the headlight control switch to the position 1 to turn on the front parking, tail,
license plate and instrument panel lights.
Turn the switch to the
position 2 to turn
on the headlights.
AUTOLIGHT SYSTEM (if so equipped)
The autolight system wil l automatically turn the headlights on when it is dark
and off when it is light. The system will keep the headlights on for a period of
time af ter you turn the ignition off and all the doors are closed.
To activate the autolight system, turn the headlight control switch to the AUTO
position
3 then place the ignition switch in the ON position. To deactivate the
autolight system, turn the headlight control switch to the OFF position,
position 1 or position 2.
HIGH BEAM SELECT
With the he adlights ON (either in the AUTO
or
position), push the headlight control
switch forward 4 to select the high beam
function. The blue indicator light
will
illuminate in the instrument panel. Pull the
headlight control switch back to the original
position to select the low beam. The blue
indicator light will extinguish.
Pull and release the headlight control switch 5 to flash the headlight high
beams on and off.
FOG LIGHT SWITCH (if so equipped)
The headlights must be on and the low
beams selected for the fog lights
to operate.
Turn the switch (inside collar) to the
position 6 to turn the fog lights on.
Turn the switch (inside collar) to the OFF
position to turn the fog lights off.
If your vehicle is equipped with Daytime Running Lights in the fog light assembly,
the fog lights may appear on even with the switch in the OFF position.
LANE CHANGE SIGNAL
Move the lever up or down until the turn signal begins to flash but the lever
does not latch to signal a lane change. Hold the lever until the lane change
is completed.
6
FIRST DRIVE FEATURES
1
3
2
4
5
To view detailed instructional videos regarding these and other features, please go to www.nissanownersinfo.mobi.
Page 20 of 36
18
USB (Universal Serial Bus) CONNECTION PORT/AUX JACK AND
iPod® INTERFACE (if so equipped)
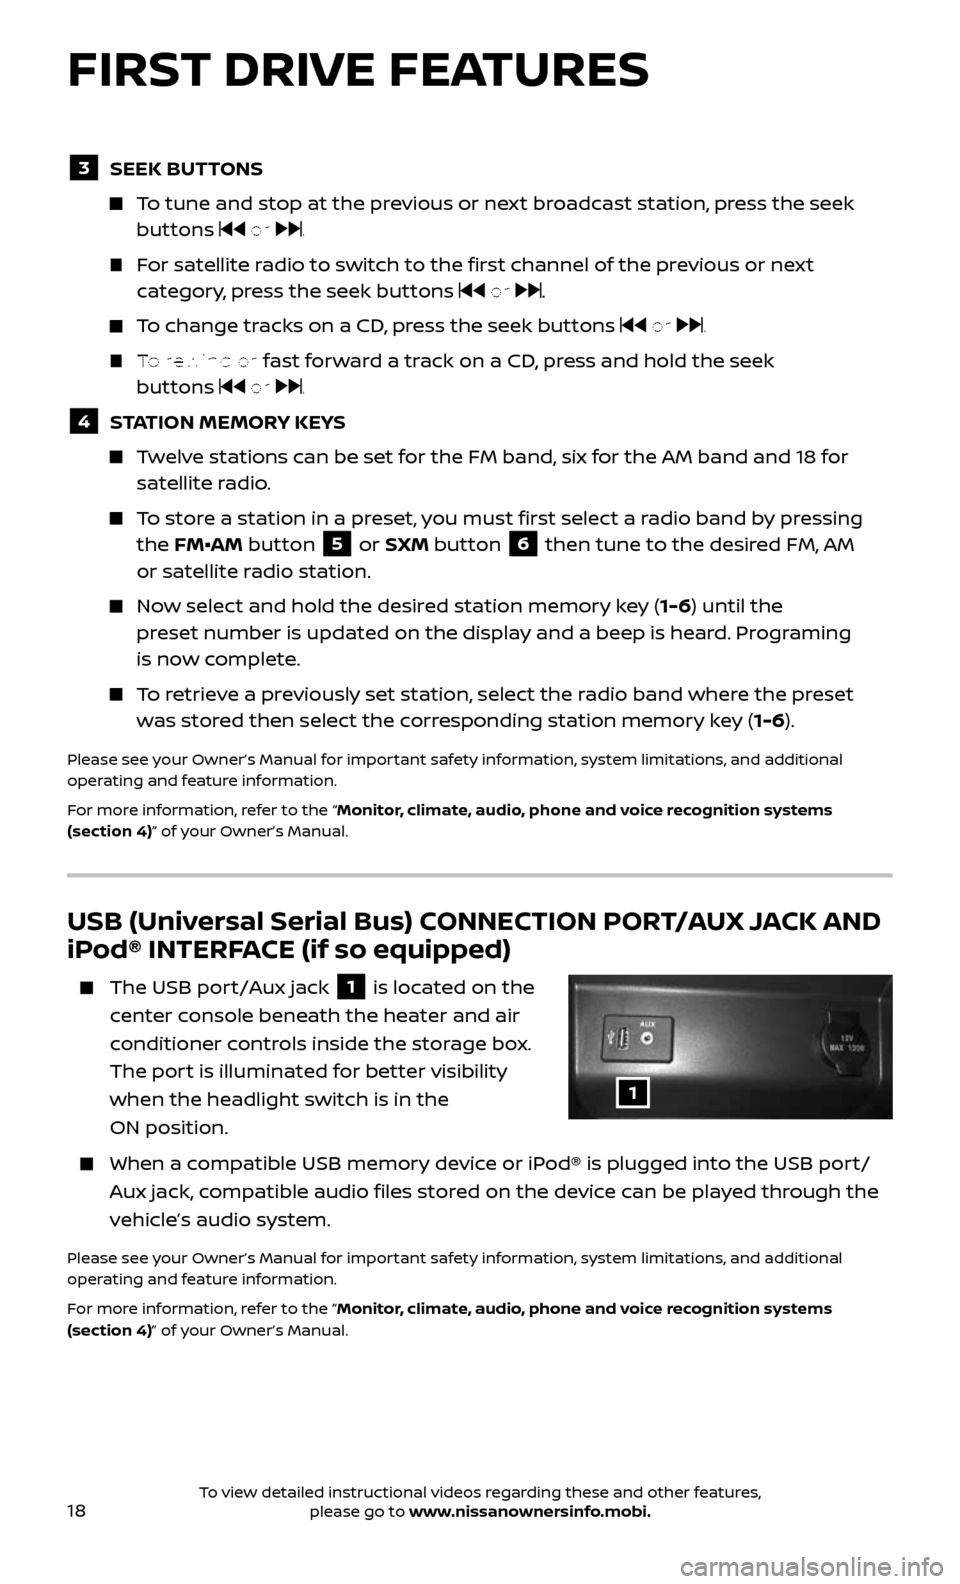
The USB port/Aux jack 1 is located on the
center console beneath the heater and air
conditioner controls inside the storage box.
The port is illuminated for better visibility
when the headlight switch is in the
ON position.
When a c ompatible USB memory device or iPod® is plugged into the USB port/
Aux jack, compatible audio files stored on the device can be played through the
vehicle’s audio system.
Please see your Owner’s Manual for important safety information, system limitations, and additional
operating and feature information.
For more information, refer to the “Monitor, climate, audio, phone and voice recognition systems
(section 4)” of your Owner’s Manual.
3 SEEK BUTTONS
To tune and stop at the previous or next broadcast station, press the seek buttons or .
For satellite radio to switch to the first channel of the previous or next
category, press the seek buttons or .
To change tracks on a CD, press the seek buttons or .
To rewind or fast forward a track on a CD, press and hold the seek
buttons or .
4 STATION MEMORY KEYS
Twelve stations can be set for the FM band, six for the AM band and 18 for satellite radio.
To store a station in a preset, you must first select a radio band by pressing
the FM•AM button 5 or SXM button 6 then tune to the desired FM, AM
or satellite radio station.
Now select and hold the desired station memory key (1-6) until the
preset number is updated on the display and a beep is heard. Programing
is now complete.
To retrieve a previously set station, select the radio band where the preset
was stored then select the corresponding station memory key (1-6).
Please see your Owner’s Manual for important safety information, system limitations, and additional
operating and feature information.
For more information, refer to the “Monitor, climate, audio, phone and voice recognition systems
(section 4)” of your Owner’s Manual.
1
FIRST DRIVE FEATURES
To view detailed instructional videos regarding these and other features, please go to www.nissanownersinfo.mobi.
Page 21 of 36
19
CRUISE CONTROL (if so equipped)
The cruise control system enables you to set a constant cruising speed once the vehicle
has reached 25 mph (40 km/h).
The system wil l automatically maintain the set speed until you tap the brake pedal,
accelerate, cancel or turn the system off.
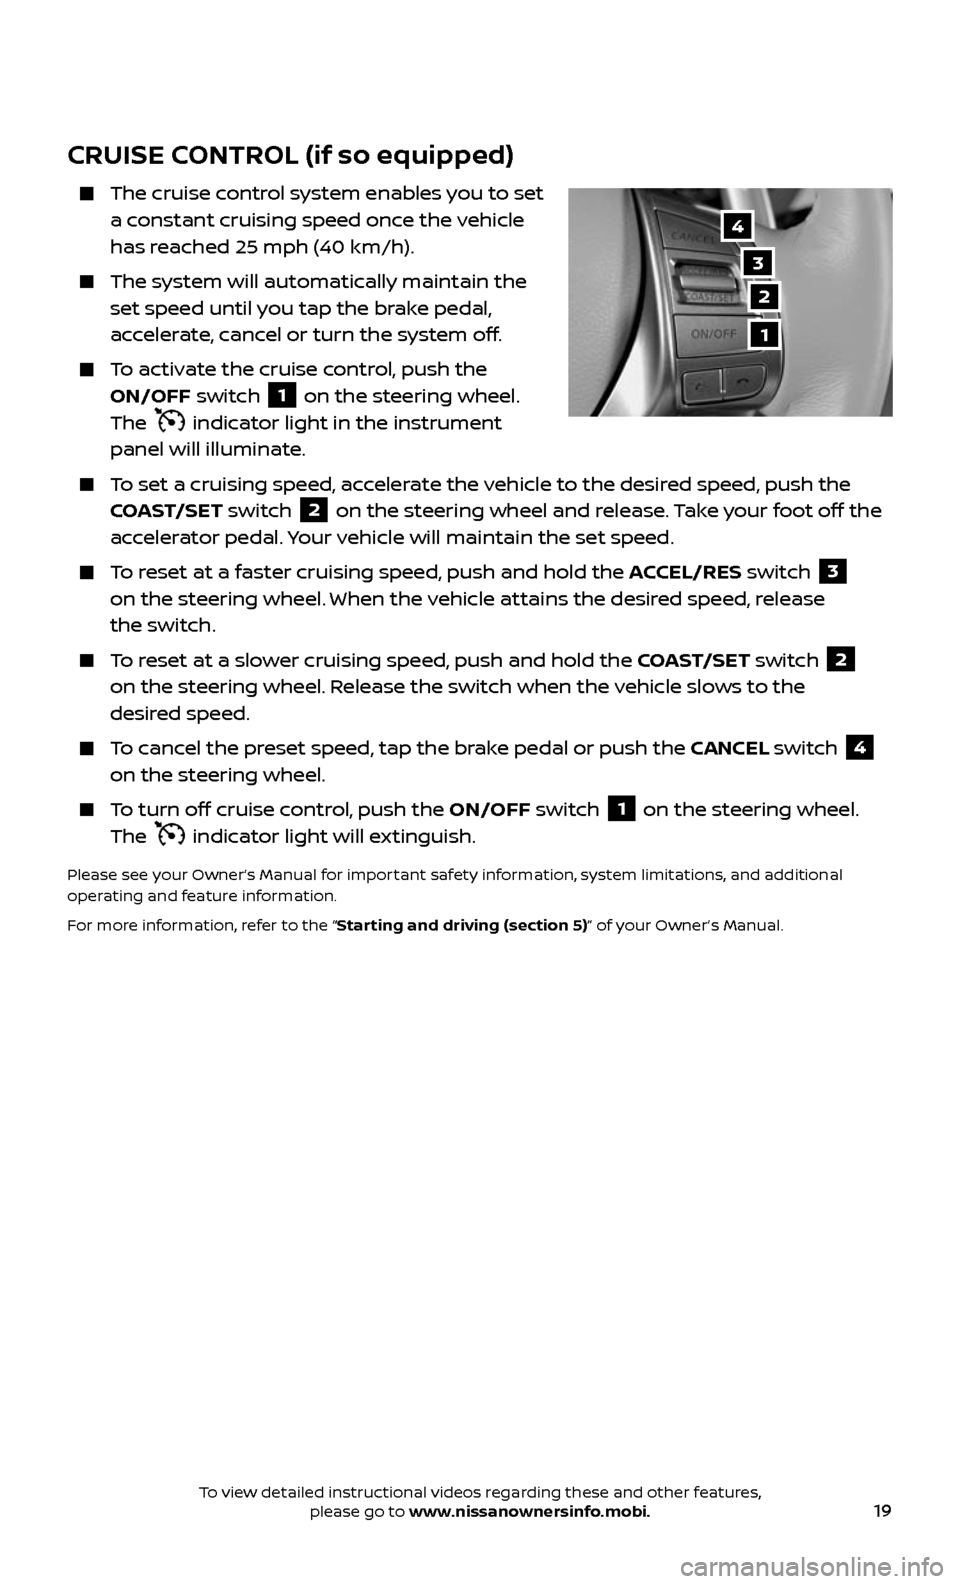
To activate the cruise control, push the
ON/OFF switch 1 on the steering wheel.
The indicator light in the instrument
panel will illuminate.
To set a cruising speed, accelerate the vehicle to the desired speed, push the COAST/SET switch 2 on the steering wheel and release. Take your foot off the
accelerator pedal. Your vehicle will maintain the set speed.
To reset at a faster cruising speed, push and hold the ACCEL/RES switch 3
on the steering wheel. When the vehicle attains the desired speed, release
the switch.
To reset at a slower cruising speed, push and hold the COAST/SET switch 2
on the steering wheel. Release the switch when the vehicle slows to the
desired speed.
To cancel the preset speed, tap the brake pedal or push the CANCEL switch 4
on the steering wheel.
To turn off cruise control, push the ON/OFF switch 1 on the steering wheel.
The indicator light will extinguish.
Please see your Owner’s Manual for important safety information, system limitations, and additional
operating and feature information.
For more information, refer to the “Starting and driving (section 5)” of your Owner’s Manual.
3
2
4
1
To view detailed instructional videos regarding these and other features, please go to www.nissanownersinfo.mobi.
Page 22 of 36
20
INTELLIGENT CRUISE CONTROL (ICC) (if so equipped)
VEHICLE-TO-VEHICLE DISTANCE CONTROL MODE
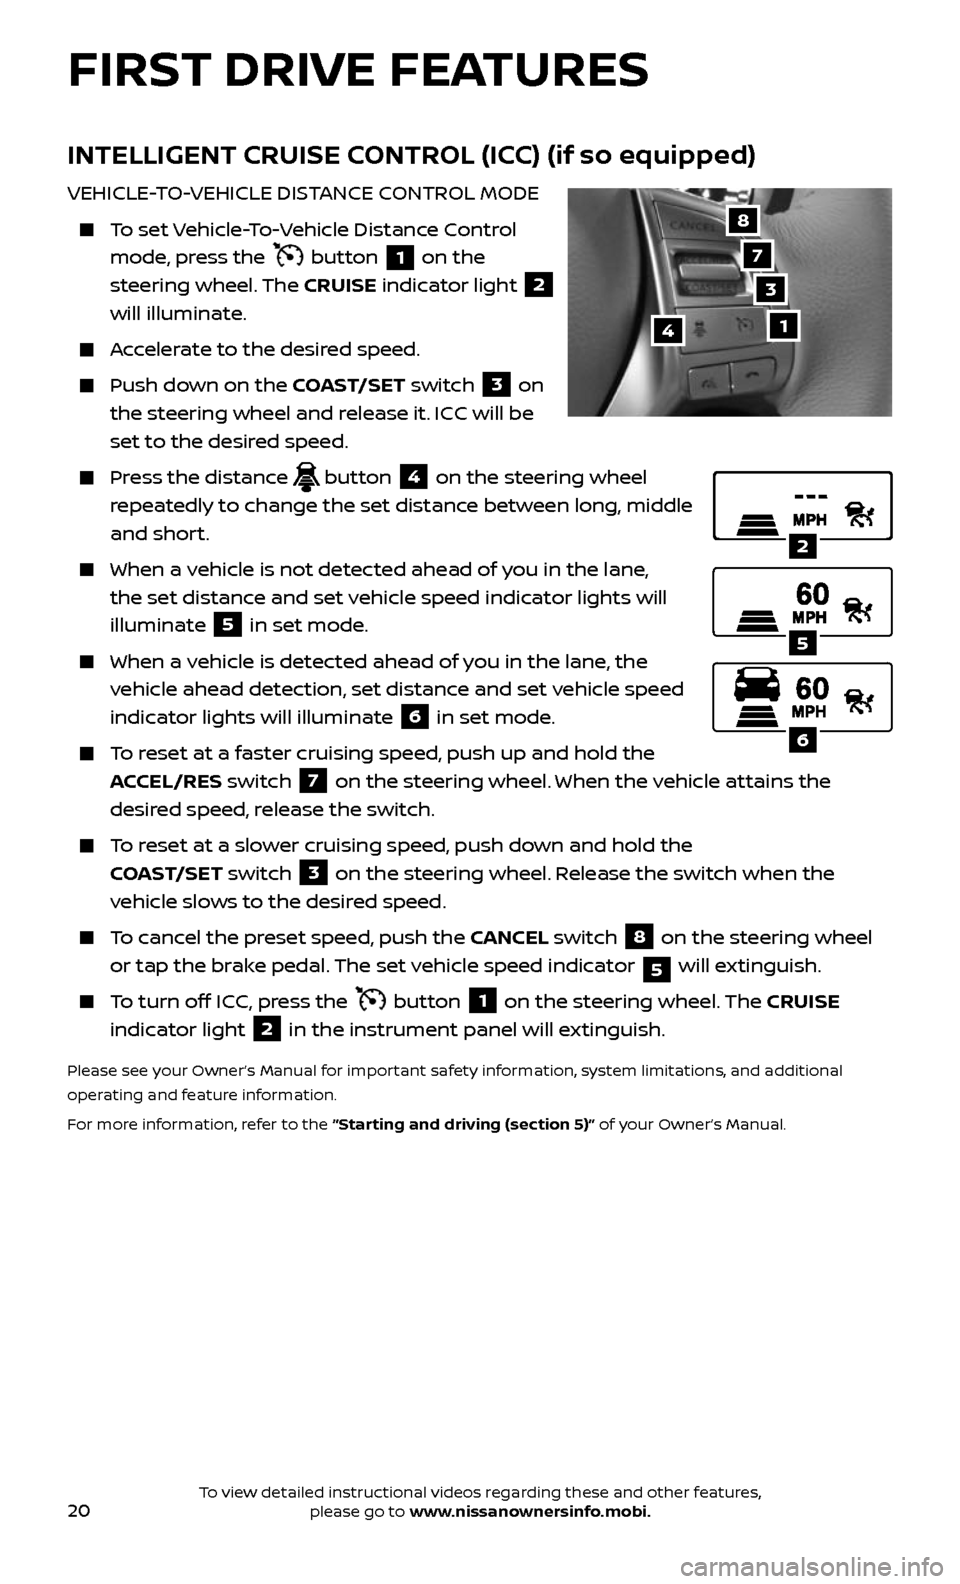
To set Vehicle-To-Vehicle Distance Control
mode, press the button 1 on the
steering wheel. The CRUISE indicator light 2
will illuminate.
Accelerate to the desired speed.
Push down on the COAST/SET switch 3 on
the steering wheel and release it. ICC will be
set to the desired speed.
Press the distance button 4 on the steering wheel
repeatedly to change the set distance between long, middle
and short.
When a v ehicle is not detected ahead of you in the lane,
the set distance and set vehicle speed indicator lights will
illuminate
5 in set mode.
When a vehicle is detected ahead of you in the lane, the
vehicle ahead detection, set distance and set vehicle speed
indicator lights will illuminate
6 in set mode.
To reset at a faster cruising speed, push up and hold the
ACCEL/RES switch
7 on the steering wheel. When the vehicle attains the
desired speed, release the switch.
To reset at a slower cruising speed, push down and hold the
COAST/SET switch
3 on the steering wheel. Release the switch when the
vehicle slows to the desired speed.
To cancel the preset speed, push the CANCEL switch 8 on the steering wheel
or tap the brake pedal. The set vehicle speed indicator
5 will extinguish.
To turn off ICC, press the button 1 on the steering wheel. The CRUISE
indicator light 2 in the instrument panel will extinguish.
Please see your Owner’s Manual for important safety information, system limitations, and additional
operating and feature information.
For more information, refer to the “Starting and driving (section 5)” of your Owner’s Manual.
2
5
6
14
8
7
3
FIRST DRIVE FEATURES
To view detailed instructional videos regarding these and other features, please go to www.nissanownersinfo.mobi.
Page 31 of 36
29
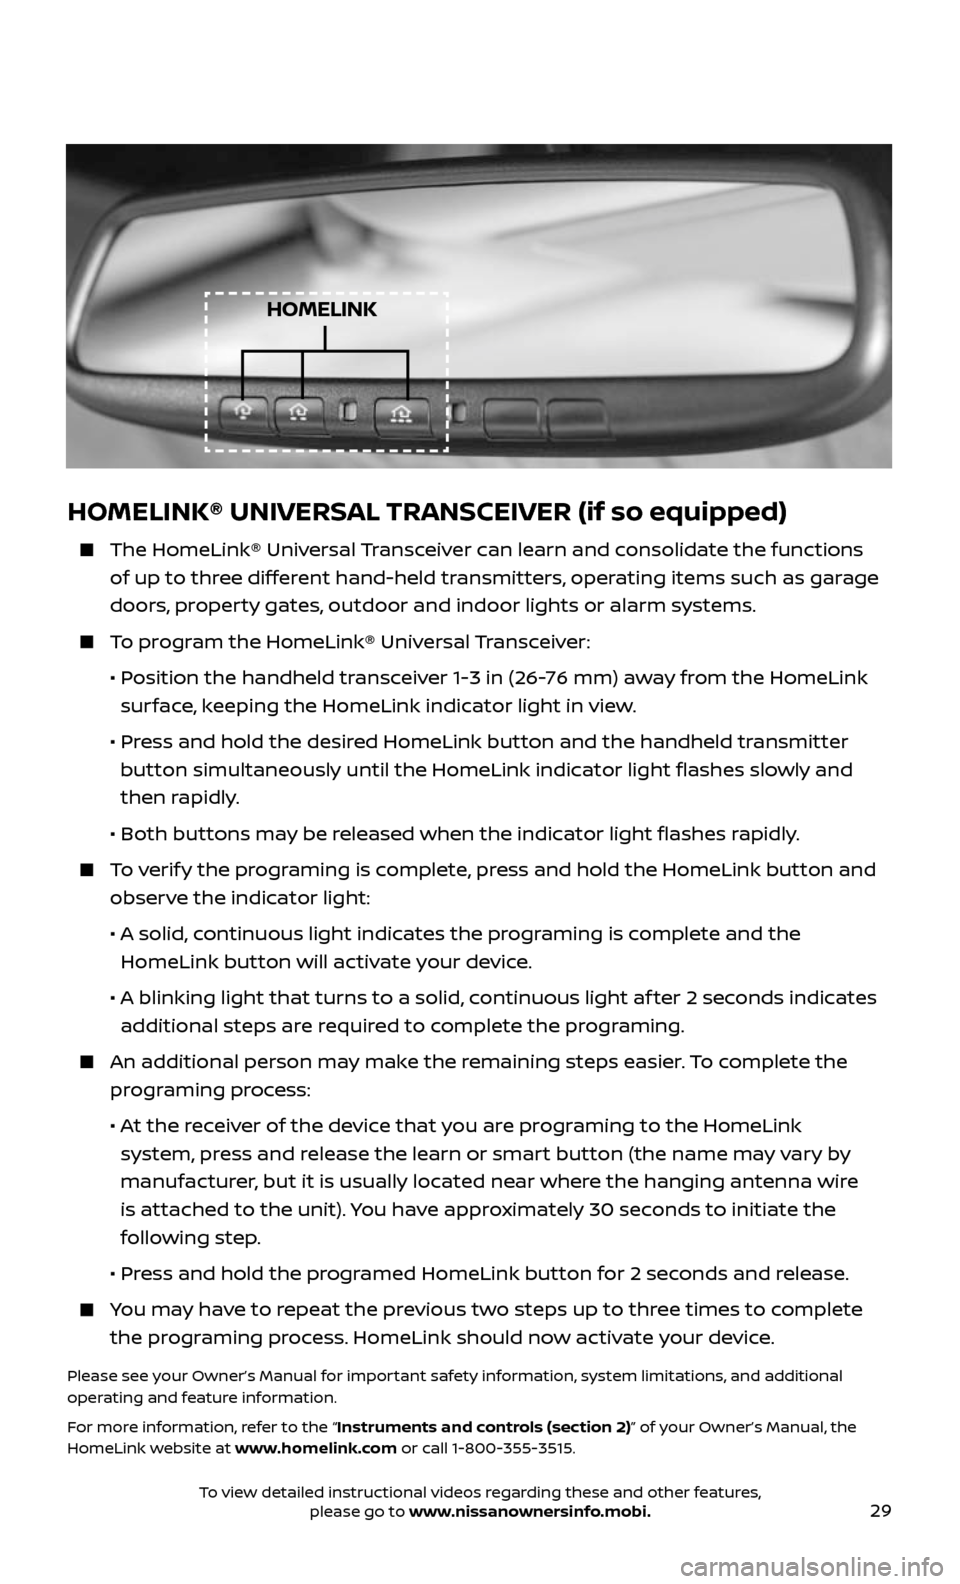
HOMELINK
HOMELINK® UNIVERSAL TRANSCEIVER (if so equipped)
The HomeLink® Universal Transceiver can learn and consolidate the functions
of up to three different hand-held transmitters, operating items such as garage
doors, property gates, outdoor and indoor lights or alarm systems.
To program the HomeLink® Universal Transceiver:
• Position the handheld transceiver 1-3 in (26-76 mm) away from the HomeLink
surface, keeping the HomeLink indicator light in view.
• Press and hold the desired HomeLink button and the handheld transmitter
button simultaneously until the HomeLink indicator light flashes slowly and
then rapidly.
• Both but tons may be released when the indicator light flashes rapidly.
To verify the programing is complete, press and hold the HomeLink button and
observe the indicator light:
• A solid , continuous light indicates the programing is complete and the
HomeLink button will activate your device.
• A blinking light that turns to a solid , continuous light af ter 2 seconds indicates
additional steps are required to complete the programing.
An additional person may make the remaining steps easier. To complete the
programing process:
• At the receiver of the device that you are programing to the HomeLink
system, press and release the learn or smart button (the name may vary by
manufacturer, but it is usually located near where the hanging antenna wire
is attached to the unit). You have approximately 30 seconds to initiate the
following step.
• Press and hold the programed HomeLink button for 2 seconds and release.
You may have to repeat the previous two steps up to three times to complete
the programing process. HomeLink should now activate your device.
Please see your Owner’s Manual for important safety information, system limitations, and additional
operating and feature information.
For more information, refer to the “Instruments and controls (section 2)” of your Owner’s Manual, the
HomeLink website at www.homelink.com or call 1-800-355-3515.
To view detailed instructional videos regarding these and other features, please go to www.nissanownersinfo.mobi.