Page 37 of 236
Example 3: Setting a destination by a
street address:
1. Push
>located on the steering
wheel. You will hear a prompt.
2. Speak “Navigation”.
3. Speak “Address”.
4. Speak the name of the state, “California”.
5. Speak the name of the city, “Gardena”.
6. Voice feedback will be provided when the command is accepted, and the list of city
names is displayed.
7. After the tone sounds and the icon on the screen changes again, speak “One”.
8. Speak the name of the street, “SouthFigueroa street”.
INFO:
Only the official street names stored in the
map database can be recognized by the
system. To improve accuracy, speak the
street name precisely and include Boule-
vard, Way, North, South, etc., if known. If
unsure of the full name, speaking only part of
the street name such as “Figueroa” is
acceptable, but recognition accuracy may
be reduced.
Getting started2-29
Page 48 of 236
![NISSAN 370Z COUPE 2017 Z34 08IT Navigation Manual OPERATING WITH TOUCH OPERA-
TION
1. Touch.
Displays the scale.
2. Touch [ZOOM IN] or [ZOOM OUT] to change the scale.
INFO:
Free zoom:
Once the [Small Step Zoom by Dial] is set to ON
in the setting scr NISSAN 370Z COUPE 2017 Z34 08IT Navigation Manual OPERATING WITH TOUCH OPERA-
TION
1. Touch.
Displays the scale.
2. Touch [ZOOM IN] or [ZOOM OUT] to change the scale.
INFO:
Free zoom:
Once the [Small Step Zoom by Dial] is set to ON
in the setting scr](/manual-img/5/509/w960_509-47.png)
OPERATING WITH TOUCH OPERA-
TION
1. Touch.
Displays the scale.
2. Touch [ZOOM IN] or [ZOOM OUT] to change the scale.
INFO:
Free zoom:
Once the [Small Step Zoom by Dial] is set to ON
in the setting screen, the scale can be changed
in smaller steps, when [ZOOM IN] or [ZOOM
OUT] is pushed and held, than when either
button is briefly pushed.
If briefly pushed, operation returns to normal.
Voice command
1. Push
>located on the steering
wheel switch.
2. After the tone sounds, speak a command.
To change the map scale:
“Zoom In
<1 to 13>” (Alternate command
mode)
“Zoom Out
<1 to 13>” (Alternate command
mode)
MAP SCALE
Any required map scale (map coverage) be-
tween 320 miles (640 km) and 1/64 of a mile
(25 m) can be selected.
Scale level for 2D map and BirdviewTM
map (3D) display
Normal Map US Units Metric Units
320 miles 640 km 80 miles 160 km
32 miles 64 km8 miles 16 km
5 miles 10 km
2 miles 4 km1 mile 2 km
1/2 mile 1 km
1/4 mile 500 m
1/8 mile 200 m
1/16 mile 100 m
1/32 mile 50 m
Shows build- ing footprint graphics 1/32 mile 50 m
1/64 mile 25 m
3-10Map settings
Page 51 of 236
Voice command
1. Push
>located on the steering
wheel switch.
2. After the tone sounds, speak a command.
.To display the 2D map: “Plan View map” (Alternate command
mode)
.To display the BirdviewTMmap:
“Birdview map” (Alternate command
mode) Other settings are also available for the map
screen, such as changing the map direction,
map color, Birdview
TMangle, etc.
BASIC OPERATION
1. Push
while the current location
map screen is displayed.
2. Highlight [Map View] and push .
3. Highlight [Map Settings] and push
.
4. Highlight the preferred item and push.
Available setting items
.[Map Orientation]:
Set the map direction to North up or
Heading Up.
“Setting map orientation” (page 3-14)
. [Long Range]:
Set the long range map view display ON/
SETTING THE MAP VIEW
Map settings3-13
Page 53 of 236
North Up
Heading Up
INFO:
Touching the icon on the map screen can also
change the direction of the map.
Voice command
1. Push
>located on the steering
wheel switch.
2. After the tone sounds, speak a command. To change the map direction: “North Up” (Alternate command mode)
“Heading Up” (Alternate command mode)
SETTINGS LONG RANGE MAP VIEW
The position of the vehicle icon can be changed
to view a wider area in the traveling direction. If
this function is activated, the vehicle icon is
located slightly lower than the center of the
screen.
1. Highlight [Long Range] and push
. The indicator illuminates.
2. Push
Page 65 of 236

INFO:
In some cases, when a street name has
been entered, the number of matching
destinations in the “Matches” column may
be different from the number displayed on
the list screen. If this occurs, enter more
characters to further reduce the number of
matches.
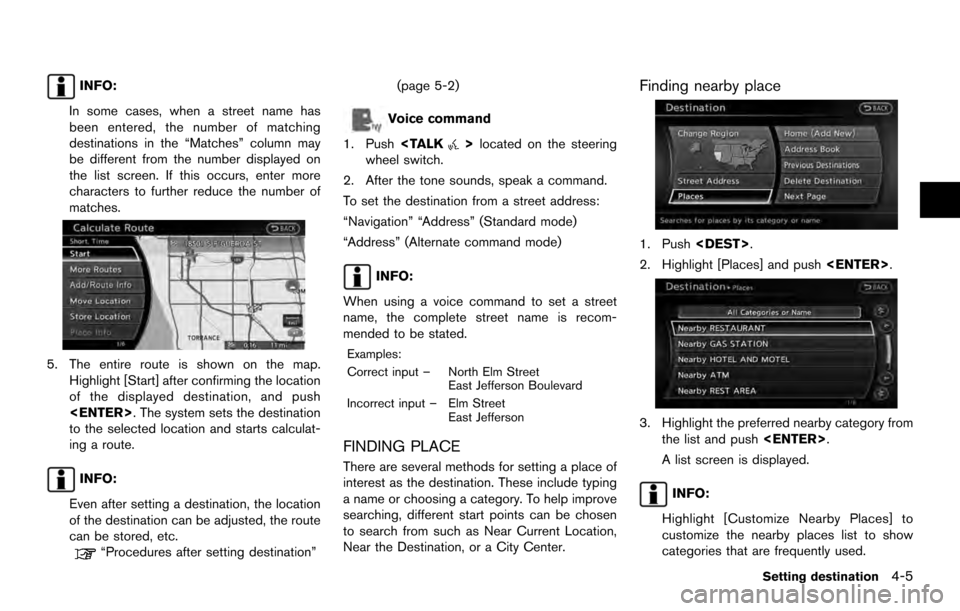
5. The entire route is shown on the map. Highlight [Start] after confirming the location
of the displayed destination, and push
. The system sets the destination
to the selected location and starts calculat-
ing a route.
INFO:
Even after setting a destination, the location
of the destination can be adjusted, the route
can be stored, etc.
“Procedures after setting destination” (page 5-2)
Voice command
1. Push
>located on the steering
wheel switch.
2. After the tone sounds, speak a command.
To set the destination from a street address:
“Navigation” “Address” (Standard mode)
“Address” (Alternate command mode)
INFO:
When using a voice command to set a street
name, the complete street name is recom-
mended to be stated.
Examples:
Correct input – North Elm Street East Jefferson Boulevard
Incorrect input – Elm Street East Jefferson
FINDING PLACE
There are several methods for setting a place of
interest as the destination. These include typing
a name or choosing a category. To help improve
searching, different start points can be chosen
to search from such as Near Current Location,
Near the Destination, or a City Center.
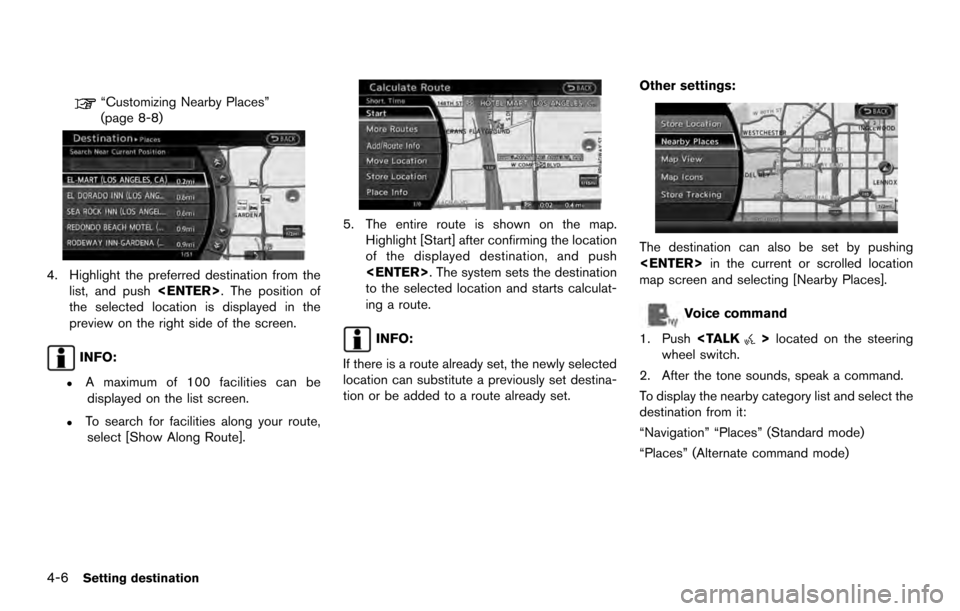
Finding nearby place
1. Push.
2. Highlight [Places] and push .
3. Highlight the preferred nearby category from
the list and push .
A list screen is displayed.
INFO:
Highlight [Customize Nearby Places] to
customize the nearby places list to show
categories that are frequently used.
Setting destination4-5
Page 66 of 236

“Customizing Nearby Places”
(page 8-8)
4. Highlight the preferred destination from thelist, and push . The position of
the selected location is displayed in the
preview on the right side of the screen.
INFO:
.A maximum of 100 facilities can be displayed on the list screen.
.To search for facilities along your route,
select [Show Along Route].
5. The entire route is shown on the map. Highlight [Start] after confirming the location
of the displayed destination, and push
. The system sets the destination
to the selected location and starts calculat-
ing a route.
INFO:
If there is a route already set, the newly selected
location can substitute a previously set destina-
tion or be added to a route already set. Other settings:
The destination can also be set by pushing
in the current or scrolled location
map screen and selecting [Nearby Places].
Voice command
1. Push
>located on the steering
wheel switch.
2. After the tone sounds, speak a command.
To display the nearby category list and select the
destination from it:
“Navigation” “Places” (Standard mode)
“Places” (Alternate command mode)
4-6Setting destination
Page 69 of 236
![NISSAN 370Z COUPE 2017 Z34 08IT Navigation Manual enter more characters to further reduce
the number of matches.
.The search conditions can be changedby highlighting [Refine].
9. The entire route is shown on the map. Highlight [Start] after confirmin NISSAN 370Z COUPE 2017 Z34 08IT Navigation Manual enter more characters to further reduce
the number of matches.
.The search conditions can be changedby highlighting [Refine].
9. The entire route is shown on the map. Highlight [Start] after confirmin](/manual-img/5/509/w960_509-68.png)
enter more characters to further reduce
the number of matches.
.The search conditions can be changedby highlighting [Refine].
9. The entire route is shown on the map. Highlight [Start] after confirming the location
of the displayed destination and push
. The system sets the destination
to the selected location and starts calculat-
ing a route.
INFO:
Even after setting a destination, the location
of the destination can be adjusted, the route
can be stored, etc.
“Procedures after setting destination”
(page 5-2)
SETTING HOME AS DESTINATION
The home location can be set as the destination
to which the system calculates a route. This
function is especially useful when searching for
a route to return to the home location.
1. Push .
2. Highlight [Home] and push .
3. The home location is displayed and set as
the destination.
INFO:
If the home location is not stored yet, the
system will automatically display a screen for
storing it.
“Storing location” (page 6-2)
4. The entire route to home is shown on the map. Highlight [Start] after confirming the
location of the displayed destination, and
push . The system sets the
destination to the selected location and
starts calculating a route.
Voice command
1. Push
>located on the steering
wheel switch.
2. After the tone sounds, speak a command.
To set the home location as the destination:
“Navigation” “Destination Home” (Standard
mode)
Setting destination4-9
Page 71 of 236

Voice command
1. Push
>located on the steering
wheel switch.
2. After the tone sounds, speak a command.
To set the destination from the Address Book:
“Navigation” “Address Book” (Standard mode)
“Address book” (Alternate command mode)
SETTING PREVIOUS DESTINATION
A previously set destination can be set again as
the destination to which the system calculates a
route. Up to 300 previous destinations will be
automatically stored.
If the number of previous destinations exceeds
300, the oldest one will be replaced by the new
one.
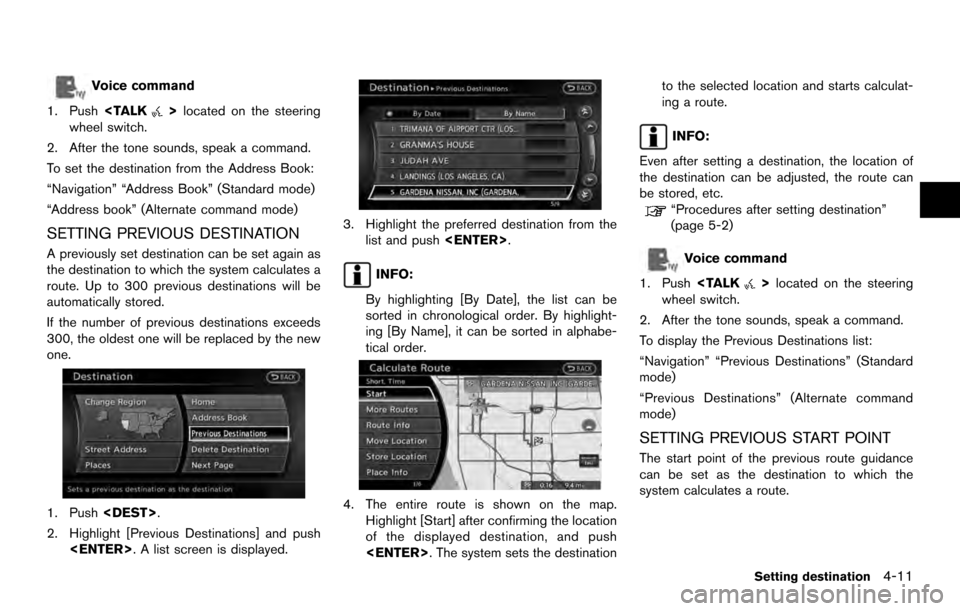
1. Push .
2. Highlight [Previous Destinations] and push . A list screen is displayed.
3. Highlight the preferred destination from thelist and push .
INFO:
By highlighting [By Date], the list can be
sorted in chronological order. By highlight-
ing [By Name], it can be sorted in alphabe-
tical order.
4. The entire route is shown on the map. Highlight [Start] after confirming the location
of the displayed destination, and push
. The system sets the destination to the selected location and starts calculat-
ing a route.
INFO:
Even after setting a destination, the location of
the destination can be adjusted, the route can
be stored, etc.
“Procedures after setting destination”
(page 5-2)
Voice command
1. Push
>located on the steering
wheel switch.
2. After the tone sounds, speak a command.
To display the Previous Destinations list:
“Navigation” “Previous Destinations” (Standard
mode)
“Previous Destinations” (Alternate command
mode)
SETTING PREVIOUS START POINT
The start point of the previous route guidance
can be set as the destination to which the
system calculates a route.
Setting destination4-11