2017 MITSUBISHI OUTLANDER SPORT fuel
[x] Cancel search: fuelPage 66 of 399
Break-in recommendations
Features and controls 5-3
5
N00508700330
Advanced automobile manufacturing tech- niques permit you to operate your new vehi-cle without requiring a long break-in period of low-speed driving. However, you can add to the future perfor-mance and economy of your vehicle by observing the following precautions during the first 300 miles (500 km).Drive your vehicle at moderate speeds duringthe break-in period. Avoid revving the engine. Avoid rough driving such as sudden starts, sudden acceleration, prolonged high-speed driving and sudden braking. These would have a detrimental effect on the engine and also cause increased fuel andoil consumption, which could result in malfunction of the engine components. Be particularly careful to avoid full accelera-tion while in low shift position (low gears). Do not overload the vehicle. Stay within the seating capacity. (Refer to “Cargo load precautions” on page 6-10.) Do not use this vehicle for trailer towing.
N00508801660
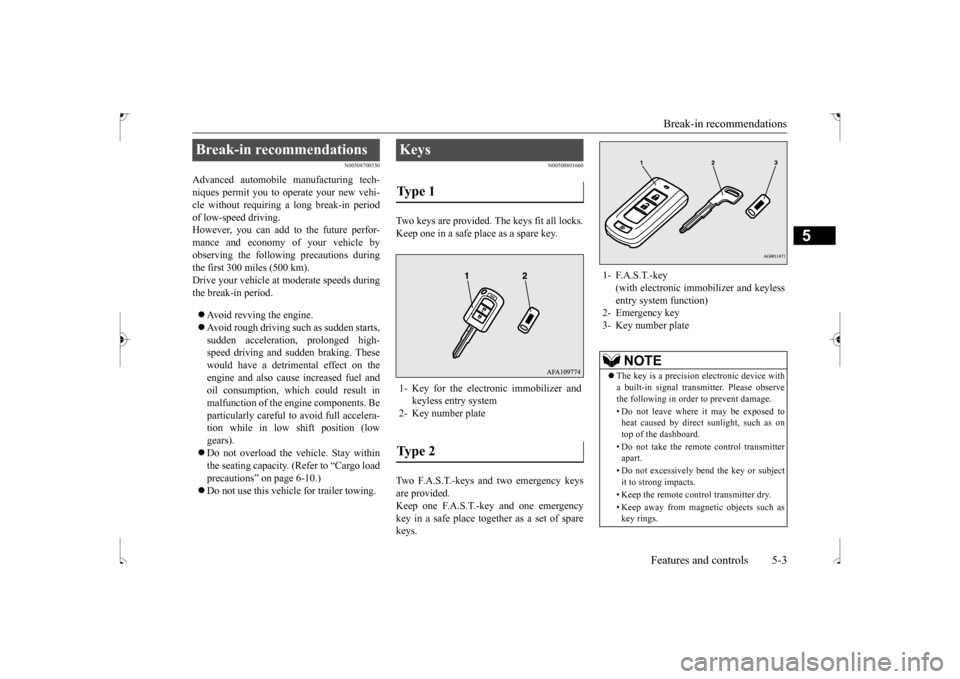
Two keys are provided. The keys fit all locks. Keep one in a safe place as a spare key. Two F.A.S.T.-keys and two emergency keys are provided. Keep one F.A.S.T.-key and one emergencykey in a safe place together as a set of spare keys.
Break-in recommendations
Keys Type 1 1- Key for the electronic immobilizer and
keyless entry system
2- Key number plateType 2
1- F.A.S.T.-key
(with electronic immob
ilizer and keyless
entry system function)
2- Emergency key 3- Key number plate
NOTE
The key is a precision electronic device with a built-in signal transmitter. Please observe the following in order to prevent damage. • Do not leave where it may be exposed to heat caused by direct sunlight, such as ontop of the dashboard. • Do not take the remote control transmitter apart. • Do not excessively bend the key or subject it to strong impacts. • Keep the remote control transmitter dry.• Keep away from magnetic objects such as key rings.
BK0239500US.bo
ok 3 ページ 2016年5月13日 金曜日 午前8時53分
Page 83 of 399
Free-hand Advanced Security Transmitte
r (F.A.S.T.-key) (if so equipped)
5-20 Features and controls
5
N00560000117
When the operation mode is in OFF, and someone tries to lock the vehicle by pressingthe driver’s or front passenger’s door lock/unlock switch, or the liftgate LOCK switch while one of the doors or the liftgate isnot fully closed, the warning display is dis- played and the buzzer
sounds for about 3 sec-
onds as a warning, and the doors and theliftgate cannot be locked.
N00560100118
When the operation mode is in any modeother than OFF, all the doors and the liftgateare closed, and someone tries to lock the vehicle by pressing the driver’s or front pas- senger’s door lock/unlock switch, or the lift-
gate LOCK switch, the warning display is displayed and the buzzer sounds for about 3 seconds as a warning, and the doors and the liftgate cannot be locked.
N00514601360
The operation mode can be in any mode to start the engine. The starter motor will be turning for up to approximately 15 seconds if the engine switch is released at once. Pressing the engine switch again while the startermotor is still turning will stop the starter motor. The starter motor will be turning for up to approximately 30 seconds whilethe engine switch is pressed. If the engine does not start, wait for a while and then attempt to start the engineagain. Trying repeatedly with the starter motor still turning will damage the starter mechanism. If the engine will not start because the bat- tery is weak or discharged, refer to “Jump-starting the engine” on page 8-2for instructions. A longer warm up period will only con- sume extra fuel.
The engine is warmed up enough for driv- ing when the bar graph of engine coolant temperature display starts to move. Refer to “Interrupt display screen (With ignitionswitch or operation mode in ON)” on page 5-95.
Your vehicle is equipped with an electroni- cally controlled fuel injection system. This isa system that automatically controls fuel injection. There is usually no need to depress the accelerator pedal when starting theengine.
Door ajar prevention system
Operation mode OFF reminder system
Starting and stopping the engine
Tips for starting
WA R N I N G Never run the engine in a closed or poorly ventilated area any longer than is needed to move your vehicle out of the area. Car- bon monoxide gas, which is odorless andextremely poisonous, could build up and cause serious injury or death.CAUTION Do not push-start the vehicle.Do not run the engine
at high rpms or drive
at high speeds until the engine has had achance to warm up.
Starting the engine
BK0239500US.bo
ok 20 ページ 2016年5月13日 金曜日 午前8時53分
Page 111 of 399
Starting the engine 5-48 Features and controls
5
For information on operation for vehicles equipped with the Free-hand Advanced Secu- rity Transmitter (F.A.S.T.-key), refer to “Free-hand Advanced Security Transmitter(F.A.S.T.-key): Starting and stopping the engine” on page 5-20. [Except for vehicles equipped with the Free-hand Advanced Security Transmitter(F.A.S.T.-key)] Do not operate the starter motor continu- ously for longer than
15 seconds as this
could run the battery down or damage thestarter motor. If the engine does not start, turn the ignition switch back to the “OFF” position, wait a few seconds, and then tryagain. Trying repeatedly with the engine or starter motor still turning will damage the starter mechanism. If the engine will not start because the bat- tery is weak or discharged, refer to “Jump-starting the engine” (on page 8-2)for instructions.
A longer warm up period will only con- sume extra fuel. The
engine is warmed up
enough for driving when the bar graph of engine coolant temperature display startsto move. Refer to “Interrupt display screen (With ignition switch or operation mode in ON)” on page 5-95.
This model is equipped with an electronically controlled fuel injection system. This is a sys- tem that automatically controls fuel injection.
There is usually no need to depress the accel- erator pedal when starting the engine. The starter should not be run for more than 15 seconds at a time.To prevent battery drain, wait a few seconds between attempts to restart the engine. 1. Make sure all occupants are properly seated with seat belts fastened.2. Insert the ignition key. 3. Make sure the parking brake is applied. 4. Press and hold the brake pedal downfirmly with your right foot.5. Press and hold the clutch pedal all the way down (manual transaxle). 6. On vehicles equipped with manual trans-axle, place the gearshift lever in the “N” (Neutral) position. On vehicles equipped with continuouslyvariable transmission (CVT), make sure the selector lever is in the “P” (PARK) position.
Tips for starting
WA R N I N G Never run the engine in a closed or poorly ventilated area any longer than is neededto move your vehicle out of the area. Car- bon monoxide gas, which is odorless and extremely poisonous, could build up andcause serious injury or death.CAUTION Do not push-start the vehicle.Do not run the engine
at high rpms or drive
at high speeds until the engine has had achance to warm up. Release the ignition switch as soon as the engine starts. Otherwise, the starter motor will be damaged.
Starting the engine
NOTE
On vehicles equipped with CVT, the starter will not operate unless the selector lever is in the “P” (PARK) or “N” (NEUTRAL) posi- tion.For safety reasons, start the engine in the “P” (PARK) position so that the wheels are locked.
BK0239500US.bo
ok 48 ページ 2016年5月13日 金曜日 午前8時53分
Page 113 of 399
Manual transaxle (if so equipped) 5-50 Features and controls
5
Press the clutch pedal all the way down and shift into 1st or “R” (Reverse) position. Then gradually release the clutch pedal whiledepressing the accelerator pedal.
N00537400052
Always use care to change the gear with the vehicle speed matched to the engine speed. Proper shifting will improve fuel economyand prolong engine life.
N00512901154
For the best fuel economy and performance inusing your manual transaxle, upshift as listedbelow. At low altitude locations, upshift as listed below. At high altitude locations, upshift as listed below.
NOTE
During cold weather, shifting may be diffi- cult until the transaxle lubricant has warmed up. This is normal and not harmful to the transaxle.
To start
CAUTION Do not move the gearshift lever into reverse while the vehicle is moving forward; doing so will damage the transaxle. Do not rest your foot on the clutch pedal because this will cause premature clutch wear or damage. Do not coast in the “N” (Neutral) position (illegal in many states). Do not use the gearshift lever as a handrest, because this can result in premature wear of the transaxle shift forks.NOTE
If it is hard to shift into 1st, depress the clutch pedal a second time; the shift will then be easier.
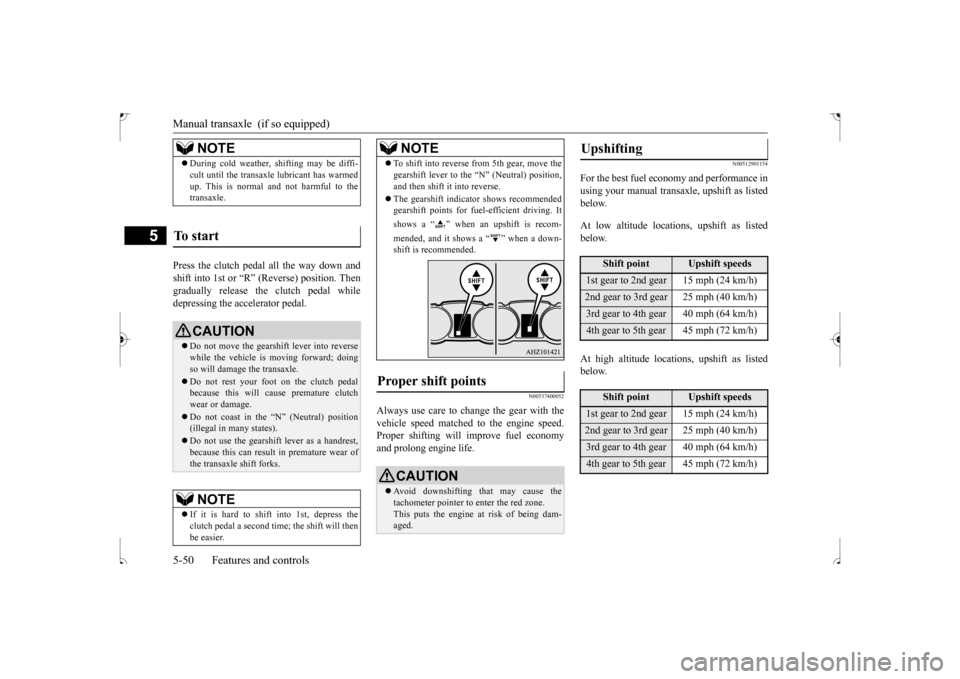
To shift into reverse from 5th gear, move the gearshift lever to the “N” (Neutral) position, and then shift it into reverse. The gearshift indicator shows recommended gearshift points for fuel-efficient driving. It shows a “ ” when an upshift is recom-mended, and it shows a “ ” when a down- shift is recommended.
Proper shift points
CAUTION Avoid downshifting that may cause the tachometer pointer to enter the red zone. This puts the engine at risk of being dam- aged.NOTE
Upshifting
Shift point
Upshift speeds
1st gear to 2nd gear 15 mph (24 km/h)2nd gear to 3rd gear 25 mph (40 km/h)3rd gear to 4th gear 40 mph (64 km/h)4th gear to 5th gear 45 mph (72 km/h)
Shift point
Upshift speeds
1st gear to 2nd gear 15 mph (24 km/h)2nd gear to 3rd gear 25 mph (40 km/h)3rd gear to 4th gear 40 mph (64 km/h)4th gear to 5th gear 45 mph (72 km/h)
BK0239500US.bo
ok 50 ページ 2016年5月13日 金曜日 午前8時53分
Page 114 of 399
Continuously variable transmission (CVT) (if so equipped)
Features and controls 5-51
5
N00513000096
It is recommended that you downshift to a lower gear when needed to maintain thedesired speed, according to the table. Avoid downshifting at too high a speed. The engine may suffer damage.To maintain a safe speed and prolong brake life, shift down to 2nd or 1st when descend- ing a steep hill.Downshifting is also important to avoid “lug-ging” the engine at too low a speed, such as when turning a corner or when driving up a steep hill.
N00513100228
Do not use the gearshift lever as a han- drest. This can result in premature wear ofthe transaxle shift forks.
The table above shows the maximum rec- ommended driving speed for in each gear. Do not drive near or at these speeds for prolonged periods of time.
N00560200047
The CVT will automatically and continuouslychange its gear ratio depending on road anddriving conditions. This helps achieve smooth driving and excellent fuel efficiency. Also you can manually shift up and shiftdown the transmission. Refer to “Sports
mode” on page 5-55. The transmission prevents unnecessary upshifts even when the accelerator pedal isreleased and ensures smooth driving. According to the condi
tions, the transmission
will automatically shift to a lower gear ratioto achieve stronger engine braking. This may help reduce your need to use the service brake.
N00560300048
As an additional safe
ty precaution, models
equipped with a continuously variable trans-mission have a shift-lock device that holds the selector lever in the “P” (PARK) position. To move the selector lever from the “P”(PARK) position to another position, follow the steps below. 1. Press and hold the brake pedal down. 2. Move the selector lever to the desiredposition.
Downshifting
Recommended downshifting speed
Downshifting speed
Shift point
Under 20 mph (32 km/h)
Shift down from cur- rent gear to 2nd gear.
20 to 30 mph (32 to
48 km/h)
Shift down from cur- rent gear to 3rd gear.
Driving precautions
Maximum possible driving speed
Shift points
Maximum possible driving
speed
1st gear
28 mph (45 km/h)
2nd gear
59 mph (95 km/h)
3rd gear
86 mph (140 km/h)
4th gear
111 mph (180 km/h)
Continuously variable transmission (CVT)
(if so
equipped)
DRIVING UPHILL
DRIVING DOWNHILL
Selector lever operation
BK0239500US.bo
ok 51 ページ 2016年5月13日 金曜日 午前8時53分
Page 122 of 399
Electronically controlled 4WD system (if so equipped)
Features and controls 5-59
5
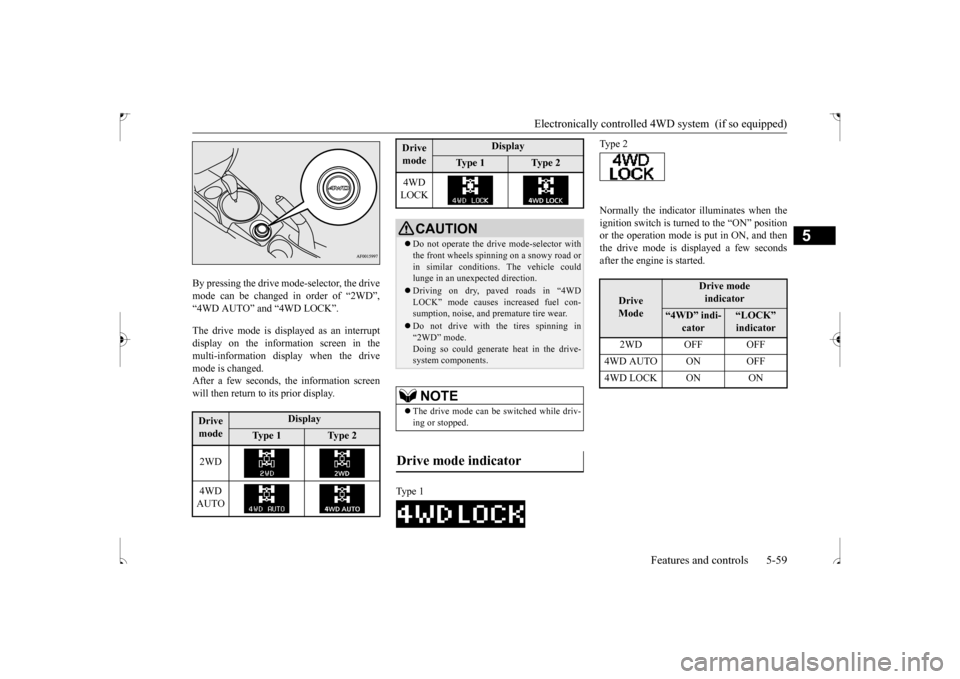
By pressing the drive mode-selector, the drive mode can be changed in order of “2WD”,“4WD AUTO” and “4WD LOCK”. The drive mode is displayed as an interrupt display on the information screen in the multi-information display when the drivemode is changed.After a few seconds, the information screen will then return to its prior display.
Normally the indicator illuminates when the ignition switch is turned to the “ON” position or the operation mode is put in ON, and then the drive mode is displayed a few secondsafter the engine is started.
Drive mode
Display
Ty p e 1
Ty p e 2
2WD 4WD AUTO
4WD LOCK
CAUTION Do not operate the drive mode-selector with the front wheels spinning on a snowy road or in similar conditions. The vehicle couldlunge in an unexpected direction. Driving on dry, paved roads in “4WD LOCK” mode causes increased fuel con- sumption, noise, and premature tire wear. Do not drive with the tires spinning in “2WD” mode. Doing so could generate heat in the drive-system components.NOTE
The drive mode can be switched while driv- ing or stopped.
Drive mode indicator
Type 1Drive mode
Display
Ty p e 1
Ty p e 2
Type 2
Drive Mode
Drive modeindicator
“4WD” indi-
cator
“LOCK” indicator
2WD OFF OFF
4WD AUTO ON OFF4WD LOCK ON ON
BK0239500US.bo
ok 59 ページ 2016年5月13日 金曜日 午前8時53分
Page 124 of 399
4-wheel drive operation
Features and controls 5-61
5
When turning a sharp corner in “4WD LOCK” position at low speed, a slight differ- ence in steering may be experienced similarto feeling as if the brakes were applied. This
is called tight corner braking and results from each of the four tires being at a different dis- tance from the corner. The phenomenon is typical of 4-wheel drive vehicles. If thisoccurs, either straighten out the steering wheel or change to another mode. Set the drive mode-selector to “4WD AUTO” or “4WD LOCK” in accordance with the road conditions, and then gradually depress the accelerator pedal for a smooth start.
WA R N I N G Do not over-rely on the 4-wheel drive vehi- cles. Even 4-wheel drive vehicles have lim- its to the system and ability to maintain control and traction. Reckless driving may lead to accidents. Always drive carefully,taking account of the road conditions. Improperly operating this vehicle on or off-pavement can cause an accident or rollover in which you and your passengers could be seriously injured or killed.• Follow all instructio
ns and guidelines in
the owner’s manual.• Keep your speed low and do not drivefaster than conditions.NOTE
Driving on rough roads can be hard on a vehicle. Before you leave the pavement, be sure all scheduled maintenance and servicehas been done, and that you have inspected your vehicle. Pay special attention to the condition of the tires, and check the tire pres-sures. Mitsubishi Motors is not responsible to the operator for any damage or injury caused or liability incurred by improper and negligentoperation of a vehicle. All techniques of vehicle operation depend on the skill and experience of the operator and other partici-pating parties. Any deviation from the rec- ommended operating instructions above is at their own risk.
Note that the stopping distance required of the 4-wheel drive vehicle differs very little from that of the front-wheel drive vehicle. When driving on a snow-covered road or a slippery, muddy surface, make sure that youkeep a sufficient distance between your vehi- cle and the one ahead of you. The driving posture should be more upright; adjust the seat to a good position for easy steering and pedal operation. Be sure to wearthe seat belt. After driving on rough roads, check each part of the vehicle and wash it thoroughly with water. Refer to the “Inspection and maintenance following rough road opera-tion” section and “Vehicle care and Mainte- nance” sections.CAUTION Setting the drive mode-selector to “4WD LOCK” position to drive on dry paved roadwill increase fuel consumption, with possible noise generation.
Turning sharp corners
NOTE
On snowy or icy roads
NOTE
The use of snow tires is recommended. Maintain a safe distance between vehicles, avoid sudden braking, and use engine brak- ing (downshifting).CAUTION Avoid sudden braking, sudden acceleration and sharp turning. Skidding occurs and con- trol of the vehicle could be lost.
BK0239500US.bo
ok 61 ページ 2016年5月13日 金曜日 午前8時53分
Page 142 of 399
Tire pressure monitoring system
Features and controls 5-79
5
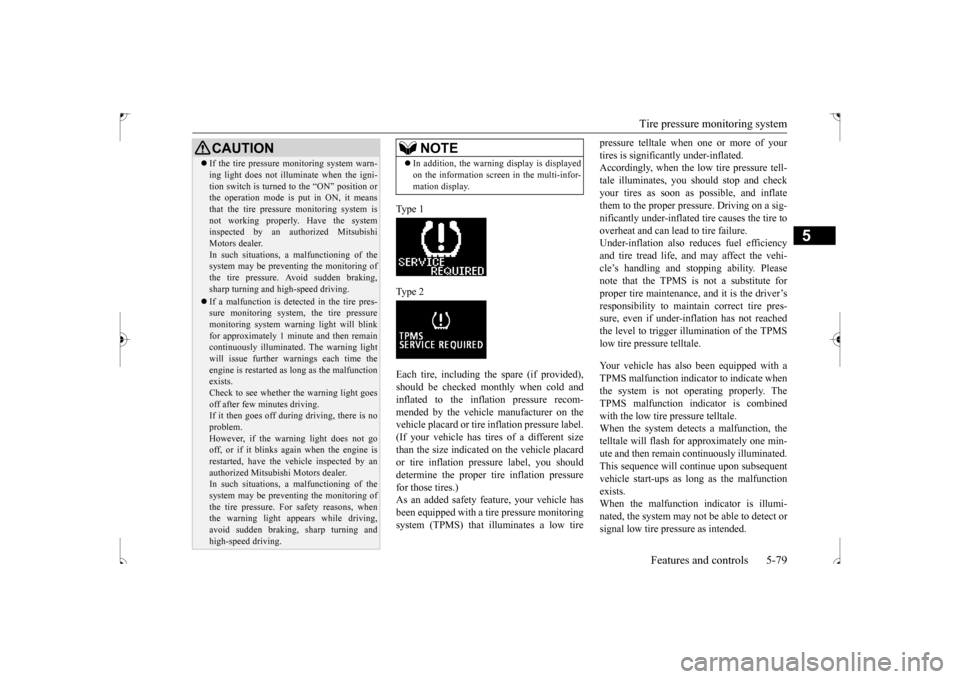
Type 1 Type 2Each tire, including the spare (if provided), should be checked monthly when cold and inflated to the inflation pressure recom-mended by the vehicle manufacturer on the vehicle placard or tire inflation pressure label. (If your vehicle has tires of a different sizethan the size indicated on the vehicle placard or tire inflation pressure label, you should determine the proper tire inflation pressurefor those tires.) As an added safety feature, your vehicle has been equipped with a ti
re pressure monitoring
system (TPMS) that illuminates a low tire
pressure telltale when one or more of your tires is significantly under-inflated. Accordingly, when the low tire pressure tell- tale illuminates, you should stop and checkyour tires as soon as possible, and inflate them to the proper pres
sure. Driving on a sig-
nificantly under-inflated tire causes the tire tooverheat and can lead to tire failure. Under-inflation also reduces fuel efficiency and tire tread life, and may affect the vehi-cle’s handling and stopping ability. Pleasenote that the TPMS is not a substitute for proper tire maintenance, and it is the driver’s responsibility to maintain correct tire pres-sure, even if under-inflation has not reached the level to trigger illumination of the TPMS low tire pressure telltale. Your vehicle has also been equipped with a TPMS malfunction indicator to indicate when the system is not operating properly. The TPMS malfunction indicator is combinedwith the low tire pressure telltale. When the system detects a malfunction, the telltale will flash for approximately one min-ute and then remain continuously illuminated. This sequence will continue upon subsequent vehicle start-ups as long as the malfunctionexists. When the malfunction indicator is illumi- nated, the system may not be able to detect orsignal low tire pressure as intended.
CAUTION If the tire pressure monitoring system warn- ing light does not illuminate when the igni- tion switch is turned to the “ON” position or the operation mode is put in ON, it means that the tire pressure monitoring system isnot working properly. Have the system inspected by an authorized Mitsubishi Motors dealer.In such situations,
a malfunctioning of the
system may be preventing the monitoring of the tire pressure. Avoid sudden braking,sharp turning and high-speed driving. If a malfunction is detected in the tire pres- sure monitoring system, the tire pressure monitoring system warning light will blink for approximately 1 minute and then remaincontinuously illuminated. The warning light will issue further warnings each time the engine is restarted as long as the malfunctionexists. Check to see whether the warning light goes off after few minutes driving.If it then goes off during driving, there is no problem. However, if the warning light does not gooff, or if it blinks again when the engine is restarted, have the vehicle inspected by an authorized Mitsubishi Motors dealer. In such situations,
a malfunctioning of the
system may be preventing the monitoring ofthe tire pressure. For safety reasons, when the warning light appears while driving, avoid sudden braking, sharp turning andhigh-speed driving.
NOTE
In addition, the warning display is displayed on the information screen in the multi-infor- mation display.
BK0239500US.bo
ok 79 ページ 2016年5月13日 金曜日 午前8時53分