2017 MITSUBISHI OUTLANDER wheel nut
[x] Cancel search: wheel nutPage 136 of 521

Parking brake
Features and controls 5-55
5
When the parking brake is applied, the brake warning light (red) in
the instrument cluster
and the indicator light (A) on the Electric parking brake switch will come on. When parking on a hill, set the parking brake, and turn the front wheels toward the curb on adownhill, or away from
the curb on an uphill.
NOTE
You may hear an operation noise from the vehicle body when operating the Electricparking brake. This do
es not indicate a mal-
function and the Elec
tric parking brake is
operating normally. When the battery is weak or dead, the Elec- tric parking brake cannot be applied or released. Refer to “Jum
p-starting the engine”
on page 8-2. You may feel the brake pedal moving when operating the Electr
ic parking brake.
This does not indi
cate a malfunction.
To apply
1. Stop the vehicle completely. 2. Pull up the Electric parking brake switch
while depressing the brake pedal.
CAUTION While the vehicle is in motion, do not apply the Electric parking
brake. Doing so may
cause overheating and/or
premature wear of
brake parts, reducing brake performance. NOTE
If the Electric parking
brake must be applied
in an emergency situa
tion, pull and hold the
Electric parking brake
switch to apply the
Electric parking brake. At that time, the fol- lowing warning display
will appear in the
multi-information disp
lay and a buzzer will
sound, however you should continue to pull and hold the Electric
parking brake switch.
When parking on stee
p grades, pull up the
Electric parking brak
e switch twice (once
more after the operati
on is completed once).
The maximum effect of the parking brake will be obtained. If the parking brake does not hold the vehicle stationary after the f
oot brake is released,
contact an authorized Mitsubishi Motorsdealer or a repair fa
cility of your choice.
When the operation mode is other than ON, if the parking brake is applied, the Electric parking brake indicator light comes on for a while. If the Electric parking brake switch is repeat- edly operated in a short time, the followingwarning display will appear in the multi- information display and
the Electrical park-
ing brake will temporarily stop working. Insuch case, wait for
approximately 1 minute
until the warning display disappears, and operate the Electric
parking brake switch
again. The brake warning light (red) and the indica- tor light on the Electric
parking brake switch
may blink. This does no
t indicate a malfunc-
tion, the lights go off when/if the Electric parking brake is released.NOTE
BK0239700US.book 55 ページ 2016年6月16日 木曜日 午前10時58分
Page 145 of 521
Ignition switch 5-64 Features and controls
5
The engine is off a
nd the steering wheel is
locked. The key can be inserted and removed only when the switch is in this position. The engine is off. The
key can be inserted and
removed only when the sw
itch is in this posi-
tion. Allows operation of electrical accessories with the engine off. All accessories can be used. Engages the starter. Release the key when the engine starts.It will automatically return to the “ON” position.
N00539601071
After about 30 minutes has elapsed with the ignition switch in the “ACC” position, thefunction automatically cuts out the power for the audio system and ot
her electric devices
that can be operated with that position.When the ignition switch is turned from the “ACC” position, the pow
er is supplied again
to those devices.
N00550901211
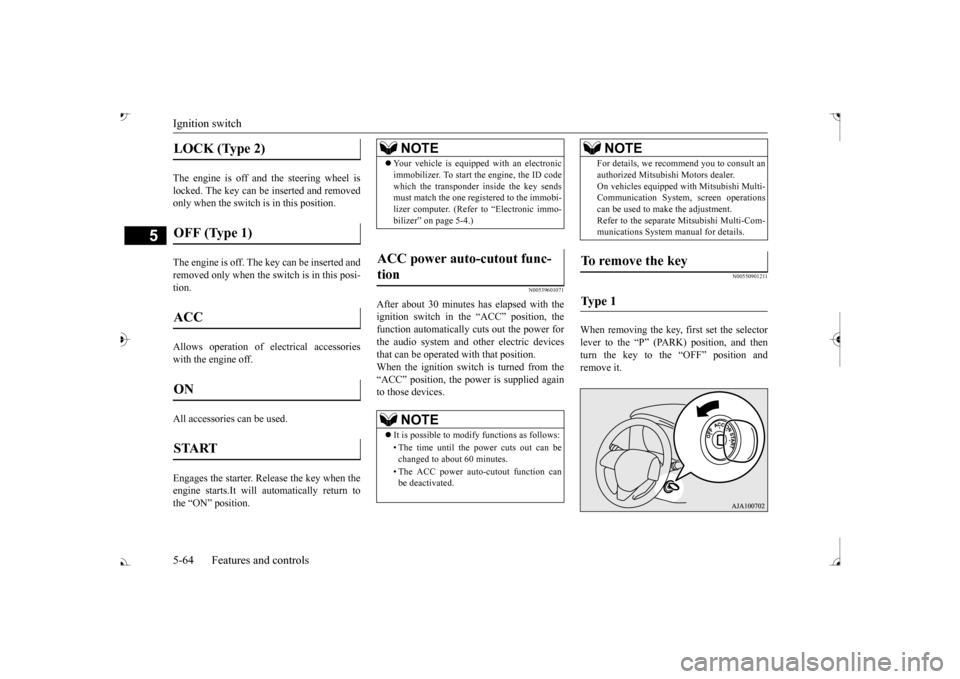
When removing the key, first set the selectorlever to the “P” (PARK) position, and thenturn the key to the “OFF” position and remove it.
LOCK (Type 2) OFF (Type 1) ACC ON START
NOTE
Your vehicle is equippe
d with an electronic
immobilizer. To start the engine, the ID codewhich the transponder inside the key sendsmust match the one registered to the immobi- lizer computer. (Refer to “Electronic immo- bilizer” on page 5-4.)
ACC power auto-cutout func- tion
NOTE
It is possible to modify functions as follows: • The time until the power cuts out can be changed to about 60 minutes. • The ACC power auto
-cutout function can
be deactivated.
For details, we recommend you to consult anauthorized Mitsubishi Motors dealer.On vehicles e
quipped with Mitsubishi Multi-
Communication System, screen operations can be used to ma
ke the adjustment.
Refer to the separate Mitsubishi Multi-Com-munications System manual for details.
To remove the key Ty p e 1
NOTE
BK0239700US.book 64 ページ 2016年6月16日 木曜日 午前10時58分
Page 226 of 521

Tire pressure monitoring system
Features and controls 5-145
5
2. If the tire pressure monitoring system warning light remain
s illuminated after
you have been driving for about 20 min- utes after you adjust the tire inflation pres- sure, one or more of the tires may have apuncture. Inspect the ti
re and if it has a
puncture, have it re
paired by an autho-
rized Mitsubishi Motors dealer as soon aspossible.
The tire pressure monitoring system may not work normally in the following circum- stances: A wireless facility
or device using the
same frequency is near the vehicle. Snow or ice is stuck inside the fenders and/or on the wheels. The tire inflation pressure sensor’s battery is dead. Wheels other than Mitsubishi genuine wheels are being used. Wheels that are not fitted with tire infla- tion pressure sensors are being used. Wheels whose ID codes are not memo- rized by the vehicle are used. Compact spare tire is fitted as a road wheel.
A window tint that affects the radio wave signals is installed.
N00532900081
If new wheels with new tire inflation pressure sensors are installed,
their ID codes must be
programmed into the tire pressure monitoringsystem. Have tire and
wheel replacement per-
formed by an authorized Mitsubishi Motors dealer to avoid the risk of damaging the tireinflation pressure sensors. If the wheel replacement is not done by an authorized Mitsubishi Motors dealer
, it is not covered by
your warranty.
Once adjustments have
been made, the warn-
ing light will go off after a few minutes ofdriving.WA R N I N G If the warning light
/ display illuminates
while you are driving, avoid hard braking, sharp steering maneuvers and high speeds.Driving with an under-inflated tire adversely affe
cts vehicle performance and
can result in an accident.CAUTION If a tire has a puncture, replace that tire with the spare tire. Driving on a punctured tirecould lead to an accident. The warning light / di
splay may not illumi-
nate immediately in the
event of a tire blow-
out or rapid leak.NOTE
NOTE
To avoid the risk of damage to the tire infla- tion pressure sensors, have any puncturedtire repaired by an authorized MitsubishiMotors dealer. If the tire repair is not done by an authorized Mitsubishi Motors dealer, it is not covered by your warranty. Do not use an aerosol puncture-repair spray on any tire.Such a spray could dama
ge the tire inflation
pressure sensors. Have any puncture repa
ired by an authorized
Mitsubishi Moto
rs dealer.
NOTE
Tire inflation pressures vary with the ambi- ent temperature. If the vehicle is subjected to large variations in ambient temperature, the tire inflation pressures may be under-inflated(causing the warning light / display come on) when the ambient temperature is relatively low. If the warning light / display comes on,adjust the tire inflation pressure.
Whenever the tires and wheels are replaced with new ones
BK0239700US.book 145 ページ 2016年6月16日 木曜日 午前10時58分
Page 239 of 521
Multi Around Monitor (if so equipped)
5
If the camera switch is pressed, the mode of Multi Around Monitor is
switched as follows.
Bird’s eye-view/Rear-view mode
Side-
view/Rear-view mode Bird’s eye-view/Rear-view mode
Side-
view/Rear-view mode
OFF
If the camera switch is
pressed, the mode of
Multi Around Monitor is switched, Bird’seye-view/Front-view mode
Side-
view/Front-view mode
OFF
N00587600033
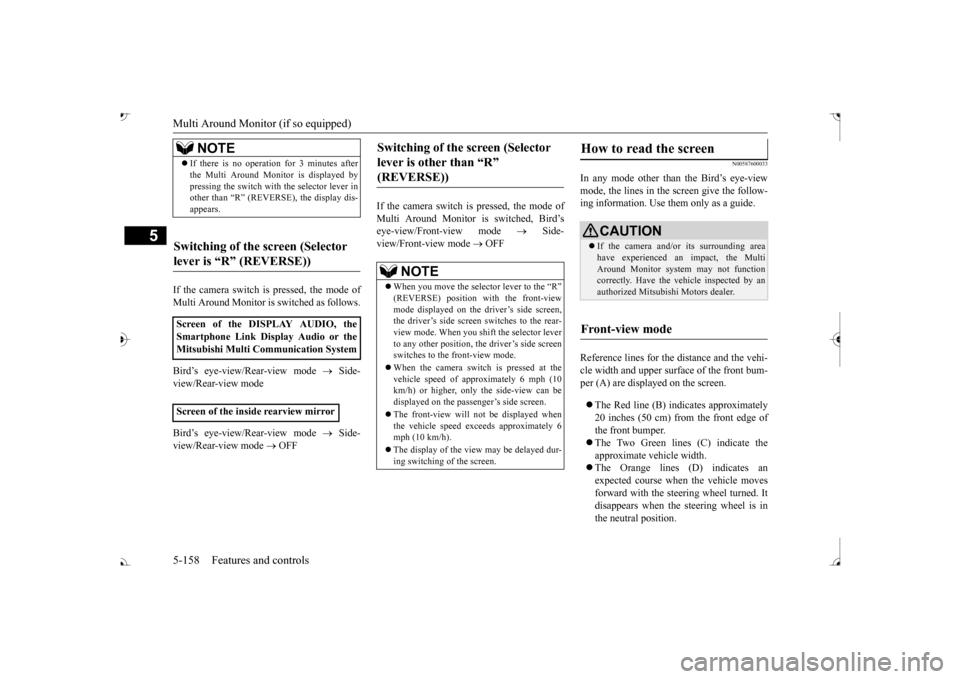
In any mode other than the Bird’s eye-view mode, the lines in the screen give the follow- ing information. Use them only as a guide. Reference lines for the distance and the vehi- cle width and upper surface of the front bum- per (A) are displayed on the screen. The Red line (B) indicates approximately 20 inches (50 cm) from the front edge ofthe front bumper. The Two Green lines (C) indicate the approximate ve
hicle width.
The Orange lines (D) indicates an expected course when the vehicle moves forward with the steering wheel turned. Itdisappears when the
steering wheel is in
the neutral position.
NOTE
If there is no operation for 3 minutes after the Multi Around Monitor is displayed bypressing the switch with the selector lever inother than “R” (REVERSE), the display dis- appears.
Switching of the screen (Selector lever is
Page 257 of 521
Multi Information display - Type 1 5-176 Features and controls
5
N00578600024
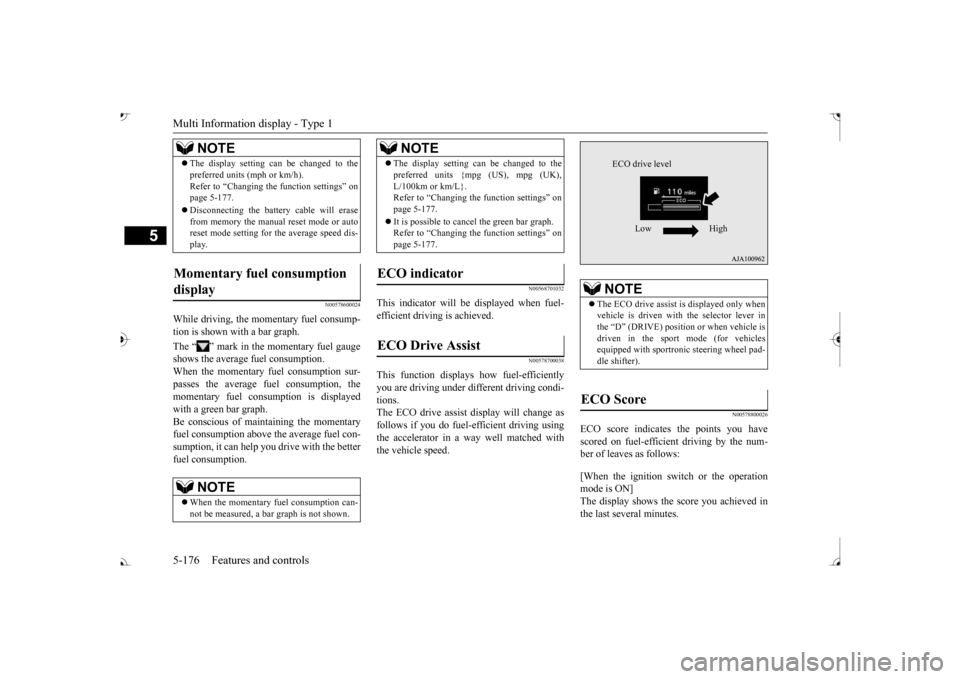
While driving, the momentary fuel consump- tion is shown with a bar graph. The “ ” mark in the momentary fuel gauge shows the average fuel consumption. When the momentary fuel consumption sur- passes the average fuel consumption, themomentary fuel consumption is displayed with a green bar graph. Be conscious of maintaining the momentaryfuel consumption above the average fuel con- sumption, it can help you drive with the better fuel consumption.
N00568701032
This indicator will be displayed when fuel-efficient driving is achieved.
N00578700038
This function displays
how fuel-efficiently
you are driving under different driving condi- tions. The ECO drive assist display will change asfollows if you do fuel-efficient driving using the accelerator in a way well matched with the vehicle speed.
N00578800026
ECO score indicates the points you have scored on fuel-efficient driving by the num- ber of leaves as follows: [When the ignition switch or the operation mode is ON] The display shows the score you achieved in the last several minutes.
The display setting can be changed to the preferred units (mph or km/h).Refer to “Changing th
e function settings” on
page 5-177. Disconnecting the batt
ery cable will erase
from memory the manual reset mode or auto reset mode setting for the average speed dis- play.
Momentary fuel consumption display
NOTE
When the momentary fuel consumption can- not be measured, a ba
r graph is not shown.
NOTE
The display setting can be changed to the preferred units {mpg (US), mpg (UK),L/100km or km/L}.Refer to “Changing the
function settings” on
page 5-177. It is possible to cancel the green bar graph. Refer to “Changing the
function settings” on
page 5-177.
ECO indicator ECO Drive Assist
NOTE
NOTE
The ECO drive assist is displayed only when vehicle is driven with
the selector lever in
the “D” (DRIVE) positi
on or when vehicle is
driven in the sport mode (for vehicles equipped with sportroni
c steering wheel pad-
dle shifter).
ECO Score
ECO drive level
Low High
BK0239700US.book 176 ページ 2016年6月16日 木曜日 午前10時58分
Page 320 of 521
Heated steering wheel switch (if so equipped)
Features and controls 5-239
5
N00589100032
The heated steering wh
eel contains internal
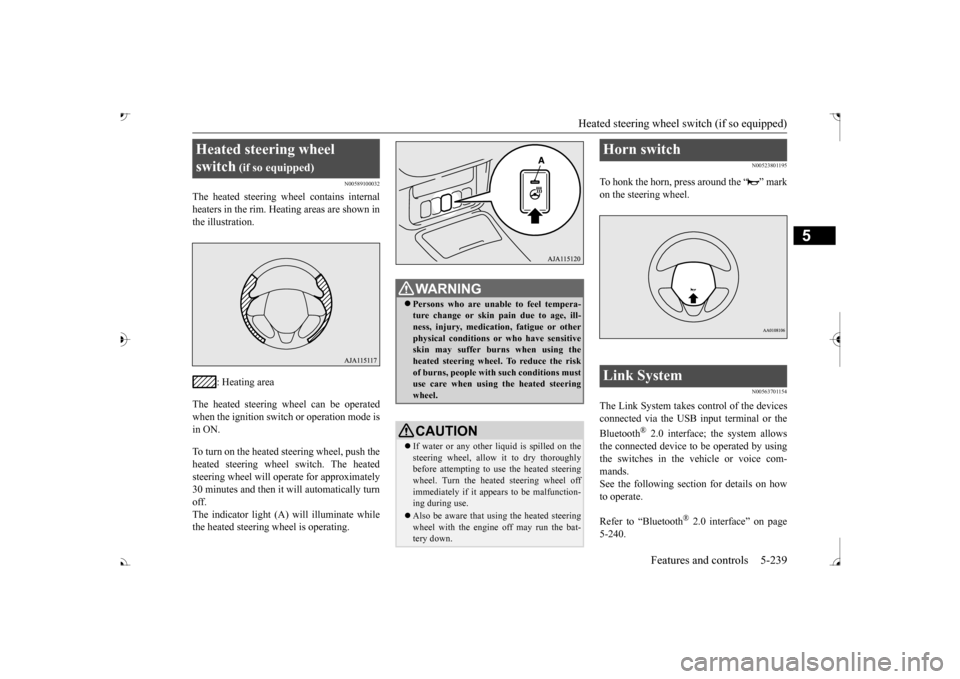
heaters in the rim. Heating areas are shown in the illustration.
: Heating area
The heated steering wheel can be operated when the ignition switch or operation mode is in ON. To turn on the heated steering wheel, push the heated steering wheel switch. The heated steering wheel will ope
rate for approximately
30 minutes and then it
will automatically turn
off. The indicator light (A) will illuminate while the heated steering wheel is operating.
N00523801195
To honk the horn, press around the “ ” markon the steering wheel.
N00563701154
The Link System takes control of the devicesconnected via the USB input terminal or the Bluetooth
® 2.0 interface; the system allows
the connected device to be operated by using the switches in the vehicle or voice com-mands. See the following section for details on how to operate. Refer to “Bluetooth
® 2.0 interface” on page
5-240.
Heated steering wheel switch
(if so equipped)
Persons who are unable
to feel tempera-
ture change or skin
pain due to age, ill-
ness, injury, medicati
on, fatigue or other
physical conditions or
who have sensitive
skin may suffer burns when using theheated steering wheel. To reduce the risk of burns, people with such conditions must use care when using the heated steeringwheel.CAUTION If water or any other li
quid is spilled on the
steering wheel, allow it to dry thoroughly before attempting to use the heated steering wheel. Turn the heated steering wheel offimmediately if it appe
ars to be malfunction-
ing during use. Also be aware that us
ing the heated steering
wheel with the engine off may run the bat- tery down.
Horn switch Link System
BK0239700US.book 239 ページ 2016年6月16日 木曜日 午前10時58分
Page 369 of 521

Vehicle preparation before driving 6-4 Driving safety
6
N00629001709
For a safer and more enjoyable trip, always check for the following: Before starting the vehicle, make certain that you and all passengers are seated andwearing their seat
belts properly (with
children in the rear seat, in appropriate restraints), and that all the doors and theliftgate are locked.
Move the driver’s seat as far backward as possible, while keeping good visibility,and good control of the steering wheel, brakes, accelerator, and controls. Check the instrument panel indicators and multi-information display
for any possible prob-
lem. Similarly, the front
passenger seat should
also be moved as fa
r back as possible.
Make sure that infants and small children are properly restrained in accordance with all laws and
regulations.
Check these by selecting the defroster mode, and set the blower swit
ch on high. You should
be able to feel the air blowing against thewindshield. Refer to “Defrosti
ng or defogging (wind-
shield, door windows)” on page 7-12 Check all the tires for heavy tread wear or uneven wear patterns. Look for stones, nails,glass, or other objects
stuck in the tread. Look
for any tread cuts or
sidewall cracks. Check
the wheel nuts for tightness, and the tires(including spare tire) for proper pressure.
Replace your tires before they are heavily worn out.As your vehicle is equi
pped with a tire pres-
sure monitoring system, there is a risk of damage to the tire inflation pressure sensorswhen the tire is replaced on the rim. Tire replacement should, onl
y, be performed by an
authorized Mitsubishi Motors dealer. Have someone watch wh
ile you turn all the
exterior lights on and off. Also check the turn signal indicators and hi
gh-beam indicators on
the instrument panel. Check the ground under the vehicle after parking overnight, for
fuel, water, oil, or
other leaks. Make sure
all the fluid levels are
correct. Also, if you
can smell fuel, you need
to find out why imme
diately and have it
fixed.
N00629201134
Even this vehicle’s sa
fety equipment, and
your safest driving, ca
nnot guarantee that you
can avoid an accident or injury. However, if
Vehicle preparation before driving Seat belts and seats
Defrosters Tires
Lights Fluid leaks Safe driving techniques
BK0239700US.book 4 ページ 2016年6月16日 木曜日 午前10時58分
Page 441 of 521
How to change a tire 8-6 For emergencies
8
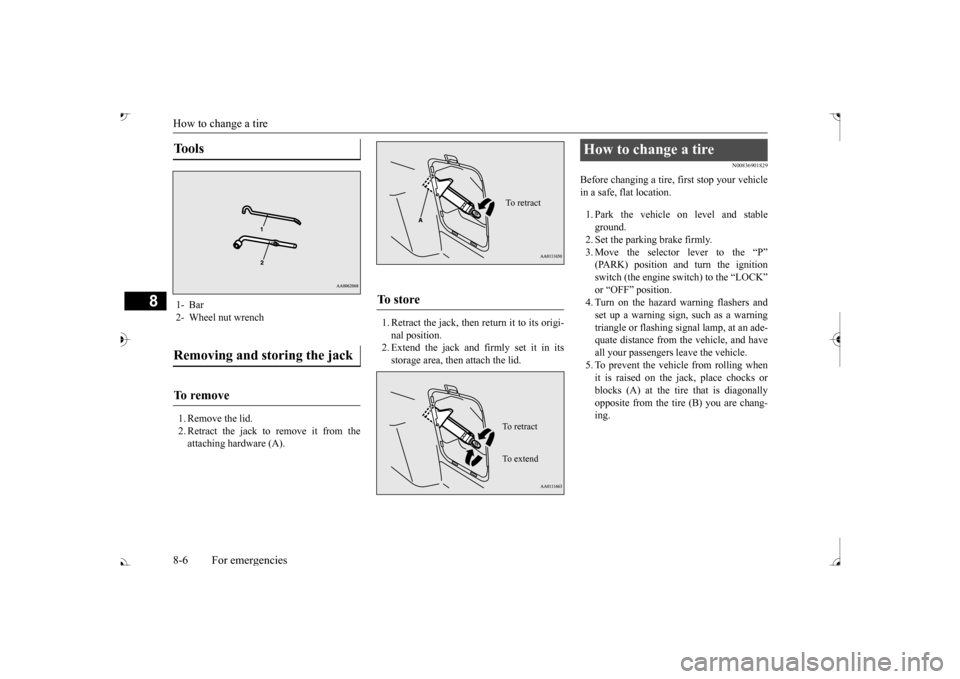
1. Remove the lid. 2. Retract the jack to remove it from theattaching hardware (A).
1. Retract the jack, then return it to its origi- nal position.2. Extend the jack and firmly set it in its storage area, then attach the lid.
N00836901829
Before changing a tire, first stop your vehiclein a safe, flat location. 1. Park the vehicle on level and stable ground.2. Set the parking brake firmly. 3. Move the selector
lever to the “P”
switch (the engine switch) to the “LOCK” or “OFF” position.4. Turn on the hazard warning flashers and set up a warning sign, such as a warning triangle or flashing signal lamp, at an ade-quate distance from the vehicle, and have all your passengers leave the vehicle. 5. To prevent the vehicle from rolling whenit is raised on the jack, place chocks or blocks (A) at the ti
re that is diagonally
opposite from the tire (B) you are chang-ing.
Tools 1- Bar 2- Wheel nut wrenchRemoving and storing the jack To r e m o v e
To s t o r e
To retractTo r e t r a c t To e x t e n d
How to change a tire
BK0239700US.book 6 ページ 2016年6月16日 木曜日 午前10時58分