2017 MITSUBISHI OUTLANDER door lock
[x] Cancel search: door lockPage 349 of 521
HomeLink® Wireless Control System (if so equipped) 5-268 Features and controls
5
N00554301040
HomeLink
® Wireless Contro
l System is a
registered trademark of Gentex Corporation. HomeLink
® provides a convenient way to
replace up to 3 hand-held radio-frequency (RF) transmitters used to activate devicessuch as gate operators
, garage door openers,
entry door locks, security systems, even home lighting. Additional HomeLink
® information
can be found at www.homelink.com, www.youtube.com/HomeLinkGentex, or by calling the toll-free HomeLink
®-Hotline at 1-
800-355-3515.
N00584600029
Some garage door openers manufactured after 1995 have “rolli
ng code protection”.
To program a garage door openerequipped with “rolli
ng code protection”; cess the garage door
opener motor to press the motor’s “Learn”
For convenience, use
a ladder and another pe
rson to assist you.
It is recommended that a new battery be placed in the hand-held
transmitter of the
device being progr
ammed to HomeLink
®
for quicker training and accurate trans- mission of the radio-frequency signal.
HomeLink
® Wireless Con-
trol System
(if so equipped)
WA R N I N G Do not use HomeLink
® with any garage
door opener that la
cks safety stop and
reverse features as required by U.S. Fed- eral Regulations.
A garage door opener
which cannot detect an object in the path of a closing garage d
oor and then auto-
matically stop and reverse, does not meetcurrent U.S. Federal
Regulations. Using a
garage door opener wi
thout these features
increases the risk of serious injury ordeath.
During programming, your garage door or gate may open or close. Make sure thatpeople and objects are clear of the garagedoor or gate that
you are programming.
NOTE
Once HomeLink
® is programmed, retain the
original transmitter for future programming procedures (for example, new vehicle pur-chases). Upon sale of the vehicle, the pro- grammed HomeLink
® buttons should be
erased for security purposes. Refer to “Cleaning the progra
mmed information” on
page 5-272. You can program a ma
ximum of 3 devices.
To change or replace any of the 3 devicesafter it has been in
itially programmed, you
must first erase the current settings. See “Cleaning the programmed information”on page 5-272 or “Reprogramming a single HomeLink
® button” on page 5-272.
WA R N I N G
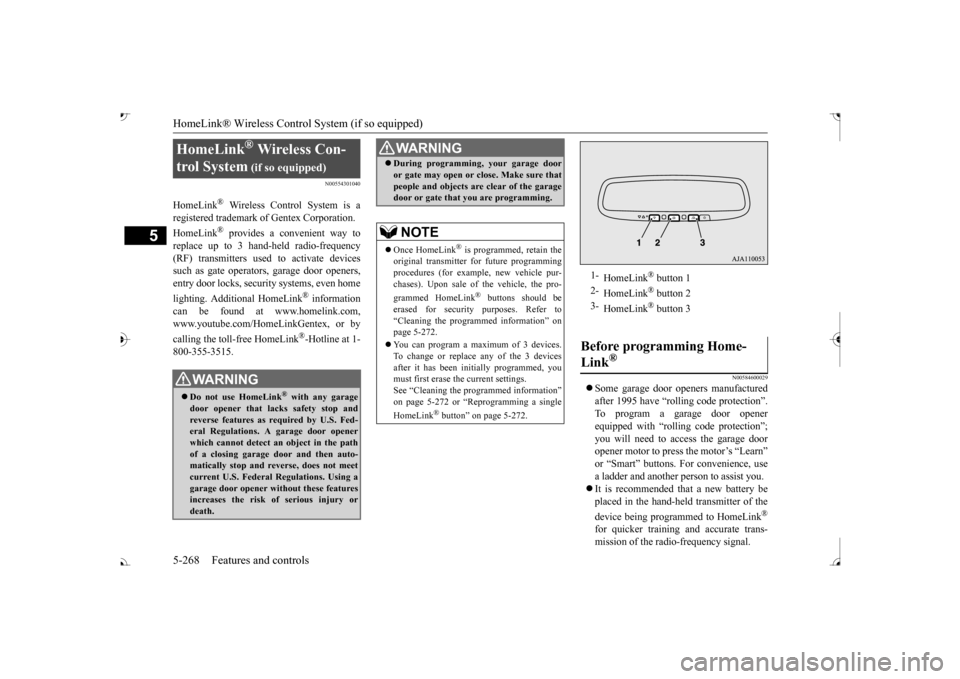
1-
HomeLink
® button 1
2-
HomeLink
® button 2
3-
HomeLink
® button 3
Before programming Home- Link
®
BK0239700US.book 268 ページ 2016年6月16日 木曜日 午前10時58分
Page 352 of 521
HomeLink® Wireless Control System (if so equipped)
Features and controls 5-271
5
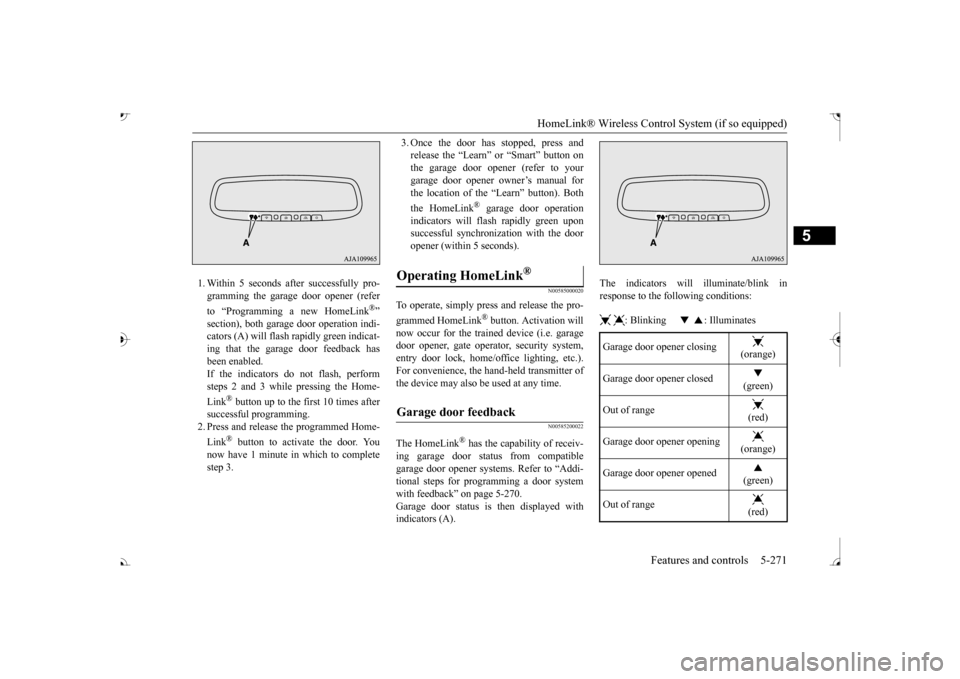
1. Within 5 seconds after successfully pro- gramming the garage door opener (refer to “Programming a new HomeLink
®”
section), both garage door operation indi- cators (A) will flash
rapidly green indicat-
ing that the garage
door feedback has
been enabled. If the indicators do not flash, performsteps 2 and 3 while pressing the Home- Link
® button up to the first 10 times after
successful programming.2. Press and release the programmed Home- Link
® button to activate the door. You
now have 1 minute in which to completestep 3.
3. Once the door has stopped, press and release the “Learn”
or “Smart” button on
the garage door opener (refer to your garage door opener owner’s manual for the location of the “Learn” button). Both the HomeLink
® garage door operation
indicators will fl
ash rapidly green upon
successful synchron
ization with the door
opener (within 5 seconds).
N00585000020
To operate, simply press and release the pro- grammed HomeLink
® button. Activation will
now occur for the traine
d device (i.e. garage
door opener, gate operat
or, security system,
entry door lock, home/of
fice lighting, etc.).
For convenience, the ha
nd-held transmitter of
the device may also be
used at any time.
N00585200022
The HomeLink
® has the capability of receiv-
ing garage door status from compatible garage door opener systems. Refer to “Addi- tional steps for programming a door systemwith feedback” on page 5-270. Garage door status is then displayed with indicators (A).
The indicators will illuminate/blink in response to the following conditions: : Blinking : Illuminates
Operating HomeLink
®
Garage door feedback
Garage door opener closing
(orange)
Garage door opener closed
(green)
Out of range
(red)
Garage door opener opening
(orange)
Garage door opener opened
(green)
Out of range
(red)
BK0239700US.book 271 ページ 2016年6月16日 木曜日 午前10時58分
Page 354 of 521

Interior lights
Features and controls 5-273
5
This equipment complies with FCC radiation exposure limits set fo
rth for an uncontrolled
environment. End Users must follow the spe- cific operating instruct
ions for satisfying RF
exposure compliance. This transmitter must be at least 12 inches (20 cm) from the user and must not be co-loc
ated or operating in
conjunction with any other antenna or trans- mitter. The term “IC:” before the certification/regis-tration number only si
gnifies that Industry
Canada technical specifications were met.
N00525301660
N00525401528
CAUTION The transmitter has been tested and complies with FCC and IC rules.Changes or modifica
tions not expressly
approved by the party responsible for com- pliance could void the user’s authority to operate the device.
Interior lights
NOTE
Be aware that leaving the light illuminated with the engine off may run the batterydown. Never leave the vehi
cle without checking
that the light is off.1- Cargo room light
P.5-275
2- Dome light (rear)
P.5-274
3- Dome light (front)/Reading lights
P.5-273
4- Downlight
P.5-220
5- Front foot lights
P.5-275
Dome light (front)/Reading lights Dome light (front)
1- (DOOR) When any of the doors or the liftgate isopened, the dome light
illuminates; when
any of them are closed, the dome light goes off after approxi
mately 30 seconds.
However, the light go
es off immediately
if: The doors and the liftgate are closed while the ignition switch is in the “ON” position or the operation mode is in ON. The driver’s door is closed while the lock knob is in the lock position, after all the other doors are closed.
BK0239700US.book 273 ページ 2016年6月16日 木曜日 午前10時58分
Page 355 of 521
Interior lights 5-274 Features and controls
5
2- (OFF) The dome light stays off regardless of any door or the liftgate being opened or closed.
N00537601165
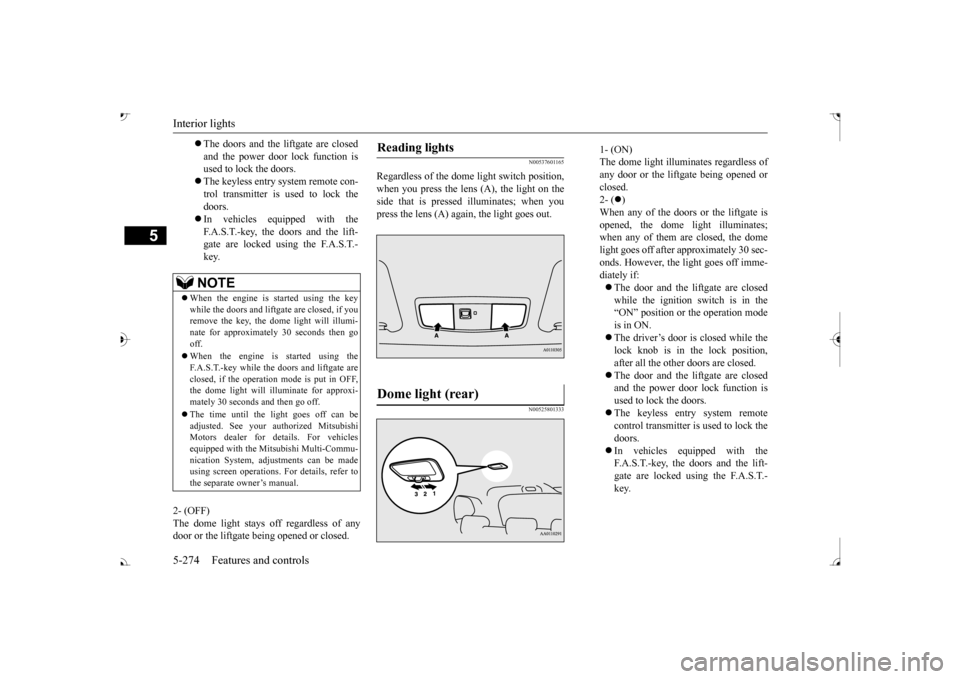
Regardless of the dom
e light switch position,
when you press the lens (A), the light on the side that is pressed illuminates; when youpress the lens (A) again, the light goes out.
N00525801333
The doors and the liftgate are closed and the power door lock function is used to lock the doors. The keyless entry system remote con- trol transmitter is used to lock the doors. In vehicles equipped with the F.A.S.T.-key, the doors and the lift- gate are locked using the F.A.S.T.-key.NOTE
When the engine is started using the key while the doors and liftga
te are closed, if you
remove the key, the do
me light will illumi-
nate for approximately 30 seconds then go off. When the engine is started using the F.A.S.T.-key while the doors and liftgate areclosed, if the operation mode is put in OFF, the dome light will il
luminate for approxi-
mately 30 seconds and then go off. The time until the light goes off can be adjusted. See your authorized MitsubishiMotors dealer for details. For vehicles equipped with the Mitsubishi Multi-Commu- nication System, adju
stments can be made
using screen operations. For details, refer to the separate owner’s manual.
Reading lights Dome light (rear)
1- (ON) The dome light illuminates regardless ofany door or the liftgate being opened or closed. 2- (
)
When any of the doors or the liftgate is opened, the dome
light illuminates;
when any of them are closed, the domelight goes off after approximately 30 sec- onds. However, the light goes off imme- diately if: The door and the liftgate are closed while the ignition switch is in the“ON” position or the operation mode is in ON. The driver’s door is closed while the lock knob is in the lock position, after all the other doors are closed. The door and the liftgate are closed and the power door lock function is used to lock the doors. The keyless entry system remote control transmitter is used to lock the doors. In vehicles e
quipped with the
F.A.S.T.-key, the doors and the lift- gate are locked using the F.A.S.T.- key.
BK0239700US.book 274 ページ 2016年6月16日 木曜日 午前10時58分
Page 356 of 521
Interior lights
Features and controls 5-275
5
3- (OFF) The dome light stays off regardless of anydoor or the liftgate being opened or closed.
N00526101186
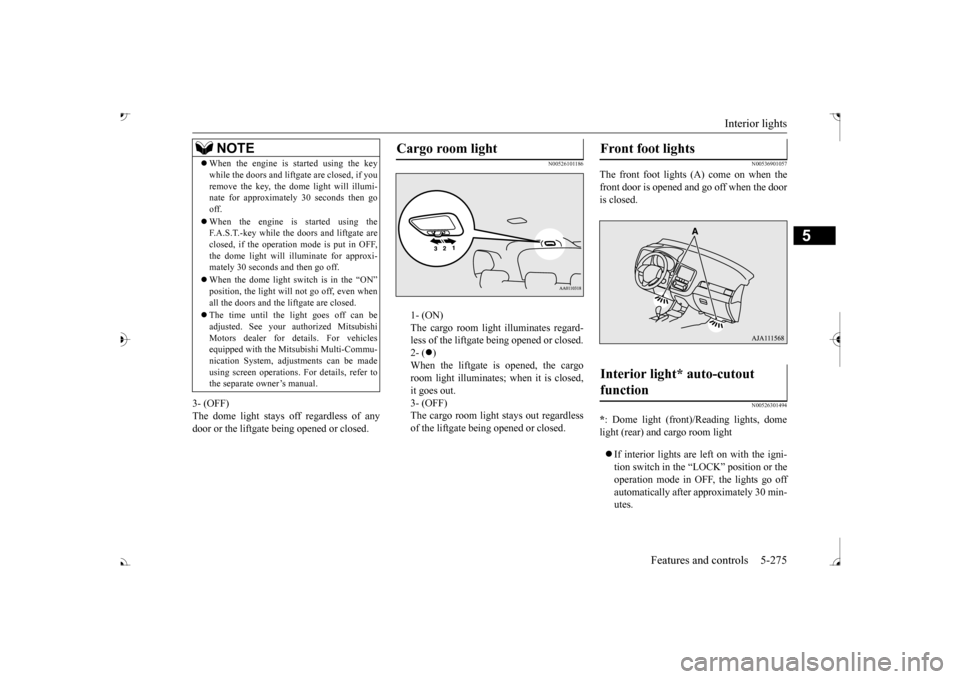
1- (ON) The cargo room light illuminates regard- less of the liftgate be
ing opened or closed.
2- (
)
When the liftgate is opened, the cargo room light illuminates; when it is closed,it goes out. 3- (OFF) The cargo room light stays out regardlessof the liftgate being opened or closed.
N00536901057
The front foot lights (A) come on when the front door is opened and go off when the door is closed.
N00526301494
* : Dome light (front)/Reading lights, dome light (rear) and cargo room light If interior lights are left on with the igni- tion switch in the “LOCK” position or theoperation mode in OFF, the lights go off automatically after approximately 30 min- utes.
NOTE
When the engine is
started using the key
while the doors and liftgate are closed, if youremove the key, the dom
e light will illumi-
nate for approximately 30 seconds then go off. When the engine is started using the F.A.S.T.-key while the doors and liftgate are closed, if the operation
mode is put in OFF,
the dome light will illuminate for approxi- mately 30 seconds and then go off. When the dome light switch is in the “ON”
not go off, even when
all the doors and the liftgate are closed. The time until the light goes off can be adjusted. See your authorized MitsubishiMotors dealer for details. For vehicles equipped with the Mitsubishi Multi-Commu- nication System, adjustments can be madeusing screen operations.
For details, refer to
the separate owner’s manual.
Cargo room light
Front foot lights Interior light* auto-cutout function
BK0239700US.book 275 ページ 2016年6月16日 木曜日 午前10時58分
Page 369 of 521

Vehicle preparation before driving 6-4 Driving safety
6
N00629001709
For a safer and more enjoyable trip, always check for the following: Before starting the vehicle, make certain that you and all passengers are seated andwearing their seat
belts properly (with
children in the rear seat, in appropriate restraints), and that all the doors and theliftgate are locked.
Move the driver’s seat as far backward as possible, while keeping good visibility,and good control of the steering wheel, brakes, accelerator, and controls. Check the instrument panel indicators and multi-information display
for any possible prob-
lem. Similarly, the front
passenger seat should
also be moved as fa
r back as possible.
Make sure that infants and small children are properly restrained in accordance with all laws and
regulations.
Check these by selecting the defroster mode, and set the blower swit
ch on high. You should
be able to feel the air blowing against thewindshield. Refer to “Defrosti
ng or defogging (wind-
shield, door windows)” on page 7-12 Check all the tires for heavy tread wear or uneven wear patterns. Look for stones, nails,glass, or other objects
stuck in the tread. Look
for any tread cuts or
sidewall cracks. Check
the wheel nuts for tightness, and the tires(including spare tire) for proper pressure.
Replace your tires before they are heavily worn out.As your vehicle is equi
pped with a tire pres-
sure monitoring system, there is a risk of damage to the tire inflation pressure sensorswhen the tire is replaced on the rim. Tire replacement should, onl
y, be performed by an
authorized Mitsubishi Motors dealer. Have someone watch wh
ile you turn all the
exterior lights on and off. Also check the turn signal indicators and hi
gh-beam indicators on
the instrument panel. Check the ground under the vehicle after parking overnight, for
fuel, water, oil, or
other leaks. Make sure
all the fluid levels are
correct. Also, if you
can smell fuel, you need
to find out why imme
diately and have it
fixed.
N00629201134
Even this vehicle’s sa
fety equipment, and
your safest driving, ca
nnot guarantee that you
can avoid an accident or injury. However, if
Vehicle preparation before driving Seat belts and seats
Defrosters Tires
Lights Fluid leaks Safe driving techniques
BK0239700US.book 4 ページ 2016年6月16日 木曜日 午前10時58分
Page 371 of 521

Parking 6-6 Driving safety
6
On snowy roads, ice can form on the braking system, making the brakes less effective. While driving in such conditions, pay closeattention to surrounding
vehicles and to the
condition of the road surface. From time to time, lightly depress the brake pedal andcheck how effective the brakes are. It is important to take
advantage of the engine
braking by downshifting while driving on steep downhill roads in order to prevent thebrakes from overheating.
N00629601385
When parking on a hill, set the parking brake,and turn the front wheels toward the curb on a downhill, or away from
the curb on an uphill.
If necessary, apply chocks to the wheels.Be sure that the parki
ng brake is firmly set
when parked and that the selector lever is in the “P” (PARK) position.
When parking on a hill, it is important to set the parking brake befo
re moving the selector
lever to the “P” (PARK) position. This pre- vents loading the parking brake against the transaxle. When this ha
ppens, it is difficult to
move the selector lever out of the “P” Never leave the engine running while you take a short nap or rest. Also, never leave the engine running in a closed or poorly venti- lated place. Your front bumper can be damaged if you scrape it over curbs or parking stop blocks.Be careful when traveling up or down steep slopes where your bumper can scrape the road.
Always carry the key and lock all doors and the liftgate when leaving the vehicle unat- tended. Always try to park your vehicle in a well litarea. Move effort could be required to turn the steering wheel. Refer to “Electric power steering system(EPS)” on page 5-99.
N00629901434
It is very important to know how muchweight your vehicle can carry. This weight is called the vehicle ca
pacity weight and
includes the weight of
all occupants, cargo
(including the roof load), non-factory-
When driving in cold weather When driving downhill Parking Parking on a hill
Parking with the engine run- ning
WA R N I N G Leaving the engine ru
nning risks injury or
death from accidentally moving the selec- tor lever or the accumulation of toxicexhaust fumes in the passenger compart- ment.
Where you park
WA R N I N G Do not park your vehicle in areas where combustible materials
such as dry grass or
leaves can come in contact with a hotexhaust, since a fire could occur.
When leaving the vehicle Do not keep the steering wheel fully turned for a long time Loading information
BK0239700US.book 6 ページ 2016年6月16日 木曜日 午前10時58分
Page 375 of 521
Cargo loads 6-10 Driving safety
6
N00629700435 N00630301092
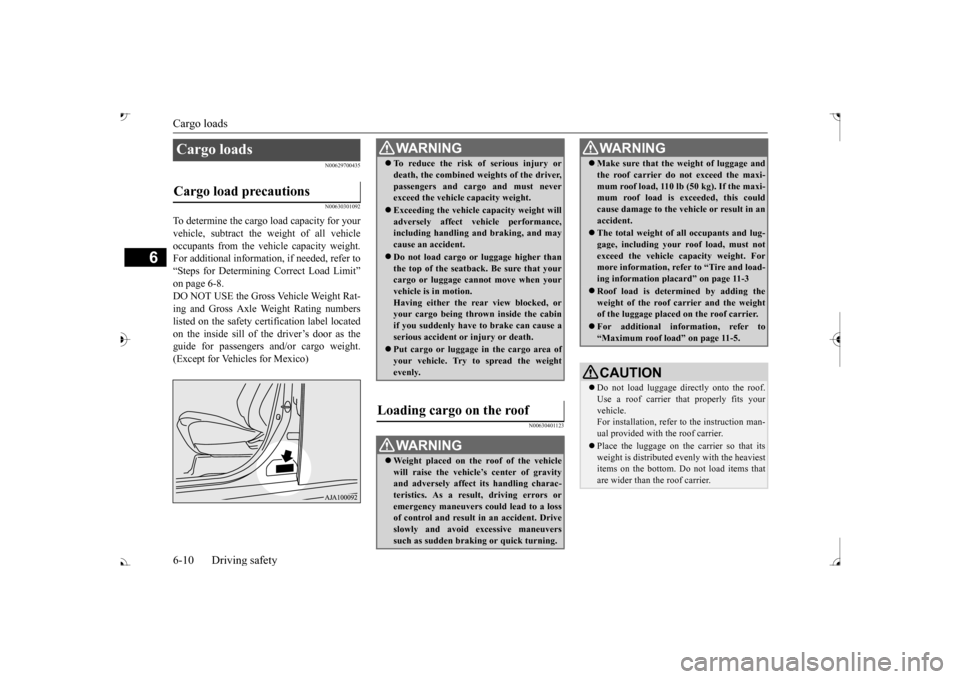
To determine the cargo load capacity for your vehicle, subtract the
weight of all vehicle
occupants from the vehi
cle capacity weight.
For additional information, if needed, refer to “Steps for Determining Correct Load Limit” on page 6-8. DO NOT USE the Gross Vehicle Weight Rat- ing and Gross Axle Weight Rating numberslisted on the safety certification label located on the inside sill of the driver’s door as the guide for passengers and/or cargo weight.(Except for Vehicles for Mexico)
N00630401123
Cargo loads Cargo load precautions
WA R N I N G To reduce the risk of serious injury or death, the combined weights of the driver,passengers and cargo and must neverexceed the vehicle capacity weight. Exceeding the vehicle capacity weight will adversely affect ve
hicle performance,
including handling and braking, and may cause an accident. Do not load cargo or luggage higher than the top of the seatback. Be sure that yourcargo or luggage cann
ot move when your
vehicle is in motion. Having either the re
ar view blocked, or
your cargo being thrown
inside the cabin
if you suddenly have to brake can cause a serious accident or
injury or death.
Put cargo or luggage in the cargo area of your vehicle. Try to spread the weightevenly.
Loading cargo on the roof
WA R N I N G Weight placed on the
roof of the vehicle
will raise the vehicle’ and adversely affect
its handling charac-
teristics. As a result, driving errors oremergency maneuvers could lead to a loss of control and result in an accident. Drive slowly and avoid excessive maneuverssuch as sudden brak
ing or quick turning.
Make sure that the
weight of luggage and
the roof carrier do not exceed the maxi-mum roof load, 110 lb (50 kg). If the maxi-mum roof load is ex
ceeded, this could
cause damage to the ve
hicle or result in an
accident. The total weight of all occupants and lug- gage, including your r
oof load, must not
exceed the vehicle capacity weight. For more information, refer to “Tire and load- ing information placard” on page 11-3 Roof load is determined by adding the weight of the roof
carrier and the weight
of the luggage placed
on the roof carrier.
For additional information, refer to “Maximum roof load” on page 11-5.CAUTION Do not load luggage directly onto the roof. Use a roof carrier that properly fits your vehicle. For installation, refer to the instruction man-ual provided with the roof carrier. Place the luggage on the carrier so that its weight is distri
buted evenly with the heaviest
items on the bottom. Do not load items that are wider than the roof carrier.WA R N I N G
BK0239700US.book 10 ページ 2016年6月16日 木曜日 午前10時58分