2017 MITSUBISHI OUTLANDER nel
[x] Cancel search: nelPage 210 of 521

Ultrasonic misacceleration Miti
gation System (if so equipped) Features and controls 5-129
5
Under certain circumstances, the system may not operate or may not detect cor-rectly an object in
front or behind the
vehicle. When your ve
hicle is approaching
the object too closely, take all necessary actions to avoid a collis
ion, such as brak-
ing and steering, regar
dless of whether the
Ultrasonic misaccel
eration Mitigation
System is activated or not. The Ultrasonic misacc
eleration Mitigation
System is not designed to detect a pedes-trian or bicycle. When propulsion power is immediately required while the Ultrasonic misaccelera- tion Mitigation System is activated, take one of the following actions. • Release the foot from the acceleratorpedal and lightly de
press the pedal again.
• Press and hold the Forward collision mit- igation system (FCM) and Ultrasonicmisacceleration Mitigation System ON/OFF switch for three seconds or more to turn off the Ultrasonic misaccel-eration Mitigation System.• Keep depressing the accelerator pedalfor 5 seconds or more.• Fully depress and release the acceleratorpedal three times or more in quick suc- cession.
Never attempt to test the Ultrasonic misacceleration Mitigation System. Doing so could result in an accident.WA R N I N G
While the Active Stability Control system (ASC) is turned off
by operating the ASC
OFF switch, the Ultrasonic misaccelera-tion Mitigation System does not operate. Refer to “ASC OF
F switch” on page
5-101. The Ultrasonic misacc
eleration Mitigation
System may not operate in certain situa-tions. Some of these include:• The sensors or surr
oundings have been
wiped by hand.• The stickers or ac
cessories have been
attached to the sens
ors or surroundings.
• When the ambient temperature is rap- idly changing. For e
xample, immediately
after the vehicle has exited from a tunnel or a garage.
Page 222 of 521

Lane Departure Warning System (LDW) (if so equipped)
Features and controls 5-141
5
N00578100045
If a problem occurs with the system, a visual warning specific to the type of the problem is given together with an audible alarm. The alarm shown below is displayed if the system becomes tempor
arily unavailable due
to the high or low temperature of the sensor. After temperature of the sensor has been in range, the system will automatically return tooperation. If the alarm continues s
howing, there is a pos-
sibility that the LDW has a malfunction. Con-tact an authorized Mitsubishi Motors dealer for inspection of the system.
The alarm shown below is displayed if the system becomes temporarily unavailable due to the dirty windshield of the sensor portion. After having cleaned the windshield, the sys-tem will automatically return to operation. If the alarm continues showing, there is a pos- sibility that the LDW has a malfunction. Con-tact an authorized Mitsubishi Motors dealer for inspection of the sensor.
• When passing through a place where the brightness suddenly changes, such as atthe entrance to or exit of a tunnel.• When the headlights of an oncomingvehicle are very bright. • When the rear of your vehicle is weigheddown with the weight of passengers andluggage.• When the headlights
of your vehicle are
not clean or are not properly aimed.• When the front windshield is not clean.• When the front windshield wipers do notclean the windshield properly.CAUTION To maintain proper function of the LDW:• Always keep the windshield and the head- lights clean.• Do not put anything, such as a sticker, onthe front windshield in front of the sensor.• Avoid applying a shock or load to the sen-sor.• Do not attempt to deta
ch or disassemble the
sensor.• Use only Mitsubishi Motors Genuine parts when replacing the
windshield wipers.
NOTE
When driving conditions are not suitable to use the LDW, turn off the LDW.WA R N I N G
System problem warning
Sensor is too hot or cold
Windshield is dirty
BK0239700US.book 141 ページ 2016年6月16日 木曜日 午前10時58分
Page 261 of 521

Multi Information display - Type 1 5-180 Features and controls
5
N00557201154
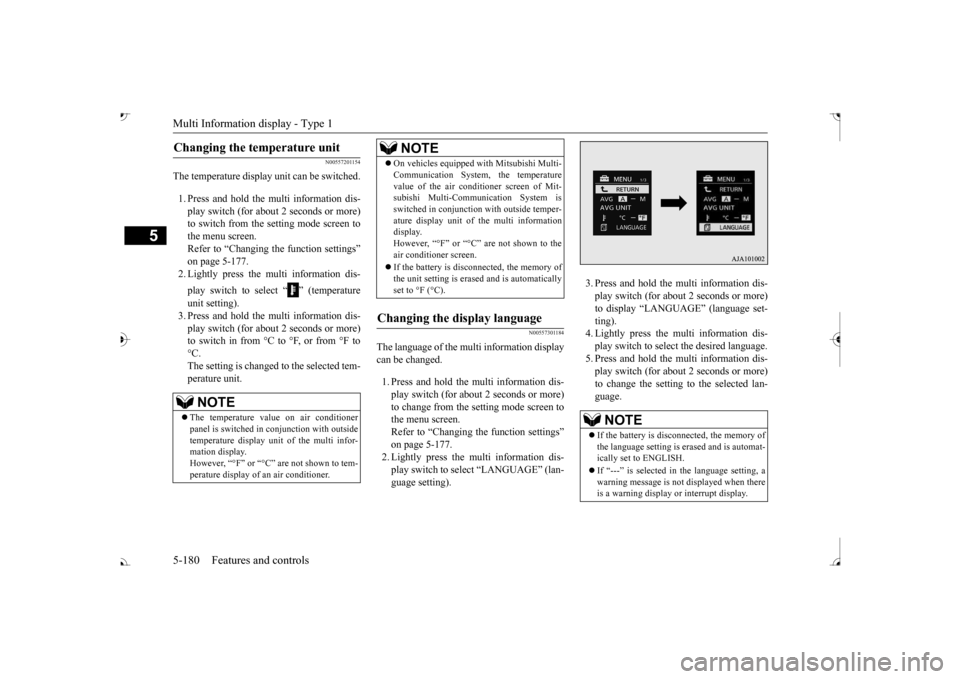
The temperature display unit can be switched. 1. Press and hold the multi information dis- play switch (for about 2 seconds or more) to switch from the setting mode screen tothe menu screen. Refer to “Changing the function settings” on page 5-177.2. Lightly press the multi information dis- play switch to select “ ” (temperature unit setting). 3. Press and hold the multi information dis- play switch (for about 2 seconds or more)to switch in from °C to °F, or from °F to °C. The setting is changed to the selected tem-perature unit.
N00557301184
The language of the multi information displaycan be changed. 1. Press and hold the mu
lti information dis-
play switch (for about 2 seconds or more) to change from the setting mode screen to the menu screen.Refer to “Changing th
e function settings”
on page 5-177. 2. Lightly press the multi information dis-play switch to se
lect “LANGUAGE” (lan-
guage setting).
3. Press and hold the multi information dis- play switch (for about 2 seconds or more)to display “LANGUAGE” (language set- ting). 4. Lightly press the multi information dis-play switch to select
the desired language.
5. Press and hold the multi information dis- play switch (for about 2 seconds or more)to change the setting to the selected lan- guage.
Changing the temperature unit
NOTE
The temperature value on air conditioner panel is switched in
conjunction with outside
temperature display unit of the multi infor-mation display. However, “°F” or “°C” are not shown to tem- perature display of
an air conditioner.
On vehicles equipped
with Mitsubishi Multi-
Communication System, the temperaturevalue of the air conditioner screen of Mit-subishi Multi-Communication System is switched in conjunction
with outside temper-
ature display unit of the multi informationdisplay. However, “°F” or “°C” air conditioner screen. If the battery is disconnected, the memory of the unit setting is erased and is automaticallyset to °F (°C).
Changing the display language
NOTE
NOTE
If the battery is disconnected, the memory of the language setting is erased and is automat- ically set to ENGLISH. If “---” is selected in the language setting, a warning message is not displayed when there is a warning display or interrupt display.
BK0239700US.book 180 ページ 2016年6月16日 木曜日 午前10時58分
Page 271 of 521

Multi Information display - Type 2 5-190 Features and controls
5
N00557101179
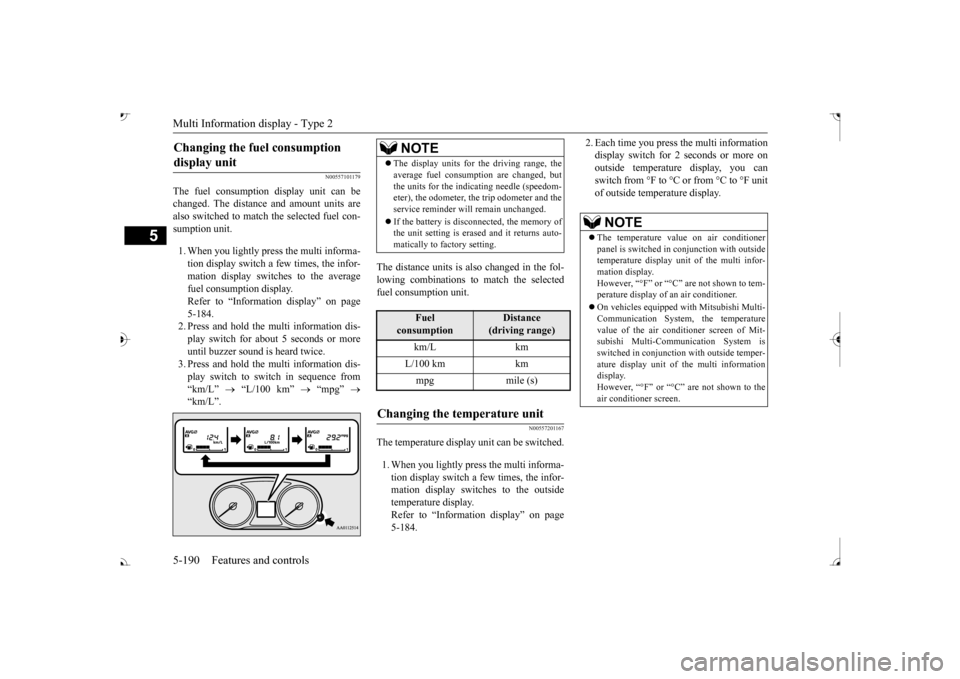
The fuel consumption display unit can be changed. The distance and amount units are also switched to match the selected fuel con- sumption unit. 1. When you lightly press the multi informa- tion display switch a few times, the infor- mation display switches to the average fuel consumption display. Refer to “Information display” on page 5-184.2. Press and hold the multi information dis- play switch for about 5 seconds or more until buzzer sound is
heard twice.
3. Press and hold the multi information dis- play switch to swit
ch in sequence from
“km/L”
“L/100 km”
“mpg”
The distance units is also changed in the fol- lowing combinations to match the selected fuel consumption unit.
N00557201167
The temperature display unit can be switched. 1. When you lightly press the multi informa- tion display switch a few times, the infor- mation display switches to the outsidetemperature display. Refer to “Information display” on page 5-184.
2. Each time you press the multi information display switch for 2 seconds or more onoutside temperatur
e display, you can
switch from °F to °C or from °C to °F unit of outside temperature display.
Changing the fuel consumption display unit
NOTE
The display units for the driving range, the average fuel consumption are changed, butthe units for the indica
ting needle (speedom-
eter), the odometer, the trip odometer and the service reminder will
remain unchanged.
If the battery is disconnected, the memory of the unit setting is erased and it returns auto- matically to factory setting.
Fuel
consumption
Distance
(driving range)
L/100 km km mpg mile (s)
Changing the temperature unit
NOTE
The temperature value on air conditioner panel is switched in
conjunction with outside
temperature display unit of the multi infor- mation display.However, “°F” or “°C” are not shown to tem- perature display of
an air conditioner.
On vehicles e
quipped with Mitsubishi Multi-
Communication System, the temperature value of the air condi
tioner screen of Mit-
subishi Multi-Communication System is switched in conjunction
with outside temper-
ature display unit of
the multi information
display. However, “°F” or “°C” air conditioner screen.
BK0239700US.book 190 ページ 2016年6月16日 木曜日 午前10時58分
Page 302 of 521

Combination headlights and dimmer switch
Features and controls 5-221
5
Rotate the switch to operate the lights. The combinations of switch operations and illuminated lights differ in accordance with the following conditions. [When the engine is started, and the parking brake is released]
[When the engine is not running, or when the engine is running but the parking brake is notreleased] The engine starts when the lights are off.
Rotate the switch to operate the lights. The combinations of switch operations and illuminated lights differ in accordance withthe following conditions. [When the engine is started, and the parking brake is released]
When it rains, or wh
en the vehicle has been
washed, the inside of the lens sometimesbecomes foggy. This is the same as whenwindow glass mists up
on a humid day, and
does not indicate a problem. When the light is switched on, the heat
will dry out the fog.
However, if water collects inside the light, have it checked by an
authorized Mitsubishi
Motors dealer or a repair facility of yourchoice.
Ty p e 1
NOTE
OFF
The daytime running lights illumi- nated The daytime running lights illumi- nated Tail, front and rear side-marker lights, license plate, instrument panel lights and downlight on Headlights and other lights onNOTE
Once the daytime running light come on, they do not go out until the ignition switch is turned to the “OFF” or “ACC” position or the operation mode is changed to OFF orACC.
OFF All lights off
Parking, tail, front and rear side- marker lights, license plate, instru- ment panel lights and downlight on Headlights and other lights on
Ty p e 2 OFF
The daytime running lights illumi- nated
AUTO
The daytime running lights illumi- nated (when it is light outside the vehicle) Headlights and other lights turn on and off automatically in accor-dance with outside light level.
BK0239700US.book 221 ページ 2016年6月16日 木曜日 午前10時58分
Page 303 of 521
![MITSUBISHI OUTLANDER 2017 3.G Owners Manual Combination headlights and dimmer switch 5-222 Features and controls
5
[When the engine is not running, or when the engine is running but the parking brake is notreleased] The engine starts when the l MITSUBISHI OUTLANDER 2017 3.G Owners Manual Combination headlights and dimmer switch 5-222 Features and controls
5
[When the engine is not running, or when the engine is running but the parking brake is notreleased] The engine starts when the l](/manual-img/19/7536/w960_7536-302.png)
Combination headlights and dimmer switch 5-222 Features and controls
5
[When the engine is not running, or when the engine is running but the parking brake is notreleased] The engine starts when the lights are off.
N00532601580
If the following operation is performed with the combination headlights and dim- mer switch in the “ ” or “ ” position, the lights automatically turn off. [Except for vehicles
equipped with the
F. A . S . T. - k e y ]The ignition switch is turned to the “OFF” from the ignition switch and the driver’sdoor is opened. [For vehicles equipped
with the F.A.S.T.-
key] The operation mode is changed to OFF orACC and the driver’s door is opened. If the following operation is performed with the combination headlights and dim- mer switch in the “ ” or “ ” position, the lights automatically turn off afterabout 3 minutes. [Except for vehicles
equipped with the
F. A . S . T. - k e y ] The ignition switch is turned to the “OFF” from the ignition switch and the driver’s door is not opened.
The daytime running lights illumi- nated Tail, front and rear side-marker lights, license pl
ate, instrument
panel lights and downlight on Headlights and other lights on
NOTE
Once the daytime running light come on, they do not go out until the ignition switch isturned to the “OFF” or “ACC” position or the operation mode is changed to OFF or ACC.OFF All lights off AUTO
Headlights and other lights turn on and off automatically in accor- dance with outside light level. Parking, tail, front
and rear side-
marker lights, license plate, instru- ment panel lights and downlight on Headlights and other lights on
NOTE
The sensitivity of the automatic on/off con- trol can be adjusted.For further informati
on, please contact your
authorized Mitsubishi Motors dealer or a repair facility of your choice. On vehicles equipped
with Mitsubishi Multi-
Communication System,
screen operations
can be used to make the adjustment. Refer to the separate owner’s manual fordetails. Do not cover the sensor (A) for the automatic on/off control by affixing
a sticker or label to
the windshield. If the lights do not turn on or off with the switch in the “AUTO” operate the switch. Have
the system checked
by an authorized Mitsubishi Motors dealer ora repair facility
of your choice.
Light auto-cutout function (headlights and other lights)
BK0239700US.book 222 ページ 2016年6月16日 木曜日 午前10時58分
Page 305 of 521

Combination headlights and dimmer switch 5-224 Features and controls
5
light in the instrument cluster indicates when the headlights are on high beam.
N00550001209
You can flash the high beams by pulling the lever gently toward you (2). The lights will go back to normal when you let go. While thehigh beam is on, you will
see a blue light on
the instrument panel.
N00591300028
The automatic high beam system turns the high beam light on
or off automatically
according to surrounding light conditions. The sensor (A) detects lights, such as thelights of an oncoming vehicle, a vehicle ahead or street lights.
N00593600038
1. Rotate the light switch to “ ” position or “AUTO” position when the engine isrunning. 2. Press the automatic high beam system switch. The automatic high beam system is acti-vated and the indicator is illuminated. If the automatic high beam system switch is pressed again, the automatic high beamsystem will be deactivated and automatic high beam system indicator will go off.
Headlight flasher
NOTE
You can flash the high beams by pulling the lever toward you, even if the light switch isoff.
If you turn the lights off with the head lights set to high-beam illumi
nation, the headlights
are automatically returned to their low-beamsetting when the light
switch is next turned
to the “ ” position.
Automatic high beam system
(if
so equipped)
WA R N I N G Do not rely solely on the Automatic High Beam. Always observe
surrounding traffic
and light conditions. If necessary, manu-ally turn the high beams on or off. Refer to “Dimmer (high/low beam change)” on page 5-223.
How to use the automatic high beam system
NOTE
If the headlights are on when the light switch is in the “AUTO” position, the automatic high beam system works.
BK0239700US.book 224 ページ 2016年6月16日 木曜日 午前10時58分
Page 311 of 521

Turn signal lever 5-230 Features and controls
5
N00522601529
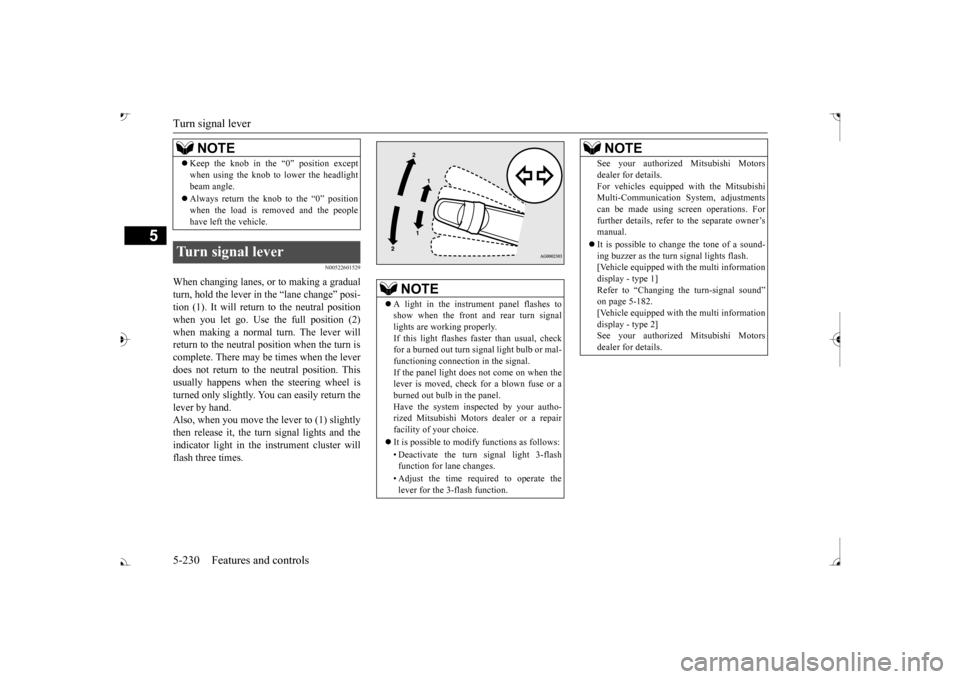
When changing lanes, or to making a gradual turn, hold the lever in the “lane change” posi-tion (1). It will return
to the neutral position
when you let go. Use the full position (2) when making a normal turn. The lever willreturn to the neutral position when the turn is complete. There may be times when the lever does not return to the neutral position. Thisusually happens when the steering wheel is turned only slightly. You can easily return the lever by hand.Also, when you move the lever to (1) slightly then release it, the turn signal lights and the indicator light in the instrument cluster willflash three times. Keep the knob in the “0” position except when using the knob to lower the headlightbeam angle. Always return the knob to the “0” position when the load is removed and the peoplehave left the vehicle.
Turn signal lever
NOTE
NOTE
A light in the instrument panel flashes to show when the front and rear turn signallights are working properly. If this light flashes fa
ster than usual, check
for a burned out turn signal light bulb or mal-functioning connect
ion in the signal.
If the panel light does not come on when the lever is moved, check for a blown fuse or aburned out bulb in the panel. Have the system inspected by your autho- rized Mitsubishi Motors dealer or a repairfacility of your choice. It is possible to modify functions as follows: • Deactivate the turn signal light 3-flash function for lane changes. • Adjust the time required to operate the lever for the 3-flash function.
See your authorized Mitsubishi Motorsdealer for details.For vehicles equipped
with the Mitsubishi
Multi-Communication System, adjustments can be made using sc
reen operations. For
further details, refer to the separate owner’smanual. It is possible to cha
nge the tone of a sound-
ing buzzer as the turn signal lights flash. [Vehicle equipped with the multi information display - type 1]Refer to “Changing the turn-signal sound” on page 5-182. [Vehicle equipped with the multi informationdisplay - type 2] See your authorized Mitsubishi Motors dealer for details.NOTE
BK0239700US.book 230 ページ 2016年6月16日 木曜日 午前10時58分