2017 MITSUBISHI OUTLANDER Settings
[x] Cancel search: SettingsPage 324 of 521

Bluetooth® 2.0 interface
Features and controls 5-243
5
N00564101113
The Bluetooth
® 2.0 interface is equipped
with a voice recognition function. Simply say voice commands and you can per- form various operations and make or receivehands-free calls. With the Bluetooth
® 2.0 interface, voice rec-
ognition is possible fo
r US English, North
American Spanish, Canadian French and Jap-anese. The factory se
tting is “English.”
vehicles with Mitsubishi Multi-Commu- nication System) or
PICK-UP button (for
vehicles with Mitsubishi Multi-Commu-nication System). 2. Say “Setup.” 3. Say “Language.”4. The voice guide wi
ll say “Select a lan-
guage: English, Spanis
h, French or Japa-
nese.” Say the desired language.(Example: “English”)
5. The voice guide will say “English (Span- ish, French or Japanese) selected. Is thiscorrect?” Say “Yes.” Step 4. 6. When the voice guide says “English (Spanish, French or Japanese) selected,” the language change process will be com- pleted and the system will return to themain menu.
NOTE
If a cellular phone is within close proximity of the microphone, it may distort the soundquality. In this case, place the cellular phoneas far as possible from the microphone.
Voice recognition function
NOTE
If the voice command that you say differs from the predefined command or cannot be recognised due to ambient noise or some other reason, the Bluetooth
® 2.0 interface
will ask you for the voice command again up to 3 times.
For best performance and further reduction of ambient noise, the vehicle windowsshould be closed, lower the blower speed andrefrain from conversat
ion with your passen-
gers while engaging
the voice recognition
function. Some voice commands have alternative commands. Depending on the sele
cted language, some
functions may not
be available.
Language can be change
d by using the audio
control panel besides
the following proce-
dure. For details, refer to
“System settings” on
page 7-44. For DISPLAY AUDIO and Mit-subishi Multi-Communication System, refer to the separate owner’s manuals.
Selecting the language
NOTE
NOTE
The voice guide will
repeat the same mes-
sage twice. The first message is in the cur- rent language, and the
second message is in
the selected language. If many entries are registered in the vehicle phonebook, changing th
e language will take
a longer time. Changing the language
deletes the mobile
phonebook imported to the Bluetooth
® 2.0
interface. If you wish to use it, you will have to import it again.
BK0239700US.book 243 ページ 2016年6月16日 木曜日 午前10時58分
Page 325 of 521

Bluetooth® 2.0 interface 5-244 Features and controls
5
N00564200016 N00564301027
The Bluetooth
® 2.0 interface is equipped
with a help function. If you say “Help” when th
e system is waiting
for a voice command i
nput, the system will
tell you a list of the
commands that can be
used under the ci
rcumstances.
N00564401028
There are 2 cancel functions. If you are at the main menu, say “Cancel” to exit from the Bluetooth
® 2.0 interface.
If you are anywhere else within the system,say “Cancel” to return to the main menu.
N00564501032
The Bluetooth
® 2.0 interface is equipped
with a confirmation function.
With the confirmation function activated, you are given more opportunities than normal toconfirm a command when making various settings to the Bluetooth
® 2.0 interface. This
allows you to decrease the possibility that asetting is accident
ally changed.
The confirmation function can be turned on or off by following the steps below. 1. Press the SPEECH button (except for vehicles with Mitsubishi Multi-Commu- nication System) or PICK-UP button (for vehicles with Mitsubishi Multi-Commu- nication System). 2. Say “Setup.”3. Say “Confirmation prompts.” 4. The voice guide will say “Confirmation prompts are
N00564601105
It is possible to use
a passcode as a security
function by setting a pa
sscode of your choice
for the Bluetooth
® 2.0 interface.
When the security function is turned on, it is necessary to make a voice input of a 4-digit
passcode in order to use all functions of the Bluetooth
® 2.0 interface, except for recep-
tion. Use the following procedure to turn on the security function by setting a passcode. 1. Press the SPEECH button (except for vehicles with Mitsubishi Multi-Commu- nication System) or
PICK-UP button (for
vehicles with Mitsubishi Multi-Commu- nication System). 2. Say “Setup.”3. Say “Passcode.” 4. The voice guide will
say “Passcode is dis-
abled. Would you like to enable it?”Answer “Yes.” passcode and return to the main menu. 5. The voice guide will say “Please say a 4- digit passcode. Remember this passcode. It will be required to use this system.” Say a 4-digit number which you want to set as a passcode. 6. For confirmation purposes, the voiceguide will say “Passc
ode <4-digit pass-
code>. Is this correct?” Answer “Yes.”input in Step 5.
Useful voice commands Help function Canceling
NOTE
You can return to the previous menu by say- ing “Go Back.” (if so equipped)
Confirmation function setting
Security function
Setting the passcode
BK0239700US.book 244 ページ 2016年6月16日 木曜日 午前10時58分
Page 329 of 521

Bluetooth® 2.0 interface 5-248 Features and controls
5
7. The voice guide will say “Start pairing procedure on the device. See the device manual for instructions.” Enter in the Bluetooth
® device the 4-digit number you
have registered in Step 6.
8. The voice guide will
say “Please say the
name of the device after the beep.” You can assign a desired name for the Blue- tooth
® device and register it as a device
tag. Say the name you want to register after the beep. 9. The voice guide will say “Pairing com- plete,” and the pairing process will end.
1. Stop your vehicle in a safe area, put the selector lever in the “P” (PARK) position and apply the parking brake. 2. Press the SPEECH button (except for vehicles with Mitsubishi Multi-Commu-nication System) or
PICK-UP button (for
vehicles with Mitsubishi Multi-Commu- nication System).3. Say “Pair Device.”
Some Bluetooth
® devices requi
re a specific
pairing code. Please re
fer to the device man-
ual for pairing code requirements. The pairing code ente
red here is only used
for the Bluetooth
® connection ce
rtification.
It is any 4-digit numbe
r the user would like
to select. Remember the pairing c
ode as it needs to be
keyed into the Bluetooth
® device later in the
pairing process. Depending on the connecti
on settings of the
Bluetooth
® device, this code may have to be
entered each time you connect the Blue- tooth
® device to the Bluetooth
® 2.0 inter-
face. For the default
connection settings,
refer to the instructions for the device.NOTE
Depending on the Bluetooth
® device, it may
take a few minutes to pair it with the Blue- tooth
® 2.0 interface.
If the Bluetooth
® 2.0 interface cannot recog-
nize the Bluetooth
® device, the voice guide
will say “Pairing has tim
ed out” and the pair-
ing process will be cancelled. Confirm that the devi
ce you are pairing sup-
ports Bluetooth
®, and try pairing it again.
If you enter the wrong number, the voice guide will say “Pairing
failed” and the pair-
ing process will be cancelled. Confirm the number is right, and try pairingit again.NOTE
When the confirmation function is on, after repeating the device
tag you have said, the
voice guide will ask “Is this correct?” Answer “Yes.”
tag, answer “No” and
then say the device tag again.NOTE
Pairing procedure- Type 2
(if so
equipped)NOTE
You cannot pair any Bluetooth
® device with
the Bluetooth
® 2.0 interface unless the vehi-
cle is parked. Before pairing a Bluetooth
®
device with the Bluetooth
® 2.0 interface,
confirm that the vehicle is parked in a safelocation.
BK0239700US.book 248 ページ 2016年6月16日 木曜日 午前10時58分
Page 349 of 521
HomeLink® Wireless Control System (if so equipped) 5-268 Features and controls
5
N00554301040
HomeLink
® Wireless Contro
l System is a
registered trademark of Gentex Corporation. HomeLink
® provides a convenient way to
replace up to 3 hand-held radio-frequency (RF) transmitters used to activate devicessuch as gate operators
, garage door openers,
entry door locks, security systems, even home lighting. Additional HomeLink
® information
can be found at www.homelink.com, www.youtube.com/HomeLinkGentex, or by calling the toll-free HomeLink
®-Hotline at 1-
800-355-3515.
N00584600029
Some garage door openers manufactured after 1995 have “rolli
ng code protection”.
To program a garage door openerequipped with “rolli
ng code protection”; cess the garage door
opener motor to press the motor’s “Learn”
For convenience, use
a ladder and another pe
rson to assist you.
It is recommended that a new battery be placed in the hand-held
transmitter of the
device being progr
ammed to HomeLink
®
for quicker training and accurate trans- mission of the radio-frequency signal.
HomeLink
® Wireless Con-
trol System
(if so equipped)
WA R N I N G Do not use HomeLink
® with any garage
door opener that la
cks safety stop and
reverse features as required by U.S. Fed- eral Regulations.
A garage door opener
which cannot detect an object in the path of a closing garage d
oor and then auto-
matically stop and reverse, does not meetcurrent U.S. Federal
Regulations. Using a
garage door opener wi
thout these features
increases the risk of serious injury ordeath.
During programming, your garage door or gate may open or close. Make sure thatpeople and objects are clear of the garagedoor or gate that
you are programming.
NOTE
Once HomeLink
® is programmed, retain the
original transmitter for future programming procedures (for example, new vehicle pur-chases). Upon sale of the vehicle, the pro- grammed HomeLink
® buttons should be
erased for security purposes. Refer to “Cleaning the progra
mmed information” on
page 5-272. You can program a ma
ximum of 3 devices.
To change or replace any of the 3 devicesafter it has been in
itially programmed, you
must first erase the current settings. See “Cleaning the programmed information”on page 5-272 or “Reprogramming a single HomeLink
® button” on page 5-272.
WA R N I N G
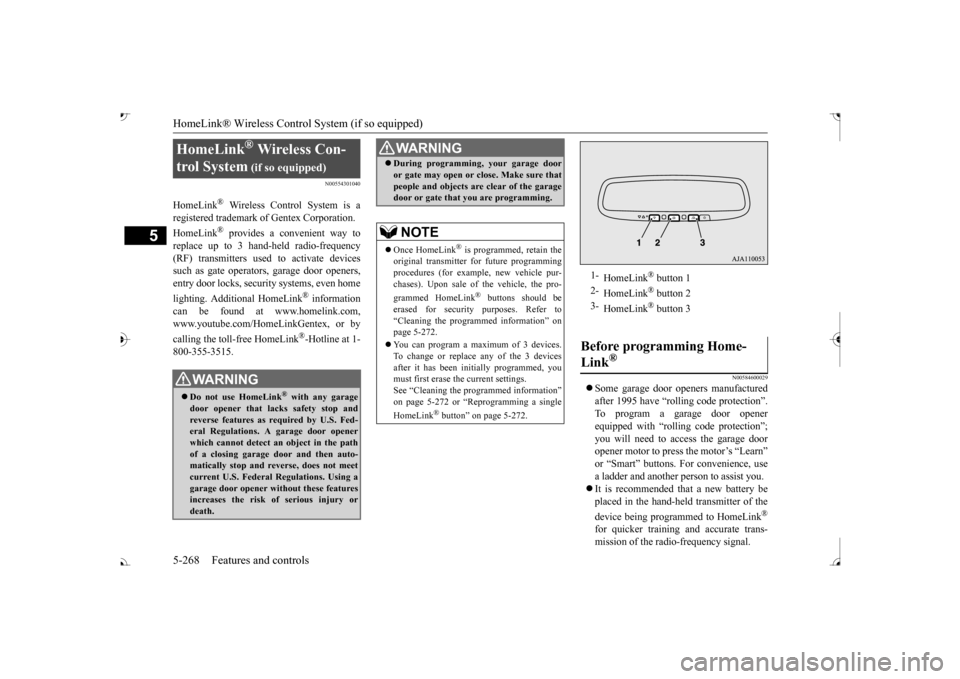
1-
HomeLink
® button 1
2-
HomeLink
® button 2
3-
HomeLink
® button 3
Before programming Home- Link
®
BK0239700US.book 268 ページ 2016年6月16日 木曜日 午前10時58分
Page 384 of 521
7
Comfort controlsVents ................................................................................................7-2 Dual-zone automatic climate control air conditioner ......................7-5 Important air conditioning operating tips ..
...........
...........
.........
.....7-13
Air purifier .....................................................................................7-14 AM/FM radio/CD player (if so equipped) .....................................7-14 Handling of Discs ..........................................................................7-18Audio Files (MP3/WMA/AAC) ....................................................7-19 Important Points on Safety for the Customer ................................7-23 Operation Keys ..............................................................................7-24Listen to Radio ...............................................................................7-26 Listen to Satellite Radio (if so equipped) .......................................7-28 Listen to CDs .................................................................................7-30Listen to MP3s ...............................................................................7-31 Listen to an iPod ............................................................................7-32 Listen to Audio Files on a USB Device .........................................7-34To play iPod/USB memory device tr
acks via voice ope
ration ......7-37
Listen to Bluetooth Audio .............................................................7-40 Display Indicator ...........................................................................7-42Audio Quality and Volume Balance Adjustment ...........................7-44 System Settings ..............................................................................7-44 Troubleshooting ..........
...........
...........
...........
...........
.........
.........
.....7-47
Clock (if so equipped) ....................................................................7-49 General information about your radio .....
...........
...........
...........
.....7-50
BK0239700US.book 1 ページ 2016年6月16日 木曜日 午前10時58分
Page 390 of 521
Dual-zone automatic climat
e control air conditioner Comfort controls 7-7
7
N00737001448
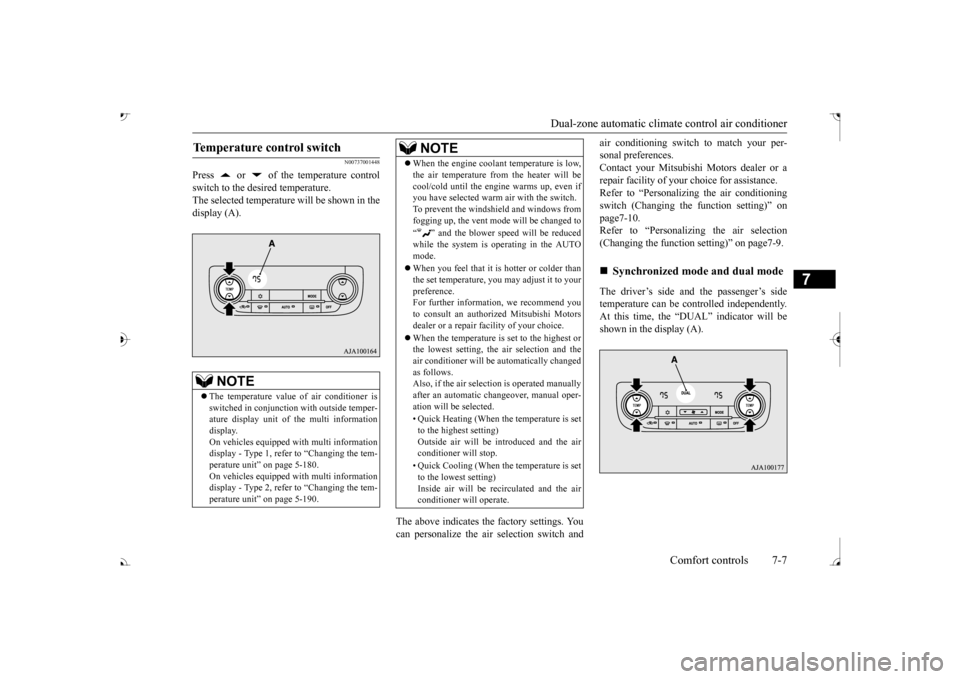
Press or of the temperature control switch to the desired temperature. The selected temperature will be shown in the display (A).
The above indicates the
factory settings. You
can personalize the air
selection switch and
air conditioning switch to match your per- sonal preferences.Contact your Mitsubishi
Motors dealer or a
repair facility of your
choice for assistance.
Refer to “Personalizi
ng the air conditioning
switch (Changing the function setting)” on page7-10. Refer to “Personalizing the air selection(Changing the function setting)” on page7-9. The driver’s side and the passenger’s side temperature can be controlled independently.At this time, the “
DUAL” indicato
r will be
shown in the display (A).
Temperature control switch
NOTE
The temperature value
of air conditioner is
switched in conjunction
with outside temper-
ature display unit of the multi informationdisplay. On vehicles equipped with multi information display - Type 1, refer to “Changing the tem-perature unit” on page 5-180. On vehicles equipped with multi information display - Type 2, refer to “Changing the tem-perature unit” on page 5-190.
When the engine coolan
t temperature is low,
the air temperature from the heater will becool/cold until the engi
ne warms up, even if
you have selected warm
air with the switch.
To prevent the windshield and windows from fogging up, the vent mode will be changed to “ ” and the blower speed will be reduced while the system is operating in the AUTO mode. When you feel that it is hotter or colder than the set temperature, you may adjust it to yourpreference. For further information, we recommend you to consult an authorized Mitsubishi Motorsdealer or a repair fa
cility of your choice.
When the temperature is set to the highest or the lowest setting, the air selection and the air conditioner will be automatically changed as follows.Also, if the air select
ion is operated manually
after an automatic ch
angeover, manual oper-
ation will be selected. • Quick Heating (When th
e temperature is set
to the highest setting)Outside air will be introduced and the air conditioner will stop. • Quick Cooling (When the temperature is set to the lowest setting) Inside air will be reci
rculated and the air
conditioner wi
ll operate.
NOTE
Synchronized mode and dual mode
BK0239700US.book 7 ページ 2016年6月16日 木曜日 午前10時58分
Page 392 of 521
Dual-zone automatic climat
e control air conditioner Comfort controls 7-9
7
N00737201378
Normally, use the outside
air position to keep
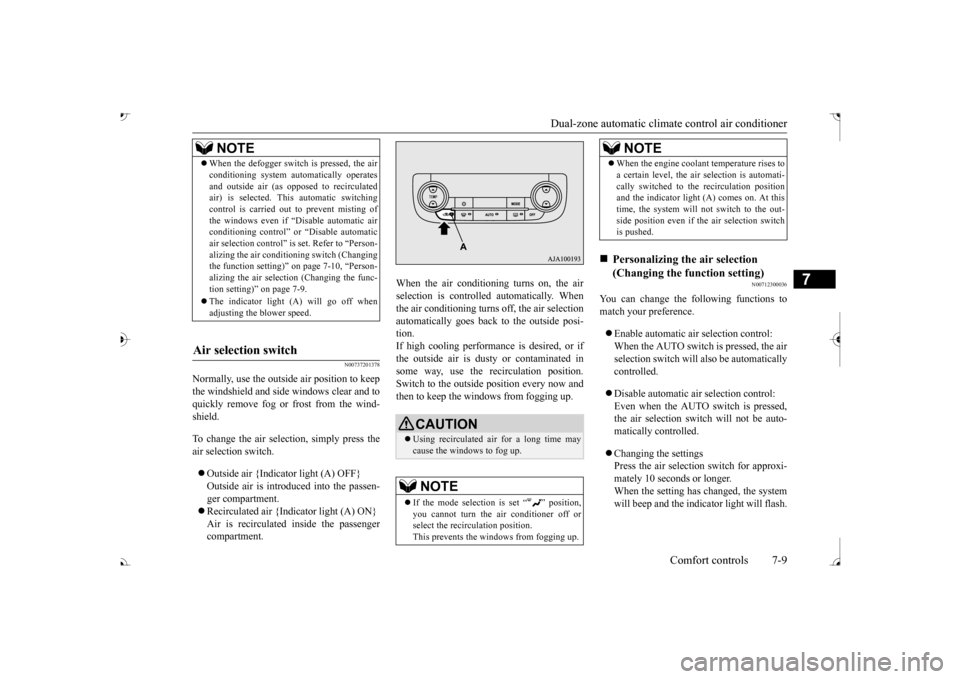
the windshield and side windows clear and to quickly remove fog or frost from the wind-shield. To change the air selection, simply press the air selection switch. Outside air {Indicator light (A) OFF} Outside air is introduced into the passen-ger compartment. Recirculated air {Indicator light (A) ON} Air is recirculated
inside the passenger
compartment.
When the air conditioning turns on, the air selection is controlled automatically. Whenthe air conditioning turns
off, the air selection
automatically goes back to the outside posi- tion.If high cooling performanc
e is desired, or if
the outside air is dusty or contaminated in some way, use the
recirculat
ion position.
Switch to the outside position every now and then to keep the windows from fogging up.
N00712300036
You can change the following functions tomatch your preference. Enable automatic air selection control: When the AUTO switch is pressed, the airselection switch will also be automatically controlled. Disable automatic air selection control: Even when the AUTO switch is pressed,the air selection switch
will not be auto-
matically controlled. Changing the settings Press the air selection switch for approxi-mately 10 seconds or longer. When the setting has changed, the system will beep and the indi
cator light will flash.
NOTE
When the defogger switch
is pressed, the air
conditioning system au
tomatically operates
and outside air (as opposed to recirculatedair) is selected. This automatic switching control is carried out to prevent misting of the windows even if “D conditioning control” or
“Disable
automatic
air selection control” is
set. Refer to “Person-
alizing the air conditi
oning switch (Changing
the function setting)
Page 393 of 521
Dual-zone automatic climate
control air conditioner
7-10 Comfort controls
7
• When the setting has changed from enabled to disabled,
the system will beep
three times and the indicator light will flash three times. • When the setting has changed from dis-abled to enabled, the system will beep two times and the i
ndicator light will
flash three times.On vehicles equippe
d with Mitsubishi
Multi-Communication System, screen operations can also be used to change the setting. Refer to th
e separate owner’s
manual for details.
N00737301467
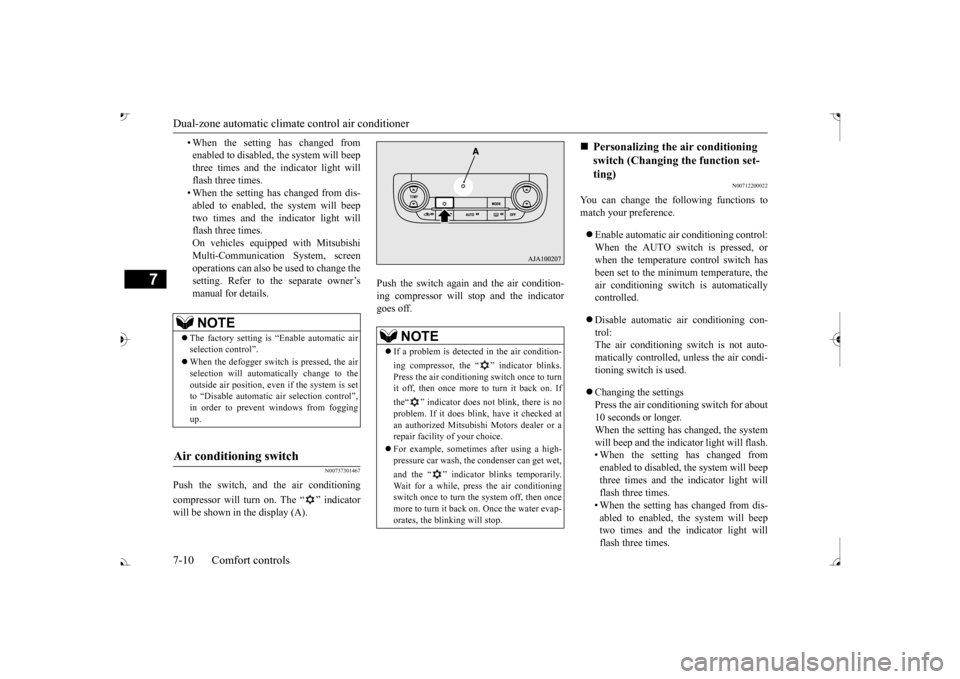
Push the switch, and the air conditioning compressor will turn on. The “ ” indicator will be shown in the display (A).
Push the switch again and the air condition- ing compressor will st
op and the indicator
goes off.
N00712200022
You can change the following functions tomatch your preference. Enable automatic air conditioning control: When the AUTO switch is pressed, or when the temperature control switch hasbeen set to the minimum temperature, the air conditioning switch is automatically controlled. Disable automatic air conditioning con- trol: The air conditioning switch is not auto-matically controlled,
unless the air condi-
tioning switch is used. Changing the settings Press the air conditioning switch for about10 seconds or longer. When the setting has changed, the system will beep and the indi
cator light will flash.
• When the setting has changed from enabled to disabled, the system will beep three times and the indicator light willflash three times. • When the setting has changed from dis- abled to enabled, the system will beeptwo times and the i
ndicator light will
flash three times.
NOTE
The factory setting is “Enable automatic air selection control”. When the defogger switch is pressed, the air selection will automatically change to the outside air position, even if the system is setto “Disable automatic air selection control”, in order to prevent windows from fogging up.
Air conditioning switch
NOTE
If a problem is detect
ed in the air condition-
ing compressor, the “ ” indicator blinks. Press the air conditioni
ng switch once to turn
it off, then once more to turn it back on. If the“ ” indicator does not blink, there is no problem. If it does blink,
have it checked at
an authorized Mitsubish
i Motors dealer or a
repair facility of your choice. For example, sometimes after using a high- pressure car wash, the
condenser can get wet,
and the “ ” indicator blinks temporarily. Wait for a while, pres
s the air conditioning
switch once to turn the system off, then once more to turn it back on. Once the water evap-orates, the blinking will stop.
Personalizing the air conditioning switch (Changing the function set-ting)
BK0239700US.book 10 ページ 2016年6月16日 木曜日 午前10時58分