2017 MITSUBISHI OUTLANDER buttons
[x] Cancel search: buttonsPage 113 of 521

Free-hand Advanced
Security Transmitter (F.A.S
.T.-key) (if so equipped)
5
The buzzer answerback function can be turned ON or OFF as required.
N00544601095
The door and liftgate
unlock function can be
set to the following two conditions. Each time the door and
liftgate unlock func-
tion is set, a chime wi
ll sound to tell you the
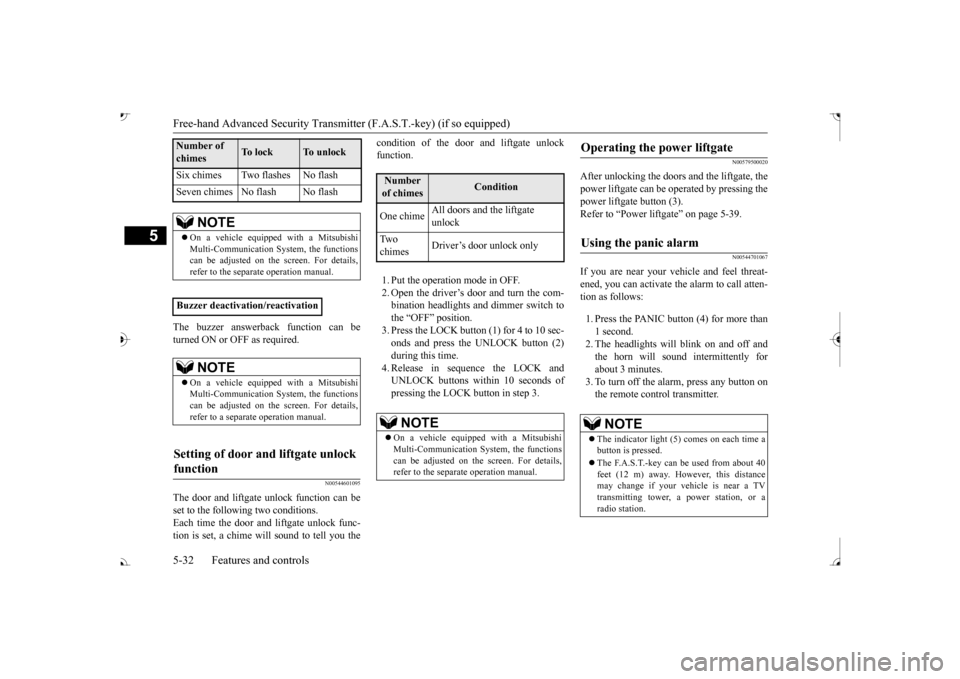
condition of the door and liftgate unlock function. 1. Put the operation mode in OFF. 2. Open the driver’s door and turn the com- bination headlights and dimmer switch tothe “OFF” position. 3. Press the LOCK button (1) for 4 to 10 sec- onds and press the UNLOCK button (2)during this time. 4. Release in sequence the LOCK and UNLOCK buttons within 10 seconds ofpressing the LOCK button in step 3.
N00579500020
After unlocking the doors and the liftgate, the power liftgate can be operated by pressing the power liftgate button (3).Refer to “Power lift
gate” on page 5-39.
N00544701067
If you are near your vehicle and feel threat- ened, you can activate the alarm to call atten- tion as follows: 1. Press the PANIC button (4) for more than 1 second. 2. The headlights will blink on and off and the horn will sound intermittently forabout 3 minutes. 3. To turn off the alarm, press any button on the remote control transmitter.
Six chimes Two flashes No flash Seven chimes No flash No flash
NOTE
On a vehicle equippe
d with a Mitsubishi
Multi-Communication System, the functions can be adjusted on the screen. For details, refer to the separate operation manual.
Buzzer deactivation/reactivation
NOTE
On a vehicle equippe
d with a Mitsubishi
Multi-Communication System, the functionscan be adjusted on the screen. For details, refer to a separa
te operation manual.
Setting of door and liftgate unlock function
Number of chimes
To l o c k
To unlock
Number of chimes
Condition
One chime
All doors and the liftgate unlock
Tw o chimes
Driver’s door unlock only
NOTE
On a vehicle equippe
d with a Mitsubishi
Multi-Communication System, the functions can be adjusted on the screen. For details, refer to the separa
te operation manual.
Operating the power liftgate
Using the panic alarm
NOTE
The indicator light (5) comes on each time a button is pressed. The F.A.S.T.-key can be used from about 40 feet (12 m) away. However, this distance may change if your vehicle is near a TVtransmitting tower, a power station, or a radio station.
BK0239700US.book 32 ページ 2016年6月16日 木曜日 午前10時58分
Page 349 of 521

HomeLink® Wireless Control System (if so equipped) 5-268 Features and controls
5
N00554301040
HomeLink
® Wireless Contro
l System is a
registered trademark of Gentex Corporation. HomeLink
® provides a convenient way to
replace up to 3 hand-held radio-frequency (RF) transmitters used to activate devicessuch as gate operators
, garage door openers,
entry door locks, security systems, even home lighting. Additional HomeLink
® information
can be found at www.homelink.com, www.youtube.com/HomeLinkGentex, or by calling the toll-free HomeLink
®-Hotline at 1-
800-355-3515.
N00584600029
Some garage door openers manufactured after 1995 have “rolli
ng code protection”.
To program a garage door openerequipped with “rolli
ng code protection”; cess the garage door
opener motor to press the motor’s “Learn”
For convenience, use
a ladder and another pe
rson to assist you.
It is recommended that a new battery be placed in the hand-held
transmitter of the
device being progr
ammed to HomeLink
®
for quicker training and accurate trans- mission of the radio-frequency signal.
HomeLink
® Wireless Con-
trol System
(if so equipped)
WA R N I N G Do not use HomeLink
® with any garage
door opener that la
cks safety stop and
reverse features as required by U.S. Fed- eral Regulations.
A garage door opener
which cannot detect an object in the path of a closing garage d
oor and then auto-
matically stop and reverse, does not meetcurrent U.S. Federal
Regulations. Using a
garage door opener wi
thout these features
increases the risk of serious injury ordeath.
During programming, your garage door or gate may open or close. Make sure thatpeople and objects are clear of the garagedoor or gate that
you are programming.
NOTE
Once HomeLink
® is programmed, retain the
original transmitter for future programming procedures (for example, new vehicle pur-chases). Upon sale of the vehicle, the pro- grammed HomeLink
® buttons should be
erased for security purposes. Refer to “Cleaning the progra
mmed information” on
page 5-272. You can program a ma
ximum of 3 devices.
To change or replace any of the 3 devicesafter it has been in
itially programmed, you
must first erase the current settings. See “Cleaning the programmed information”on page 5-272 or “Reprogramming a single HomeLink
® button” on page 5-272.
WA R N I N G
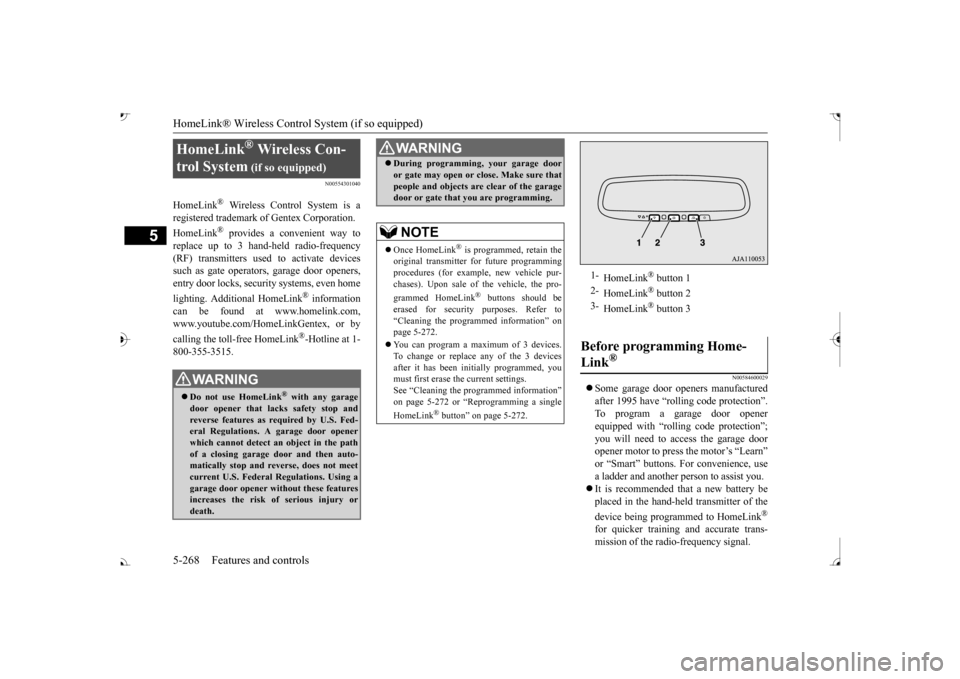
1-
HomeLink
® button 1
2-
HomeLink
® button 2
3-
HomeLink
® button 3
Before programming Home- Link
®
BK0239700US.book 268 ページ 2016年6月16日 木曜日 午前10時58分
Page 353 of 521

HomeLink® Wireless Control System (if so equipped) 5-272 Features and controls
5
The HomeLink
® has the capability of listen-
ing to these messages at a range up to 820.2feet (250 m) (open line of sight), but range may be reduced by obst
acles such as houses
or trees. You may have to slow your vehiclespeed to receive the CLOSED or OPENED message feedback from the garage door opener. If the unit is out of range beforereceiving either the UP or DOWN message from the door opener, both the UP and DOWN indicators will
flash red followed by
a continuous lit orange indicator in the direc- tion the door was last moving.Recall of the door state after initial feedback is possible by simultaneously pressing either HomeLink
® buttons 1 and 2 or buttons 2 and
3 for 2 seconds. The la
st recorded message
will be displayed for 3 seconds, again follow- ing the garage door stat
us indication of the
figure above.
N00585300023
To erase programming from the 3 buttons (individual buttons cannot
be erased but can
be “reprogrammed” as
outlined below), fol-
low the steps noted:
1. Press and hold the 2 outer HomeLink
®
buttons for at least
10 seconds. The indi-
cator will change from continuous yellow to rapidly flashing green. 2. Release both buttons. 3. HomeLink
® is now in the train (or learn-
ing) mode and can be programmed at anytime beginning with
“Programming a new
HomeLink
®” step 1.
N00585400024
To reprogram a HomeLink
® button, complete
the following. 1. Press and hold the desired HomeLink
®
button. Do not release the button. 2. The indicator light
will begin to slowly
flash orange after 20 seconds. The Home- Link
® button can be released at this point.
Proceed with “Programming a new HomeLink
®” step 2.
N00585600026
Your HomeLink
® system operates on a radio
frequency subject to
Federal Communica-
tions Commission (FCC)
Rules (For vehicles
sold in U.S.A.) and Industry Canada Rules (For vehicles sold in
Canada). This device
complies with Part 15 of the FCC Rules and RSS- 210 of the Industry Canada Rules. Operation is subject to
the following two con-
ditions. This device may not
cause harmful inter-
ference. This device must ac
cept any interference
that may be received, including interfer- ence that may caus
e undesired operation.
Clearing the programmed information
NOTE
Do not hold for longer than 20 seconds.
Reprogramming a single HomeLink
® button
NOTE
If you do not complete the programming of a new device to the button,
it will revert to the
previously stored programming.For questions or comments, visit www.homelink.com, www.youtube.com/HomeL
inkGentex, or by
calling the HomeLink
® Hotline.
General information
BK0239700US.book 272 ページ 2016年6月16日 木曜日 午前10時58分
Page 408 of 521

Operation Keys
Comfort controls 7-25
7
N00716700113
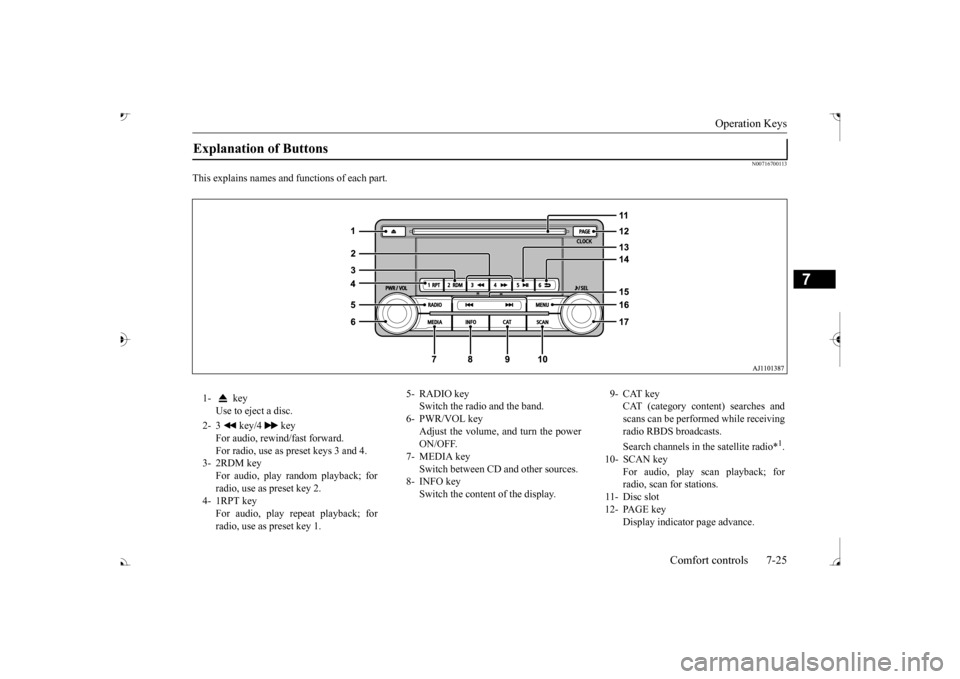
This explains names and
functions of each part.
Explanation of Buttons 1- key
Use to eject a disc.
2- 3 key/4 key
For audio, rewind/fast forward. For radio, use as preset keys 3 and 4.
3- 2RDM key
For audio, play random playback; for radio, use as preset key 2.
4- 1RPT key
For audio, play repeat playback; for radio, use as preset key 1.
5- RADIO key
Switch the radio and the band.
6- PWR/VOL key
Adjust the volume, and turn the powerON/OFF.
7- MEDIA key
Switch between CD and other sources.
8- INFO key
Switch the content of the display.
9- CAT key
CAT (category content) searches and scans can be performed while receiving radio RBDS broadcasts. Search channels in the satellite radio*
1.
10- SCAN key
For audio, play scan playback; forradio, scan for stations.
11- Disc slot 12- PAGE key
Display indicato
r page advance.
BK0239700US.book 25 ページ 2016年6月16日 木曜日 午前10時58分
Page 416 of 521

Listen to an iPod
Comfort controls 7-33
7
Press the MEDIA key to set the iPod as the source. The selected source is indicated on the dis- play.
Press the key or key to select the track. This enables selection of the next or previous track. Hold down the 3 key or the 4 key. Fast forward/rewind is possible. Repeat playback and
shuffle playback are
possible. Press the 1RPT key. Repeat playback of the track currently being played.
The types of devices
that can be connected
may vary.[For vehicles sold in U.S.A.]For details, access the Mitsubishi Motors North America website. [For vehicles sold in Canada and Mexico]For details, access the Mitsubishi Motors website. Please read and agree to the “Warn- ing about Links to the Web Sites of OtherCompanies”. The webs
ites mentioned above
may connect you to websites other than the Mitsubishi Motors website.http://www.mitsubishi-motors.com/en/prod- ucts/index.html Regarding how to connect the iPod/iPhone, refer to “How to connect an iPod” on page 5-264. When connecting the iPod/iPhone, use a commercially-availab
le iPod connection
cable. Set up the device in
order that no unsafe
actions, such as plugging in the connection cable are taken while driving. When inserting and removing the iPod/iPhone, for safety’s
sake first stop the
vehicle. Depending on the status of the iPod/iPhone, it may take some time unt
il the device is rec-
ognized, or playback starts. Buttons on the product will not operate while iPod/iPhone is
connected.
NOTE
iPod/iPhone spec
ifications and settings may
mean that connection
is not possible, or
result in differences
in operation or display.
Depending on audio data
in the iPod/iPhone,
track information may
not be displayed cor-
rectly. Depending on the status of the vehicle and device, the iPod/iPhone
may not play back
after starting
the engine.
Data containing copyri
ght information may
not play back. It is recommended that the iPod/iPhone equalizer settings be set to flat. Operate the iPod/iPhone
while connected to
this product. If the iPod/iPhone is c
onnected via Bluetooth
as a Bluetooth-capable
audio device, then do
not connect the iPod/
iPhone using an iPod
cable. Connection us
ing both methods will
result in err
oneous operation.
If an iPod/iPhone does not
operate correctly,
then remove the iPod/iPhone from the prod- uct, reset, then reconnect.
Play iPod
NOTE
Select the Track (File) Fast Forward or Rewind Switch Playback Mode Repeat Playback (RPT)
NOTE
Pressing again will cancel.
BK0239700US.book 33 ページ 2016年6月16日 木曜日 午前10時58分
Page 418 of 521

Listen to Audio Files on a USB Device
Comfort controls 7-35
7
Press the MEDIA key to set USB as the source. The selected source is indicated on the dis- play.
Press the key or key to select the track. This enables selection of the next or previous track. Hold down the 3 key or the 4 key. Fast forward/rewind is possible. Repeat playback, random
playback, and scan
playback are possible. Press the 1RPT key. Repeat playback of the track currently being played.
NOTE
Digital audio players
that support the mass
storage class specific
ations can be con-
nected. For details regarding the types of USB devices that can be c
onnected and the types
of files that can be
played back, refer to
“Types of connectable
devices and supported
file specifications” on page 5-265. Regarding how to c
onnect USB devices,
refer to “How to connect a USB memorydevice” on page 5-263. When connecting a US
B device, use a con-
nection cable. Failur
e to use a connection
cable when connecti
ng may place undue load
on, or damage the USB connector. Set up the device in
order that no unsafe
actions, such as plugging in the connectioncable are taken while driving. When inserting and removing the USB device, for safety’s sa
ke first stop the vehi-
cle. Do not insert other than audio devices into the USB port. Damage to the device or equipment may result. Depending on the status of the USB device, it may take some time unt
il the device is rec-
ognized, or playback starts. Depending on USB device
s, buttons on the
product will not opera
te while the USB
device is connected. USB device specificati
ons and settings may
mean that connection is not possible, or result in differences
in operation or display.
Depending on audio data
in the USB device,
track information may
not be displayed cor-
rectly. Depending on the status of the vehicle and device, the iPod/iPhone
may not play back
after starting
the engine.
Data containing copyri
ght information may
not play back. This product can play back MP3, WMA, and AAC format audio files. Depending on the type of
USB device, usage
may not be possible, or functions that can be used may be restricted. The recommended file system for USB memory is FAT32. The maximum supported capacity for USB memory is 32GB. Operate the USB device containing recorded audio files while conne
cted to this product.
Play Back of Audio Files on a USB Device
NOTE
Select the Track (File) Fast Forward or Rewind Switch Playback Mode Repeat Playback (RPT)
NOTE
Pressing again will cancel.
BK0239700US.book 35 ページ 2016年6月16日 木曜日 午前10時58分