2017 MITSUBISHI OUTLANDER III change time
[x] Cancel search: change timePage 353 of 521

HomeLink® Wireless Control System (if so equipped) 5-272 Features and controls
5
The HomeLink
® has the capability of listen-
ing to these messages at a range up to 820.2feet (250 m) (open line of sight), but range may be reduced by obst
acles such as houses
or trees. You may have to slow your vehiclespeed to receive the CLOSED or OPENED message feedback from the garage door opener. If the unit is out of range beforereceiving either the UP or DOWN message from the door opener, both the UP and DOWN indicators will
flash red followed by
a continuous lit orange indicator in the direc- tion the door was last moving.Recall of the door state after initial feedback is possible by simultaneously pressing either HomeLink
® buttons 1 and 2 or buttons 2 and
3 for 2 seconds. The la
st recorded message
will be displayed for 3 seconds, again follow- ing the garage door stat
us indication of the
figure above.
N00585300023
To erase programming from the 3 buttons (individual buttons cannot
be erased but can
be “reprogrammed” as
outlined below), fol-
low the steps noted:
1. Press and hold the 2 outer HomeLink
®
buttons for at least
10 seconds. The indi-
cator will change from continuous yellow to rapidly flashing green. 2. Release both buttons. 3. HomeLink
® is now in the train (or learn-
ing) mode and can be programmed at anytime beginning with
“Programming a new
HomeLink
®” step 1.
N00585400024
To reprogram a HomeLink
® button, complete
the following. 1. Press and hold the desired HomeLink
®
button. Do not release the button. 2. The indicator light
will begin to slowly
flash orange after 20 seconds. The Home- Link
® button can be released at this point.
Proceed with “Programming a new HomeLink
®” step 2.
N00585600026
Your HomeLink
® system operates on a radio
frequency subject to
Federal Communica-
tions Commission (FCC)
Rules (For vehicles
sold in U.S.A.) and Industry Canada Rules (For vehicles sold in
Canada). This device
complies with Part 15 of the FCC Rules and RSS- 210 of the Industry Canada Rules. Operation is subject to
the following two con-
ditions. This device may not
cause harmful inter-
ference. This device must ac
cept any interference
that may be received, including interfer- ence that may caus
e undesired operation.
Clearing the programmed information
NOTE
Do not hold for longer than 20 seconds.
Reprogramming a single HomeLink
® button
NOTE
If you do not complete the programming of a new device to the button,
it will revert to the
previously stored programming.For questions or comments, visit www.homelink.com, www.youtube.com/HomeL
inkGentex, or by
calling the HomeLink
® Hotline.
General information
BK0239700US.book 272 ページ 2016年6月16日 木曜日 午前10時58分
Page 390 of 521
Dual-zone automatic climat
e control air conditioner Comfort controls 7-7
7
N00737001448
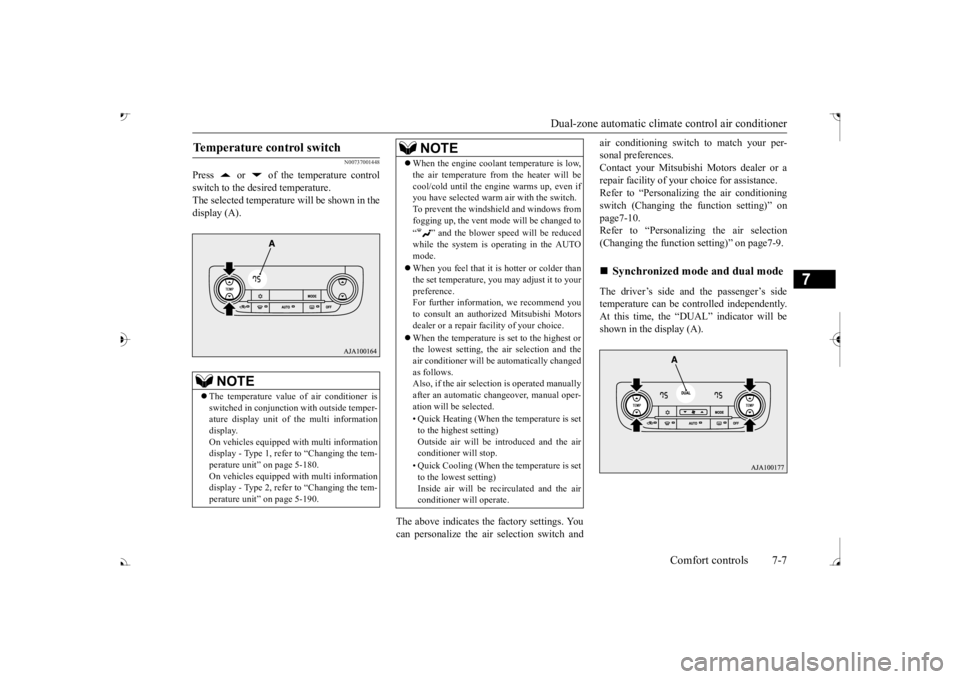
Press or of the temperature control switch to the desired temperature. The selected temperature will be shown in the display (A).
The above indicates the
factory settings. You
can personalize the air
selection switch and
air conditioning switch to match your per- sonal preferences.Contact your Mitsubishi
Motors dealer or a
repair facility of your
choice for assistance.
Refer to “Personalizi
ng the air conditioning
switch (Changing the function setting)” on page7-10. Refer to “Personalizing the air selection(Changing the function setting)” on page7-9. The driver’s side and the passenger’s side temperature can be controlled independently.At this time, the “
DUAL” indicato
r will be
shown in the display (A).
Temperature control switch
NOTE
The temperature value
of air conditioner is
switched in conjunction
with outside temper-
ature display unit of the multi informationdisplay. On vehicles equipped with multi information display - Type 1, refer to “Changing the tem-perature unit” on page 5-180. On vehicles equipped with multi information display - Type 2, refer to “Changing the tem-perature unit” on page 5-190.
When the engine coolan
t temperature is low,
the air temperature from the heater will becool/cold until the engi
ne warms up, even if
you have selected warm
air with the switch.
To prevent the windshield and windows from fogging up, the vent mode will be changed to “ ” and the blower speed will be reduced while the system is operating in the AUTO mode. When you feel that it is hotter or colder than the set temperature, you may adjust it to yourpreference. For further information, we recommend you to consult an authorized Mitsubishi Motorsdealer or a repair fa
cility of your choice.
When the temperature is set to the highest or the lowest setting, the air selection and the air conditioner will be automatically changed as follows.Also, if the air select
ion is operated manually
after an automatic ch
angeover, manual oper-
ation will be selected. • Quick Heating (When th
e temperature is set
to the highest setting)Outside air will be introduced and the air conditioner will stop. • Quick Cooling (When the temperature is set to the lowest setting) Inside air will be reci
rculated and the air
conditioner wi
ll operate.
NOTE
Synchronized mode and dual mode
BK0239700US.book 7 ページ 2016年6月16日 木曜日 午前10時58分
Page 391 of 521
Dual-zone automatic climate
control air conditioner
7-8 Comfort controls
7
Synchronized mode If the driver’s side temperature controlswitch is pressed, the passenger’s side temperature will also be controlled to the same setting temperature as the driver’sside. Dual mode If the passenger’s side temperature con-trol switch is pressed under synchronized mode, the system will switch to dual mode. In dual mode, the driver’s side and the passenger’s side
temperature can be
set separately by usi
ng each temperature
control switch. Press the AUTO switch to return to syn- chronized mode.
N00737101234
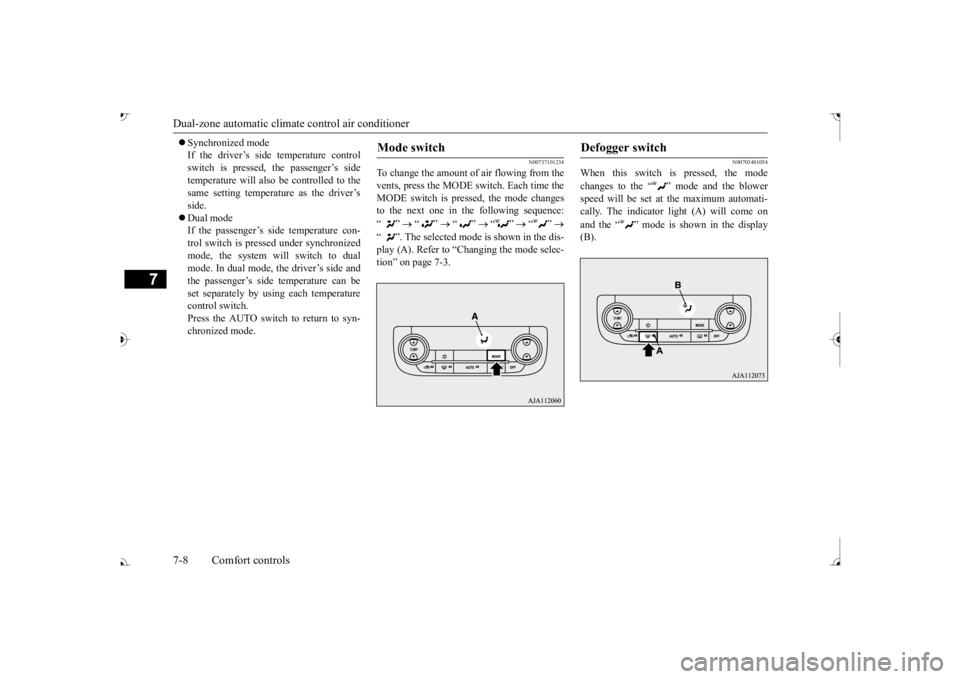
To change the amount of air flowing from the vents, press the MODE switch. Each time the MODE switch is pressed, the mode changesto the next one in the following sequence: “”
“”
“”
“”
“”
“ ”. The selected mode is shown in the dis- play (A). Refer to “C tion” on page 7-3.
N00703401054
When this switch is pressed, the mode changes to the “ ”
mode and the blower
speed will be set at the maximum automati- cally. The indicator light (A) will come on and the “ ” mode is shown in the display (B).
Mode switch
Defogger switch
BK0239700US.book 8 ページ 2016年6月16日 木曜日 午前10時58分
Page 393 of 521
Dual-zone automatic climate
control air conditioner
7-10 Comfort controls
7
• When the setting has changed from enabled to disabled,
the system will beep
three times and the indicator light will flash three times. • When the setting has changed from dis-abled to enabled, the system will beep two times and the i
ndicator light will
flash three times.On vehicles equippe
d with Mitsubishi
Multi-Communication System, screen operations can also be used to change the setting. Refer to th
e separate owner’s
manual for details.
N00737301467
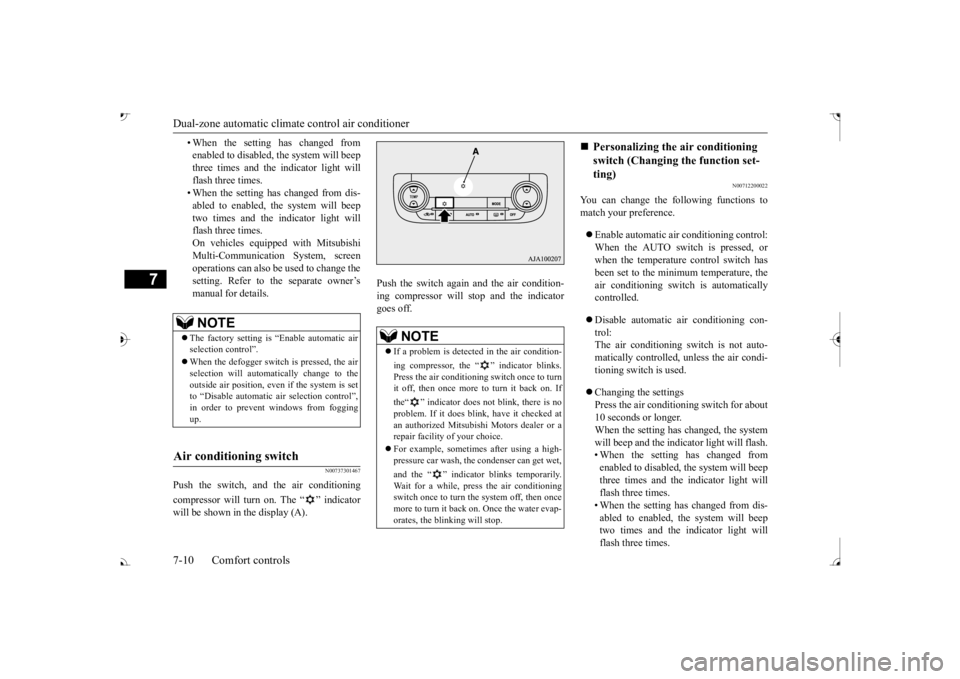
Push the switch, and the air conditioning compressor will turn on. The “ ” indicator will be shown in the display (A).
Push the switch again and the air condition- ing compressor will st
op and the indicator
goes off.
N00712200022
You can change the following functions tomatch your preference. Enable automatic air conditioning control: When the AUTO switch is pressed, or when the temperature control switch hasbeen set to the minimum temperature, the air conditioning switch is automatically controlled. Disable automatic air conditioning con- trol: The air conditioning switch is not auto-matically controlled,
unless the air condi-
tioning switch is used. Changing the settings Press the air conditioning switch for about10 seconds or longer. When the setting has changed, the system will beep and the indi
cator light will flash.
• When the setting has changed from enabled to disabled, the system will beep three times and the indicator light willflash three times. • When the setting has changed from dis- abled to enabled, the system will beeptwo times and the i
ndicator light will
flash three times.
NOTE
The factory setting is “Enable automatic air selection control”. When the defogger switch is pressed, the air selection will automatically change to the outside air position, even if the system is setto “Disable automatic air selection control”, in order to prevent windows from fogging up.
Air conditioning switch
NOTE
If a problem is detect
ed in the air condition-
ing compressor, the “ ” indicator blinks. Press the air conditioni
ng switch once to turn
it off, then once more to turn it back on. If the“ ” indicator does not blink, there is no problem. If it does blink,
have it checked at
an authorized Mitsubish
i Motors dealer or a
repair facility of your choice. For example, sometimes after using a high- pressure car wash, the
condenser can get wet,
and the “ ” indicator blinks temporarily. Wait for a while, pres
s the air conditioning
switch once to turn the system off, then once more to turn it back on. Once the water evap-orates, the blinking will stop.
Personalizing the air conditioning switch (Changing the function set-ting)
BK0239700US.book 10 ページ 2016年6月16日 木曜日 午前10時58分
Page 425 of 521
Display Indicator 7-42 Comfort controls
7
N00717700022
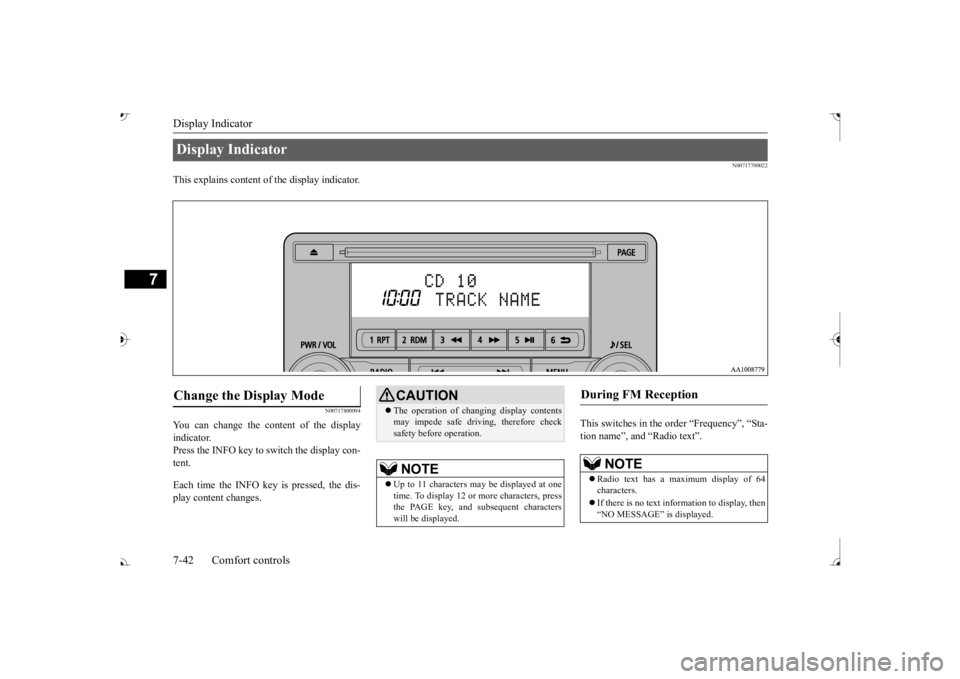
This explains content of the display indicator.
N00717800094
You can change the content of the display indicator. Press the INFO key to switch the display con-tent. Each time the INFO key is pressed, the dis- play content changes.
This switches in the order “Frequency”, “Sta- tion name”, and “Radio text”.
Display Indicator Change the Display Mode
CAUTION The operation of changing display contents may impede safe driving, therefore checksafety before operation.NOTE
Up to 11 characters
may be displayed at one
time. To display 12 or more characters, press the PAGE key, and s
ubsequent characters
will be displayed.
During FM Reception
NOTE
Radio text has a ma
ximum display of 64
characters. If there is no text information to display, then “NO MESSAGE” is displayed.
BK0239700US.book 42 ページ 2016年6月16日 木曜日 午前10時58分
Page 427 of 521
Audio Quality and Volume Balance Adjustment 7-44 Comfort controls
7
N00718400084
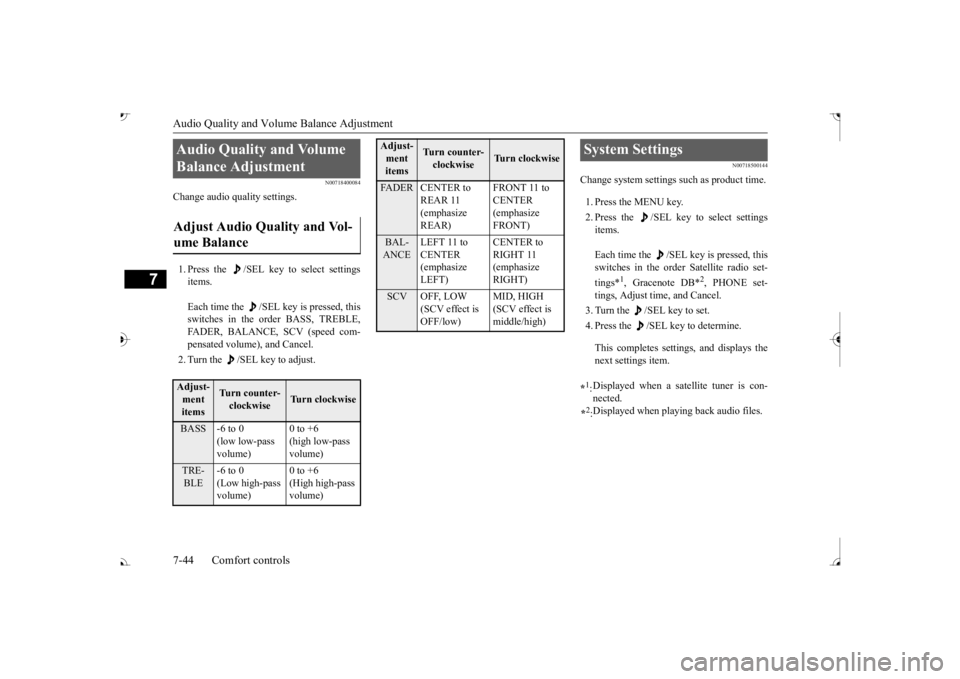
Change audio quality settings. 1. Press the /SEL key to select settings items. Each time the /SEL key is pressed, this switches in the order BASS, TREBLE, FADER, BALANCE, SCV (speed com- pensated volume), and Cancel. 2. Turn the /SEL key to adjust.
N00718500144
Change system settings
such as product time.
1. Press the MENU key. 2. Press the /SEL key to select settings items. Each time the /SEL key is pressed, this switches in the order Satellite radio set- tings*
1, Gracenote DB*
2, PHONE set-
tings, Adjust time, and Cancel. 3. Turn the /SEL key to set.4. Press the /SEL key to determine. This completes settings, and displays the next settings item.
Audio Quality and Volume Balance Adjustment Adjust Audio Quality and Vol- ume Balance Adjust- ment items
Turn counter-clockwise
Turn clockwise
BASS -6 to 0
(low low-pass volume)
0 to +6 (high low-pass volume)
TRE-BLE
-6 to 0 (Low high-pass volume)
0 to +6 (High high-pass volume)
FADER CENTER to
REAR 11 (emphasize REAR)
CENTER (emphasize FRONT)
BAL-ANCE
LEFT 11 to CENTER (emphasize LEFT)
RIGHT 11 (emphasize RIGHT)
SCV OFF, LOW
(SCV effect is OFF/low)
MID, HIGH (SCV effect is middle/high)
Adjust-ment items
Tu r n c o u n t e r - clockwise
Turn clockwise
System Settings *1: Displayed when a satellite tuner is con- nected.
*2: Displayed when playing back audio files.
BK0239700US.book 44 ページ 2016年6月16日 木曜日 午前10時58分
Page 429 of 521
System Settings 7-46 Comfort controls
7
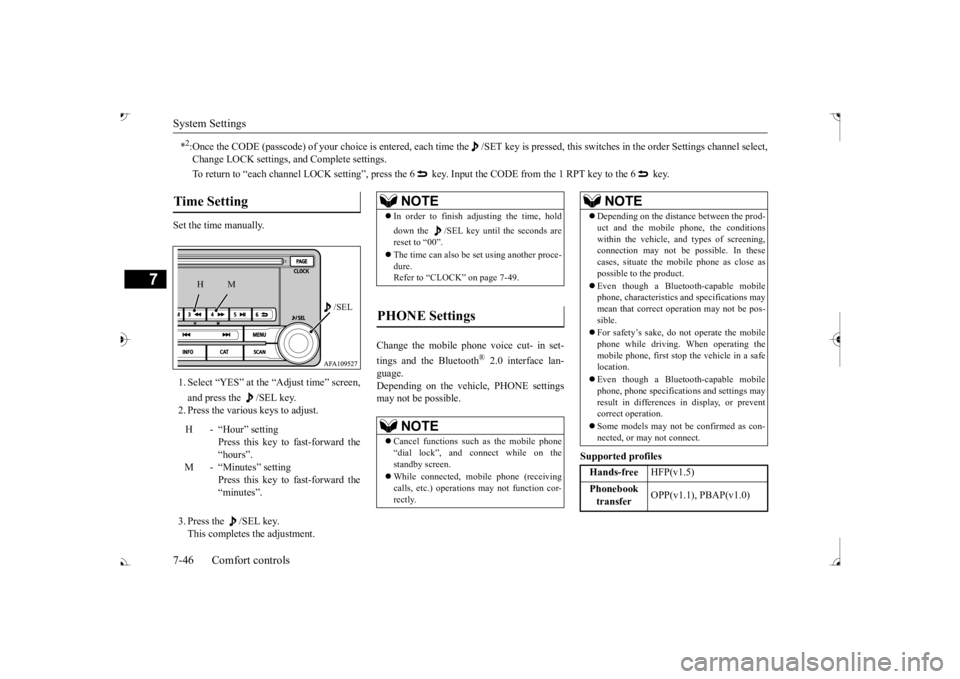
Set the time manually. 1. Select “YES” at the “Adjust time” screen, and press the /SEL key. 2. Press the various keys to adjust. 3. Press the /SEL key. This completes the adjustment.
Change the mobile phone voice cut- in set- tings and the Bluetooth
® 2.0 interface lan-
guage. Depending on the vehi
cle, PHONE settings
may not be possible.
Supported profiles
*2:Once the CODE (passcode) of your
choice is entered, each time th
e /SET key is pressed, this swit
ches in the order Settings chan
nel select,
Change LOCK settings, a
nd Complete settings.
To return to “each channel LOCK setting”, press the
6 key. Input the CODE from the 1 RPT key to the 6 key.
Time Setting
H - “Hour” setting
Press this key to fast-forward the “hours”.
M - “Minutes” setting
Press this key to fast-forward the “minutes”.
/SEL
M
H
NOTE
In order to finish adjusting the time, hold down the /SEL key until
the seconds are
reset to “00”. The time can also be
set using another proce-
dure. Refer to “CLOCK” on page 7-49.
PHONE Settings
NOTE
Cancel functions such as the mobile phone “dial lock”, and connect while on the standby screen. While connected, mobile phone (receiving calls, etc.) operations
may not function cor-
rectly.
Depending on the distance between the prod- uct and the mobile phone, the conditions within the vehicle, a
nd types of screening,
connection may not be
possible. In these
cases, situate the mobile phone as close as possible to the product. Even though a Bluet
ooth-capable mobile
phone, characteristics a
nd specifications may
mean that correct operation may not be pos-sible. For safety’s sake, do not operate the mobile phone while driving.
When operating the
mobile phone, first stop the vehicle in a safe location. Even though a Bluet
ooth-capable mobile
phone, phone specifications
and settings may
result in differences in display, or prevent correct operation. Some models may not
be confirmed as con-
nected, or may not connect.Hands-free
HFP(v1.5)
Phonebook transfer
OPP(v1.1), PBAP(v1.0)
NOTE
BK0239700US.book 46 ページ 2016年6月16日 木曜日 午前10時58分
Page 433 of 521
General information about your radio 7-50 Comfort controls
7
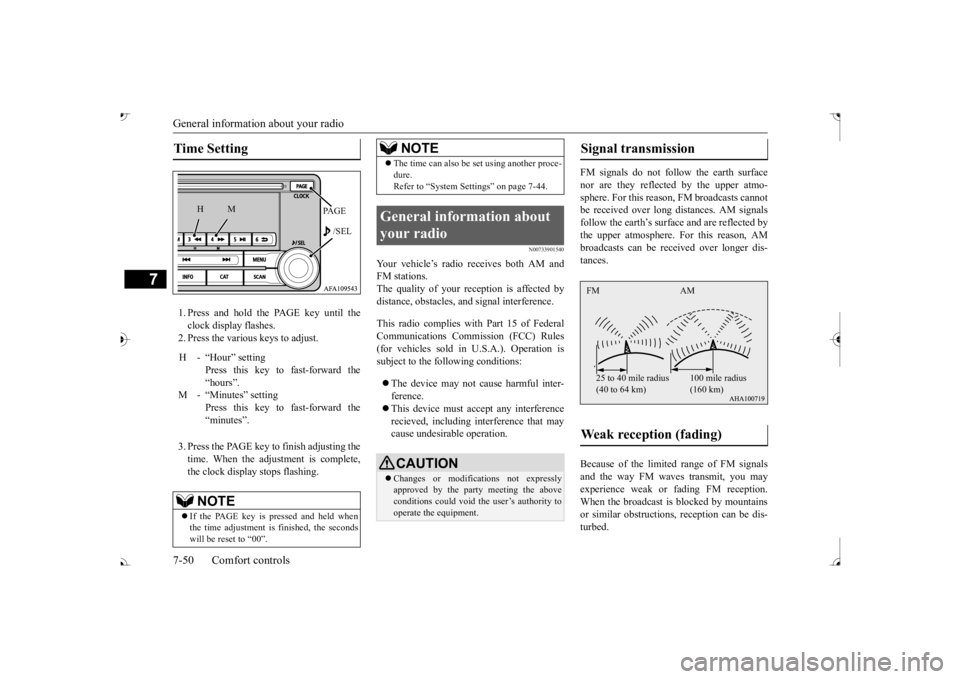
1. Press and hold the PAGE key until the clock display flashes. 2. Press the various keys to adjust. 3. Press the PAGE key to finish adjusting the time. When the adjustment is complete, the clock displa
y stops flashing.
N00733901540
Your vehicle’s radio receives both AM and FM stations. The quality of your reception is affected by distance, obstacles, a
nd signal interference.
This radio complies with
Part 15 of Federal
Communications Comm
ission (FCC) Rules
(for vehicles sold in U.S.A.). Operation is subject to the following conditions: The device may not cause harmful inter- ference. This device must ac
cept any interference
recieved, including interference that maycause undesirable operation.
FM signals do not foll
ow the earth surface
nor are they reflected by the upper atmo- sphere. For this reason,
FM broadcasts cannot
be received over long di
stances. AM signals
follow the earth’s surfa
ce and are reflected by
the upper atmosphere. For this reason, AM broadcasts can be rece
ived over longer dis-
tances. Because of the limite
d range of FM signals
and the way FM waves transmit, you may experience weak or fading FM reception.When the broadcast is blocked by mountains or similar obstructions,
reception ca
n be dis-
turbed.
Time Setting
H - “Hour” setting
Press this key to fast-forward the “hours”.
M - “Minutes” setting
Press this key to fast-forward the “minutes”.NOTE
If the PAGE key is pressed and held when the time adjustment is
finished, the seconds
will be reset to “00”.
PAGE /SEL
M
H
The time can also be
set using another proce-
dure.Refer to “System Se
ttings” on page 7-44.
General information about your radio
CAUTION Changes or modifica
tions not expressly
approved by the party meeting the aboveconditions could void th
e user’s authority to
operate the equipment.NOTE
Signal transmission Weak reception (fading) FM AM 25 to 40 mile radius (40 to 64 km)
100 mile radius (160 km)
BK0239700US.book 50 ページ 2016年6月16日 木曜日 午前10時58分