2017 MITSUBISHI iMiEV start stop button
[x] Cancel search: start stop buttonPage 35 of 296

Regular charging (charging method with rated AC 120 V outlet)
General information/Charging 3-21
3
12. Close the inner lid and close the regular
charging lid.
13. Remove the charging cable plug from the
outlet.
14. Install the cap on the regular charge con-
nector.
N01202501047
You cannot charge the main drive lithium-ion battery when the main drive lithium-ion bat-tery temperature is -13 °F (-25 °C) or lower. The air conditioning wi
ll automatically oper-
ate and the main drive lithium-ion batterywill be heated when all the following condi- tions are met.
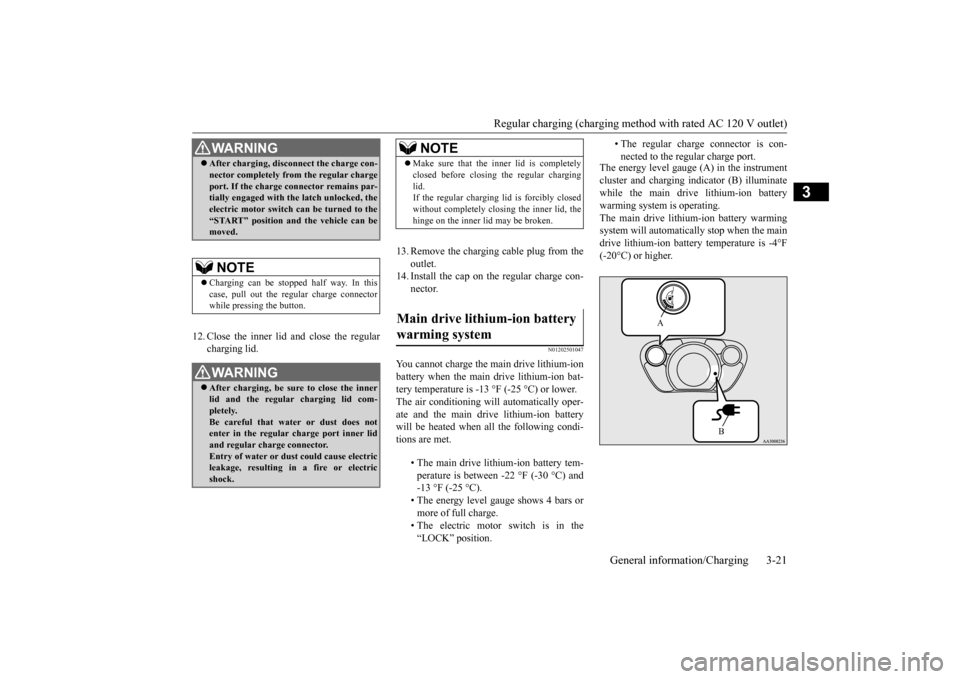
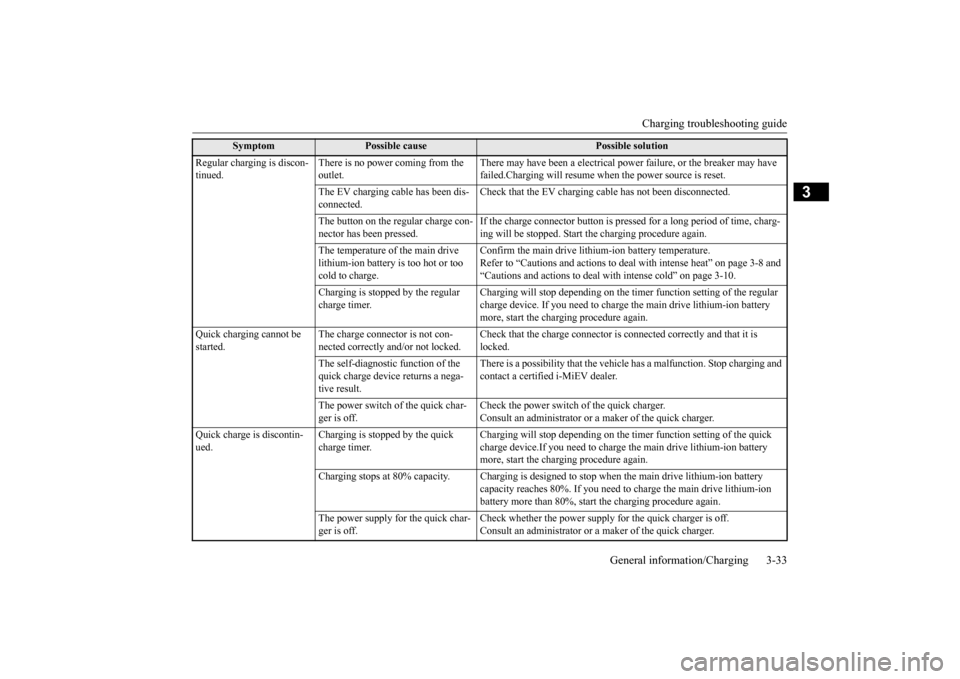
The energy level gauge (A) in the instrument cluster and charging i
ndicator (B) illuminate
while the main drive lithium-ion batterywarming system is operating. The main drive lithium-ion battery warming system will automatically stop when the maindrive lithium-ion battery temperature is -4°F (-20°C) or higher.
WA R N I N G After charging, discon
nect the charge con-
nector completely from the regular chargeport. If the charge connector remains par-tially engaged with th
e latch unlocked, the
electric motor switch can be turned to the “START” position an
d the vehicle can be
moved.NOTE
Charging can be stopped
half way. In this
case, pull out the regular charge connector while pressing the button.WA R N I N G After charging, be sure to close the inner lid and the regular charging lid com- pletely.Be careful that water or dust does not enter in the regular charge port inner lid and regular charge connector.Entry of water or dust could cause electric leakage, resulting in a fire or electric shock.
NOTE
Make sure that the inner lid is completely closed before closi
ng the regular charging
lid.If the regular charging lid is forcibly closed without complete
ly closing the inner lid, the
hinge on the inner lid may be broken.
Main drive lithium-ion battery warming system
• The main drive lithium-ion battery tem- perature is between -22 °F (-30 °C) and -13 °F (-25 °C).• The energy level gauge shows 4 bars or more of full charge. • The electric motor switch is in the“LOCK” position.
• The regular charge connector is con- nected to the regular charge port.
A
B
BK0220401US.book 21 ページ 2015年6月3日 水曜日 午前7時42分
Page 47 of 296

Charging troubleshooting guide
General information/Charging 3-33
3
Regular charging is discon- tinued.
There is no power coming from the outlet.
There may have been a el
ectrical power failure,
or the breaker may have
failed.Charging will resume when
the power source is reset.
The EV charging cable has been dis- connected.
Check that the EV charging ca
ble has not been disconnected.
The button on the regular charge con- nector has been pressed.
If the charge connector button is pre
ssed for a long period of time, charg-
ing will be stopped. Start
the charging procedure again.
The temperature of the main drive lithium-ion battery is too hot or too cold to charge.
Confirm the main drive lithium-ion battery temperature. Refer to “Cautions and actions to deal
with intense heat” on page 3-8 and
“Cautions and actions to deal with intense cold” on page 3-10.
Charging is stopped by the regular charge timer.
Charging will stop depending on the
timer function setting of the regular
charge device. If you need to charge
the main drive lithium-ion battery
more, start the charging procedure again.
Quick charging cannot be started.
The charge connector is not con- nected correctly and/or not locked.
Check that the charge connector is
connected correctly and that it is
locked.
The self-diagnostic function of the quick charge device returns a nega- tive result.
There is a possibility that the vehicl
e has a malfunction. Stop charging and
contact a certified i-MiEV dealer.
The power switch of the quick char- ger is off.
Check the power switch of the quick charger. Consult an administrator or
a maker of the quick charger.
Quick charge is discontin- ued.
Charging is stopped by the quick charge timer.
Charging will stop depending on the
timer function setti
ng of the quick
charge device.If you need
to charge the main drive lithium-ion battery
more, start the charging procedure again.
Charging stops at 80% capacity. Cha
rging is designed to stop when th
e main drive lithium-ion battery
capacity reaches 80%. If you need to
charge the main drive lithium-ion
battery more than 80%, start
the charging procedure again.
The power supply for the quick char- ger is off.
Check whether the power supply for the quick charger is off. Consult an administrator or
a maker of the quick charger.
Symptom
Possible cause
Possible solution
BK0220401US.book 33 ページ 2015年6月3日 水曜日 午前7時42分
Page 148 of 296

Instrument cluster 5-40 Features and controls
5
N00572600019
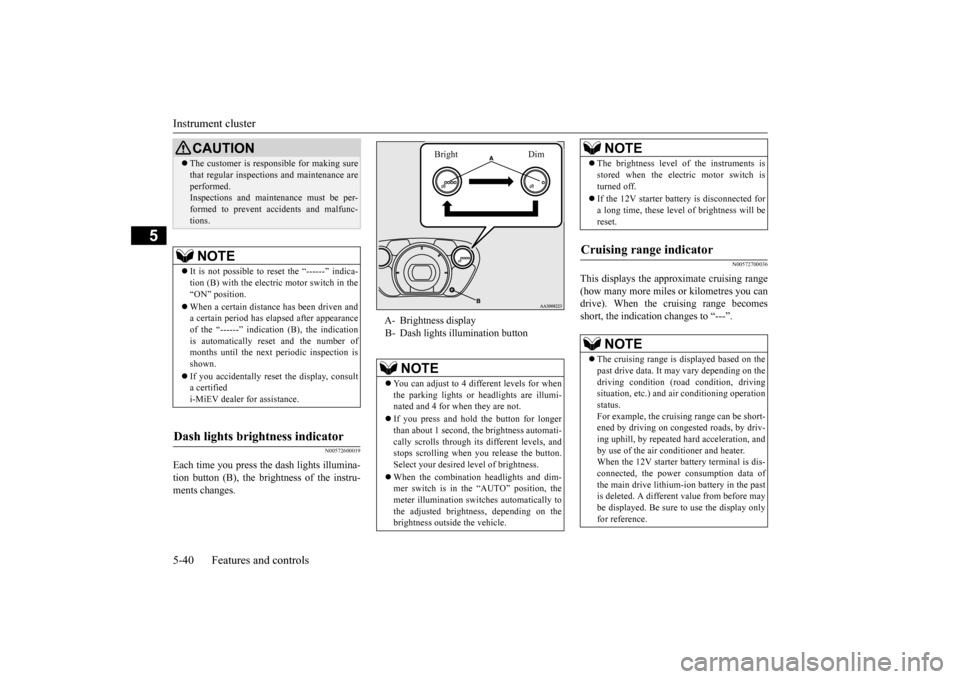
Each time you press the
dash lights illumina-
tion button (B), the brightness of the instru- ments changes.
N00572700036
This displays the approximate cruising range(how many more miles
or kilometres you can
drive). When the cruising range becomes short, the indicatio
n changes to “---”.
CAUTIONThe customer is responsible for making sure that regular inspections
and maintenance are
performed.Inspections and mainte
nance must be per-
formed to prevent accidents and malfunc- tions.NOTE
It is not possible to re
set the “------” indica-
tion (B) with the electric motor switch in the “ON” position. When a certain distance has been driven and a certain period has elapsed after appearance of the “------” indicati
on (B), the indication
is automatically re
set and the number of
months until the next
periodic inspection is
shown. If you accidentally reset
the display, consult
a certified i-MiEV dealer for assistance.
Dash lights brightness indicator
A- Brightness display B- Dash lights illumination button
NOTE
You can adjust to 4 different levels for when the parking lights or
headlights are illumi-
nated and 4 for when they are not. If you press and hold the button for longer than about 1 second, the brightness automati- cally scrolls through its different levels, andstops scrolling when you release the button. Select your desired
level of brightness.
When the combination headlights and dim- mer switch is in the “AUTO” position, the meter illumination switches automatically tothe adjusted brightne
ss, depending on the
brightness outsi
de the vehicle.
Bright Dim
The brightness level
of the instruments is
stored when the electric motor switch isturned off. If the 12V starter battery is disconnected for a long time, these level of brightness will bereset.
Cruising range indicator
NOTE
The cruising range is displayed based on the past drive data. It ma
y vary depending on the
driving condition (road condition, driving situation, etc.) and
air conditioning operation
status.For example, the cruising range can be short- ened by driving on congested roads, by driv- ing uphill, by repeated ha
rd acceleration, and
by use of the air cond
itioner and heater.
When the 12V starter battery terminal is dis- connected, the power consumption data of the main drive lithium-ion battery in the pastis deleted. A differen
t value from before may
be displayed. Be sure
to use the display only
for reference.NOTE
BK0220401US.book 40 ページ 2015年6月3日 水曜日 午前7時42分
Page 167 of 296

Bluetooth® 2.0 interface (if so equipped)
Features and controls 5-59
5
5. The voice guide will prompt for phrase 1. Repeat the correspondi
ng phrase listed in
table “Enrollment commands” on page 5-73. The system will register your voice andthen move on to the registration of the next command. Continue the process until all phrases have been registered. 6. When all enrollment commands have been read out, the voice guide will say “Speaker enrollment is complete.” The system will then end the speaker enroll-ment process and return to the main menu.
N00564901108
You can turn a voice model registered with the speaker enrollment function on and off whenever you want. You can also retrain the system.Use the following procedure to perform these actions. 1. Press the PICK-UP button. 2. Say “Voice training.” 3. If you have completed a speaker enroll- ment process once already, the voiceguide will say eith
er “Enrollment is
enabled. Would you like to disable or retrain?” or “Enrol
lment is disabled.
Would you like to enable or retrain?” 4. When enrollment is
“enabled,” the voice
model is on; when enrollment is “dis-abled,” the voice model is off. Say the command that fits your needs. Say “Retrain” to start the speaker enroll-ment process and recreate a new voice model. (Refer to “Speaker enrollment” on page 5-58.
)
N00565001278
Before you can make
or receive hands-free
calls or play music using the Bluetooth
® 2.0
interface function, you must pair the Blue- tooth
® device and Bluetooth
® 2.0 interface.
Up to 7 Bluetooth
® devices can be paired
with the Bluetooth
® 2.0 interface.
If multiple paired Bluetooth
® devices are
available in the vehicl
e, the cellular phone or
music player most recent
ly connected is auto-
matically connected
to the Bluetooth
® 2.0
interface. You can also change a Bluetooth
® device to
be connected.
NOTE
To repeat the most recent voice training com- mand, press and release the SPEECH button. If you press the HANG-UP button anytime during the process, the
system will beep and
stop the speaker enrollment process.NOTE
Completing the speaker enrollment process will turn on the voice
model automatically.
The commands “Help” a
nd “Cancel” will not
work in this mode.
Enabling and disabling the voice model and retraining
Connecting the Bluetooth
® 2.0
interface and Bluetooth
® device
NOTE
Pairing is required only when the device is used for the first time. Once the device has been paired with
the Bluetooth
® 2.0 inter-
face, all you need is to
bring the device into
the vehicle next time
and the device will
connect to the Bluetooth
® 2.0 interface auto-
matically (if supported by the device).
BK0220401US.book 59 ページ 2015年6月3日 水曜日 午前7時42分
Page 168 of 296

Bluetooth® 2.0 interface (if so equipped) 5-60 Features and controls
5
To pair a Bluetooth
® device with the Blue-
tooth
® 2.0 interface, foll
ow the steps below.
1. Stop your vehicle in a safe area, put the selector lever in the “P” (PARK) position,and then pull the parking brake lever. 2. Press the PICK-UP button. 3. Say “Setup.” 4. Say “Pairing Options.”5. The voice guide will say “Select one of the following: pair, edit, delete, or list.”
say “Please say a 4-
digit pairing code.” Say a 4-digit number.When the confirmation function is on, the system will confirm
whether the number
said is acceptable. Answer “Yes.” selection.
7. The voice guide will say “Start pairing procedure on the device. See the device manual for instructions.” Enter in the Bluetooth
® device the 4-digit number you
have registered in Step 6.
To p a i r
NOTE
You cannot pair any Bluetooth
® device with
the Bluetooth
® 2.0 interface unless the vehi-
cle is parked. Before paring a Bluetooth
®
device with the Bluetooth
® 2.0 interface,
confirm that the vehicle is parked in a safe location.
NOTE
If 7 devices have alre
ady been paired, the
voice guide will sa
y “Maximum devices
paired” and then the system will end thepairing process. To re
gister a ne
w device,
delete one device and th
en repeat the pairing
process.(Refer to
Page 221 of 296

AM/FM electronically tuned radio with CD player (if so equipped)
Comfort controls 7-19
7
N00771900017
Press the SCAN button.
“SCAN” will appear
on the display and the CD player will playback the first 10 second
s of each track on the
selected disc (music
CDs only) or the cur-
rently selected folder (MP3 CDs only).The track number will blink while the scan mode is selected. To stop the scan mode, press the SCAN button again.
N00752100166
This audio system can
display CD text and
MP3 titles including ID3 tag information. The audio system can di
splay disc and track
titles for discs with converted disc and track title information. Press the DISP button repeatedly to make selections in the following sequence: disc name
track name
normal
display mode. The audio system can display folder and track titles for discs wi
th converted folder and track
information. Press the DISP button repeat- edly to make selections in the followingsequence: folder name
track name
nor-
mal display mode.
The audio system can
display ID3 tag infor-
mation for files that ha
ve been recorded with
ID3 tag information. 1. Press the DISP button for 2 seconds or longer to switch to the ID3 tag informa- tion. “TAG” will appear on the display.2. Press the DISP button repeatedly to make selections in th
e following sequence:
album name
track name
artist name
normal display mode.
NOTE
With a disc that contains both CD-DA and MP3 files, the random
mode causes only
files of the same format (CD-DA only orMP3 files only) to be repeated.
To find the start of each track on a disc for playback
NOTE
Once all tracks on the
disc (music CDs only)
or the currently selected folder (MP3 CDs only) have been scanne
d, playback of the
disc will restart from
the beginning of the
track that was play
ing when scanning
started. With a disc that contains both CD-DA and MP3 files, the scan m
ode causes only files of
the same format (CD-DA only or MP3 filesonly) to be played.
CD text and MP3 title display
CD text
NOTE
The display can show up to 11 characters. If a disc name or track
name has more than 11
characters, press the PAGE button to viewthe next 11 characters. When there is no title information to be dis- played, the display shows “NO TITLE”. Characters that the a
udio system cannot dis-
play are shown as “ ”.
ID3 tag information
NOTE
To return from ID3 tag information to the folder name, press the DISP button again for2 seconds or longer. When there is no title information to be dis- played, the display
shows “NO TITLE”.
a folder name, track name
, or item of ID3 tag
information has more than 11 characters, press the PAGE button to view the next 11characters. Folder names, trac
k names and ID3 tag
information can each be displayed up to a length of 32 characters. Characters that the a
udio system cannot dis-
play are shown as “ ”.
BK0220401US.book 19 ページ 2015年6月3日 水曜日 午前7時42分