2017 MITSUBISHI ASX ECU
[x] Cancel search: ECUPage 90 of 458

3.Use the locking clip to completely elimi-
nate any slackness.
4. Push and pull the child restraint in all di-
rections to be sure it is secure.WARNINGl For some types of child restraint, the lock-
ing clip (A) should be used to help avoid personal injury during a collision or sud-den manoeuvre.
It must be fitted and used in accordance
with the child restraint manufacturer’s instructions.
The locking clip must be removed when the child restraint is removed.Seat belt inspection
E00406301876
Check the belts for cuts, worn or frayed web- bing and for cracked or deformed metallic
parts. Replace the belt assembly if it is defec-
tive.WARNINGl We recommend you to have all seat belt
assemblies including retractors and at-
taching hardware inspected after any col- lision. We recommend that seat belt as-
semblies in use during a collision be re- placed unless the collision was minor and
the belts show no damage and continue to operate properly.
l Do not attempt to repair or replace any
part of the seat belt assemblies; we recom-
mend you to have this work done by a MITSUBISHI MOTORS Authorized
Service Point. Incorrect repair or replace-
ment could reduce the effectiveness of the
belts and could result in serious injury in the event of a collision.
l Once the pretensioner has been activated,
it cannot be re-used.
It must be replaced together with the re-
tractor.WARNINGl Do not insert any foreign objects (pieces
of plastic, paper clips, buttons, etc.) in the
buckle or retractor mechanism. In addi- tion, do not modify, remove or install the
seat belt. Otherwise, the seat belt may not be able to provide adequate protection in a collision or other situation.
l A dirty belt should be cleaned with neu-
tral detergent in warm water. After rins-
ing in water, let it dry in the shade. Do not
attempt to bleach or re-dye the belts be-
cause this will affect their characteristics.
Supplemental restraint
system (SRS) - airbag E00407201944
The information for SRS airbags includes im-
portant information concerning the driver’s and front passenger’s airbags, the driver’s knee airbag, the side airbags and the curtain
airbags.
Seat belt inspection
4-24OGAE17E2Seat and seat belts4
Page 133 of 458

Screen type 1Screen type 2CauseSolution (Reference)lThe security alarm system is
operating.l Refer to “Security alarm sys-
tem” on page 3-32.
Indication lamp, warning lamp, and information screen display list
5-29OGAE17E2Instruments and controls5
Page 171 of 458

Driving, alcohol and drugsE00600200070
Driving after drinking alcohol is one of the
most frequent causes of accidents.
Your driving ability can be seriously im- paired even with blood alcohol levels far be-
low the legal minimum. If you have been drinking, don’t drive. Ride with a designated non-drinking driver, call a cab or a friend, or
use public transportation.
Drinking coffee or taking a cold shower will
not make you sober.
Similarly, prescription and nonprescription
drugs affect your alertness, perception and re- action time. Consult with your doctor or pharmacist before driving while under the in-fluence of any of these medications.WARNINGl NEVER DRINK AND DRIVE.
Your perceptions are less accurate, your reflexes are slower and your judgment is
impaired.Safe driving techniques
E00600300446
Driving safety and protection against injury
cannot be fully ensured. However, we recom- mend that you pay extra attention to the fol-
lowing:
Seat belts
Before starting the vehicle, make sure that
you and your passengers have fastened your seat belts.
Floor mats
WARNINGl Keep floor mats clear of the pedals by
correctly laying floor mats that are suita-
ble for the vehicle.
To prevent the floor mats from slipping out of position, securely retain them usingthe hook etc.
Note that laying a floor mat over a pedal
or laying one floor mat on top of another can obstruct pedal operation and lead to a
serious accident.Carrying children in the vehi-
cle
l Never leave your vehicle unattended
with the key and children inside the ve-hicle. Children may play with the driv-
ing controls and this could lead to an ac- cident.
l Make sure that infants and small chil-
dren are properly restrained in accord-
ance with the laws and regulations, and
for maximum protection in case of an accident.
l Prevent children from playing in the lug-
gage compartment. It is quite dangerous
to allow them to play there while the ve- hicle is moving.
Loading luggage
When loading luggage, be careful not to load above the height of seats. This is dangerous
not only because rearward vision will be ob- structed, but also the luggage may be projec-ted into the passenger compartment underhard braking.
Driving, alcohol and drugs
6-03OGAE17E2Starting and driving6
Page 176 of 458
Parking with the engine run-ning
Never leave the engine running while you
take a short sleep/rest. Also, never leave the engine running in a closed or poorly ventila-
ted place.
WARNINGl Leaving the engine running carries the
riskof injury or death from accidentally
moving the gearshift lever ( M/T) or the
selector lever ( A/T or CVT) or the accu-
mulation of toxic exhaust fumes in the
passenger compartment.
Where you park
WARNINGl Do not park your vehicle in areas where
combustible materials such as dry grass
or leaves can come in contact with a hot exhaust, since a fire could occur.
Do not keep the steering wheel
fully turned for a long time
More effort could be required to turn the
steering wheel.
Refer to “Electric power steering system (EPS)” on page 6-50.
When leaving the vehicle
Always carry the key and lock all doors and
the tailgate when leaving the vehicle unatten-
ded.
Always try to park your vehicle in a well lit
area.
Steering wheel height and
reach adjustment E00600700512
1.Release the lever while holding the
steering wheel up.
2. Adjust the steering wheel to the desired
position.
3. Securely lock the steering wheel by pull-
ing the lever fully upward.
A- Locked B- Release
WARNINGl Do not attempt to adjust the steering
wheel while you are driving the vehicle.Inside rear-view mirror
E00600801998
Adjust the rear-view mirror only after mak-
ing any seat adjustments so you have a clear
view to the rear of the vehicle.
Steering wheel height and reach adjustment
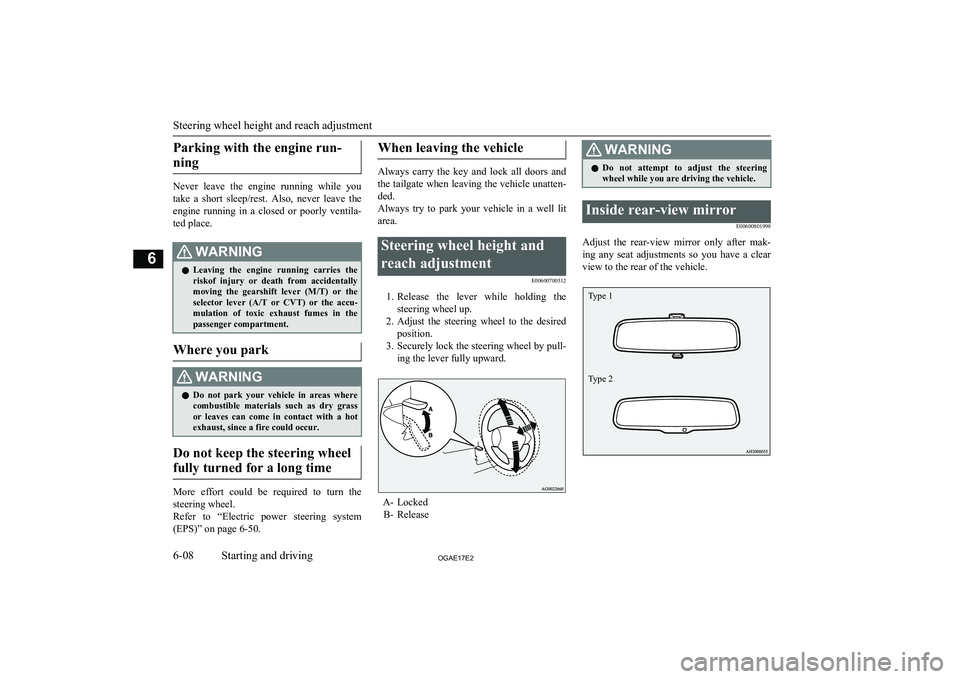
6-08OGAE17E2Starting and driving6 Type 1
Type 2
Page 197 of 458

Sports mode
E00603901381
Whether the vehicle is stationary or in mo-
tion, sports mode is selected by gently push-
ing the selector lever from the “D” (DRIVE) position into the manual gate (A). To return
to “D” range operation, gently push the selec- tor lever back into the main gate (B).
In sports mode, gear shifts can be made rap- idly simply by moving the selector leverbackward and forward. Shift paddles at the steering wheel can also be used to perform
gearshifts. In contrast to a manual transmis- sion, the sports mode allows gear shifts with
the accelerator pedal depressed.
NOTEl You can shift into sports mode with shift
paddles when the selector lever is in the main gate as well. Also, you can return to
the “D” range operation in any of following ways.
When returning to “D” range operation, the selector lever position display will change to
“D” (DRIVE) position.
• Pull the “+ (SHIFT UP)” side shift paddle
forward (towards the driver) for over 2 seconds.
• Stop the vehicle.NOTE•Push the selector lever from the “D”
(DRIVE) position into the manual gate
(A) and push the selector lever back into the main gate (B).SHIFT
UPSHIFT
DOWNSHIFT
UPSHIFT
DOWN
+ (SHIFT UP)
The transmission shifts up by one gear
with each operation.
- (SHIFT DOWN)
The transmission shifts down by one gear
with each operation.
CAUTIONl In sports mode, the driver must execute up-
ward shifts in accordance with prevailingroad conditions, taking care to keep the en-
gine speed below the red zone.
l Repeated continuous operation of the selec-
tor lever or the shift paddles will continuous- ly switch shift position.CAUTIONl Do not use the left- and right-hand shift pad-
dles at the same time. Doing so could cause
a shift of gear ratio that you do not expect.NOTEl The upward shift may be made automatical-
ly in sports mode when the engine revolu-
tions rises and approaches the tachometer’s
red zone (the red-coloured part of the tach- ometer dial).
l In sports mode, only the
6 forward gears can
be selected. To reverse or park the vehicle, move the selector lever to the “R” (RE-
VERSE) or “P” (PARK) position as re- quired.
l To maintain good running performance, the
transmission may refuse to perform an up- shift when the selector lever is moved to the“+ (SHIFT UP)” position at certain vehicle
speeds. Also, to prevent over-revving of the engine, the transmission may refuse to per-
form a downshift when the lever is moved to
the “- (SHIFT DOWN)” position at certain vehicle speeds. When this happens, a buzzer
sounds to indicate that a downshift is not go-
ing to take place.
l In sports mode, downward shifts are made
automatically when the vehicle slows down.
When the vehicle stops, 1 st
gear is automati-
cally selected.
Automatic transmission INVECS-II Sports Mode 6A/T (Intelligent & Innovative Vehicle Electronic Control System II)*
6-29OGAE17E2Starting and driving6
Page 204 of 458

Sports mode
E00602500194
Whether the vehicle is stationary or in mo-
tion, sports mode is selected by gently push-
ing the selector lever from the “D” (DRIVE) position into the manual gate (A). To return
to “D” range operation, gently push the selec- tor lever back into the main gate (B).
In sports mode, gear ratio shifts can be made rapidly simply by moving the selector leverbackward and forward. Shift paddles at the
steering wheel can also be used to shift the gear ratio. In contrast to a manual transmis-
sion, the sports mode allows gear shifts with the accelerator pedal depressed.
NOTEl You can shift into sports mode with shift
paddles when the selector lever is in the main gate as well. Also, you can return to
the “D” range operation in any of following ways.
When returning to “D” range operation, the selector lever position display will change to
“D” (DRIVE) position.
• Pull the “+ (SHIFT UP)” side shift paddle
forward (towards the driver) for over 2 seconds.
• Stop the vehicle.NOTE•Push the selector lever from the “D”
(DRIVE) position into the manual gate
(A) and push the selector lever back into the main gate (B).SHIFT
UPSHIFT
DOWNSHIFT
UPSHIFT
DOWN
+ (SHIFT UP)
The transmission shifts up once by each operation.
- (SHIFT DOWN)
The transmission shifts down once by
each operation.
CAUTIONl In sports mode, the driver must execute up-
ward shifts in accordance with prevailingroad conditions, taking care to keep the en-
gine speed below the red zone.
l Repeated continuous operation of the selec-
tor lever or the shift paddles will continuous- ly switch shift position.CAUTIONl Do not use the left- and right-hand shift pad-
dles at the same time. Doing so could cause
a shift of gear ratio that you do not expect.NOTEl The upward shift may be made automatical-
ly in sports mode when the engine revolu-
tions rises and approaches the tachometer’s
red zone (the red-coloured part of the tach- ometer dial).
l In sports mode, only the 6 forward gears can
be selected. To reverse or park the vehicle, move the selector lever to the “R” (RE-
VERSE) or “P” (PARK) position as re- quired.
l To maintain good running performance, the
transmission may refuse to perform an up- shift when the selector lever is moved to the“+ (SHIFT UP)” position at certain vehicle
speeds. Also, to prevent over-revving of the engine, the transmission may refuse to per-
form a downshift when the lever is moved to
the “- (SHIFT DOWN)” position at certain vehicle speeds. When this happens, a buzzer
sounds to indicate that a downshift is not go-
ing to take place.
l In sports mode, downward shifts are made
automatically when the vehicle slows down.
When the vehicle stops, 1 st
gear is automati-
cally selected.
Automatic transmission INVECS-III Sports Mode 6CVT (Intelligent & Innovative Vehicle Electronic Control System III)*
6-36OGAE17E2Starting and driving6
Page 213 of 458

Brake system
The service brake is divided into two brake
circuits. And your vehicle is equipped with
power brakes. If one brake circuit fails, the
other is available to stop the vehicle. If you should lose the power assist for some reason, the brakes will still work. In these situations,
even if the brake pedal moves down to the
very end of its possible stroke or resists being
depressed, keep depressing the brake pedal down harder and further than usual; stop
driving as soon as possible and have the
brake system repaired.
WARNINGl Do not turn off the engine while your ve-
hicle is in motion. If you turn off the en-
gine while driving, the power assistance for the braking system will stop working
and your brakes will not work effectively.
l If the power assist is lost or if either brake
hydraulic system stops working properly, have your vehicle checked immediately.
Warning display
The brake warning lamp illuminates to indi-
cate a fault in the braking system. A warning
is also displayed on the multi-information display. Refer to “Brake warning lamp” on page 5-45 and “Brake warning display” on
page 5-46.
When brakes are wet
Check the brake system while driving at a
low speed immediately after starting, espe- cially when the brakes are wet, to confirmthey work normally.
A film of water can be formed on the brake
discs and prevent normal braking after driv-
ing in heavy rain or through large puddles, or after the vehicle is washed. If this occurs, dry
the brakes out by driving slowly while lightly depressing the brake pedal.
When driving downhill
It is important to take advantage of the en-
gine braking by shifting to a lower shift posi- tion while driving on steep downhill roads in order to prevent the brakes from overheating.
WARNINGl Do not leave any objects near the brake
pedal or let a floor mat slide under it; do- ing so could prevent the full pedal stroke
that would be necessary in an emergency. Make sure that the pedal can be operatedfreely at all times. Make sure the floor mat is securely held in place.Brake pad
l Avoid hard braking situations.
New brakes need to be broken-in by
moderate use for the first 200 km (124 miles).
l The disc brakes are provided with a
warning device which emits a shrieking
metallic sound while braking if the brake pads have reached their wear limit. Ifyou hear this sound, have the brake padsreplaced immediately.
WARNINGl Driving with worn brake pads will make
it harder to stop, and can cause an acci-
dent.Hill start assist*
E00628000155
The hill start assist makes it easy to start offon a steep uphill slope by preventing the ve-
hicle from moving backwards. It keeps the
braking force for about 2 seconds when you move your foot from the brake pedal to the
accelerator pedal.
Hill start assist*
6-45OGAE17E2Starting and driving6
Page 227 of 458

To resume the set speed
E00609800675
If the set speed driving is deactivated by the
condition described in “To deactivate” on
page 6-58, you can resume the previously set
speed by push up the RES + switch (C) while
driving at a speed of about 40 km/h (25 mph)
or higher.
Under either of the following conditions, however, using the switch does not allow you
to resume the previously set speed.
In these situations, repeat the speed setting procedure:
l The CRUISE CONTROL ON/OFF
switch is pressed.
l [Except vehicles equipped with keyless
operation system]
Turn the ignition switch to the “LOCK”
or “ACC” position.
[Vehicles equipped with keyless opera- tion system]
Put the operation mode in OFF or ACC.
l “CRUISE” indication lamp is turned
OFF.Tyre pressure monitoring
system (TPMS)* E00637100279
The tyre pressure monitoring system (TPMS)
uses tyre inflation pressure sensors (A) on the wheels to monitor the tyre inflation pressures.
The system only indicates when a tyre is sig-
nificantly under-inflated.
The base tyre pressure can be set at desired value by the driver with the reset function ex-
ecution. (The low pressure warning threshold is set based on the reset.)
The tyre inflation pressure sensor IDs for two
sets of tyres can be registered by aMITSUBISHI MOTORS Authorized Service
Point, and the valid ID set can be switched by the multi-information meter switch (It’s ben-
eficial in case of seasonal tyre change be- tween summer tyre and winter tyre.)WARNINGl The spare wheel does not have a tyre in-
flation pressure sensor.
When the spare tyre is used, the tyre pres- sure monitoring system will not work
properly.
See a MITSUBISHI MOTORS Author-
ized Service Point as soon as possible to replace or repair the original tyre.
Tyre pressure monitoring system (TPMS)*
6-59OGAE17E2Starting and driving6