2017 MERCEDES-BENZ SL-Class ESP
[x] Cancel search: ESPPage 16 of 202

Operating safety
Important safety notes
GWARNING
If you operate information systems and com-
munication equipment integrated in the vehi-
cle while driving, you will be distracted from
traffic conditions. You could also lose control
of the vehicle. There is a risk of an accident.
Only operate the equipment when the traffic
situation permits. If you are not sure that this
is possible, park the vehicle paying attention
to traffic conditions and operate the equip-
ment when the vehicle is stationary.
You must observe the legal requirements for the
country in which you are currently driving when
operating the multimedia system.
The multimedia system calculates the route to
the destination without taking account of the
following, for example:
Rtraffic lights
Rstop and yield signs
Rmerging lanes
Rparking or stopping in a no parking/no stop-
ping zone
Rother road and traffic rules and regulations
Rnarrow bridges
The multimedia system can give incorrect navi-
gation commands if the actual street/traffic sit-
uation does not correspond with the digital
map's data. Digital maps do not cover all areas
nor all routes in an area. For example, a route
may have been diverted or the direction of a one-
way street may have changed.
For this reason, you must always observe road
and traffic rules and regulations during your
journey. Road and traffic rules and regulations
always have priority over the system's driving
recommendations.
Navigation announcements are intended to
direct you while driving without diverting your
attention from the road and driving.
Please always use this feature instead of con-
sulting the map display for directions. Looking
at the icons or map display can distract you from
traffic conditions and driving, and increase the
risk of an accident. Bear in mind that at a speed of only 30 mph
(approximately 50 km/
h), your vehicle covers a
distance of 44 feet (approximately 14 m) every
second.
This equipment complies with FCC radiation
exposure limits set forth for uncontrolled equip-
ment and meet s t
he FCC radio frequency (RF)
Exposure Guidelines in Supplement C to OET65.
This equipment has very low levels of RF energy
that is deemed to comply without maximum
permissive exposure evaluation (MPE). How-
ever, it is recommended to install it at a distance
of at least 8 inches (approx. 20 cm) between the
radiation source and a person's body (not
including limbs such as hands, wrists, feet and
legs).
GWARNING
Modifications to electronic components, their software as well as wiring can impair their
function and/or the function of other net-
worked components. In particular, systems
relevant to safety could also be affected. As a
result, these may no longer function as inten-
ded and/or jeopardize the operating safety of
the vehicle. There is an increased risk of an
accident and injury.
Never tamper with the wiring as well as elec-
tronic components or their software. You
should have all work to electrical and elec-
tronic equipment carried out at a qualified
specialist workshop.
If you make any changes to the vehicle elec-
tronics, the general operating permit is ren-
dered invalid.
Declarations of conformity
Vehicle components which receive
and/or transmit radio waves
USA only: The wireless devices of this vehicle
comply with Part 15 of the FCC Rules. Operation
is subject to the following two conditions:
1) These devices may not cause interference,
and
2) These devices must accept any interference,
including interference that may cause undesired
operation of the device.
14Introduction
Page 17 of 202
Changes or modifications not expressly
approved bythe party responsible for compli-
ance could void the user's authority to operate
the equipm ent.
Canada only: The wireless devices of th isveh i-
cle co mply wit hIndustry Canada license-
exempt RSSstandard(s). Operation issubject to
the foll owing two conditions:
1) These devices may not cause interference,
and
2) These devices must accept any interference,
inc ludin g interference that may cause undesired
operation of the device.
Correct use
You need to observe the foll owing information
when using the multimed iasystem:
Rthe safety notes inthis manual
Rtraff icrules and regulations
Rlaws and safety standards pertaining to motor
veh icles
Using roof carriers may impair the correct func-
tioning of a roof antenna (phone, satellit e radio,
GPS).
Attaching metalized retrof it filmto the wind-
shield may affect radio reception. This can have
a negative impact on all other antennas (e.g.
emergency call antenna) inthe veh icleinterior.
Protection against theft: this device is equip-
ped with technical provisions to protect it
against theft. Further information on protection
against theft can beobtained from an author-
ized Mercedes-Benz Center.
Qualified specialist workshop
Read the information on qualified specialist
workshops in the vehicleOperator's Manual.
Function restrictions
For safety reasons, some functions are restric-
ted or unav ailable while the vehicle is in motion.
You willnotice this, for example, because either
you willnotbe able to select certain menu items
or a message willappear to th iseffect.
Data stored in the vehicle
Data recording
A wide range of electronic components in your
vehicle contain data memories.
These data memories temporarily or perma-
nently store technical information about:
Rthe vehicle's operating state
Revents
Rmalfunctions
In general, this technical information docu-
ments the state of a component, a module, a
system or the surroundings.
These include, for example:
Roperating conditions of system components,
e.g. fluid leve ls
Rthe vehicle's status messages and those of its
individual components, e.g. number of wheel
revolutions/speed, decelerationinmove-
ment, lateral acceleration, accelerator pedal
position
Rmalfunctions and defects in important system
components, e.g. lights, brakes
Rvehicle reactions and operating conditions in
special driving situations, e.g. air bag deploy-
ment, intervention of stability control sys-
tems
Rambient conditions, e.g. outside temperature
This data isof an exclusively technical nature
and can beused to:
Rassist in detecting and rectifying faults and
defects
Ranalyze vehicle functions, e.g. after an acci-
dent
Roptimize vehicle function
The data cannot be used to trace the vehicle's
movements.
When your vehicle isserviced, technical infor-
mation can beread f
rom the event data memory
and fault data memory.
Services include, for example:
Rrepair services
Rservice processes
Rwarranty events
Rquality assurance
The vehicle is read out byemployees of the ser-
vice network (including the manufacturer) using
special diagnostic testers. You can obtain more
information there, if required.
Introduction15
Z
Page 18 of 202
After a malfunction has been rectified, the infor-
mation is deleted from the malfunction memory
or is continually overwritten.
When operating the vehicle, situations are con-
ceivable in which this technical data, in connec-
tion with other information (if necessary, after
consultation with an authorized expert), could
be traced to a person.
Examples include:
Raccident reports
Rdamage to the vehicle
Rwitness statements
Further additional functions that have been con- tractually agreed upon with the customer allow
certain vehicle data to be conveyed by the vehi-
cle as well. The additional functions include, for
example, vehicle location in case of an emer-
gency.
COMAND/mbrace
If the vehicle is equipped with COMAND or
mbrace, additional data about the vehicle’s
operation, the use of the vehicle in certain sit-
uations, and the location of the vehicle may be
compiled through COMAND or the mbrace sys-
tem.
For additional information please refer to the
COMAND User Manual and/or the mbrace
Terms and Conditions.
Event data recorders
This vehicle is equipped with an event data
recorder (EDR). The main purpose of an EDR is
to record data that will assist in understanding
how a vehicle’s systems performed in certain
crash or near crash-like situations, such as dur-
ing air bag deployment or when hitting a road
obstacle. The EDR is designed to record data
related to vehicle dynamics and safety systemsfor a short period of time, typically 30 seconds
or less.
The EDR in this vehicle is designed to record
such data as:
Rhow various systems in your vehicle are oper-
ating
Rwhether or not the driver and passenger seat
belts are fastened
Rhow far (if at all) the driver is depressing the
accelerator and/or brake pedal and
Rhow fast the vehicle is traveling
This data can help provide a better understand-
ing of the circumstances in which crashes and
injuries occur. NOTE: EDR data is recorded by
your vehicle only if a non-trivial crash situation
occurs; no data is recorded by the EDR under
normal driving conditions and no personal data
(e.g., name, gender, age, and crash location) are recorded. However, other parties, such as law
enforcement, can combine the EDR data wi th
the ty
pe of personal identification data routinely
acquired during a crash investigation.
To read data recorded by an EDR, special equip- ment is required, and access to the vehicle or
the EDR is needed. In addition to the vehicle
manufacturer, other parties that have the spe-
cial equipment, such as law enforcement, can
read the information by accessing the vehicle or
the EDR.
EDR data may be used in civil and criminal mat-
ters as a tool in accident reconstruction, acci-
dent claims, and vehicle safety. Since the Crash
Data Retrieval CDR tool that is used to extract
data from the EDR is commercially available,
Mercedes-Benz USA, LLC ("MBUSA") expressly
disclaims any and all liability arising from the
extraction of this information by unauthorized
Mercedes-Benz personnel.
MBUSA will not share EDR data with others
without the consent of the vehicle owners or, if
the vehicle is leased, without the consent of the lessee. Exceptions to this representation
include responses to subpoenas by law enforce-
ment; by federal, state or local government; in
connection with or arising out of litigation involv-
ing MBUSA or its subsidiaries and affiliates; or,
as required by law.
Warning: The EDR is a component of the Su
p-
plemental Restraint System ("SRS") Module.
Tampering with, altering, modifying or removing the EDR component may result in a malfunction
of the SRS Module and other systems.
State laws or regulations regarding EDRs that
conflict with federal regulation are pre-empted.
This means that in the event of such conflict, the
federal regulation governs. As of February 2013,13 states have enacted laws relating to EDRs.
16Introduction
Page 29 of 202
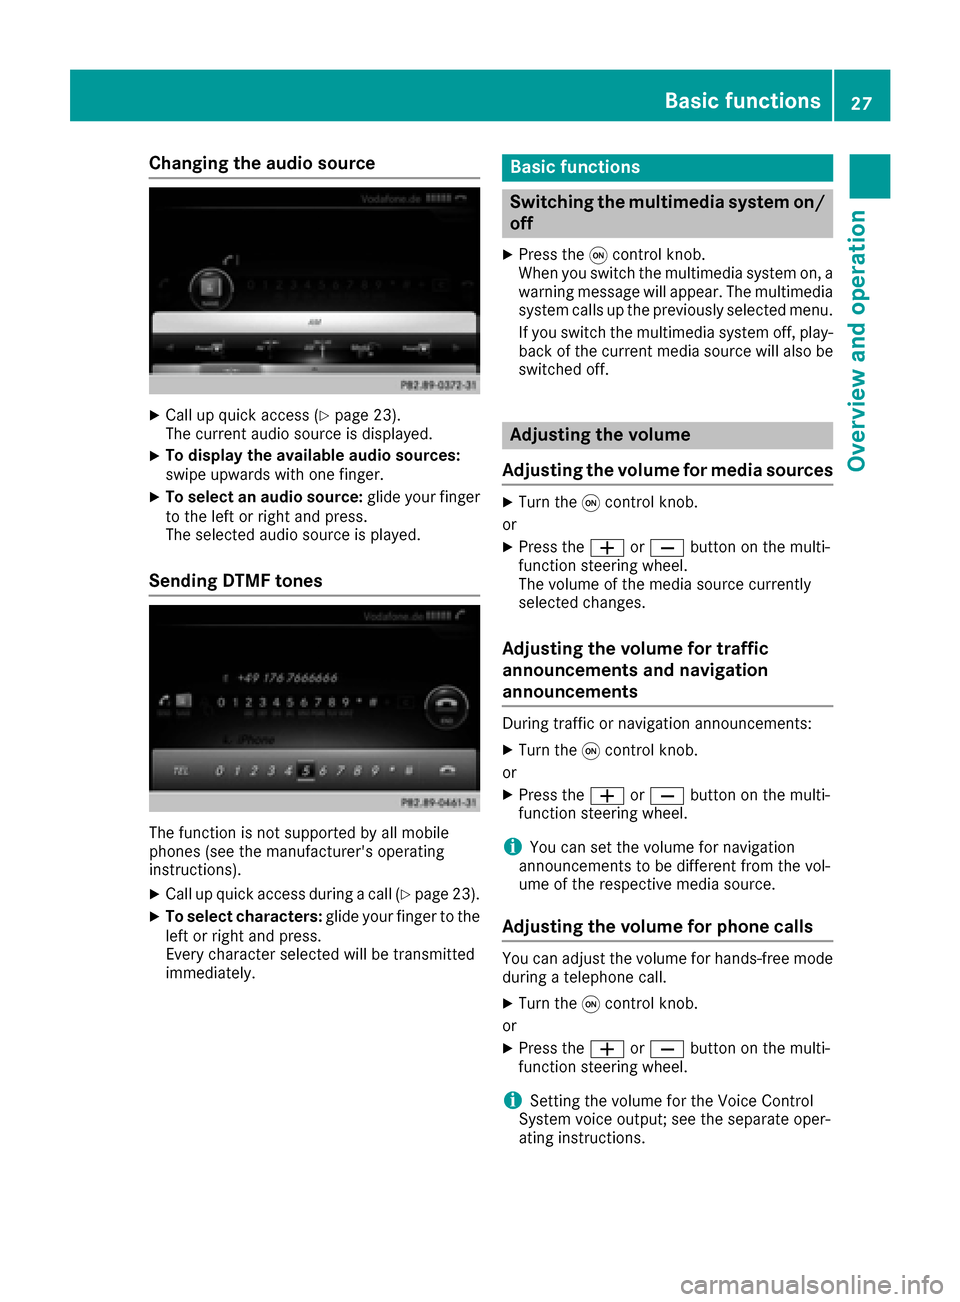
Changing the audio source
XCall up quick access (Ypage 23).
The current audio source is displayed.
XTo display the available audio sources:
swipe upwards with one finger.
XTo select an audio source: glide your finger
to the left or right and press.
The selected audio source is played.
Sending DTMF tones
The function is not supported by all mobile
phones (see the manufacturer's operating
instructions).
XCall up quick access during a call (Ypage 23).
XTo select characters: glide your finger to the
left or right and press.
Every character selected will be transmitted
immediately.
Basic functions
Switching the multimedia system on/
off
XPress the qcontrol knob.
When you switch the multimedia system on, a
warning message will appear. The multimedia
system calls up the previously selected menu.
If you switch the multimedia system off, play- back of the current media source will also be
switched off.
Adjusting the volume
Adjusting the volume for media sources
XTurn the qcontrol knob.
or
XPress the WorX button on the multi-
function steering wheel.
The volume of the media source currently
selected changes.
Adjusting the volume for traffic
announcements and navigation
announcements
During traffic or navigation announcements:
XTurn the qcontrol knob.
or
XPress the WorX button on the multi-
function steering wheel.
iYou can set the volume for navigation
announcements to be different from the vol-
ume of the respective media source.
Adjusting the volume for phone calls
You can adjust the volume for hands-free mode
during a telephone call.
XTurn the qcontrol knob.
or
XPress the WorX button on the multi-
function steering wheel.
iSetting the volume for the Voice Control
System voice output; see the separate oper-
ating instructions.
Basic functions27
Overview and operation
Page 34 of 202

Adding favorites
Adding predefined favorites
XPress th efavorite sbutto non th econtroller .
The favorite sare displayed.
XTo sho wthemen ubar :slid e6 thecon-
troller .
XTo select Reassign:tur nand press th econ-
troller .
The categorie sfor th eavailable favorite sare
displayed.
XTo select acategory: turnth econtroller and
press to confirm .
The corresponding favorite sare displayed.
XTo select afavorite: turnand press th econ-
troller .
XTo add afavorit eat th edesired position:
tur nand press th econtroller .
If there is already afavorite at this position ,
then this will be deleted.
Adding your own favorites
You can creat eyour own favorite sto help you to
use these functions, for example:
RCallin gup telephon enumber sfrom th etele-
phone book
RSelecting radi ostation s
RSkippin gto aspecific plac ein atrack or an
audio book
RCallin gup favore dmedia
RSelecting navigation destination sfor rout e
calculation
The exampl edescribes how to add acontact's
telephon enumber as afavorite .
XCall up th ephone book (Ypage 102).
XSelectth econtact .
XTo add atelephone number as afavorit e
at th edesired position: press and hold the
favorite sbutto non th econtroller until th e
favorite sare displayed.
XTurn and press th econtroller .
If there is already afavorite at this position ,it
will be delete dand replace dby ane wone.
Renaming favorites
XPress th efavorite sbutto non th econtroller .
The favorite sare displayed.
XTo select afavorit eto be renamed: turnth e
controller .
XTo showthemen ubar :slid e6 thecon-
troller .
XTo select Rename:tur nand press th econtrol -
ler .
XEnte rcharacters usin gth econtroller .
XTo finish th eentry :select OK.
The favorite is renamed .
Moving favorites
XPress thefavorite sbutto non th econtroller .
The favorite sare displayed.
XTo select afavorit eto be moved: turnth e
controller .
XTo showthemen ubar :slid e6 thecon-
troller .
XTo select Move:tur nand press th econtroller .
XTo storeafavorit ein th edesired order:
tur nand press th econtroller .
The favorite is moved.
If on efavorite is store dove ranother one, this
is then is deleted.
Deleting favorites
XPress th efavorite sbutto non th econtroller .
The favorite sare displayed.
XTo select afavorit eto be deleted: turnth e
controller .
XTo showthemen ubar :slid e6 thecon-
troller .
32Favorites
Overview and operation
Page 50 of 202
Massage the entire back, rising waves, sooth-
ing downward movements
RActivating Massage
Mobilizing massage and rising and descend-
ing dynamic waves
RClassic Massage
Single and twin waves moving upwards
across the entire back
RMobilizing Massage
Mobilization via stronger single and twin
waves moving upwards across the entire back
Selecting a massage program
XCall up the seat functions (Ypage 47).
XTo selectMassage: turn and press the con-
troller.
XTo select a seat: slide 1the controller.
XTo select massage programs: turn and press
the controller.
The massage program runs for approximately
15 to 25 minutes, depending on the setting.
XTo exit the menu: press the%button.
Seat heating balance
The balance function controls the distribution of
heat for the seat backrest and seat cushion.
The balance function influences the currently
set heating level of the seat heating (see the
vehicle Operator's Manual).
XCall up the seat functions (Ypage 47).
XTo select Seat Heating Balance: turn and
press the controller.
XTo select a seat: slide 1the controller.
XTo change the setting: turn the controller.
You will see the changes you have made in the
settings display.
The settings represent the following:
R0— the backrest and seat cushion are evenly
heated according to the setting selected with
the seat heating button.
R1to 3increasing — the heat output to the seat
cushion is reduced one level at a time.
R1to 3decreasing — the heat output for the
backrest is reduced one level at a time.
XTo exit the menu: press the%button.
Resetting all adjustments
XCall up the seat functions (Ypage 47).
XSelect a seat.
XTo select Reset: turn and press the controller.
XTo select a seat: slide 1the controller.
XTo reset: press the controller.
A prompt appears.
XTo select YesorNo: turn and press the con-
troller.
If you select No
the process is canceled.
After selecting Yes
all seat adjustments are
reset to the default values (factory setting).
360° camera
General notes
The 360° camera covers the immediate sur-
roundings of the vehicle and assists you, for
instance when parking or at exits with reduced
visibility.
The 360° camera is only an aid. It is not a
replacement for your attention to your immedi-
ate surroundings. You are always responsible
for safe maneuvering and parking. Make sure
that no persons or animals are in the maneu-
vering range.
Further information on the 360°camera can be
found in the vehicle Operator's Manual.
Displaying the 360° camera image
The 360° camera image can be displayed if:
Ryour vehicle is equipped with a 360° camera
Rthe 360°Camerafunction is switched on (see
the vehicle Operator's Manual)
XPress Vehiclein the main function bar.
The vehicle menu is displayed.
XSelect 360° Camera.
The 360° camera image appears in split-
screen mode.
You will see the previous view on the display if,
when the function is switched on:
Ryou turn the SmartKey to position 1in the
ignition lock
Ryou select transmission position P
Rwhen you are driving at moderate speeds
48360° camera
Vehicle functions
Page 51 of 202
Switching the display off manually
XTo select&: slide 6and press the con-
troller.
Switching the display on automatically
XYou can switch on the 360 camera display
automatically using the reverse gear
(
Ypage 49).
Switching the 360° camera auto-
matic mode on/off
This function activates the 360° camera when
reverse gear is engaged.
XPress Vehiclein the main function bar.
The vehicle menu is displayed.
XTo switch to the menu bar: slide6the
controller.
XTo select System Settings: turn and press
the controller.
XTo select 360° Camera: turn and press the
controller.
The 360° Camera
menu appears.
XSelect Activation by R gear.
The function is switched on Oor off ª.
Opening the camera cover for clean-
ing
XTo select Open Camera Coverin the 360°
camera menu: turn the controller and press to
confirm.
The Please Wait...
message appears for
approximately three seconds.
The camera cover opens.
The camera cover closes automatically if:
Rthe ignition is switched off
Rthe vehicle exceeds a moderate speed
iDepending on the vehicle's equipment, this
function is not available.
Rear view camera
General notes
The rear view camera covers the immediate sur-
roundings of the vehicle and assists you when
parking. The rear view camera is only an aid. It is not a
replacement for your attention to your immedi-
ate surroundings. You are always responsible
for safe maneuvering and parking. When maneu-
vering or parking, make sure that there are no
persons, animals or objects in the area in which
you are maneuvering.
There may be fewer settings depending on your
vehicle's equipment.
You can find further information about the rear
view camera in the vehicle Operator's Manual.
Switching the rear view camera auto-
matic mode on/off
This function activates the rear view camera
when reverse gear is engaged.
XPress the Øbutton.
or
XPress Vehiclein the main function bar.
The vehicle menu is displayed.
XSlide 6the controller.
XTo select System Settings: turn and press
the controller.
XSelect Rear View Camera.
The Rear View Cameramenu appears.
XSelect Activation by R gear.
The function is switched on Oor off ª,
depending on the previous status.
When you start the vehicle and engage
reverse gear, the area behind the vehicle is
shown with guide lines in the display. For fur-
ther information on the rear view camera (see
the vehicle Operator's Manual).
Opening the camera cover for clean-
ing
XTo select Open Camera Coverin the rear
view camera menu: turn and press the con-
troller.
The Please Wait...
message appears for
approximately three seconds.
The camera cover opens.
The camera cover closes automatically if:
Rthe ignition is switched off
Rthe vehicle pulls away
Rear view camera49
Vehicle functions
Z
Page 52 of 202
DYNAMIC SELECT
General notes
PressDYNAMI CSELECTto configur eth efollow -
in g setting sand values fo rth eIndividual drive
program:
RDrive syste m
RSuspension
RSteering
RClimatecontro l
RECOstart/sto pfunction
iIn afe w countries, th eEC Ostart/sto pfunc-
tion is deactivated at th efactory due to th e
available fue lgrade. In this case, th eEC O
start/sto pfunction is no tavailable regardles s
of th edisplay in th emultimedia syste mdis -
play.
Fo rMercedes-AMG vehicles ,you can configur e
th efollowin gsetting sand adjustmen tvalues fo r
th eIndividual drive program:
RDrive syste m
RSuspension
RTransmissio n
RESP®(Electronic Stability Program)
There may be fewer setting sor set values, or
none ,dependin gon your vehicle' sequipment.
Fo rfurther information on th eIndividual drive
program; see th evehicle Operator's Manual.
Configuration using th eDYNAMIC
SELECT butto n
XUse theDYNAMI CSELECT butto nto selec t
th eIndividual drive program (se eth evehicle
Operator's Manual).
A window appears after ashort while.
XTo confirm Adjust:press th econtroller .
The Individua lConfiguratio nmenufo r
setting th edrive program appears .
XTo selectDrive, Suspensio n,Steering,
Climat eContro l
orEco Start/Sto pFunction:turn and press th econtroller .
XSelectindividual settings.
The men usymbol, text and imag esho wthe
selecte dsetting .
Configuration via th eDYNAMIC
SELECT controller
The DYNAMI CSELECT Controlle ris available fo r
Mercedes-AMG vehicles .
XUse theDYNAMI CSELECT controller to selec t
th eIndividual drive program; see th evehicle
Operator's Manual.
A window appears after ashort while.
XTo confirm Adjust:press th econtroller .
The Individua lConfiguratio nmenufo r
setting th edrive program appears .
XTo selectDrive, Suspensio n,Transmis‐
sio norESP:turn and press th econtroller .
XSelectindividual settings.
The men usymbol, text and imag esho wthe
selecte dsetting .
Displaying vehicle data
XPressVehicl ein themain function bar .
The vehicle men uis displayed.
XTo selec tDYNAMI CSELECT:turn and press
th econtroller .
XSelectVehicl eDat a.
Updates of th efollowin gdat aare displayed:
RRoad typ eanalogous to th eselecte ddrive
program
RG-force display of longitudinal and latera l
acceleration
RAccelerator and brake peda lactivity
RActivit yof th esuspensio nstrut s
RWheel angle
RVehicle level display (Mercedes-AM Gvehi-
cles)
The G-force display is no tavailable in all of th e
drive programs .
Daytime or night-time vie wis shown dependin g
on th eautomatic ligh tsensor .
Displaying engin edata
i
There may be fewer displays dependin gon
your vehicle' sequipment.
50DYNAMIC SELECT
Vehicle functions