2017 MERCEDES-BENZ S-Class MAYBACH warning
[x] Cancel search: warningPage 269 of 382
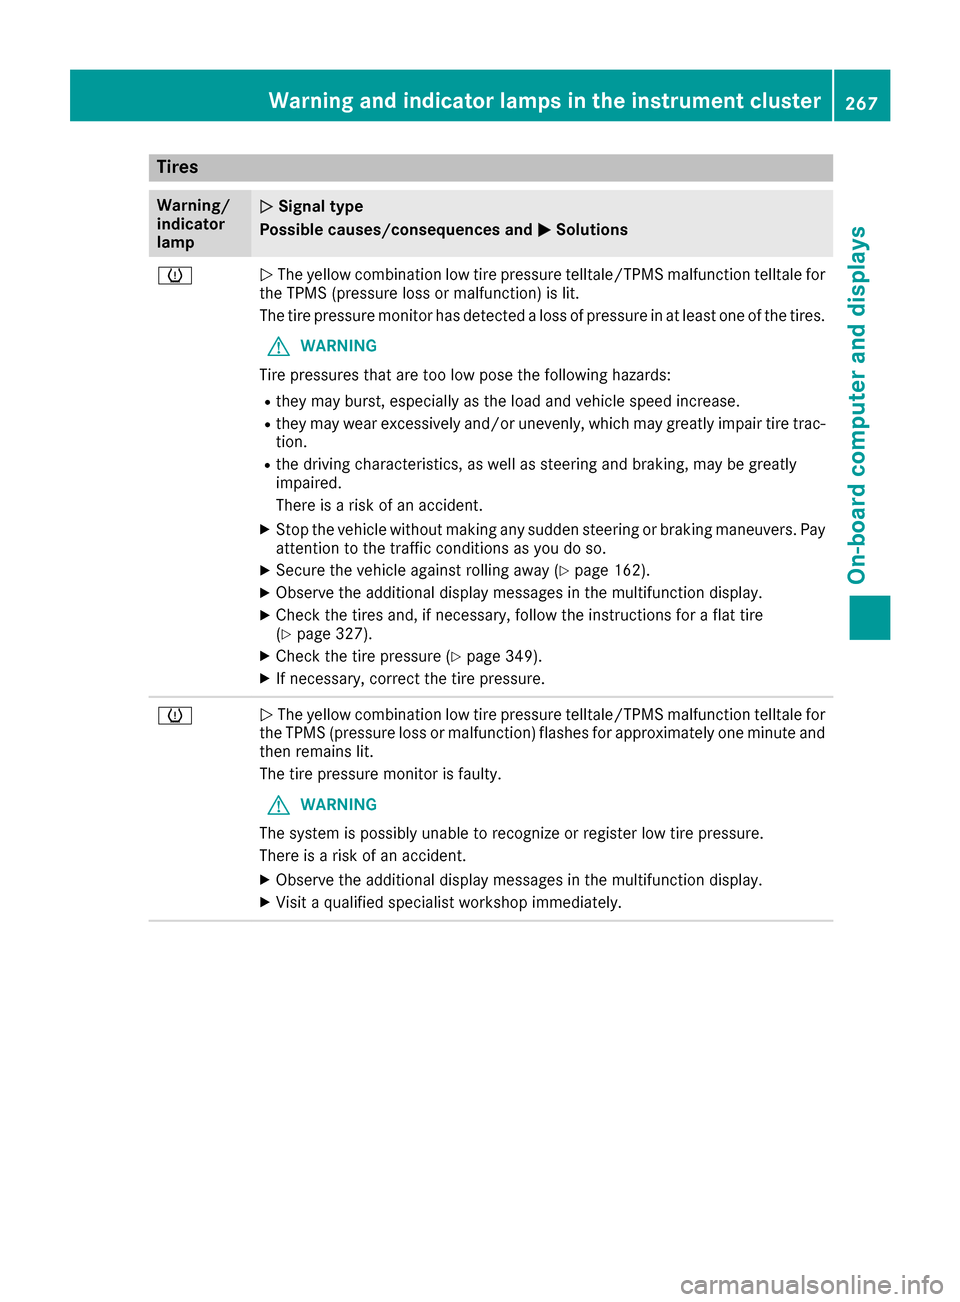
Tires
Warning/
indicator
lampNSignal type
Possible causes/consequences and M
Solutions
hNThe yellow combination low tire pressure telltale/TPMS malfunction telltale for
the TPMS (pressure loss or malfunction) is lit.
The tire pressure monitor has detected a loss of pressure in at least one of the tires.
GWARNING
Tire pressures that are too low pose the following hazards:
Rthey may burst, especially as the load and vehicle speed increase.
Rthey may wear excessively and/or unevenly, which may greatly impair tire trac-
tion.
Rthe driving characteristics, as well as steering and braking, may be greatly
impaired.
There is a risk of an accident.
XStop the vehicle without making any sudden steering or braking maneuvers. Pay
attention to the traffic conditions as you do so.
XSecure the vehicle against rolling away (Ypage 162).
XObserve the additional display messages in the multifunction display.
XCheck the tires and, if necessary, follow the instructions for a flat tire
(Ypage 327).
XCheck the tire pressure (Ypage 349).
XIf necessary, correct the tire pressure.
hN The yellow combination low tire pressure telltale/TPMS malfunction telltale for
the TPMS (pressure loss or malfunction) flashes for approximately one minute and
then remains lit.
The tire pressure monitor is faulty.
GWARNING
The system is possibly unable to recognize or register low tire pressure.
There is a risk of an accident.
XObserve the additional display messages in the multifunction display.
XVisit a qualified specialist workshop immediately.
Warning and indicator lamps in the instrument cluster267
On-board computer and displays
Z
Page 270 of 382
Vehicle
Warning/
indicator
lampNSignal type
Possible causes/consequences and M
Solutions
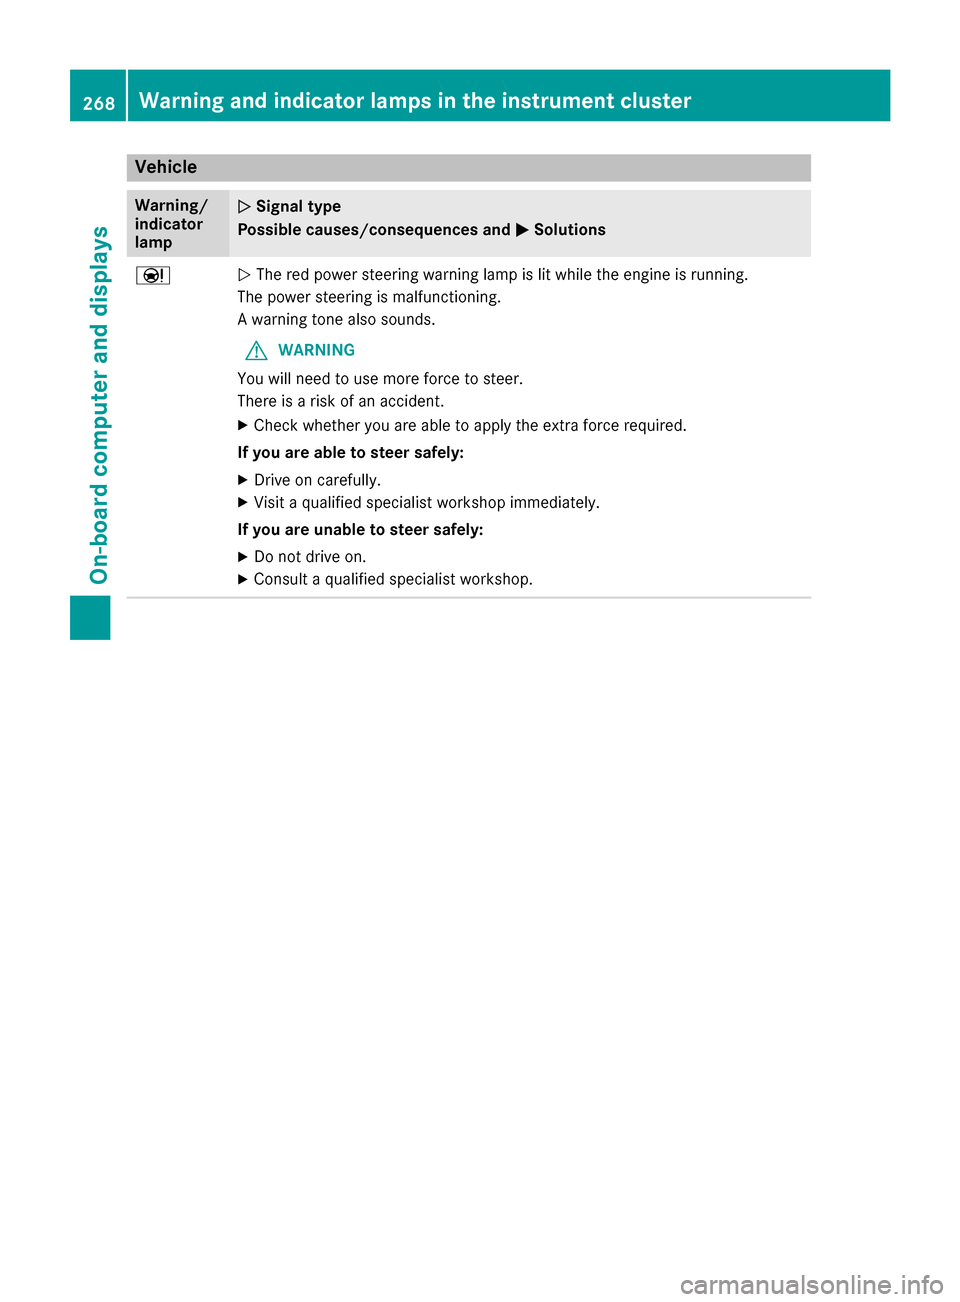
ÐNThe red power steering warning lamp is lit while the engine is running.
The power steering is malfunctioning.
A warning tone also sounds.
GWARNING
You will need to use more force to steer.
There is a risk of an accident.
XCheck whether you are able to apply the extra force required.
If you are able to steer safely:
XDrive on carefully.
XVisit a qualified specialist workshop immediately.
If you are unable to steer safely:
XDo not drive on.
XConsult a qualified specialist workshop.
268Warning and indicator lamps in the instrument cluster
On-board computer and displays
Page 271 of 382
General notes
The multimedia system section in this Opera-
tor's Manual describes the basic principles for
operation. More information can be found in theDigital Operator's Manual.
Important safety notes
GWARNING
If you operate information systems and com-
munication equipment integrated in the vehi-
cle while driving, you will be distracted from
traffic conditions. You could also lose control
of the vehicle. There is a risk of an accident.
Only operate the equipment when the traffic
situation permits. If you are not sure that this
is possible, park the vehicle paying attention
to traffic conditions and operate the equip-
ment when the vehicle is stationary.
You must observe the legal requirements for the
country in which you are currently driving when
operating the multimedia system.
The multimedia system calculates the route to
the destination without taking the following into
account, for example:
Rtraffic lights
Rstop and yield signs
Rparking or stopping restrictions
Rroad narrowing
Rother road and traffic rules and regulations
The multimedia system may give incorrect nav-
igation recommendations if the actual street/
traffic situation does not correspond with the
digital map's data.
For example:
Ra diverted route
Rthe road layout or the direction of a one-way
street has been changed
For this reason, you must always observe road
and traffic rules and regulations during your
journey. Road and traffic rules and regulations
always have priority over multimedia system
driving recommendations.
Navigation announcements are intended to
direct you while driving without diverting your
attention from the road and driving. Please always use this feature instead of con-
sulting the map display for directions. Looking
at the icons or map display can distract you from
traffic conditions and driving, and increase the
risk of an accident.
This equipment complies with FCC radiation
exposure limits set forth for uncontrolled equip-
ment and meets the FCC radio frequency (RF)
Exposure Guidelines in Supplement C to OET65.
This equipment has very low levels of RF energy
that is deemed to comply without maximum
permissive exposure evaluation (MPE). How-
ever, it is recommended
to insta
ll it at a distance
of at least 8 inches (approx. 20 cm) between the
radiation source and a person's body (not
including limbs such as hands, wrists, feet and
legs).
GWARNING
Modifications to electronic components, their software as well as wiring can impair their
function and/or the function of other net-
worked components. In particular, systems
relevant to safety could also be affected. As a
result, these may no longer function as inten-
ded and/or jeopardize the operating safety of
the vehicle. There is an increased risk of an
accident and injury.
Never tamper with the wiring as well as elec-
tronic components or their software. You
should have all work to electrical and elec-
tronic equipment carried out at a qualified
specialist workshop.
If you make any changes to the vehicle elec-
tronics, the general operating permit is ren-
dered invalid.
Function restrictions
For safety reasons, some functions are restric-
ted or unavailable while the vehicle is in motion.
You will notice this, for example, because either
you will not be able to select certain menu items
or a message will appear to this effect.
Function restrictions269
Multimedia system
Z
Page 272 of 382
Operating system
Overview
General notes
Wearing polarized sunglasses may impair your
ability to read the display.
The display has an automatic temperature-con-
trolled switch-off feature. The brightness is
automatically reduced if the temperature is too
high. The display may temporarily switch off
completely.
Cleaning instructions
!Do not touch the display. The display has a
very sensitive high-gloss surface; there is a
risk of scratching. If you have to clean the
screen, however, use a mild cleaning agent
and a soft, lint-free cloth.
The display must be switched off and have
cooled down before you start cleaning. Do not
apply pressure to the display surface when
cleaning it, as this could cause irreversible dam-
age to the display.
Switching the multimedia system
on/off
XPress the Übutton on the center console
to the right of the controller.
When you switch the multimedia system on, a
warning message will appear. The multimedia
system calls up the previously selected menu.
If you switch the multimedia system off, play- back of the current media source will also be
switched off.
Adjusting the volume
XTurn the thumbwheel to the right of the con-
troller.
or
XPress the WorX button on the multi-
function steering wheel.
The volume of the media source currently
selected changes.
The volume is adjusted:
Rfor the currently selected media source
Rduring traffic or navigation announcements
Rin hands-free mode during a phone call
Switching the sound on or off
XPress the thumbwheel beside the controller.
or
XPress the 8button on the multifunction
steering wheel.
If the audio output is switched off, the status
line will show the 8symbol. If you switch
the media source or change the volume, the
sound is automatically switched on.
iNavigation announcements will be heard
even if the sound is muted.
Functions
The multimedia system has the following func-
tions:
RRadio mode
RMedia mode with media search
RSound systems
RNavigation system
RCommunication functions
RSIRIUS Weather
RVehicle functions with system settings
RFavorites functions
RMulti-Seat Entertainment System
Controller
The controller in the center console lets you:
Rselect menu items on the display
Renter characters
Rselect a destination on the map
Rsave entries
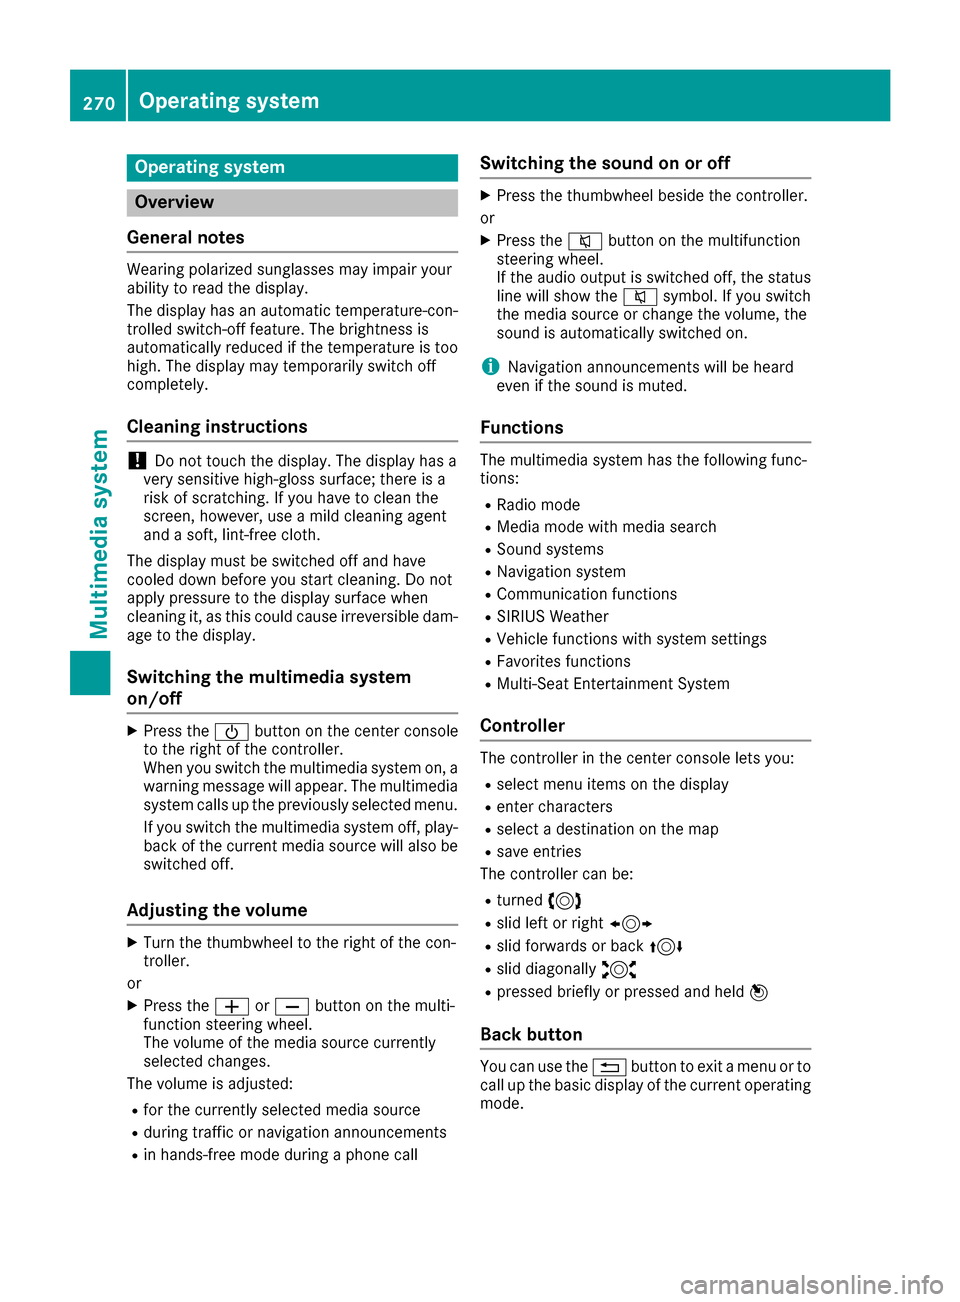
The controller can be:
Rturned 3
Rslid left or right 1
Rslid forwards or back 4
Rslid diagonally2
Rpressed briefly or pressed and held 7
Back button
You can use the%button to exit a menu or to
call up the basic display of the current operating
mode.
270Operating system
Multimedia system
Page 277 of 382
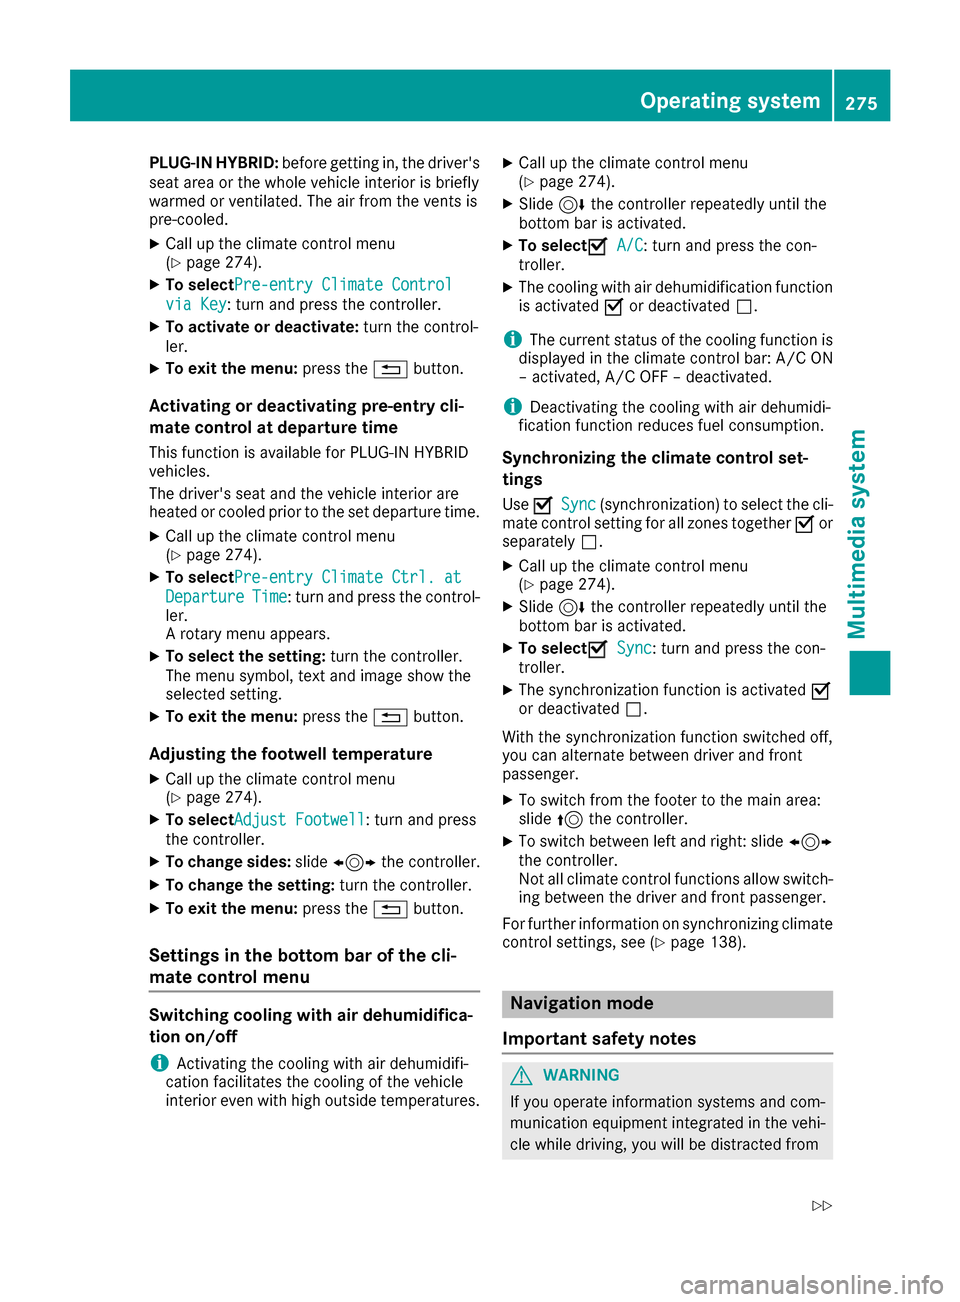
PLUG‑IN HYBRID:before getting in, the driver's
seat area or the whole vehicle interior is briefly
warmed or ventilated. The air from the vents is
pre-cooled.
XCall up the climate control menu
(Ypage 274).
XTo select Pre-entry Climate Control
via Key: turn and press the controller.
XTo activate or deactivate: turn the control-
ler.
XTo exit the menu: press the%button.
Activating or deactivating pre-entry cli-
mate control at departure time
This function is available for PLUG ‑IN HYBRID
vehicles.
The driver's seat and the vehicle interior are
heated or cooled prior to the set departure time.
XCall up the climate control menu
(Ypage 274).
XTo select Pre-entry Climate Ctrl. at
DepartureTime: turn and press the control-
ler.
A rotary menu appears.
XTo select the setting: turn the controller.
The menu symbol, text and image show the
selected setting.
XTo exit the menu: press the%button.
Adjusting the footwell temperature
XCall up the climate control menu
(Ypage 274).
XTo select Adjust Footwell: turn and press
the controller.
XTo change sides: slide1 the controller.
XTo change the setting: turn the controller.
XTo exit the menu:press the%button.
Settings in the bottom bar of the cli-
mate control menu
Switching cooling with air dehumidifica-
tion on/off
iActivating the cooling with air dehumidifi-
cation facilitates the cooling of the vehicle
interior even with high outside temperatures.
XCall up the climate control menu
(Ypage 274).
XSlide 6the controller repeatedly until the
bottom bar is activated.
XTo select OA/C: turn and press the con-
troller.
XThe cooling with air dehumidification function
is activated Oor deactivated ª.
iThe current status of the cooling function is
displayed in the climate control bar: A/C ON
– activated, A/C OFF – deactivated.
iDeactivating the cooling with air dehumidi-
fication function reduces fuel consumption.
Synchronizing the climate control set-
tings
Use OSync(synchronization) to select the cli-
mate control setting for all zones together Oor
separately ª.
XCall up the climate control menu
(Ypage 274).
XSlide6the controller repeatedly until the
bottom bar is activated.
XTo select OSync: turn and press the con-
troller.
XThe synchronization function is activated O
or deactivated ª.
With the synchronization function switched off,
you can alternate between driver and front
passenger.
XTo switch from the footer to the main area:
slide 5the controller.
XTo switch between left and right: slide 1
the controller.
Not all climate control functions allow switch-
ing between the driver and front passenger.
For further information on synchronizing climate
control settings, see (
Ypage 138).
Navigation mode
Important safety notes
GWARNING
If you operate information systems and com-
munication equipment integrated in the vehi-
cle while driving, you will be distracted from
Operating system275
Multimedia system
Z
Page 280 of 382
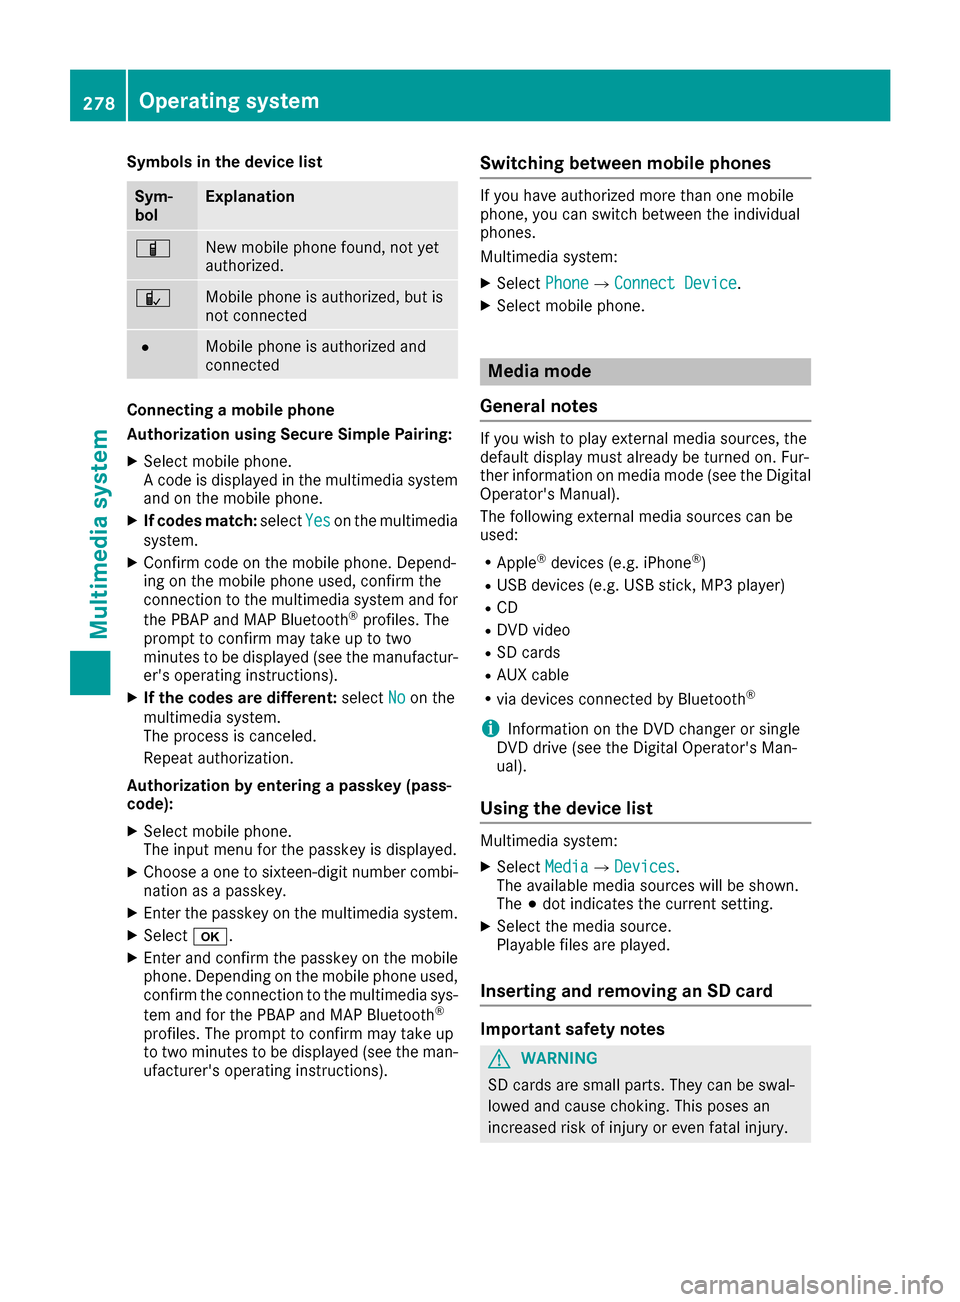
Symbols in the device list
Sym-
bolExplanation
ÏNew mobile phone found, not yet
authorized.
ÑMobile phone is authorized, but is
not connected
#Mobile phone is authorized and
connected
Connecting a mobile phone
Authorization using Secure Simple Pairing:
XSelect mobile phone.
A code is displayed in the multimedia system
and on the mobile phone.
XIf codes match:selectYeson the multimedia
system.
XConfirm code on the mobile phone. Depend-
ing on the mobile phone used, confirm the
connection to the multimedia system and for
the PBAP and MAP Bluetooth
®profiles. The
prompt to confirm may take up to two
minutes to be displayed (see the manufactur-
er's operating instructions).
XIf the codes are different: selectNoon the
multimedia system.
The process is canceled.
Repeat authorization.
Authorization by entering a passkey (pass-
code):
XSelect mobile phone.
The input menu for the passkey is displayed.
XChoose a one to sixteen-digit number combi- nation as a passkey.
XEnter the passkey on the multimedia system.
XSelect b.
XEnter and confirm the passkey on the mobile
phone. Depending on the mobile phone used,
confirm the connection to the multimedia sys-
tem and for the PBAP and MAP Bluetooth
®
profiles. The prompt to confirm may take up
to two minutes to be displayed (see the man-
ufacturer's operating instructions).
Switching between mobile phones
If you have authorized more than one mobile
phone, you can switch between the individual
phones.
Multimedia system:
XSelect PhoneQConnect Device.
XSelect mobile phone.
Media mode
General notes
If you wish to play external media sources, the
default display must already be turned on. Fur-
ther information on media mode (see the Digital
Operator's Manual).
The following external media sources can be
used:
RApple®devices (e.g. iPhone®)
RUSB devices (e.g. USB stick, MP3 player)
RCD
RDVD video
RSD cards
RAUX cable
Rvia devices connected by Bluetooth®
iInformation on the DVD changer or single
DVD drive (see the Digital Operator's Man-
ual).
Using the device list
Multimedia system:
XSelect MediaQDevices.
The available media sources will be shown.
The #dot indicates the current setting.
XSelect the media source.
Playable files are played.
Inserting and removing an SD card
Important safety notes
GWARNING
SD cards are small parts. They can be swal-
lowed and cause choking. This poses an
increased risk of injury or even fatal injury.
278Operating system
Multimedia system
Page 283 of 382
Stowage areas
Loading guidelines
GWARNING
Combustion engines emit poisonous exhaust
gases such as carbon monoxide. Exhaust
gases can enter the vehicle interior if the
trunk lid is open when the engine is running,
especially if the vehicle is in motion. There is a
risk of poisoning.
Always switch off the engine before opening
the trunk lid. Never drive with the trunk lid
open.
GWARNING
If objects, luggage or loads are not secured or
not secured sufficiently, they could slip, tip
over or be flung around and thereby hit vehicle
occupants. There is a risk of injury, particu-
larly in the event of sudden braking or a sud-
den change in direction.
Always store objects so that they cannot be
flung around. Secure objects, luggage or
loads against slipping or tipping before the
journey.
GWARNING
The exhaust tail pipe and tail pipe trim can
become very hot. If you come into contact
with these parts of the vehicle, you could burn
yourself. There is a risk of injury.
Always be particularly careful around the
exhaust tail pipe and the tail pipe trim. Allow
these components to cool down before touch-
ing them.
The handling characteristics of a laden vehicle
are dependent on the distribution of the load
within the vehicle. For this reason, you should
observe the following notes when transporting a
load:
RNever exceed the maximum permissible
gross vehicle mass or the gross axle weight
rating for the vehicle (including occupants).
The values are specified on the vehicle iden- tification plate on the B-pillar of the driver's
door.
RThe trunk is the preferred place to carry
objects.
RPosition heavy loads as far forwards as pos-
sible and as low down in the trunk as possible.
RThe load must not protrude above the upper
edge of the seat backrests.
RAlways place the load behind unoccupied
seats if possible.
RSecure the load with sufficiently strong and
wear-resistant tie-downs. Pad sharp edges for
protection.
Stowage spaces
Important safety notes
GWARNING
If objects in the passenger compartment are
stowed incorrectly, they can slide or be
thrown around and hit vehicle occupants. In
addition, cupholders, open stowage spaces
and mobile phone brackets cannot always
retain all objects they contain. There is a risk of injury, particularly in the event of sudden
braking or a sudden change in direction.
RAlways stow objects so that they cannot be
thrown around in such situations.
RAlways make sure that objects do not pro-
trude from stowage spaces, parcel nets or
stowage nets.
RClose the lockable stowage spaces before
starting a journey.
RAlways stow and secure heavy, hard, poin-
ted, sharp-edged, fragile or bulky objects in
the trunk.
Observe the loading guidelines (
Ypage 281).
Stowage areas281
Stowage and features
Z
Page 286 of 382
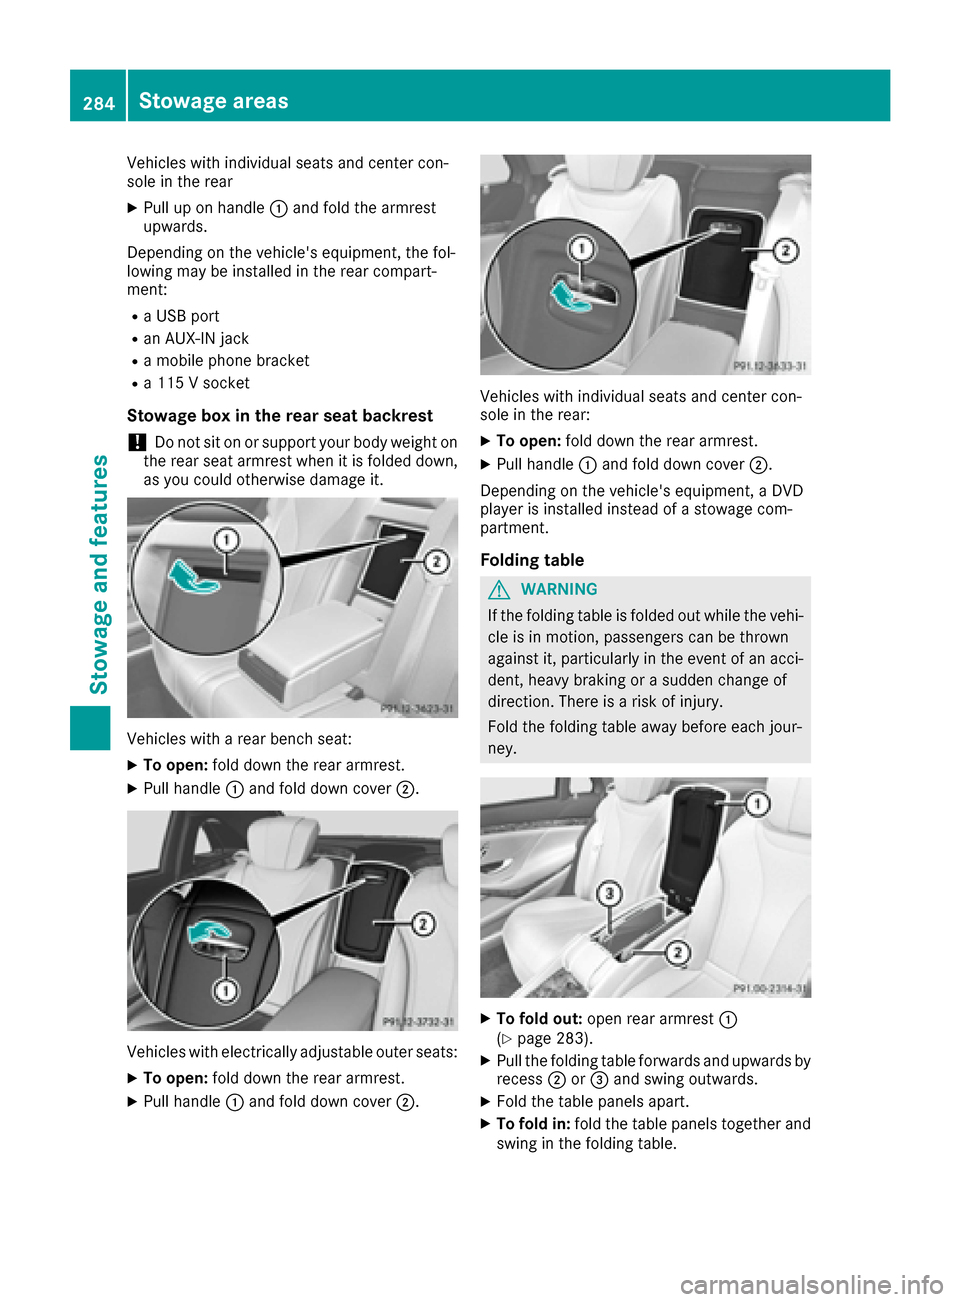
Vehicles with individual seats and center con-
sole in the rear
XPull up on handle:and fold the armrest
upwards.
Depending on the vehicle's equipment, the fol-
lowing may be installed in the rear compart-
ment:
Ra USB port
Ran AUX-IN jack
Ra mobile phone bracket
Ra 115 V socket
Stowage box in the rear seat backrest
!Do not sit on or support your body weight on
the rear seat armrest when it is folded down,
as you could otherwise damage it.
Vehicles with a rear bench seat:
XTo open: fold down the rear armrest.
XPull handle :and fold down cover ;.
Vehicles with electrically adjustable outer seats:
XTo open:fold down the rear armrest.
XPull handle :and fold down cover ;.
Vehicles with individual seats and center con-
sole in the rear:
XTo open:fold down the rear armrest.
XPull handle :and fold down cover ;.
Depending on the vehicle's equipment, a DVD
player is installed instead of a stowage com-
partment.
Folding table
GWARNING
If the folding table is folded out while the vehi-
cle is in motion, passengers can be thrown
against it, particularly in the event of an acci-
dent, heavy braking or a sudden change of
direction. There is a risk of injury.
Fold the folding table away before each jour-
ney.
XTo fold out: open rear armrest :
(Ypage 283).
XPull the folding table forwards and upwards by
recess ;or= and swing outwards.
XFold the table panels apart.
XTo fold in: fold the table panels together and
swing in the folding table.
284Stowage areas
Stowage and features