2017 MERCEDES-BENZ S-Class MAYBACH water
[x] Cancel search: waterPage 293 of 382
XTo open:open the stowage compartment
(Ypage 282).
XOpen the protective flap if necessary.
XTo remove: slide catch:forwards and pull
the cup holder upwards.
XTo insert: make sure that the protective flap
is closed.
XInsert the cup holder and slide catch :back.
You can remove the cup holder and the rubber
mat for cleaning. Clean them with clean, luke-
warm water only.
Cup holder in the rear seat armrest
Vehicles with a rear bench seat
!Close the cup holder before folding the rear
seat armrest up. Otherwise, the cup holder
could be damaged.
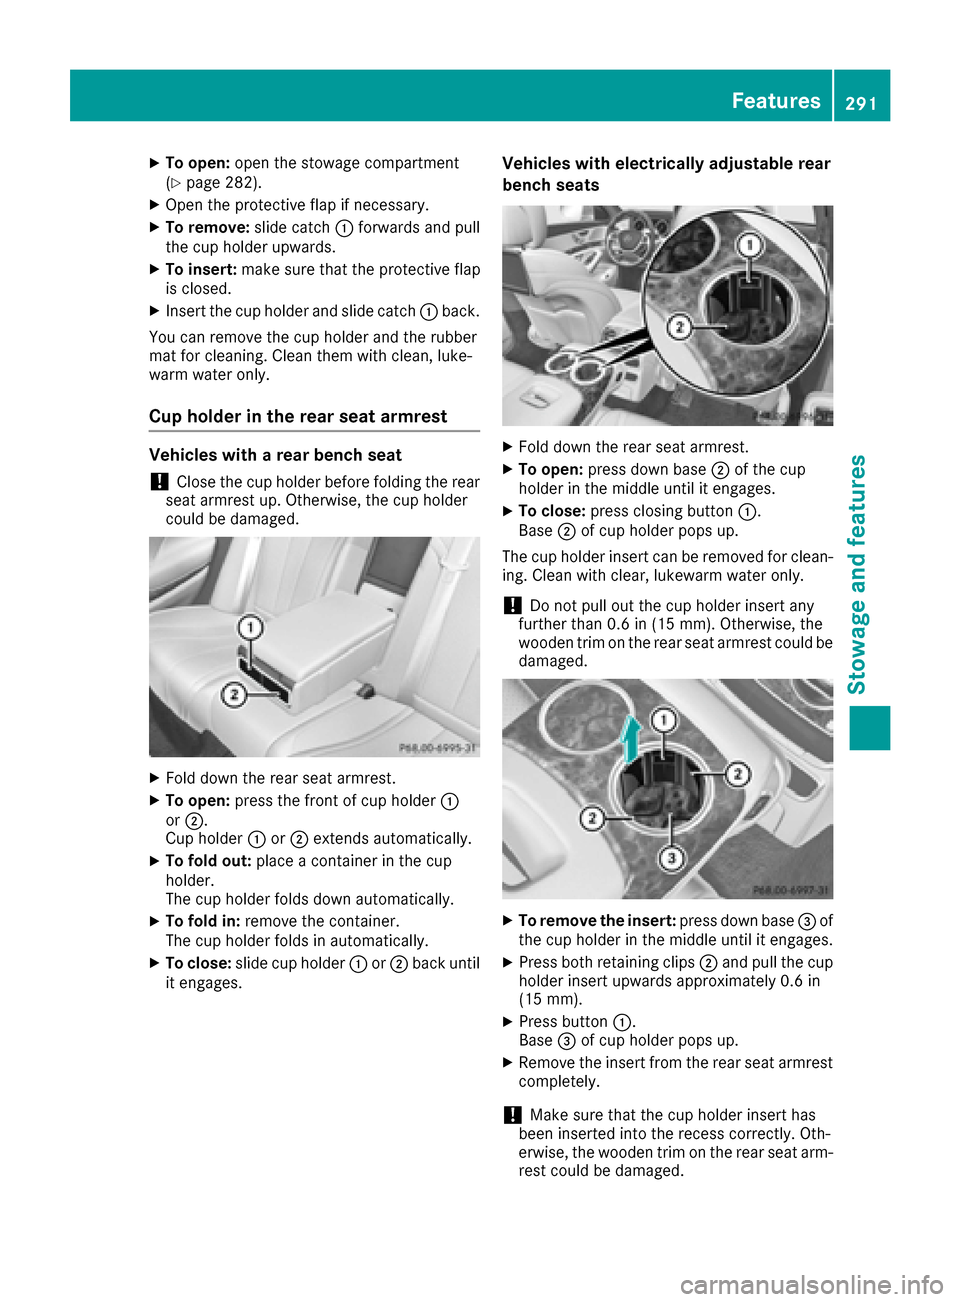
XFold down the rear seat armrest.
XTo open: press the front of cup holder :
or ;.
Cup holder :or; extends automatically.
XTo fold out: place a container in the cup
holder.
The cup holder folds down automatically.
XTo fold in: remove the container.
The cup holder folds in automatically.
XTo close: slide cup holder :or; back until
it engages.
Vehicles with electrically adjustable rear
bench seats
XFold down the rear seat armrest.
XTo open: press down base ;of the cup
holder in the middle until it engages.
XTo close: press closing button :.
Base ;of cup holder pops up.
The cup holder insert can be removed for clean-
ing. Clean with clear, lukewarm water only.
!Do not pull out the cup holder insert any
further than 0.6 in (15 mm). Otherwise, the
wooden trim on the rear seat armrest could be
damaged.
XTo remove the insert: press down base=of
the cup holder in the middle until it engages.
XPress both retaining clips ;and pull the cup
holder insert upwards approximately 0.6 in
(15 mm).
XPress button :.
Base =of cup holder pops up.
XRemove the insert from the rear seat armrest
completely.
!Make sure that the cup holder insert has
been inserted into the recess correctly. Oth-
erwise, the wooden trim on the rear seat arm-
rest could be damaged.
Features291
Stowag ean d features
Z
Page 294 of 382
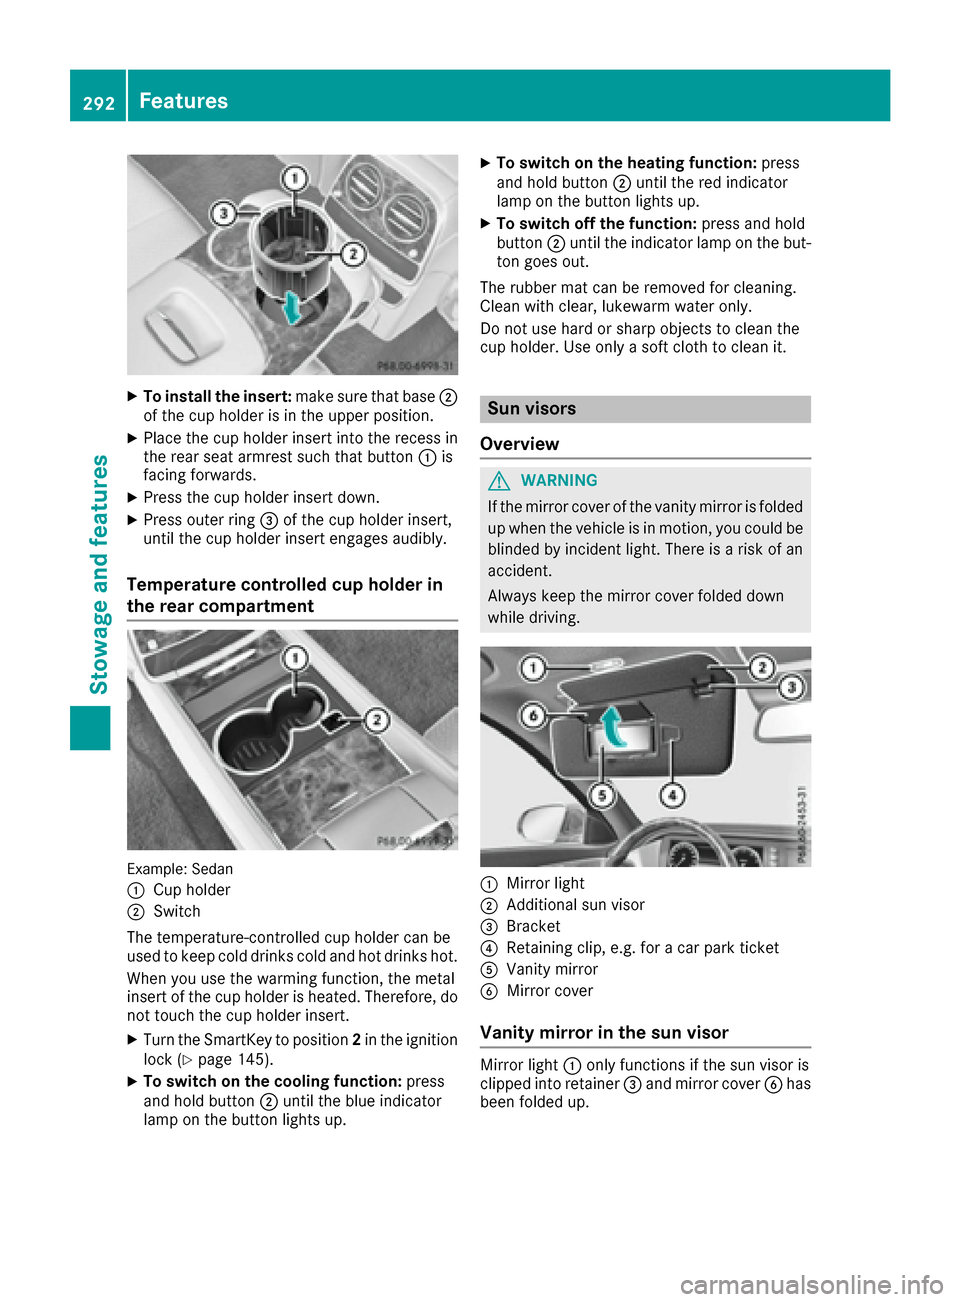
XTo install the insert:make sure that base;
of the cup holder is in the upper position.
XPlace the cup holder insert into the recess in
the rear seat armrest such that button :is
facing forwards.
XPress the cup holder insert down.
XPress outer ring =of the cup holder insert,
until the cup holder insert engages audibly.
Temperature controlled cup holder in
the rear compartment
Example: Sedan
:
Cup holder
;Switch
The temperature-controlled cup holder can be
used to keep cold drinks cold and hot drinks hot.
When you use the warming function, the metal
insert of the cup holder is heated. Therefore, do not touch the cup holder insert.
XTurn the SmartKey to position 2in the ignition
lock (Ypage 145).
XTo switch on the cooling function: press
and hold button ;until the blue indicator
lamp on the button lights up.
XTo switch on the heating function: press
and hold button ;until the red indicator
lamp on the button lights up.
XTo switch off the function: press and hold
button ;until the indicator lamp on the but-
ton goes out.
The rubber mat can be removed for cleaning.
Clean with clear, lukewarm water only.
Do not use hard or sharp objects to clean the
cup holder. Use only a soft cloth to clean it.
Sun visors
Overview
GWARNING
If the mirror cover of the vanity mirror is folded
up when the vehicle is in motion, you could be
blinded by incident light. There is a risk of an
accident.
Always keep the mirror cover folded down
while driving.
:Mirror light
;Additional sun visor
=Bracket
?Retaining clip, e.g. for a car park ticket
AVanity mirror
BMirror cover
Vanity mirror in the sun visor
Mirror light :only functions if the sun visor is
clipped into retainer =and mirror cover Bhas
been folded up.
292Features
Stowag ean d features
Page 317 of 382
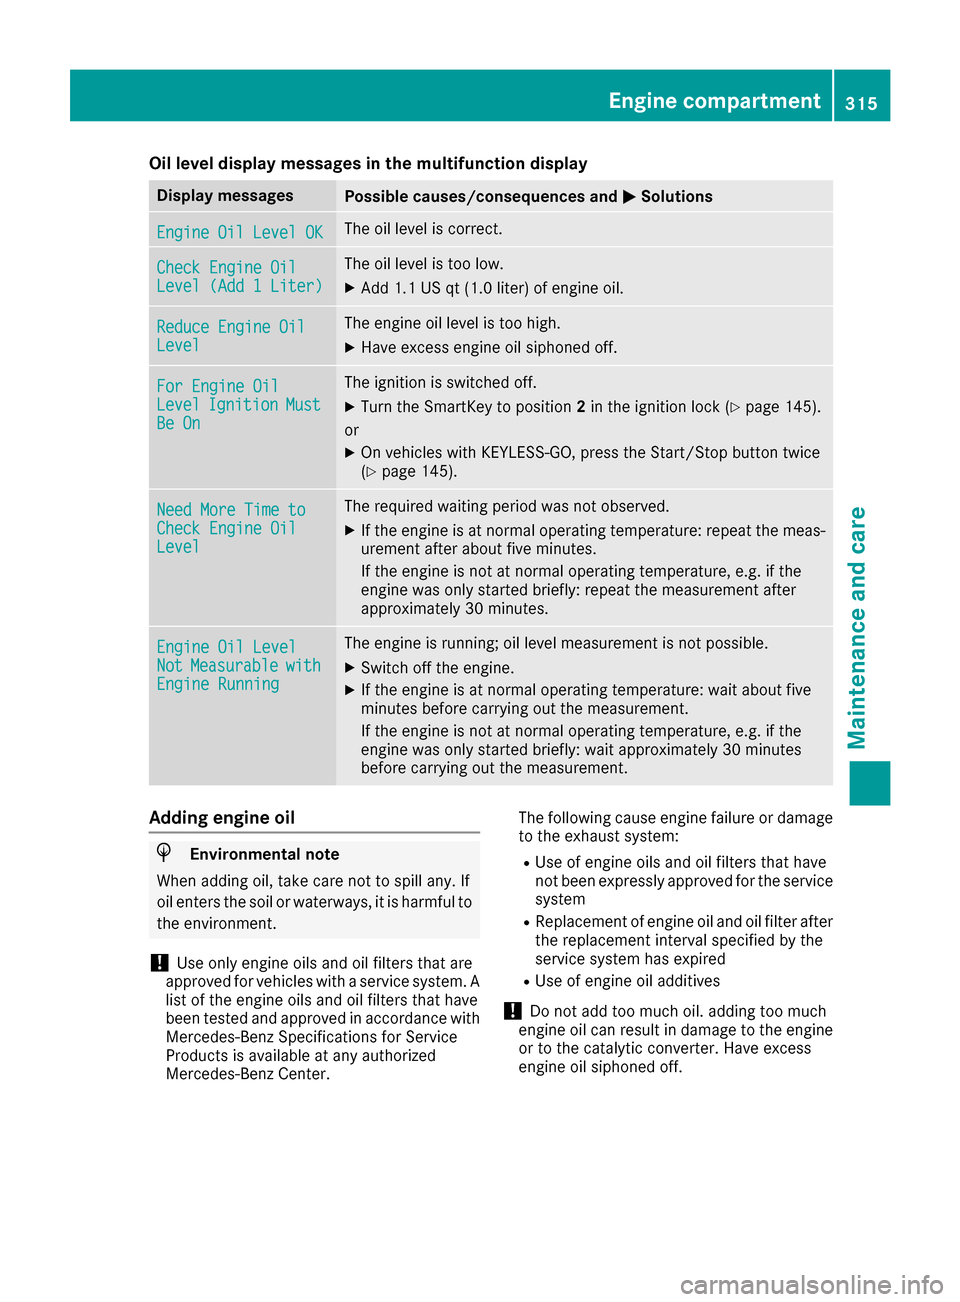
Oil level display messages in the multifunction display
Display messagesPossible causes/consequences andMSolutions
Engine Oil Level OKThe oil level is correct.
Check Engine OilLevel (Add 1 Liter)
The oil level is too low.
XAdd 1.1 US qt (1.0 liter) of engine oil.
Reduce Engine OilLevel
The engine oil level is too high.
XHave excess engine oil siphoned off.
For Engine OilLevelIgnitionMustBe On
The ignition is switched off.
XTurn the SmartKey to position2in the ignition lock (Ypage 145).
or
XOn vehicles with KEYLESS-GO, press the Start/Stop button twice
(Ypage 145).
Need More Time toCheck Engine OilLevel
The required waiting period was not observed.
XIf the engine is at normal operating temperature: repeat the meas-
urement after about five minutes.
If the engine is not at normal operating temperature, e.g. if the
engine was only started briefly: repeat the measurement after
approximately 30 minutes.
Engine Oil LevelNotMeasurablewithEngine Running
The engine is running; oil level measurement is not possible.
XSwitch off the engine.
XIf the engine is at normal operating temperature: wait about five
minutes before carrying out the measurement.
If the engine is not at normal operating temperature, e.g. if the
engine was only started briefly: wait approximately 30 minutes
before carrying out the measurement.
Adding engine oil
HEnvironmental note
When adding oil, take care not to spill any. If
oil enters the soil or waterways, it is harmful to
the environment.
!Use only engine oils and oil filters that are
approved for vehicles with a service system. A list of the engine oils and oil filters that have
been tested and approved in accordance with
Mercedes-Benz Specifications for Service
Products is available at any authorized
Mercedes-Benz Center. The following cause engine failure or damage
to the exhaust system:
RUse of engine oils and oil filters that have
not been expressly approved for the service
system
RReplacement of engine oil and oil filter after
the replacement interval specified by the
service system has expired
RUse of engine oil additives
!Do not add too much oil. adding too much
engine oil can result in damage to the engine
or to the catalytic converter. Have excess
engine oil siphoned off.
Engine compartment315
Maintenance and care
Z
Page 322 of 382
low speeds. Otherwise, when in transmis-
sion positionDor Rthe automatic trans-
mission will automatically switch to park
position Pand block the wheels.
ROperating with the Start/Stop button:
Do not open the driver's door when the
engine is switched off or at very low
speeds. Otherwise, when in transmission
position Dor Rthe automatic transmission
will automatically switch to park position P
and block the wheels.
Observe the following to make sure that the
automatic transmission stays in position Nneu-
tral:
Operating with the SmartKey:
XMake sure that the ignition is switched on.
XMake sure that the vehicle is stationary.
XDepress and hold the brake pedal.
XShift to neutral N.
XRelease the brake pedal.
XRelease the electric parking brake, if neces-
sary.
XSwitch off the ignition and leave the SmartKey
in the ignition lock.
Operating with the Start/Stop button:
XMake sure that the ignition is switched on.
XMake sure that the vehicle is stationary.
XDepress and hold the brake pedal.
XEngage park position P.
XRelease the brake pedal.
XRemove Start/Stop button from ignition lock
(Ypage 145).
XInsert the SmartKey into the ignition lock.
XSwitch on the ignition.
XDepress and hold the brake pedal.
XShift to neutral N.
XRelease the brake pedal.
XRelease the electric parking brake, if neces-
sary.
XSwitch off the ignition and leave the SmartKey
in the ignition lock.
You can wash the vehicle in an automatic car
wash from the very start.
If the vehicle is very dirty, pre-wash it before
cleaning it in an automatic car wash.
After using an automat
ic car wash, wipe off wax
from the windshield and the wiper blades. This will prevent smears and reduce wiping noises
caused by residue on the windshield.
Washing by hand
In some countries, washing by hand is only
allowed at specially equipped washing bays.
Observe the legal requirements in each country.
XDo not use hot water and do not wash the
vehicle in direct sunlight.
XUse a soft sponge to clean.
XUse a mild cleaning agent, such as a car
shampoo approved by Mercedes-Benz.
XThoroughly hose down the vehicle with a gen-
tle jet of water.
XDo not point the water jet directly towards the
air inlet.
XUse plenty of water and rinse out the sponge
frequently.
XRinse the vehicle with clean water and dry
thoroughly with a chamois.
XDo not let the cleaning agent dry on the paint-
work.
Carefully remove all deposits of road salt as
soon as possible when driving in winter.
Power washers
GWARNING
The water jet from a circular jet nozzle (dirt
blasters) can cause invisible exterior damage
to the tires or chassis components. Compo-
nents damaged in this way may fail unexpect-
edly. There is a risk of an accident.
Do not use power washers with circular jet
nozzles to clean the vehicle. Have damaged
tires or chassis components replaced imme-
diately.
!Always maintain a distance of at least
11.8 in (30 cm) between the vehicle and the
power washer nozzle. Information about the
correct distance is available from the equip-
ment manufacturer.
Move the power washer nozzle around when
cleaning your vehicle.
Do not aim directly at any of the following:
RTires
RDoor gaps, roof gaps, joints, etc.
RElectrical components
320Care
Maintenance and care
Page 323 of 382
RBattery
RConnectors
RLamps
RSeals
RTrim
RVentilation slots
Damaged seals or electrical components can
lead to leaks or failures.
!If the SmartKey is within the rear detection
range of KEYLESS-GO, the following situa-
tions, for example, could lead to the uninten-
tional opening of the trunk:
Rusing a car wash
Rusing a power washer
Make sure that the SmartKey is at least 10 ft
(3 m) away from the vehicle.
Cleaning the paintwork
!Do not affix:
Rstickers
Rfilms
Rmagnetic plates or similar items
to painted surfaces. You could otherwise
damage the paintwork.
Scratches, corrosive deposits, areas affected by corrosion and damage caused by inadequate
care cannot always be completely repaired. In
such cases, visit a qualified specialist workshop.
XRemove dirt immediately, where possible,
while avoiding rubbing too hard.
XSoak insect remains with insect remover and
rinse off the treated areas afterwards.
XSoak bird droppings with water and rinse off
the treated areas afterwards.
XRemove coolant, brake fluid, tree resin, oils,
fuels and greases by rubbing gently with a
cloth soaked in petroleum ether or lighter
fluid.
XUse tar remover to remove tar stains.
XUse silicone remover to remove wax.
If water no longer forms "beads" on the paint
surface, use the paint care products recommen-
ded and approved by Mercedes-Benz. This is the
case approximately every three to five months,
depending on the climate conditions and the
care product used.
The cleaning product Paint Cleaner, which has
been recommended and approved by Mercedes-Benz, should be used when dirt has
penetrated the paint surface.
Also use Paint Cleaner on paint that has become
dull.
Do not use these care products in the sun or on
the hood while the hood is hot.
XUse a suitable touch-up stick, e.g. MB Touch-
Up Stick, to rep
air slight damage to the paint-
work quickly and provisionally.
Matte finish care
!Never polish the vehicle or the light alloy
wheels. Polishing causes the finish to shine.
!The following may cause the paint to
become shiny and thus reduce the matte
effect:
Rstrong rubbing of the paintwork with
unsuitable materials
Rfrequent use of automatic car washes
Rwashing the vehicle in direct sunlight
!Never use paint cleaner, buffing or polishing
products, or gloss preserver, e.g. wax, for the
purpose of paintwork care. These products
are only suitable for high-gloss surfaces. Their
use on vehicles with matte paintwork leads to considerable surface damage or, more spe-
cifically, to shiny, spotted areas.
Always have paintwork repairs carried out at a
qualified specialist workshop.
!Do not use wash programs with a hot wax
treatment under any circumstances.
Observe these notes if your vehicle has a clear
matte finish. This will help you to avoid damage to the paintwork due to incorrect treatment.
These notes also apply to light alloy wheels with
a clear matte finish.
The vehicle should ideally be washed by hand
using a soft sponge, car shampoo and plenty of
water.
Use only insect remover and car shampoo from
the range of approved Mercedes-Benz care
products.
Care321
Maintenance and care
Z
Page 324 of 382
Cleaning the vehicle parts
Cleaning the wheels
GWARNING
The water jet from a circular jet nozzle (dirt
blasters) can cause invisible exterior damage
to the tires or chassis components. Compo-
nents damaged in this way may fail unexpect-
edly. There is a risk of an accident.
Do not use power washers with circular jet
nozzles to clean the vehicle. Have damaged
tires or chassis components replaced imme-
diately.
!Do not use acidic wheel cleaning products
to remove brake dust. This could damage
wheel bolts and brake components.
!Do not park your vehicle for a long period of
time directly after cleaning, particularly after
cleaning the wheel rim with wheel cleaner.
Wheel cleaner can lead to the increased cor-
rosion of the brake discs and pads. Therefore,
drive for a few minutes after cleaning. By
heating up the brakes, the brake discs and
pads dry. The vehicle can then be parked for a
long period of time.
Cleaning the windows
GWARNING
You could become trapped by the windshield wipers if they start moving while cleaning the
windshield or wiper blades. There is a risk of
injury.
Always switch off the windshield wipers and
the ignition before cleaning the windshield or
wiper blades.
!Do not use dry cloths, abrasive products,
solvents or cleaning agents containing sol-
vents to clean the inside of the windows. Do
not touch the insides of the windows with
hard objects, e.g. an ice scraper or ring. There
is otherwise a risk of damaging the windows.
!Clean the water drainage channels of the
windshield and the rear window at regular
intervals. Deposits such as leaves, petals and pollen may under certain circumstances pre-
vent water from draining away. This can lead to corrosion damage and damage to elec-
tronic components.
XClean the inside and outside of the windows
with a damp cloth and a cleaning product that
is recommended and approved by Mercedes-
Benz.
Cleaning wiper blades
GWARNING
You could become trapped by the windshield wipers if they start moving while cleaning the
windshield or wiper blades. There is a risk of
injury.
Always switch off the windshield wipers and
the ignition before cleaning the windshield or
wiper blades.
!Do not pull the wiper blade. Otherwise, the
wiper blade could be damaged.
!Do not clean wiper blades too often and do
not rub them too hard. Otherwise, the graph-
ite coating could be damaged. This could
cause wiper noise.
!Hold the wiper arm securely when folding
back. The windshield could be damaged if the
wiper arm smacks against it suddenly.
XFold the windshield wiper arms away from the
windshield (Ypage 129).
XCarefully clean the wiper blades with a damp
cloth.
XFold the windshield wiper arms back again
before switching on the ignition.
Cleaning the exterior lighting
!Only use cleaning agents or cleaning cloths
which are suitable for plastic light lenses.
Unsuitable cleaning agents or cleaning cloths
could scratch or damage the plastic light len- ses.
XClean the plastic lenses of the exterior lights
with a wet sponge and a mild cleaning agent,
e.g. Mercedes-Benz car shampoo or cleaning
cloths.
322Care
Maintenance and care
Page 325 of 382

Cleaning the mirror turn signals
!Only use cleaning agents or cleaning cloths
that are suitable for plastic lenses. Unsuitable
cleaning agents or cleaning cloths could
scratch or damage the plastic lenses of the
mirror turn signals.
XClean the plastic lenses of the mirror turn sig-
nals in the exterior mirror housing using a wet
sponge and mild cleaning agent, e.g.
Mercedes-Benz car shampoo or cleaning
cloths.
Cleaning the sensors
!If you clean the sensors with a power
washer, make sure that you keep a distance
of at least 11.8 in (30 cm)betwee nthe vehicl e
and the power washer nozzle. Information
about the correct distance is available from
the equipment manufacturer.
XClean sensors :of the driving systems with
water, car shampoo and a soft cloth.
Cleaning the rear view camera and 360°
camera
!Do not clean the camera lens and the area
around the rear view camera or 360° camera
with a power washer.
XMake sure that the vehicle is stationary.
XTurn the SmartKey to position 1or 2in the
ignition lock (Ypage 145).
or
XPress the Start/Stop button once or twice on
vehicles with KEYLESS-GO (Ypage 145).
XOpen the camera cover for cleaning via the
multimedia system; see Digital Operator's
Manual.
XTo clean the camera: use clean water and a
soft cloth to clean the camera lens :.
The camera cover closes automatically:
Rif you are driving at speeds above 6 mph
(10 km/ h)
Rif the ignition is switched off
Cleaning the exhaust pipes
GWARNING
The exhaust tail pipe and tail pipe trim can
become very hot. If you come into contact
with these parts of the vehicle, you could burn
yourself. There is a risk of injury.
Always be particularly careful around the
exhaust tail pipe and the tail pipe trim. Allow
these components to cool down before touch-
ing them.
!Do not clean the exhaust pipe with acid-
based cleaning agents, such as bathroom
cleaner or wheel cleaner.
Impurities combined with the effects of road grit and corrosive environmental factors may cause
flash rust to form on the surface. You can
restore the original shine of the exhaust pipe by
cleaning it regularly, especially in winter and
after washing.
Care323
Maintenance and care
Z
Page 326 of 382
XClean the exhaustpipe with a care product
tested and approved byMercedes-Benz.
Interior care
Cleaning the display
!For cleaning, donot use any of the foll owing:
Ralcohol-based thinner or gasolin e
Rabrasive cleaning agents
Rcommercially-availab lehousehold cleaning
agents
These may damage the display surface. Do
not put pressure on the display surface when
cleaning. This could lead to irreparable dam-
age to the display.
XBefore cleaning the display, make sure that it
is swit ched off and has cooled down.
XClean the display surface using a commer-
cially availab lemicrof ibercloth and TFT /LCD
displ ay cleaner.
XDry the display surface using a dry microf iber
cloth.
Cleaning Night View Assist Plus
Cleaning the camera behind the wind-
shield
!Never clean the camera lens. When cleaning
the field of vision of the driving systems, make
sure that you do not spray glass cleaner on
the camera lens. Ifthe camera lens is dirty,
vis itaqualif ied specialist workshop.
XFolddown the camera cover byrecess :.
XUse a soft cloth to clean the windshield in
front of camera ;.
Cleaning the camera in the radiator trim
Camera lens:iscleaned at regular intervals by
operating the windshield washer system.
XUse clear water and a soft cloth to clean cam-
era lens :when itis very dirty.
Cleaning the plastic trim
GWARNING
Care products and cleaning agents containing solvents cause surfaces in the cockpit to
become porous. As a result, plastic parts may
come loose inthe event of air bag deploy-
ment. There isa risk of injury.
Do not use any care products and cleaning
agents to clean the cockpit.
!Do not aff ixthe foll owing to plastic surfaces:
Rstickers
Rfilms
Rscented oil bottles or similar items
You can otherwise damage the plastic.
324Care
Maintenance and care