2017 MERCEDES-BENZ S-Class COUPE Trunk
[x] Cancel search: TrunkPage 174 of 338
Rif the camera lenses are dirty or covered.
Observe the notes on cleaning
(
Ypage 284)
Rif the vehicle components in which the cam-
eras are installed are damaged. In this event,
have the camera position and setting checked
at a qualified specialist workshop
Do not use the 360° camera in this case. You
can otherwise injure others or cause damage to
objects or the vehicle.
The guide lines on the multimedia system show
the distances to your vehicle. The distances only
apply to road level.
The camera in the rear area is protected from
raindrops and dust by means of a flap. This flap
opens when the 360° camera is activated.
The flap closes again when:
Ryou have finished the maneuvering process
Ryou switch off the engine
Ryou open the trunk
Observe the notes on cleaning (
Ypage 284).
For technical reasons, the flap may remain open
briefly after the 360° camera has been deacti-
vated.
The field of vision and other functions of the
camera system may be restricted due to addi-
tional attachments (e.g. license plate holder,
rear bicycle carrier).
On vehicles with height-adjustable chassis,
depending on technical conditions, leaving the
standard height can result in:
Rinaccuracies in the guide lines
Rinaccuracies in the display of generated
images (top view)
Activation conditions
The image from the 360° camera appears if:
Rthe multimedia system is switched on
Rthe 360° Camerafunction is switched on
If the 360° camera is activated at speeds above
approximately 19 mph (30 km/h), a warning
message appears.
The warning message disappears if:
Rthe vehicle's speed falls below approximately
19 mph (30 km/h). The 360° camera is then
activated.
Rthe message is confirmed with the 0038but-
ton.
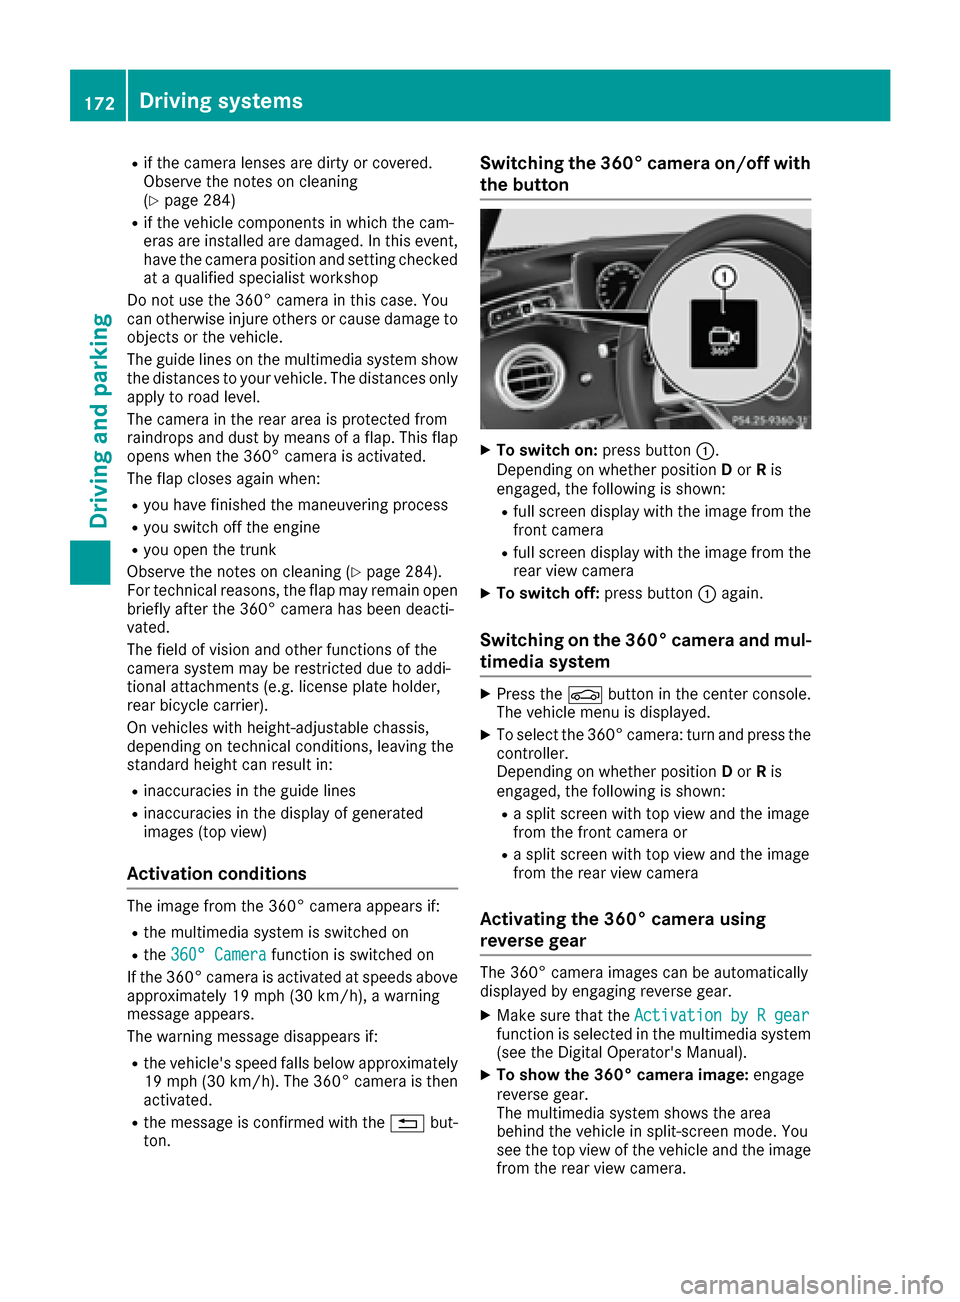
Switching the 360° camera on/off with
the button
XTo switch on: press button0043.
Depending on whether position Dor Ris
engaged, the following is shown:
Rfull screen display with the image from the
front camera
Rfull screen display with the image from the
rear view camera
XTo switch off: press button0043again.
Switching on the 360° camera and mul-
timedia system
XPress the 00D4button in the center console.
The vehicle menu is displayed.
XTo select the 360° camera: turn and press the
controller.
Depending on whether position Dor Ris
engaged, the following is shown:
Ra split screen with top view and the image
from the front camera or
Ra split screen with top view and the image
from the rear view camera
Activating the 360° camera using
reverse gear
The 360° camera images can be automatically
displayed by engaging reverse gear.
XMake sure that the Activation by R gearfunction is selected in the multimedia system
(see the Digital Operator's Manual).
XTo show the 360° camera image: engage
reverse gear.
The multimedia system shows the area
behind the vehicle in split-screen mode. You
see the top view of the vehicle and the image
from the rear view camera.
172Driving systems
Driving and parking
Page 175 of 338
Selecting the split-screen view and full
screen mode
Switching between split screen views:
XTo switch to the line with the vehicle icons:
slide5the controller.
XTo select a vehicle icon: turn the controller.
Switching to full screen mode:
XTurn and press 180°Viewwith the controller.
The 180° option is only available in the following
views:
RTop view with picture from the rear view cam-
era
RTop view with picture from the front camera
Displays in the multimedia system
Important safety notes
The camera system may show a distorted view
of obstacles, show them incorrectly or not at all.
Obstacles are not shown by the system in the
following locations:
Runder the front and rear bumpers
Rvery close to the front and rear bumpers
Rin close range above the handle on the trunk
lid
Rvery close to the exterior mirrors
Rin the transitional areas between the various
cameras in the virtual top view
!Objects not at ground level may appear to
be further away than they actually are, e.g.:
Rthe bumper of a parked vehicle
Rthe drawbar of a trailer
Rthe ball coupling of a trailer tow hitch
Rthe rear section of an HGV
Ra slanted post
Use the guidelines only for orientation.
Approach objects no further than the bottom-
most guideline.
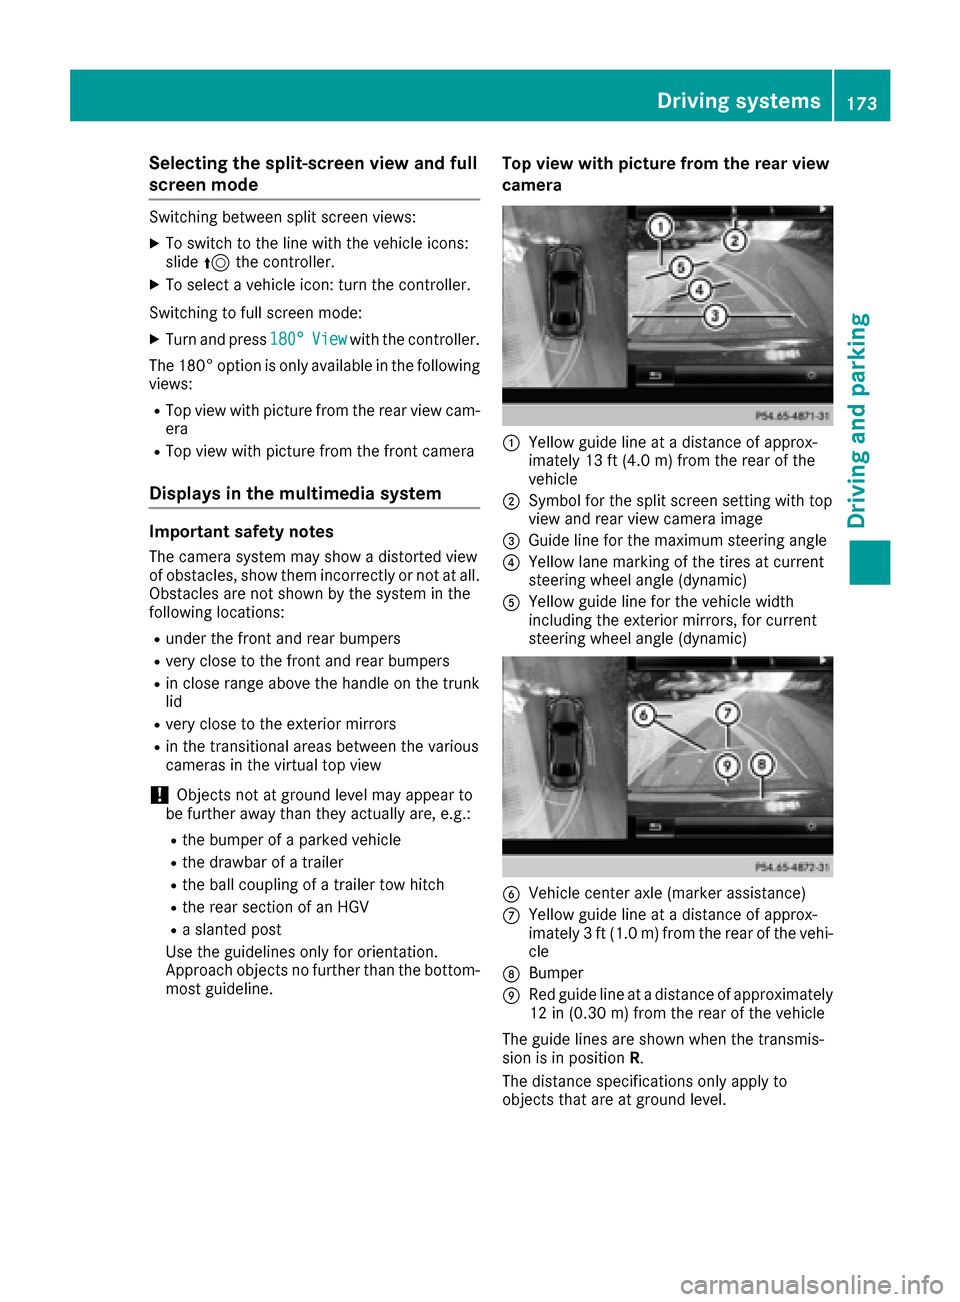
Top view with picture from the rear view
camera
0043Yellow guide line at a distance of approx-
imately 13 ft (4.0 m) from the rear of the
vehicle
0044Symbol for the split screen setting with top
view and rear view camera image
0087Guide line for the maximum steering angle
0085Yellow lane marking of the tires at current
steering wheel angle (dynamic)
0083Yellow guide line for the vehicle width
including the exterior mirrors, for current
steering wheel angle (dynamic)
0084Vehicle center axle (marker assistance)
006BYellow guide line at a distance of approx-
imately 3 ft (1.0 m) from the rear of the vehi-
cle
006CBumper
006DRed guide line at a distance of approximately
12 in (0.30 m) from the rear of the vehicle
The guide lines are shown when the transmis-
sion is in position R.
The distance specifications only apply to
objects that are at ground level.
Driving systems173
Driving and parking
Z
Page 231 of 338
Display messagesPossible causes/consequences and0050Solutions
Auxiliary BatteryMalfunctionThe auxiliary battery for th etransmission is no longer bein gcharged.
XVisit aqualified specialist workshop .
XUntilthen ,set th etransmission to position Pbefore you switch off
th eengine.
XBefor eleaving th evehicle, apply th eelectric parking brake.
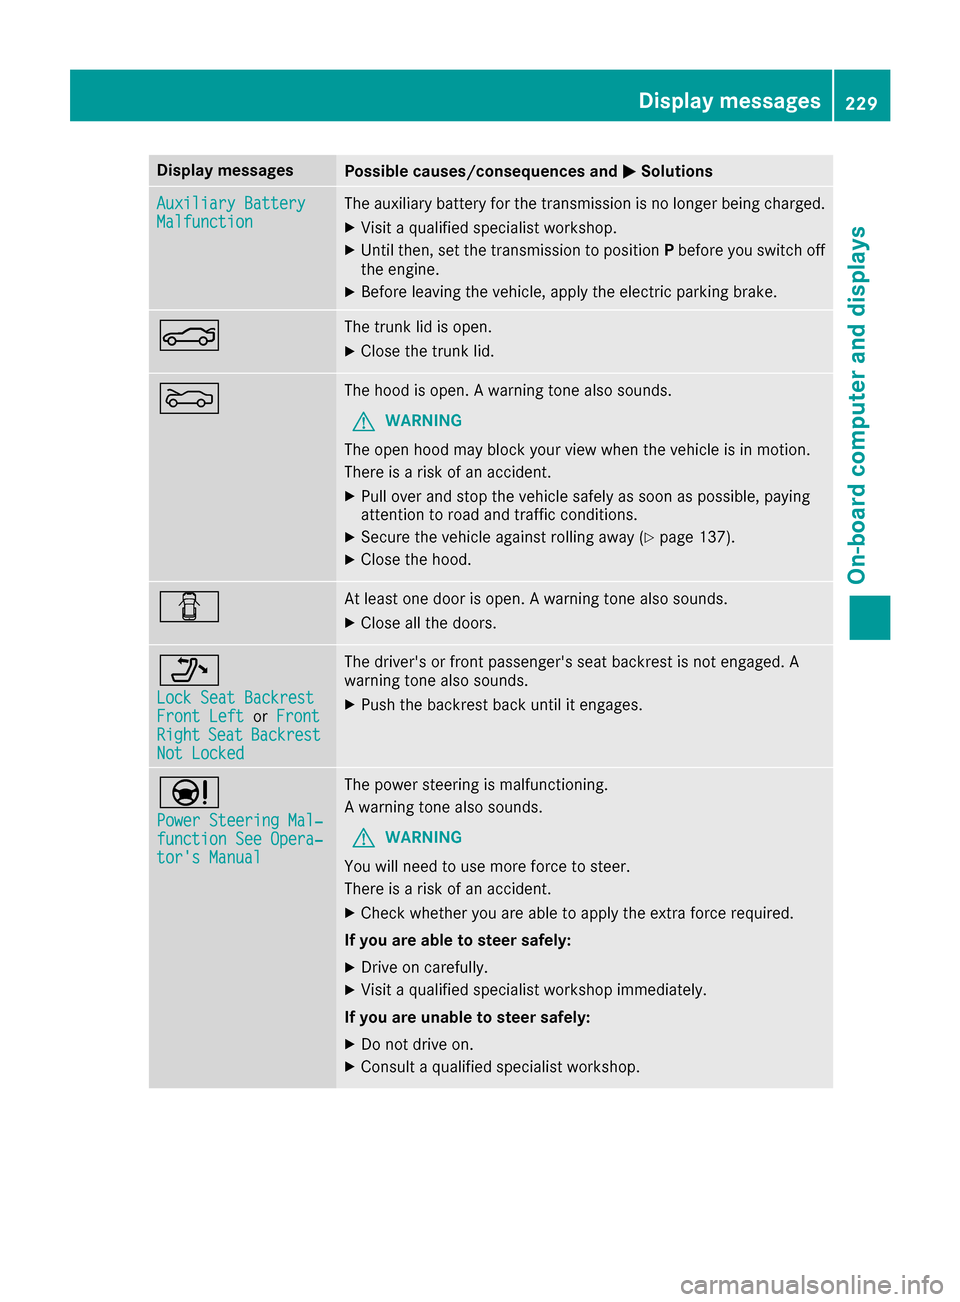
0084The trunk lid is open .
XCloseth etrunk lid.
0083The hoo dis open . Awarning tone also sounds.
GWARNIN G
The open hoo dmay bloc kyour vie wwhen th evehicl eis in motion .
There is aris kof an accident.
XPull ove rand stop th evehicl esafely as soo nas possible, payin g
attention to roa dand traffic conditions.
XSecur eth evehicl eagainst rollin gaway (Ypage 137).
XCloseth ehood.
0051At least on edoor is open . Awarning tone also sounds.
XClos eall th edoors.
006F
Loc kSea tBackrestFront Lef torFrontRightSea tBackrestNot Locked
The driver's or fron tpassenger's seat backrest is no tengaged. A
warning tone also sounds.
XPush th ebackrest bac kuntil it engages.
00CC
Power Steering Mal ‐function See Opera‐tor's Manual
The powersteering is malfunctioning .
A warning tone also sounds.
GWARNIN G
You will need to use mor eforce to steer .
There is aris kof an accident.
XChec kwhether you are able to apply th eextr aforce required.
If you ar eabl eto steer safely:
XDrive on carefully.
XVisit aqualified specialist workshop immediately.
If you ar eunable to steer safely:
XDo no tdrive on .
XConsult aqualified specialist workshop .
Display messages229
On-board computer and displays
Z
Page 255 of 338
Stowage areas
Loading guidelines
GWARNING
Combustion engines emit poisonous exhaust
gases such as carbon monoxide. Exhaust
gases can enter the vehicle interior if the
trunk lid is open when the engine is running,
especially if the vehicle is in motion. There is a
risk of poisoning.
Always switch off the engine before opening
the trunk lid. Never drive with the trunk lid
open.
GWARNING
If objects, luggage or loads are not secured or
not secured sufficiently, they could slip, tip
over or be flung around and thereby hit vehicle
occupants. There is a risk of injury, particu-
larly in the event of sudden braking or a sud-
den change in direction.
Always store objects so that they cannot be
flung around. Secure objects, luggage or
loads against slipping or tipping before the
journey.
GWARNING
The exhaust tail pipe and tail pipe trim can
become very hot. If you come into contact
with these parts of the vehicle, you could burn
yourself. There is a risk of injury.
Always be particularly careful around the
exhaust tail pipe and the tail pipe trim. Allow
these components to cool down before touch-
ing them.
The handling characteristics of a laden vehicle
are dependent on the distribution of the load
within the vehicle. For this reason, you should
observe the following notes when transporting a
load:
RNever exceed the maximum permissible
gross vehicle mass or the gross axle weight
rating for the vehicle (including occupants).
The values are specified on the vehicle iden- tification plate on the B-pillar of the driver's
door.
RThe trunk is the preferred place to carry
objects.
RPosition heavy loads as far forwards as pos-
sible and as low down in the trunk as possible.
RThe load must not protrude above the upper
edge of the seat backrests.
RAlways place the load behind unoccupied
seats if possible.
RSecure the load with sufficiently strong and
wear-resistant tie-downs. Pad sharp edges for
protection.
Stowage spaces
Important safety notes
GWARNING
If objects in the passenger compartment are
stowed incorrectly, they can slide or be
thrown around and hit vehicle occupants. In
addition, cupholders, open stowage spaces
and mobile phone brackets cannot always
retain all objects they contain. There is a risk of injury, particularly in the event of sudden
braking or a sudden change in direction.
RAlways stow objects so that they cannot be
thrown around in such situations.
RAlways make sure that objects do not pro-
trude from stowage spaces, parcel nets or
stowage nets.
RClose the lockable stowage spaces before
starting a journey.
RAlways stow and secure heavy, hard, poin-
ted, sharp-edged, fragile or bulky objects in
the trunk.
Observe the loading guidelines (
Ypage 253).
Stowage areas253
Stowage and features
Z
Page 258 of 338
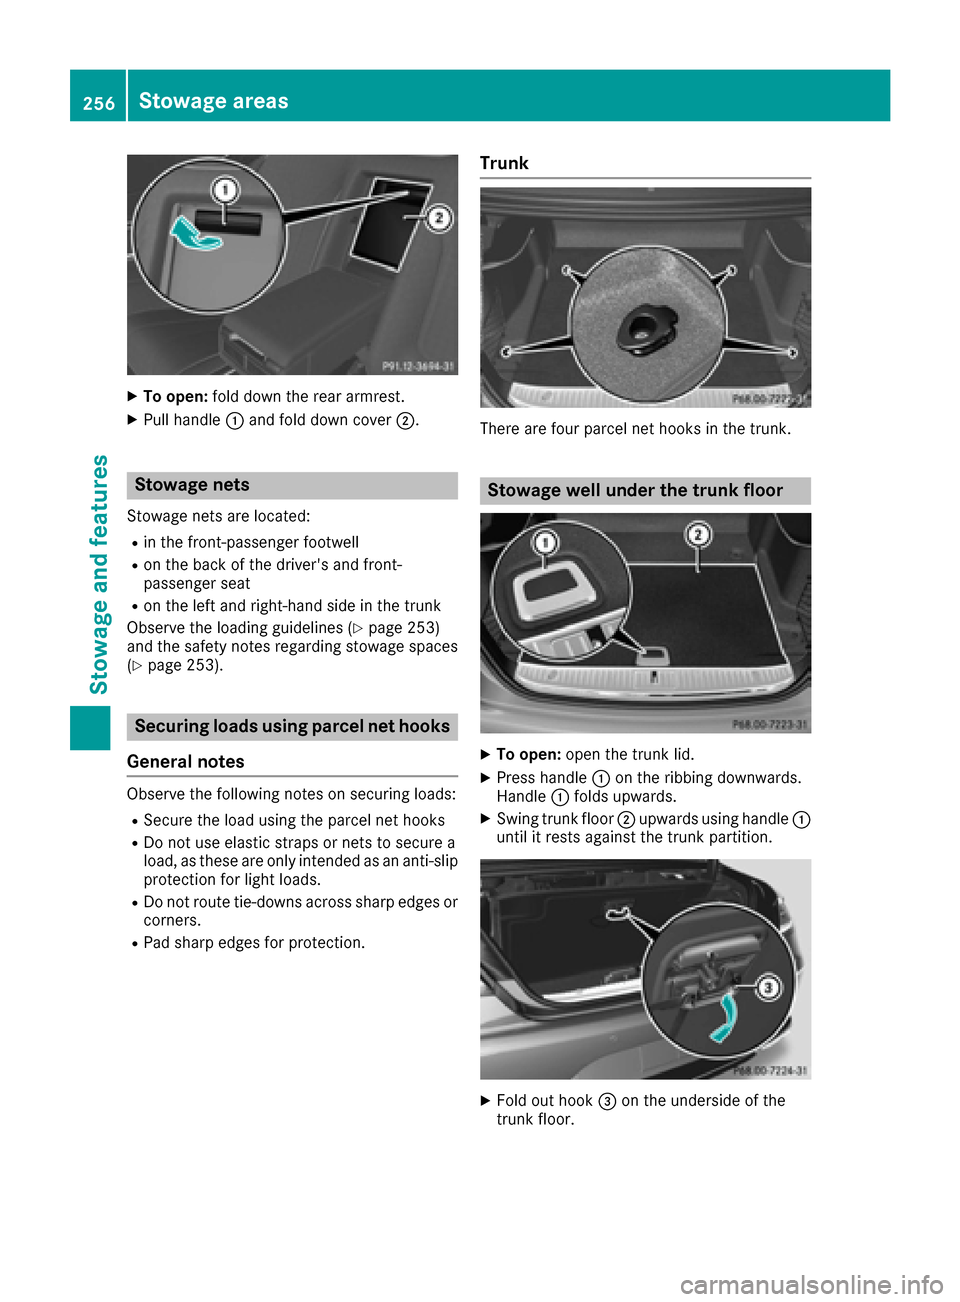
XTo open:fold down the rear armrest.
XPull handle 0043and fold down cover 0044.
Stowage nets
Stowage nets are located:
Rin the front-passenger footwell
Ron the back of the driver's and front-
passenger seat
Ron the left and right-hand side in the trunk
Observe the loading guidelines (
Ypage 253)
and the safety notes regarding stowage spaces
(
Ypage 253).
Securing loads using parcel net hooks
General notes
Observe the following notes on securing loads:
RSecure the load using the parcel net hooks
RDo not use elastic straps or nets to secure a
load, as these are only intended as an anti-slip protection for light loads.
RDo not route tie-downs across sharp edges or
corners.
RPad sharp edges for protection.
Trunk
There are four parcel net hooks in the trunk.
Stowage well under the trunk floor
XTo open: open the trunk lid.
XPress handle 0043on the ribbing downwards.
Handle 0043folds upwards.
XSwing trunk floor 0044upwards using handle 0043
until it rests against the trunk partition.
XFold out hook 0087on the underside of the
trunk floor.
256Stowage areas
Stowag ean d features
Page 259 of 338
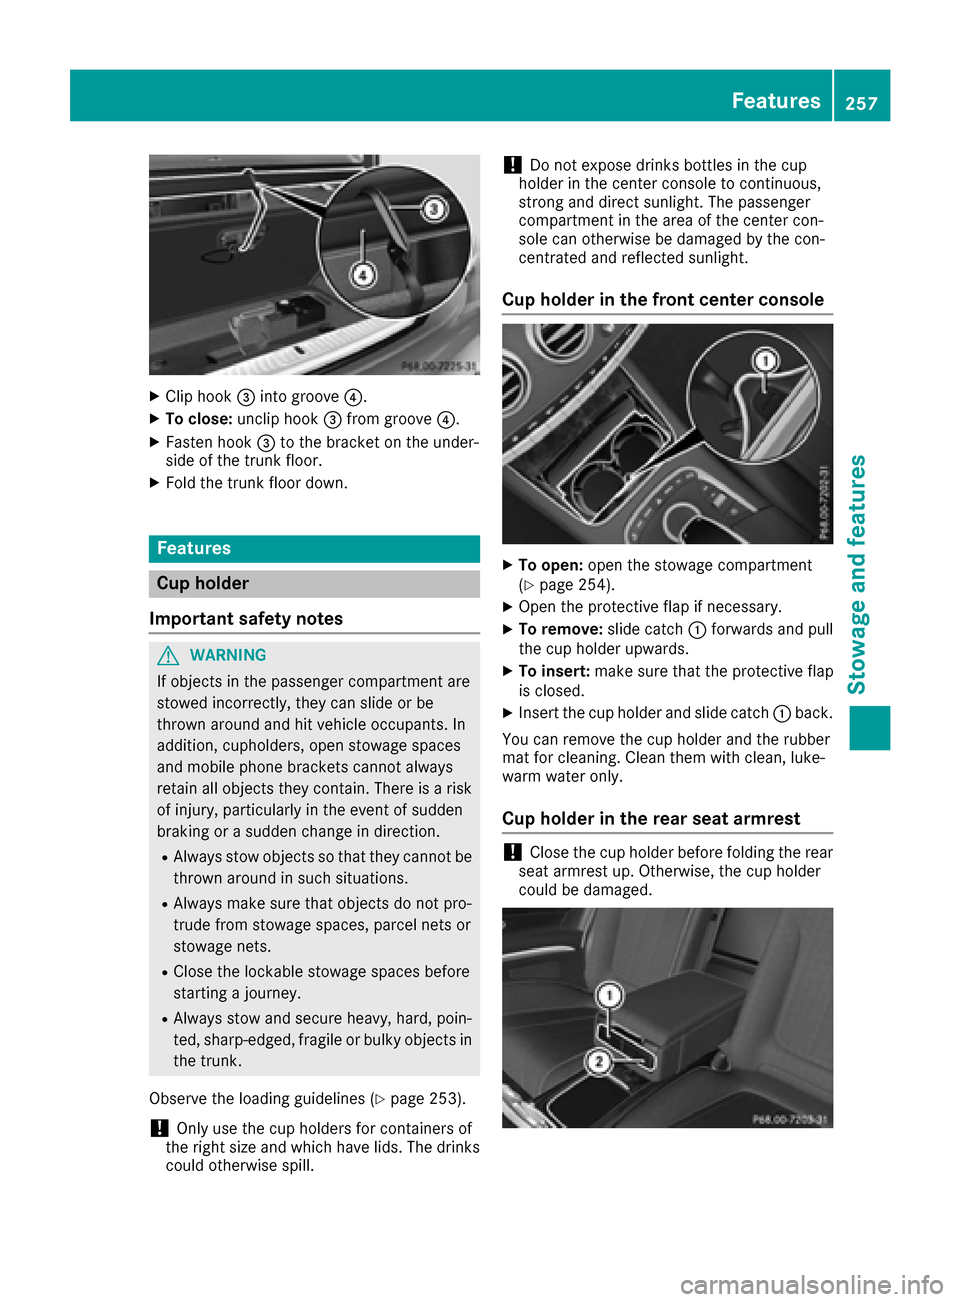
XCliphook 0087into groove 0085.
XTo close:uncliphook 0087from groove 0085.
XFasten hook 0087to the bracket on the under-
side of the trunk floor.
XFold the trunk floor down.
Features
Cup holder
Important safety notes
GWAR NING
If objects inthe passenger compartment are
stowed incorrectly, they can slideorbe
thrown around and hit veh icleoccupants. In
addit ion, cupholders, open stowage spaces
and mob ilephone brackets cannot always
retain all objects they contain. There isa risk
of injury, particular ly inthe event of sudden
braking or a sudden change in direction.
RAlways stow objects so that they cannot be
thrown around insuch situations.
RAlwa ys make sure that objects donot pro-
trude from stowage spaces, parcel nets or
stowage nets.
RClose the lockab lestowage spaces before
starting a journey.
RAlwa ys stow and secure heavy, hard, poin-
te d, sharp-edged, fragile or bulky objects in
the trunk.
Observe the loading guidelines (
Ypage 253).
!Onlyuse the cup holders for containers of
the right size and which have lids.Thedrinks
could otherwise spill.
!Do not expose drinks bottles in the cup
holder in the center console to continuous,
strong and direct sunlight. The passenger
compartment in the area of the center con-
sole can otherwise bedamaged by the con-
centrated and reflected sunlight.
Cup holder in the front center console
XTo open: open the stowage compartment
(Ypage 254).
XOpen the protective flap ifnecessary.
XTo remove: slide catch0043forwards and pull
the cup holder upwards.
XTo insert: make sure that the protective flap
is closed.
XInsert the cup holder and slide catch 0043back.
You can remove the cup holder and the rubber
mat for cleaning. Clean them with clean, luke-
warm water only.
Cup holder in the rear seat armrest
!Close the cup holder before folding the rear
seat armrest up. Otherwise, the cup holder
could bedamaged.
Features257
Stowage and features
Z
Page 262 of 338
12 V sockets
General notes
XTurn the SmartKey to position 1in the ignition
lock (Ypage 121).
The sockets can be used for accessories with a maximum draw of 180 W (15 A). Accessories
include such items as chargers for mobile
phones.
If you use the sockets for long periods when the
engine is switched off, the battery may dis-
charge.
An emergency cut-out ensures that the on-
board voltage does not drop too low. If the on-
board voltage is too low, the power to the sock-
ets is automatically cut. This ensures that there is sufficient power to start the engine.
Socket in the front center console
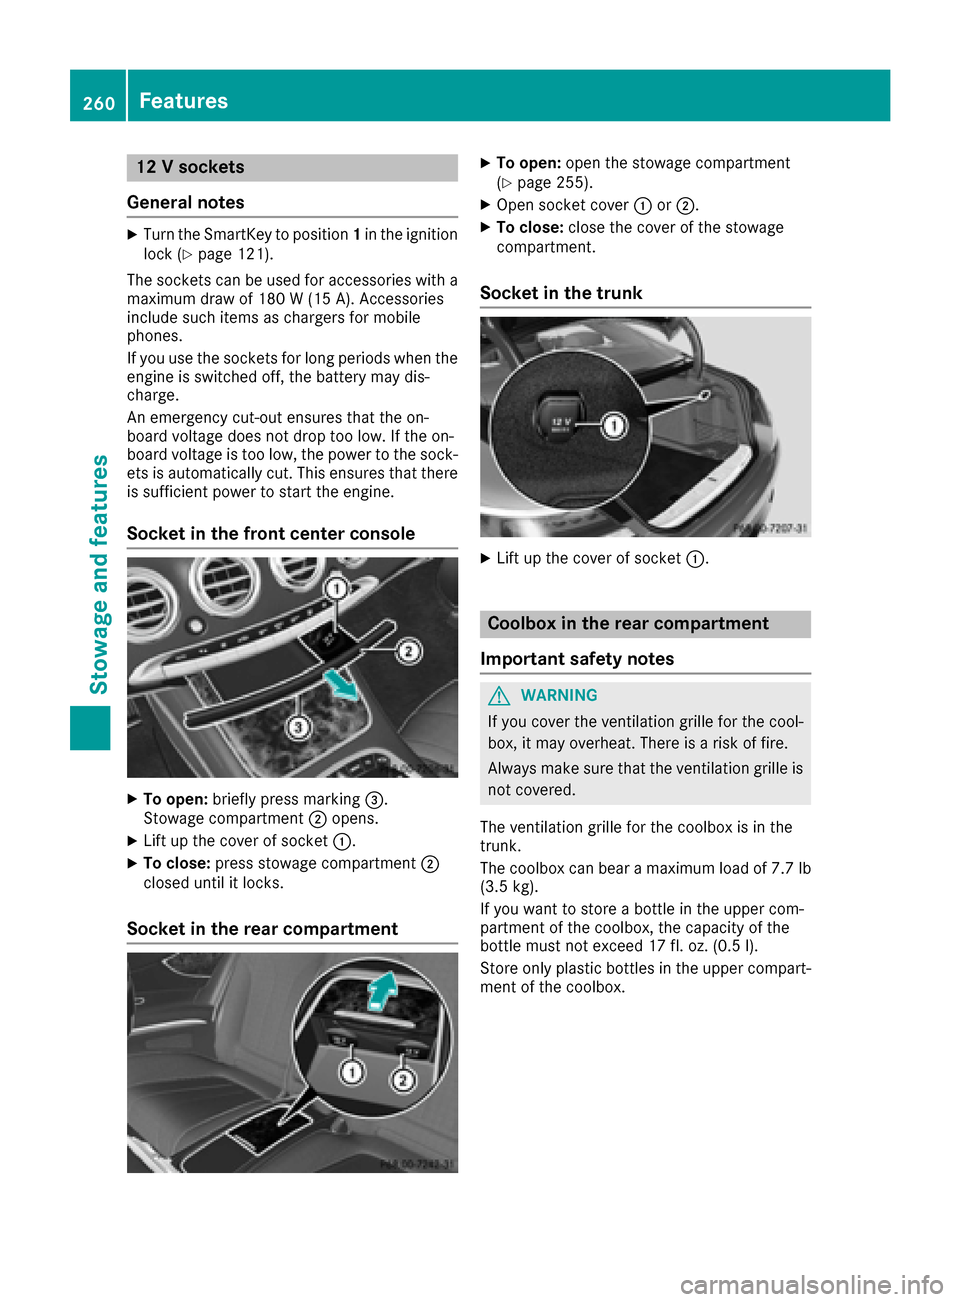
XTo open: briefly press marking 0087.
Stowage compartment 0044opens.
XLift up the cover of socket 0043.
XTo close:press stowage compartment 0044
closed until it locks.
Socket in the rear compartment
XTo open: open the stowage compartment
(Ypage 255).
XOpen socket cover 0043or0044.
XTo close: close the cover of the stowage
compartment.
Socket in the trunk
XLift up the cover of socket 0043.
Coolbox in the rear compartment
Important safety notes
GWARNING
If you cover the ventilation grille for the cool-
box, it may overheat. There is a risk of fire.
Always make sure that the ventilation grille is not covered.
The ventilation grille for the coolbox is in the
trunk.
The coolbox can bear a maximum load of 7.7 lb (3.5 kg).
If you want to store a bottle in the upper com-
partment of the coolbox, the capacity of the
bottle must not exceed 17 fl. oz. (0.5 l).
Store only plastic bottles in the upper compart-
ment of the coolbox.
260Features
Stowage and features
Page 282 of 338
Drivingabroad
An extensive Mercedes-Ben zServic enetwor kis
also available in other countries. You can obtain
further information from any authorized
Mercedes-Ben zCenter.
Car e
General notes
!
Fo rcleanin gyour vehicle, do no tuse any of
th efollowing:
Rdry, rough or har dcloths
Rabrasiv ecleanin gagents
Rsolvents
Rcleanin gagents containin gsolvents
Do no tscrub .
Do no ttouch th esurfaces or protective films
wit hhar dobjects ,e.g. arin gor ic escraper.
You could otherwise scratch or damage th e
surfaces and protective film.
!Do no tpar kyour vehicle fo r alon gperiod of
time directl yafter cleaning, particularly after
cleanin gth ewhee lrim wit hwhee lcleaner.
Wheel cleaner can lead to th eincrease dcor-
rosio nof th ebrake discs and pads .Therefore,
drive fo r afew minutes after cleaning. By
heatin gup th ebrakes, th ebrake discs and
pads dry. The vehicle can then be parke dfo r a
lon gperiod of time.
HEnvironmental not e
Dispose of empty packagin gand cleanin g
cloths in an environmentally responsible man -
ner.
Regular car eof your vehicle is acondition fo r
retainin gth equalit yin th elon gterm .
Use car eproducts and cleanin gagents recom -
mended and approved by Mercedes-Benz.
Washing th evehicle an dcleaning th e
paintwor k
Automatic car was h
GWARNING
Brakin gefficiency is reduce dafter washin g
th evehicle. There is aris kof an accident.
Afte rth evehicle has bee nwashed, brake
carefully whil epayin gattention to th etraffic
condition suntil full braking powe ris restored .
!WhenDISTRONIC PLU Sor th eHOLD func-
tion is activated, th evehicle brake sautomat -
ically in certain situations.
To avoid damage to th evehicle, deactivat e
DISTRONIC PLU Sand th eHOLD function in
th efollowin gor similar situations:
Rwhen towin gth evehicle
Rin th ecar wash
!Never clean your vehicle in aTouchless
Automatic Car Wash as these use special
cleanin gagents .These cleanin gagents can
damage th epaintwor kor plasti cparts .
!Makesur ethat :
Rthesid ewindows are full yclose d
Rtheblower is switched of f
Rthewindshield wipe rswitch is at position 0
Rthe360° camera or rea rvie wcamera is
switched of f
The vehicle may otherwise be damaged .
!If theSmartKey is within th erea rdetection
range of KEYLESS-GO ,th efollowin gsitua-
tions, fo rexample, could lead to th euninten -
tional opening of th etrunk :
Rusing acar wash
Rusin g apowe rwasher
Mak esur ethat th eSmartKey is at leas t10 ft
(3 m) away from th evehicle.
!Mak esur ethat th eautomatic transmissio n
is in neutral position Nwhen washin gyour
vehicle in atow-through car wash .The vehicle
may otherwise be damaged .
ROperatingwit hth eSmartKey:
Do no tremov eth eSmartKey from th eigni-
tion lock. Do no tope nth edriver's doo r
when th eengin eis switched of for at ver y
low speeds .Otherwise ,when in transmis -
sio nposition Dor Rtheautomatic trans -
missio nwill automatically switch to par k
position Pand bloc kth ewheels.
ROperatin gwit hth eStart/Sto pbutton:
Do no tope nth edriver's doo rwhen th e
engin eis switched of for at ver ylow
speeds .Otherwise ,when in transmissio n
position Dor Rth eautomatic transmissio n
280Care
Maintenance and care