2017 MERCEDES-BENZ GLE43AMG SUV key battery
[x] Cancel search: key batteryPage 98 of 366
The system automatically switches down from
level2to level 1after approximately ten
minutes.
The system automatically switches off approx-
imately 35 minutes after it is set to level 1.
XTurn the SmartKey to position1or 2in the
ignition lock (Ypage 125).
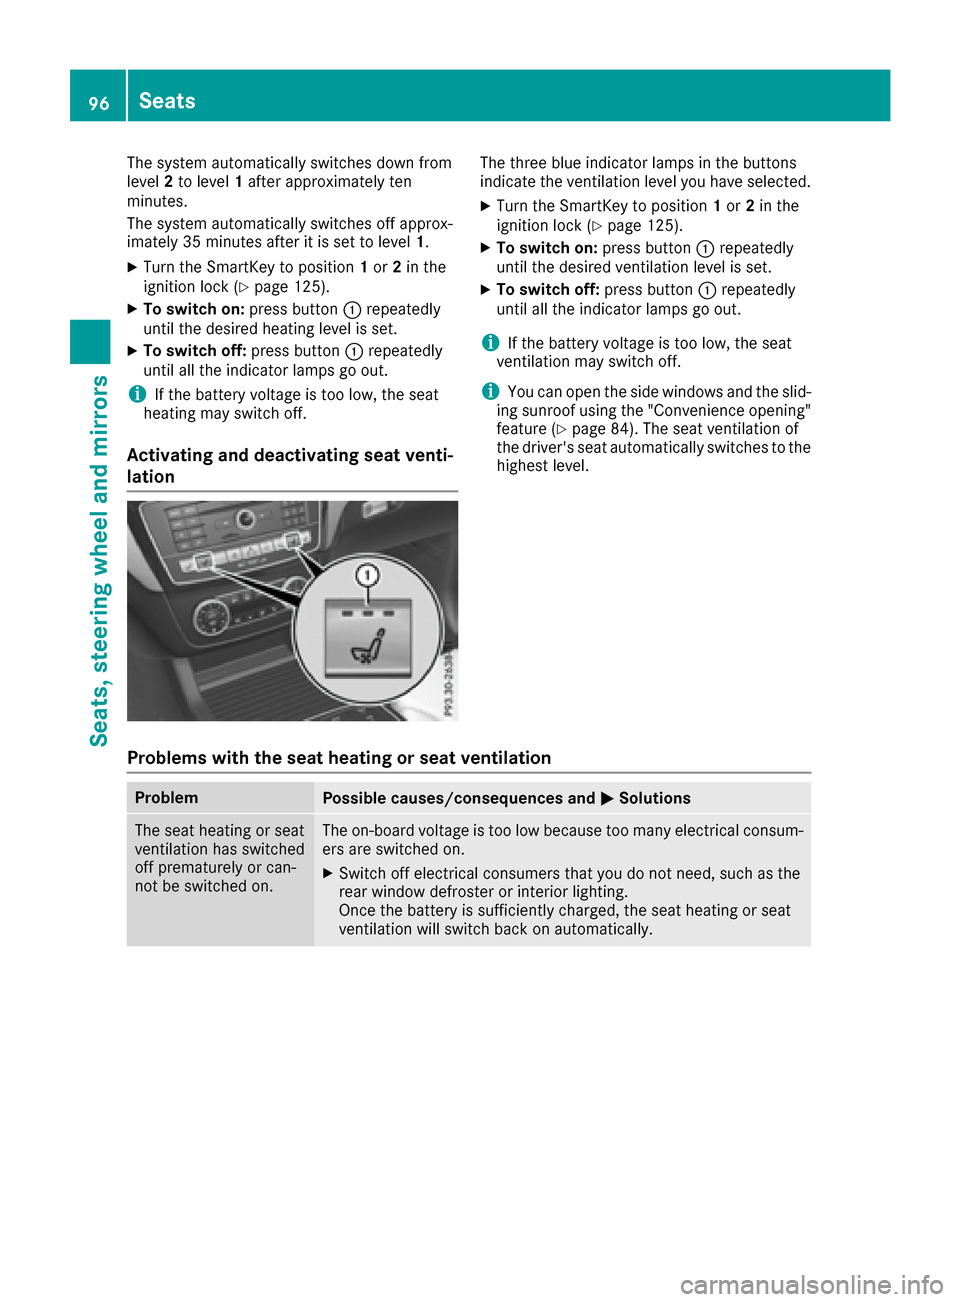
XTo switch on: press button:repeatedly
until the desired heating level is set.
XTo switch off: press button:repeatedly
until all the indicator lamps go out.
iIf the battery voltage is too low, the seat
heating may switch off.
Activating and deactivating seat venti-
lation
The three blue indicator lamps in the buttons
indicate the ventilation level you have selected.
XTurn the SmartKey to position 1or 2in the
ignition lock (Ypage 125).
XTo switch on: press button:repeatedly
until the desired ventilation level is set.
XTo switch off: press button:repeatedly
until all the indicator lamps go out.
iIf the battery voltage is too low, the seat
ventilation may switch off.
iYou can open the side windows and the slid-
ing sunroof using the "Convenience opening"
feature (
Ypage 84). The seat ventilation of
the driver's seat automatically switches to the
highest level.
Problems with the seat heating or seat ventilation
ProblemPossible causes/consequences and MSolutions
The seat heating or seat
ventilation has switched
off prematurely or can-
not be switched on.The on-board voltage is too low because too many electrical consum-
ers are switched on.
XSwitch off electrical consumers that you do not need, such as the
rear window defroster or interior lighting.
Once the battery is sufficiently charged, the seat heating or seat
ventilation will switch back on automatically.
96Seats
Seats, steering wheel and mirrors
Page 102 of 366
XTurn the SmartKey to position1or 2in the
ignition lock (Ypage 125).
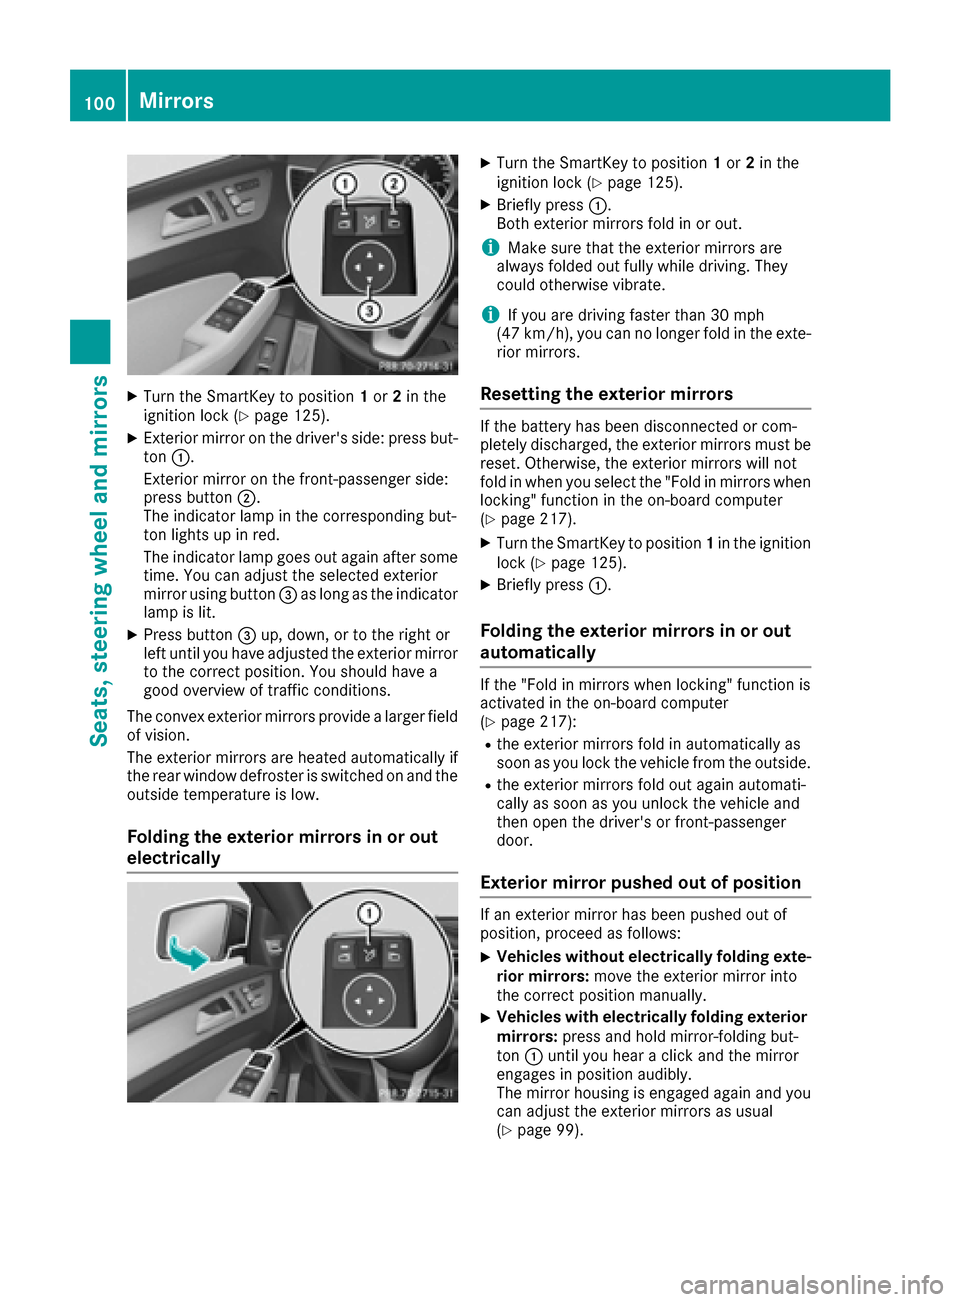
XExterior mirror on the driver's side: press but-
ton :.
Exterior mirror on the front-passenger side:
press button ;.
The indicator lamp in the corresponding but-
ton lights up in red.
The indicator lamp goes out again after some
time. You can adjust the selected exterior
mirror using button =as long as the indicator
lamp is lit.
XPress button =up, down, or to the right or
left until you have adjusted the exterior mirror
to the correct position. You should have a
good overview of traffic conditions.
The convex exterior mirrors provide a larger field
of vision.
The exterior mirrors are heated automatically if
the rear window defroster is switched on and the
outside temperature is low.
Folding the exterior mirrors in or out
electrically
XTurn the SmartKey to position 1or 2in the
ignition lock (Ypage 125).
XBriefly press :.
Both exterior mirrors fold in or out.
iMake sure that the exterior mirrors are
always folded out fully while driving. They
could otherwise vibrate.
iIf you are driving faster than 30 mph
(47 km/h), you can no longer fold in the exte-
rior mirrors.
Resetting the exterior mirrors
If the battery has been disconnected or com-
pletely discharged, the exterior mirrors must be
reset. Otherwise, the exterior mirrors will not
fold in when you select the "Fold in mirrors when
locking" function in the on-board computer
(
Ypage 217).
XTurn the SmartKey to position 1in the ignition
lock (Ypage 125).
XBriefly press :.
Folding the exterior mirrors in or out
automatically
If the "Fold in mirrors when locking" function is
activated in the on-board computer
(
Ypage 217):
Rthe exterior mirrors fold in automatically as
soon as you lock the vehicle from the outside.
Rthe exterior mirrors fold out again automati-
cally as soon as you unlock the vehicle and
then open the driver's or front-passenger
door.
Exterior mirror pushed out of position
If an exterior mirror has been pushed out of
position, proceed as follows:
XVehicles without electrically folding exte-
rior mirrors: move the exterior mirror into
the correct position manually.
XVehicles with electrically folding exterior
mirrors: press and hold mirror-folding but-
ton :until you hear a click and the mirror
engages in position audibly.
The mirror housing is engaged again and you
can adjust the exterior mirrors as usual
(
Ypage 99).
100Mirrors
Seats, steering wheel and mirrors
Page 107 of 366

The daytime running lamps improve the visibility
of your vehicle during the day. To do this, the
daytime running lamps function must be
switched on using the on-board computer
(
Ypage 216).
If the engine is running and you turn the light
switch to TorL, the manual settings
take precedence over the daytime running
lamps.
Low-beam headlamps
Even if the light sensor does not detect that it is
dark, the parking lamps and low-beam head-
lamps switch on when the ignition is switched on and the light switch is set to the Lposition.
This is a particularly useful function in the event
of rain and fog.
XTo switch on the low-beam headlamps:
turn the SmartKey in the ignition lock to posi- tion 2or start the engine.
XTurn the light switch to L.
The green Lindicator lamp in the instru-
ment cluster lights up.
Rear fog lamp
The rear fog lamp improves visibility of your
vehicle for the traffic behind in the event of thick
fog. Please take note of the country-specific
regulations for the use of rear fog lamps.
XTo switch on the rear fog lamp: turn the
SmartKey in the ignition lock to position 2or
start the engine.
XTurn the light switch to Lorà .
XPress the Rbutton.
The yellow Rindicator lamp in the instru-
ment cluster lights up.
XTo switch off the rear fog lamp: press the
R button.
The yellow Rindicator lamp in the instru-
ment cluster goes out.
Parking lamps
!If the battery charge is very low, the parking
lamps or standing lamps are automatically
switched off to enable the next engine start.
Always park your vehicle safely and in a well lit
area, in accordance with the relevant legal
stipulations. Avoid using the Tparking
lamps over a period of several hours. If pos-
sible, switch on the right-hand Xor left-
hand W standing lamps.
XTo switch on: turn the light switch to T.
The green Tindicator lamp in the instru-
ment cluster lights up.
Standing lamps
Switching on the standing lamps ensures the
corresponding side of the vehicle is illuminated.
XTo switch on the standing lamps: the
SmartKey should not be in the ignition lock or
it should be in position 0.
XTurn the light switch toW(left-hand side of
the vehicle) or X(right-hand side of the
vehicle).
Vehicles towing a trailer: both the right-hand
and left-hand standing lamps (tail lamps) are
always illuminated on the trailer.
Combination switch
:High-beam headlamps
;Turn signal, right
=High-beam flasher
?Turn signal, left
XTo indicate briefly: press the combination
switch briefly to the pressure point in the
direction of arrow ;or?.
The corresponding turn signal flashes three
times.
XTo indicate: press the combination switch
beyond the pressure point in the direction of
arrow ;or?.
XTo switch on the high-beam headlamps:
turn the light switch to LorÃ.
XPress the combination switch beyond the
pressure point in the direction of arrow :.
In the Ãposition, the high-beam head-
lamps are only switched on when it is dark and
the engine is running.
Exterior lighting105
Lights and windshield wipers
Z
Page 110 of 366
Always carefully observe the traffic conditions
and switch off the high-beam headlamps in
good time.
Adaptive Highbeam Assist cannot take into
account road, weather or traffic conditions.
Adaptive Highbeam Assist is only an aid. You are
responsible for adjusting the vehicle's lighting
to the prevailing light, visibility and traffic con-
ditions.
In particular, the detection of obstacles can be
impaired if:
Rpoor visibility, e.g. due to fog, heavy rain or
snow
Rdirt on the sensors or the sensors are
obscured
Switching Adaptive Highbeam Assist
on/off
XTo switch on: turn the light switch to Ã.
XPress the combination switch beyond the
pressure point in the direction of arrow :.
The _ indicator lamp in the multifunction
display lights up when it is dark and the light
sensor activates the low-beam headlamps.
If you are driving at speeds above approx-
imately 16 mph (25 km/h):
The headlamp range is set automatically
depending on the distance between the vehi-
cle and other road users.
If you are driving at speeds above approx-
imately 19 mph (30 km/h) and no other road
users have been detected:
The high-beam headlamps are switched on
automatically. The Kindicator lamp in the
instrument cluster also lights up.
If you are driving at speeds below approx-
imately 16 mph (25 km/h) or other road users
have been detected or the roads are ade-
quately lit:
The high-beam headlamps are switched off
automatically. The Kindicator lamp in the
instrument cluster goes out. The _indi-
cator lamp in the multifunction display
remains lit.
XTo switch off:move the combination switch
back to its normal position or move the light
switch to another position.
The _ indicator lamp in the multifunction
display goe s o
ut.
Headlamps fogged up on the inside
Certain climatic and physical conditions may
cause moisture to form in the headlamp. This
moisture does not affect the functionality of the
headlamp.
Interior lighting
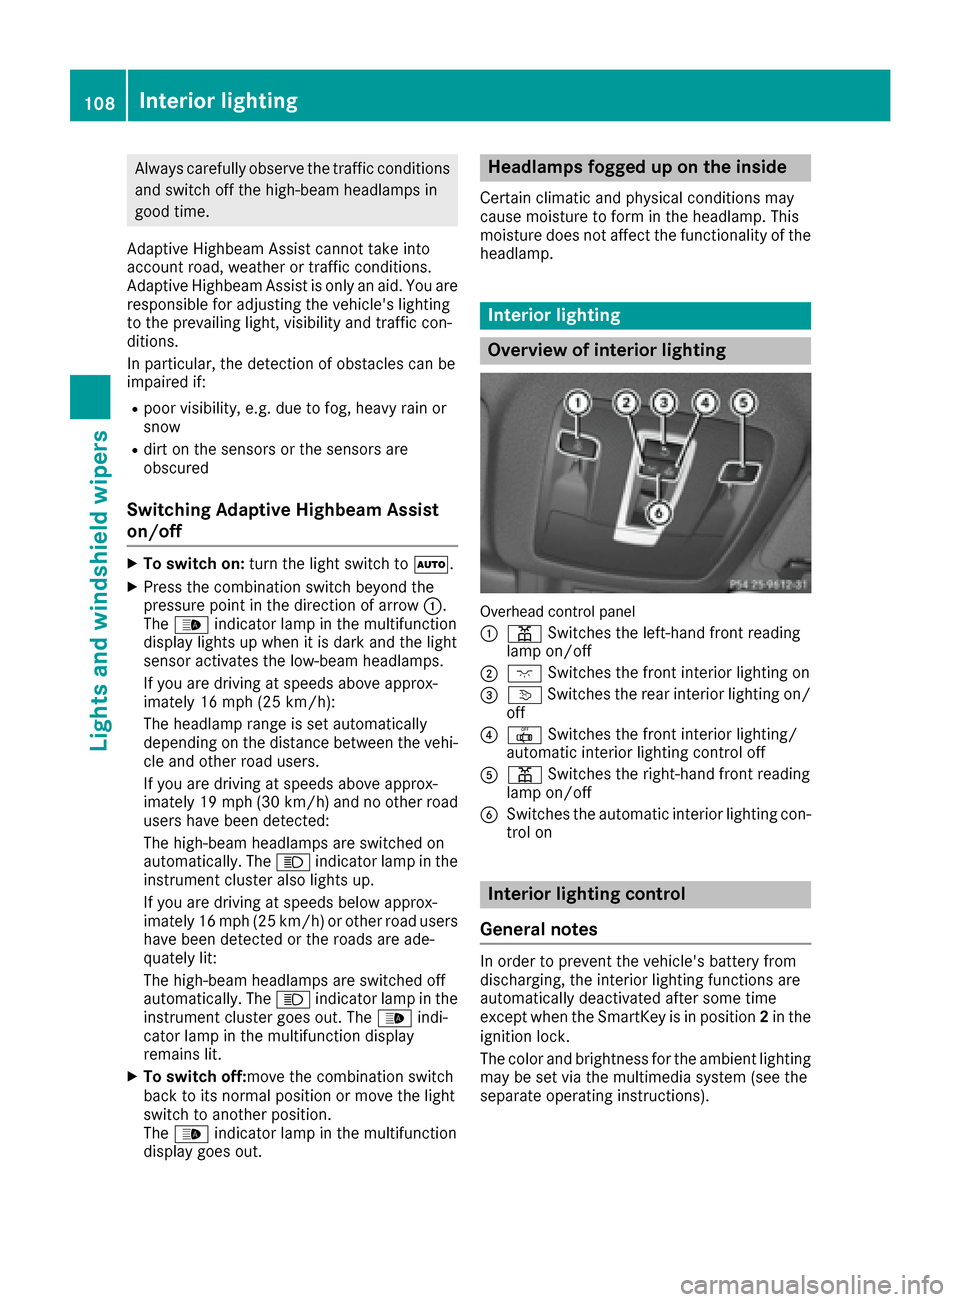
Overview of interior lighting
Overhead control panel
:
pSwitches the left-hand front reading
lamp on/off
;c Switches the front interior lighting on
=vSwitches the rear interior lighting on/
off
?| Switches the front interior lighting/
automatic interior lighting control off
Ap Switches the right-hand front reading
lamp on/off
BSwitches the automatic interior lighting con-
trol on
Interior lighting control
General notes
In order to prevent the vehicle's battery from
discharging, the interior lighting functions are
automatically deactivated after some time
except when the SmartKey is in position 2in the
ignition lock.
The color and brightness for the ambient lighting
may be set via the multimedia system (see the
separate operating instructions).
108Interior lighting
Lights and windshield wiper s
Page 123 of 366
iIf you clean the windows regularly, they do
not fog up so quickly.
Rear window defroster
General notes
The rear window defroster has a high current
draw. You should therefore switch it off as soon
as the rear window is clear. Otherwise, the rear
window defroster switches off automatically
after several minutes. If the battery voltage is too low, the rear window
defroster may switch off.
Switching on/off
XTurn the SmartKey to position 2in the ignition
lock (Ypage 125).
XPress the ¤button.
The indicator lamp in the ¤button lights
up or goes out.
Problems with the rear window defroster
ProblemPossible causes/consequences and MSolutions
The rear window
defroster has deactiva-
ted prematurely or can-
not be activated.The battery has not been sufficiently charged.
XSwitch off any consumers that are not required, e.g. reading lamps,
interior lighting or the seat heating.
When the battery is sufficiently charged, the rear window defroster
can be activated again.
Switching air-recirculation mode
on/off
General notes
You can deactivate the flow of fresh air if
unpleasant odors are entering the vehicle from
outside. The air already inside the vehicle will
then be recirculated.
If you switch on air-recirculation mode, the win-
dows can fog up more quickly, in particular at
low temperatures. Only use air-recirculation
mode briefly to prevent the windows from fog-
ging up.
Switching on/off
XTurn the SmartKey to position 2in the ignition
lock (Ypage 125).
XTo activate: press thedbutton.
The indicator lamp in the dbutton lights
up.
iIn the event of high pollution levels (3-zone
automatic climate control only) or at high out-
side temperatures, air-recirculation mode is
automatically activated. When air-recircula-
tion mode is activated automatically, the indi-
cator lamp in the dbutton is not lit. Outside air is added after about 30 minutes.
XTo deactivate:
press thedbutton.
The indicator lamp in the dbutton goes
out.
iAir-recirculation mode deactivates auto-
matically:
Rafter approximately five minutes at outside
temperatures below approximately 41 ‡
(5 †)
Rafter approximately five minutes if cooling
with air dehumidification is deactivated
Rafter approximately 30 minutes at outside
temperatures above approximately 41 ‡
(5 †) if the "Cooling with air dehumidifica-
tion" function is activated
Switching the residual heat on or off
General notes
The residual heat function is only available on
vehicles for Canada.
It is possible to make use of the residual heat of
the engine to continue heating the stationary
vehicle for up to 30 minutesafter the engine has
Operating the climate control systems121
Climate control
Page 129 of 366
ignite if in contact with the exhaust system or
parts of the engine that heat up. There is a risk
of fire.
Carry out regular checks to make sure that
there are no flammable foreign materials in
the engine compartment or in the exhaust
system.
General notes
Vehicles with a gasoline engine:the catalytic
converter is preheated for up to 30 seconds
after a cold start. The sound of the engine may
change during this time.
Automatic transmission
XShift the transmission to position P
(Ypage 132).
The transmission position display in the mul-
tifunction display shows P(
Ypage 134).
iYou can start the engine in transmission
position Pand N.
Starting procedure with the SmartKey
XTo start a diesel engine : turn the SmartKey
to position 2in the ignition lock (Ypage 125).
The % preglow indicator lamp in the instru-
ment cluster lights up.
XTurn the SmartKey to position 3in the ignition
lock and release it as soon as the engine is
running (
Ypage 125).
iVehicles with a diesel engine: you can
start the engine without preglow if the engine
is warm.
Using KEYLESS-GO to start the engine
The Start/Stop button can be used to start the
vehicle without inserting the SmartKey into the
ignition lock. The Start/Stop button must be
inserted in the ignition lock and the SmartKey
must be in the vehicle. This mode for starting the
engine operates independently of the ECO
start/stop automatic engine start function.
XDepress the brake pedal and keep it
depressed.
XPress the Start/Stop button once
(Ypage 125).
Vehicles with a gasoline engine: the engine
starts.
Vehicles with a diesel engine: preglow is
activated and the engine starts.
Starting procedure via smartphone
Observe the important safety notes on starting
the engine (Ypage 126).
You can also start your engine via your smart-
phone from outside the vehicle. In this case, the
previously selected climate control setting is
activated. In this way you can cool or heat the
interior of the vehicle before starting the jour-
ney.
Only start the engine via your smartphone if it is
safe to start and run the engine where your vehi-
cle is parked.
Observe the legal stipulations in the area where your vehicle is parked. Engine start via smart-
phone may be limited to certain countries or
regions.
You can execute a maximum of two consecutive
starting attempts via your smartphone. If you
insert the SmartKey into the ignition lock, you
can carry out two more starting attempts.
Once you have started the engine, you can
switch the engine off via your smartphone at any
time.
You can only start the engine via your smart-
phone if:
Rthe SmartKey is in the ignition lock
Rpark position Pis selected
Rthe accelerator pedal is not depressed
Rthe anti-theft alarm system is not activated
Rthe panic alarm is not activated
Rthe hazard warning lamps are switched off
Rthe hood is closed.
Rthe doors are closed and locked
Rthe windows and sliding sunroof are closed
Also make sure that:
Rthe fuel tank is sufficiently filled
Rthe starter battery is sufficiently charged
Driving127
Driving and parking
Z
Page 131 of 366
leave the vehicle when it is held by hill start
assist.
Hill start assist is not active if:
Ryou are pulling away on a level road or on a
downhill gradient.
Rthe transmission is in position N.
Rthe electric parking brake is applied.
RESP®is malfunctioning.
ECO start/stop function
Introduction
The ECO start/stop function switches the
engine off automatically if the vehicle is stopped
under certain conditions.
The engine starts automatically when the driver
wants to pull away again. The ECO start/stop
function thereby helps you to reduce the fuel
consumption and emissions of your vehicle.
Important safety notes
GWARNING
If the engine is switched off automatically and
you exit the vehicle, the engine is restarted
automatically. The vehicle may begin moving.
There is a risk of accident and injury.
If you wish to exit the vehicle, always turn off
the ignition and secure the vehicle against
rolling away.
General notes
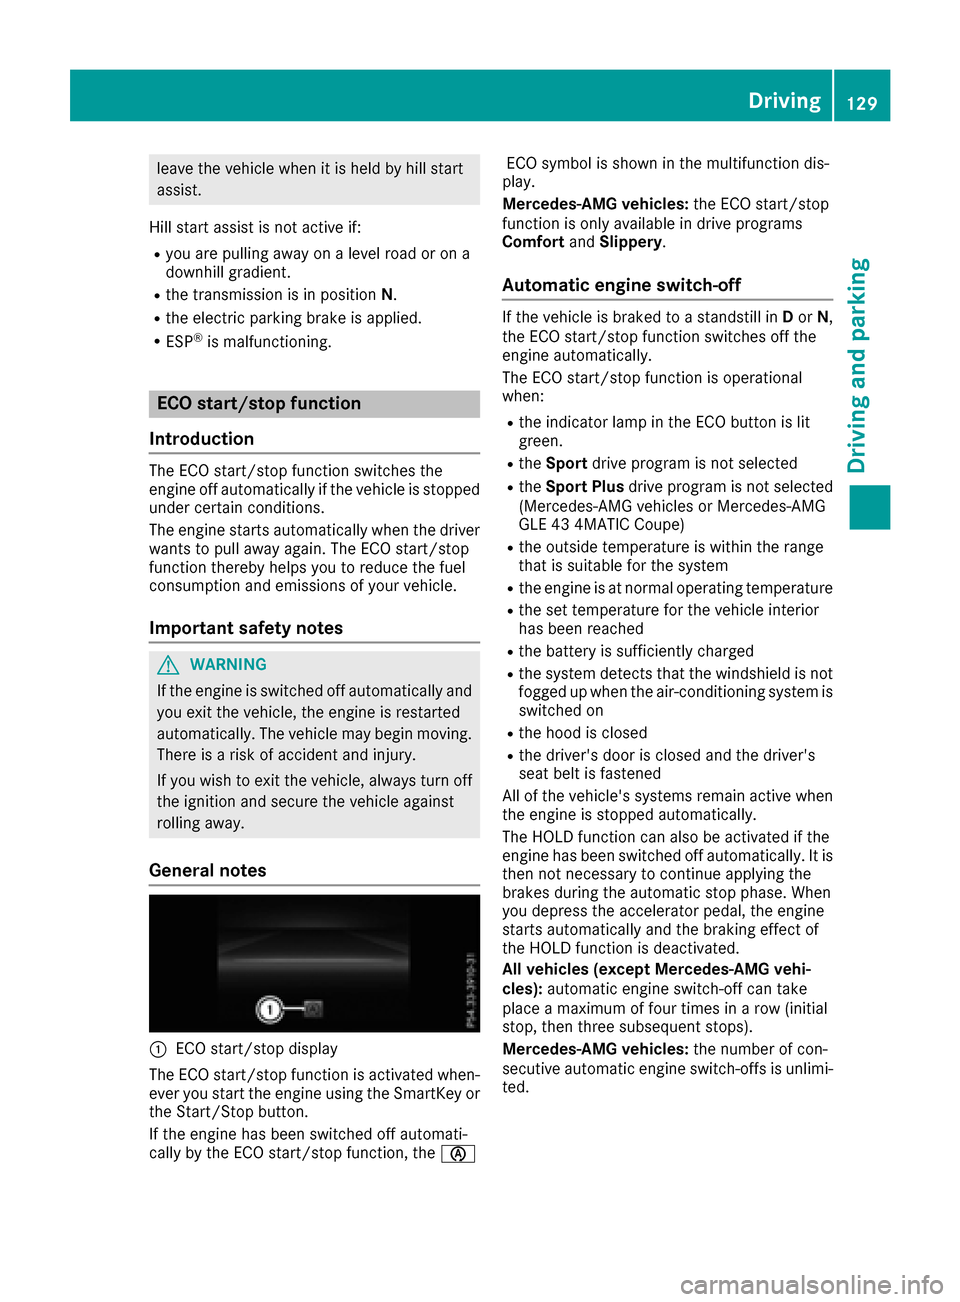
:ECO start/stop display
The ECO start/stop function is activated when-
ever you start the engine using the SmartKey or the Start/Stop button.
If the engine has been switched off automati-
cally by the ECO start/stop function, the èECO symbol is shown in the multifunction dis-
play.
Mercedes-AMG vehicles: the ECO start/stop
function is only available in drive programs
Comfort andSlippery.
Automatic engine switch-off
If the vehicle is braked to a standstill in Dor N,
the ECO start/stop function switches off the
engine automatically.
The ECO start/stop function is operational
when:
Rthe indicator lamp in the ECO button is lit
green.
Rthe Sport drive program is not selected
RtheSport Plus drive program is not selected
(Mercedes-AMG vehicles or Mercedes-AMG
GLE 43 4MATIC Coupe)
Rthe outside temperature is within the range
that is suitable for the system
Rthe engine is at normal operating temperature
Rthe set temperature for the vehicle interior
has been reached
Rthe battery is sufficiently charged
Rthe system detects that the windshield is not
fogged up when the air-conditioning system is switched on
Rthe hood is closed
Rthe driver's door is closed and the driver's
seat belt is fastened
All of the vehicle's systems remain active when
the engine is stopped automatically.
The HOLD function can also be activated if the
engine has been switched off automatically. It is
then not necessary to continue applying the
brakes during the automatic stop phase. When
you depress the accelerator pedal, the engine
starts automatically and the braking effect of
the HOLD function is deactivated.
All vehicles (except Mercedes-AMG vehi-
cles): automatic engine switch-off can take
place a maximum of four times in a row (initial
stop, then three subsequent stops).
Mercedes-AMG vehicles: the number of con-
secutive automatic engine switch-offs is unlimi-
ted.
Driving129
Driving and parking
Z
Page 133 of 366

Problems with the engine
ProblemPossible causes/consequences andMSolutions
The engine does not
start. The starter motor
can be heard.RThere is a malfunction in the engine electronics.
RThere is a malfunction in the fuel supply.
Before attempting to start the engine again:
XTurn the SmartKey back to position 0in the ignition lock.
or
XPress the Start/Stop button repeatedly until all indicator lamps in
the instrument cluster go out.
XTry to start the engine again (Ypage 126). Avoid excessively long
and frequent attempts to start the engine as these will drain the
battery.
If the engine does not start after several attempts:
XConsult a qualified specialist workshop.
The engine does not
start. You cannot hear
the starter motor.The on-board voltage is too low because the battery is too weak or
discharged.
XJump-start the vehicle (Ypage 313).
If the engine does not start despite attempts to jump-start it:
XConsult a qualified specialist workshop.
The starter motor was exposed to a thermal load that was too high.
XAllow the starter motor to cool down for approximately two minutes.
XTry to start the engine again.
If the engine still does not start:
XConsult a qualified specialist workshop.
Vehicles with a gasoline
engine:
The engine is not running
smoothly and is misfir-
ing.There is a malfunction in the engine electronics or in a mechanical
component of the engine management system.
XOnly depress the accelerator pedal slightly.
Otherwise, non-combusted fuel may get into the catalytic converter
and damage it.
XHave the cause rectified immediately at a qualified specialist work-
shop.
The coolant temperature
gage shows a value
above 248 ‡ (120 †).The coolant level is too low. The coolant is too hot and the engine is no
longer being cooled sufficiently.
XStop as soon as possible and allow the engine and the coolant to
cool down.
XCheck the coolant level (Ypage 297). Observe the warning notes
as you do so and add coolant if necessary.
Driving131
Driving and parking
Z