2017 MERCEDES-BENZ GLE43AMG SUV ECO mode
[x] Cancel search: ECO modePage 129 of 366
ignite if in contact with the exhaust system or
parts of the engine that heat up. There is a risk
of fire.
Carry out regular checks to make sure that
there are no flammable foreign materials in
the engine compartment or in the exhaust
system.
General notes
Vehicles with a gasoline engine:the catalytic
converter is preheated for up to 30 seconds
after a cold start. The sound of the engine may
change during this time.
Automatic transmission
XShift the transmission to position P
(Ypage 132).
The transmission position display in the mul-
tifunction display shows P(
Ypage 134).
iYou can start the engine in transmission
position Pand N.
Starting procedure with the SmartKey
XTo start a diesel engine : turn the SmartKey
to position 2in the ignition lock (Ypage 125).
The % preglow indicator lamp in the instru-
ment cluster lights up.
XTurn the SmartKey to position 3in the ignition
lock and release it as soon as the engine is
running (
Ypage 125).
iVehicles with a diesel engine: you can
start the engine without preglow if the engine
is warm.
Using KEYLESS-GO to start the engine
The Start/Stop button can be used to start the
vehicle without inserting the SmartKey into the
ignition lock. The Start/Stop button must be
inserted in the ignition lock and the SmartKey
must be in the vehicle. This mode for starting the
engine operates independently of the ECO
start/stop automatic engine start function.
XDepress the brake pedal and keep it
depressed.
XPress the Start/Stop button once
(Ypage 125).
Vehicles with a gasoline engine: the engine
starts.
Vehicles with a diesel engine: preglow is
activated and the engine starts.
Starting procedure via smartphone
Observe the important safety notes on starting
the engine (Ypage 126).
You can also start your engine via your smart-
phone from outside the vehicle. In this case, the
previously selected climate control setting is
activated. In this way you can cool or heat the
interior of the vehicle before starting the jour-
ney.
Only start the engine via your smartphone if it is
safe to start and run the engine where your vehi-
cle is parked.
Observe the legal stipulations in the area where your vehicle is parked. Engine start via smart-
phone may be limited to certain countries or
regions.
You can execute a maximum of two consecutive
starting attempts via your smartphone. If you
insert the SmartKey into the ignition lock, you
can carry out two more starting attempts.
Once you have started the engine, you can
switch the engine off via your smartphone at any
time.
You can only start the engine via your smart-
phone if:
Rthe SmartKey is in the ignition lock
Rpark position Pis selected
Rthe accelerator pedal is not depressed
Rthe anti-theft alarm system is not activated
Rthe panic alarm is not activated
Rthe hazard warning lamps are switched off
Rthe hood is closed.
Rthe doors are closed and locked
Rthe windows and sliding sunroof are closed
Also make sure that:
Rthe fuel tank is sufficiently filled
Rthe starter battery is sufficiently charged
Driving127
Driving and parking
Z
Page 141 of 366
Problems with the transmission
ProblemPossible causes/consequences andMSolutions
The transmission has
problems shifting gear.The transmission is losing oil.
XHave the transmission checked at a qualified specialist workshop
immediately.
All vehicles (except
Mercedes-AMG vehi-
cles):
The acceleration ability
is deteriorating.
The transmission no lon-
ger changes gear.The transmission is in emergency mode.
It is only partly possible to engage the gears or the transmission is in
positionN.
XStop the vehicle.
XShift the transmission to position P.
XSwitch off the engine.
XWait at least ten seconds before restarting the engine.
XShift the transmission to positionDor R.
XHave the transmission checked at a qualified specialist workshop
immediately.
Mercedes-AMG vehi-
cles:
The acceleration ability
is deteriorating.
The transmission no lon-
ger changes gear.The transmission is in emergency mode.
It is only possible to shift into secondgear and reverse gear.
XStop the vehicle.
XShift the transmission to position P.
XSwitch off the engine.
XWait at least ten seconds before restarting the engine.
XShift the transmission to positionDor R.
If D is selected, the transmission shifts into secondgear; ifRis
selected, the transmission shifts into reverse gear.
XHave the transmission checked at a qualified specialist workshop
immediately.
Transfer case
!
Performance tests may only be carried out
on a 2-axle dynamometer. The brake system
or transfer case could otherwise be damaged.
Contact a qualified specialist workshop for a
performance test.
!Because ESP®is an automatic system, the
engine and ignition must be switched off
(SmartKey in position 0or 1or Start/Stop
button in position 0or 1) when the electric
parking brake is being tested on a brake dyna-
mometer (maximum 10 seconds).
Braking triggered automatically by ESP
®may
seriously damage the brake system.
!Vehicles with 4MATIC must not be towed
with either the front or the rear axle raised, as
doing so will damage the transmission.
Refueling
Important safety notes
GWARNING
Fuel is highly flammable. If you handle fuel
incorrectly, there is a risk of fire and explo-
sion.
You must avoid fire, open flames, creating
sparks and smoking. Switch off the engine
and, if applicable, the auxiliary heating before refueling.
Refueling139
Driving and parking
Z
Page 152 of 366
The ECO display consists of three sections, with
an inner and outer area. The sections corre-
spond to the following three categories:
:Acceleration(evaluation of all accel-
eration processes):
Rthe outer area fills up and the inner area lights up green: moderate
acceleration, especially at higher
speeds
Rthe outer area empties and the
inner area is gray: sporty acceler-
ation
;Coasting (evaluation of all decelera-
tion processes):
Rthe outer area fills up and the inner area lights up green: anticipatory
driving, keeping your distance and
early release of the accelerator.
The vehicle can coast without use
of the brakes.
Rthe outer area empties and the
inner area is gray: frequent heavy
braking
=Constant (continuous evaluation
over the entire journey):
Rthe outer area fills up and the inner area lights up green: constant
speed and avoidance of unneces-
sary acceleration and deceleration
Rthe outer area empties and the
inner area is gray: fluctuations in
speed
The three inner areas display the current driving
style and light up green as a result of a particu-
larly economical driving style. Depending on thedriving situation, up to two areas may light up
simultaneously.
At the beginning of the journey, the three outer
areas are empty and fill up as a result of eco-
nomical driving. A higher level indicates a more
economical driving style. If the three outer areas
are completely filled at the same time, the driver
has adopted the most economical driving style
for the selected settings and prevailing condi-
tions. The ECO display border lights up.
The ECO display does not indicate the actual fuel consumption. The additionally achieved range
displayed under Bonus fr. Start
does not
indicate a fixed consumption reduction. In addition to driving style, the actual consump-
tion is affected by other factors, such as:
Rload
Rtire pressure
Rcold start
Rchoice of route
Relectrical consumers switched on
These factors are not included in the ECO dis-
play.
An economical driving style specially requires
driving at moderate engine speeds.
Achieving a higher value in the categories
"Acceleration" and "Constant":
Robserve the gearshift recommendations.
Rdrive the vehicle in the Comfortdrive pro-
gram.
On long journeys at a constant speed, e.g. on the
highway, only the outer area for "constant" will
change.
The ECO display summarizes the driving style
from the start of the journey to its completion.
Therefore, there are more marked changes in
the outer areas at the start of a journey. On lon- ger journeys, there are fewer changes. For more
marked changes, perform a manual rest
(
Ypage 210).
For further information on the ECO display, see
(
Ypage 209).
Braking
Important safety notes
GWARNING
If you shift down on a slippery road surface in an attempt to increase the engine's braking
effect, the drive wheels could lose their grip.
There is an increased danger of skidding and
accidents.
Do not shift down for additional engine brak-
ing on a slippery road surface.
Downhill gradients
!On long and steep gradients, you must
reduce the load on the brakes by shifting to a
lower gear in good time. This allows you to
take advantage of the engine's braking effect.
150Driving tips
Driving and parking
Page 154 of 366

parking brake is being tested on a brake dyna-
mometer (maximum 10 seconds).
Braking triggered automatically by ESP
®may
seriously damage the brake system.
All checks and maintenance work on the brake
system must be carried out at a qualified spe-
cialist workshop.
Have brake pads installed and brake fluid
replaced at a qualified specialist workshop.
If the brake system has only been subject to
moderate loads, you should test the functional-
ity of your brakes at regular intervals. To do so,
depress the brake pedal firmly when driving at a high speed. This improves the grip of the brake
pads.
You can find a description of Brake Assist (BAS)
on (
Ypage 61) or of BAS PLUS on (Ypage 67).
Mercedes-Benz recommends that you only have
brake pads/linings installed on your vehicle
which have been approved for Mercedes-Benz
vehicles or which correspond to an equivalent
quality standard. Brake pads/linings which have
not been approved for Mercedes-Benz vehicles
or which are not of an equivalent quality could
affect your vehicle's operating safety.
Mercedes-Benz recommends that you only use
brake fluid that has been specially approved for
your vehicle by Mercedes-Benz, or which corre-
sponds to an equivalent quality standard. Brake
fluid which has not been approved for
Mercedes-Benz vehicles or which is not of an
equivalent quality could affect your vehicle's
operating safety.
Driving on wet roads
Hydroplaning
If water has accumulated to a certain depth on
the road surface, there is a danger of hydro-
planing occurring, even if:
Ryou drive at low speeds.
Rthe tires have adequate tread depth.
For this reason, in the event of heavy rain or in
conditions in which hydroplaning may occur,
you must drive in the following manner:
Rlower your speed.
Ravoid ruts.
Ravoid sudden steering movements.
Rbrake carefully.
Driving on flooded roads
!Do not drive through flooded areas. Check
the depth of any water before driving through
it. Drive slowly through standing water. Oth-
erwise, water may enter the vehicle interior or
the engine compartment. This can damage
the electronic components in the engine or
the automatic transmission. Water can also
be drawn in by the engine's air suction nozzles
and this can cause engine damage.
iVehicles with the AIRMATIC package:
select the raised vehicle level before driving
through a body of water.
Off-road fording
!Under no circumstances should you accel-
erate before entering the water. The bow
wave could cause water to enter and damage
the engine and other assemblies.
!Do not open any of the vehicle's doors while
fording. Otherwise, water could get into the
vehicle interior and damage the vehicle's
electronics and interior equipment.
REstablish how deep the water is and the char-
acteristics of the body of water before ford-
ing.
RSelect the highest possible vehicle level.
RShift to a lower gear using the left-hand steer-
ing wheel paddle shifter.
RAvoid high engine speeds.
REnter and exit the water at a flat place and at
a steady walking pace.
RDrive slowly and at an even speed through the
water.
REnsure that a bow wave does not form as you
drive.
RDo not stop and do not switch off the engine. Water offers a high degree of resistance, and
the ground is slippery and in some cases
unstable. Therefore, it is difficult and danger-
ous to pull away in the water.
RClean any mud from the tire tread after ford-
ing.
RApply the brakes to dry them after fording.
Always observe the fording depth values
(
Ypage 359).
152Driving tips
Driving and parking
Page 172 of 366
and to reduce fuel consumption. There is also
the option to manually adjust the vehicle level.
AIRMATIC consists of:
Rlevel settings
Rlevel control and
RADS PLUS (Adaptive Damping System)
All vehicles (except Mercedes-AMG vehi-
cles): your vehicle may also be equipped with
the ACTIVE CURVE SYSTEM (
Ypage 171).
Mercedes-AMG vehicles: your vehicle is equip-
ped with the ACTIVE CURVE SYSTEM.
(
Ypage 171).
Observe the notes on driving with a trailer
(
Ypage 200).
The vehicle level can be set using the DYNAMIC
SELECT controller (
Ypage 132) or the level but-
ton (Ypage 171). The setting always corre-
sponds to the last selected function.
Important safety notes
GWARNING
When the vehicle is being lowered, people
could become trapped if their limbs are
between the vehicle body and the wheels or
underneath the vehicle. There is a risk of
injury.
Make sure no one is underneath the vehicle or
in the immediate vicinity of the wheel arches
when the vehicle is being lowered.
If you unlock the vehicle or open a door, the
vehicle begins to compensate for load discrep-
ancies while still parked. However, for signifi-
cant level changes, such as after the vehicle has
been stationary for a long period, the engine
must be on. For safety reasons, the vehicle is
only lowered when the doors are closed. Low-
ering is interrupted if a door is opened, and it
continues once the door has been closed.
ADS PLUS (Adaptive Damping System)
General notes
ADS PLUS automatically controls the calibration
of the dampers. The damping characteristics
adapt to the current operating and driving sit-
uation. The damping is tuned individually to each wheel
and depends on:
Ryour driving style, e.g. sporty
Rthe road surface conditions
Rthe drive program selected
Rthe vehicle level setting
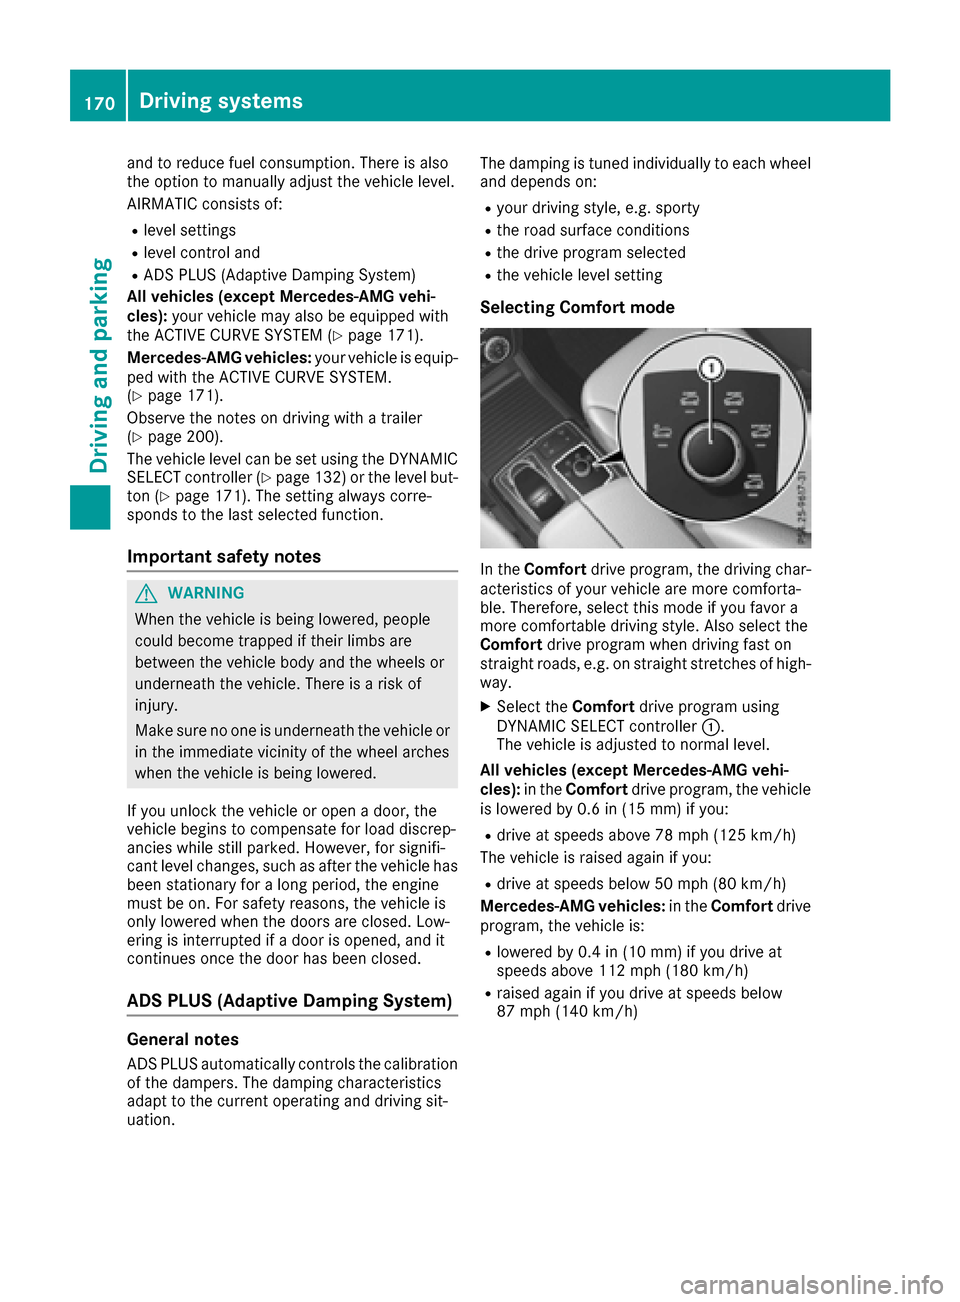
Selecting Comfort mode
In the Comfort drive program, the driving char-
acteristics of your vehicle are more comforta-
ble. Therefore, select this mode if you favor a
more comfortable driving style. Also select the
Comfort drive program when driving fast on
straight roads, e.g. on straight stretches of high-
way.
XSelect the Comfortdrive program using
DYNAMIC SELECT controller :.
The vehicle is adjusted to normal level.
All vehicles (except Mercedes-AMG vehi-
cles): in theComfort drive program, the vehicle
is lowered by 0.6 in (15 mm) if you:
Rdrive at speeds above 78 mph (125 km/h)
The vehicle is raised again if you:
Rdrive at speeds below 50 mph (80 km/h)
Mercedes-AMG vehicles: in theComfort drive
program, the vehicle is:
Rlowered by 0.4 in (10 mm) if you drive at
speeds above 112 mph (180 km/h)
Rraised again if you drive at speeds below
87 mph (140km/ h)
170Driving systems
Driving and parking
Page 173 of 366
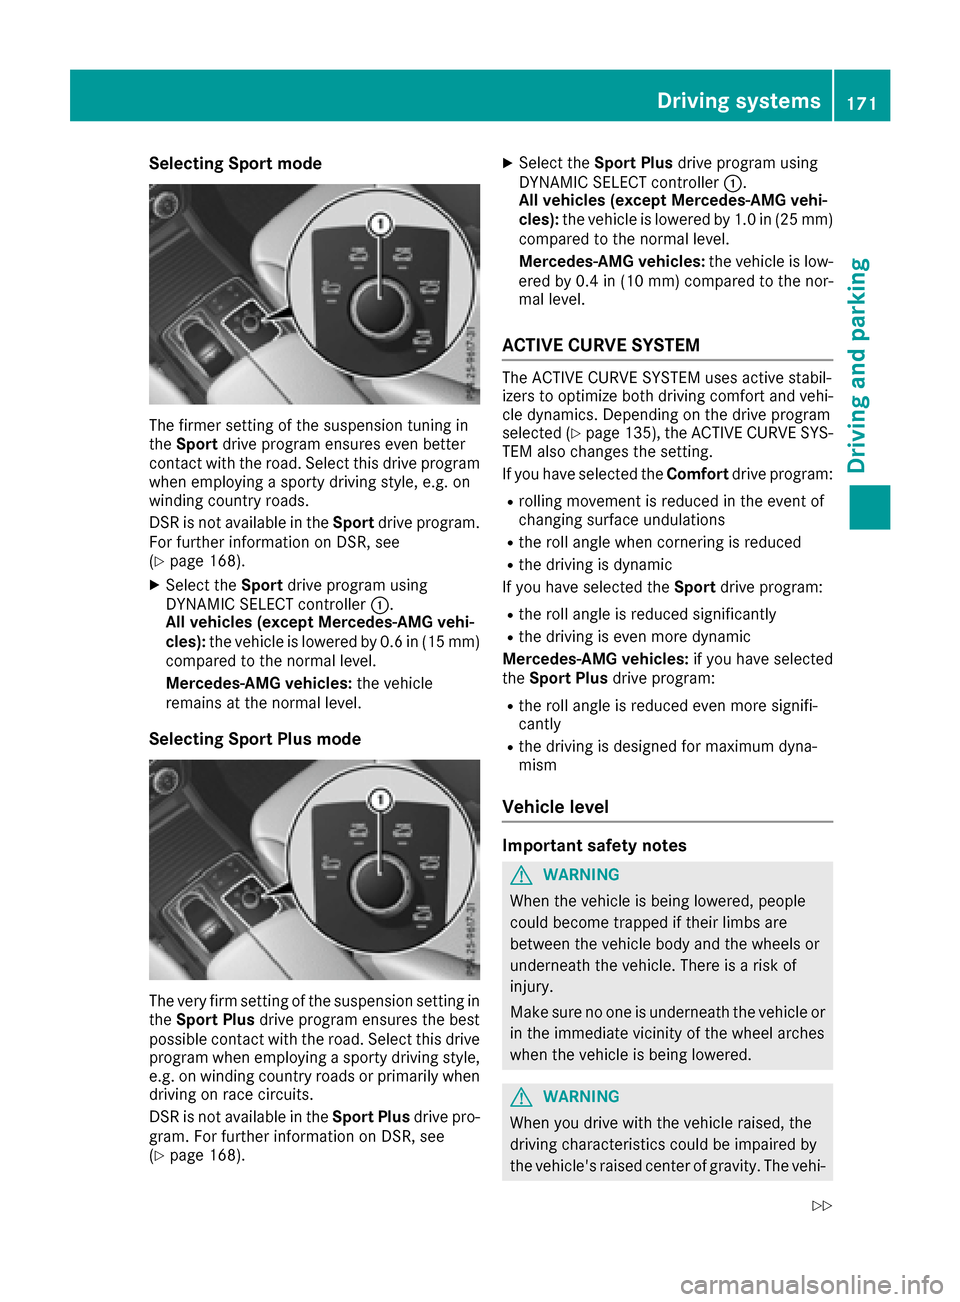
Selecting Sport mode
The firmer setting of the suspension tuning in
theSport drive program ensures even better
contact with the road. Select this drive program
when employing a sporty driving style, e.g. on
winding country roads.
DSR is not available in the Sportdrive program.
For further information on DSR, see
(
Ypage 168).
XSelect the Sportdrive program using
DYNAMIC SELECT controller :.
All vehicles (except Mercedes-AMG vehi-
cles): the vehicle is lowered by 0.6 in (15 mm)
compared to the normal level.
Mercedes-AMG vehicles: the vehicle
remains at the normal level.
Selecting Sport Plus mode
The very firm setting of the suspension setting in
the Sport Plus drive program ensures the best
possible contact with the road. Select this drive
program when employing a sporty driving style, e.g. on winding country roads or primarily when
driving on race circuits.
DSR is not available in the Sport Plusdrive pro-
gram. For further information on DSR, see
(
Ypage 168).
XSelect the Sport Plus drive program using
DYNAMIC SELECT controller :.
All vehicles (except Mercedes-AMG vehi-
cles): the vehicle is lowered by 1.0 in (25 mm)
compared to the normal level.
Mercedes-AMG vehicles: the vehicle is low-
ered by 0.4 in (10 mm) compared to the nor-
mal level.
ACTIVE CURVE SYSTEM
The ACTIVE CURVE SYSTEM uses active stabil-
izers to optimize both driving comfort and vehi-
cle dynamics. Depending on the drive program
selected (
Ypage 135), the ACTIVE CURVE SYS-
TEM also changes the setting.
If you have selected the Comfortdrive program:
Rrolling movement is reduced in the event of
changing surface undulations
Rthe roll angle when cornering is reduced
Rthe driving is dynamic
If you have selected the Sportdrive program:
Rthe roll angle is reduced significantly
Rthe driving is even more dynamic
Mercedes-AMG vehicles: if you have selected
the Sport Plus drive program:
Rthe roll angle is reduced even more signifi-
cantly
Rthe driving is designed for maximum dyna-
mism
Vehicle level
Important safety notes
GWARNING
When the vehicle is being lowered, people
could become trapped if their limbs are
between the vehicle body and the wheels or
underneath the vehicle. There is a risk of
injury.
Make sure no one is underneath the vehicle or
in the immediate vicinity of the wheel arches
when the vehicle is being lowered.
GWARNING
When you drive with the vehicle raised, the
driving characteristics could be impaired by
the vehicle's raised center of gravity. The vehi-
Driving systems171
Driving and parking
Z
Page 175 of 366
If you press the%ora button on the
multifunction steering wheel, the message will
disappear.
The raised level setting is canceled if you:
Rdrive at speeds above 50 mph (80 km/h) (all
vehicles except Mercedes-AMG vehicles)
Rdrive at speeds above 43 mph (70 km/h)
(Mercedes-AMG vehicles)
Rdrive at speed s between 40 mph (64 km/h)
and 50 mph (80 km/h) for approximately 20
seconds (all vehicles except Mercedes-AMG
vehicles)
Rdrive at speeds between 40 mph (64 km/h)
and 43 mph (70 km/h) for approximately 20
seconds (Mercedes-AMG vehicles)
Rdrive at speeds above 19 mph (30 km/h) with
a trailer
The raised vehicle level remains saved when you
are not driving within these speed ranges.
Setting the normal vehicle level
!Make sure that there is enough ground
clearance when the vehicle is being lowered.
It could otherwise hit the ground, damaging
the underbody.
XStart the engine.
If indicator lamp ;is lit:
XPress button :.
Indicator lamp ;flashes while the vehicle is
being lowered, and goes out as soon as the
desired vehicle level is reached.
Vehicles with no trailer coupled: the vehi-
cle is adjusted to the height of the selected
drive program (
Ypage 132).
Vehicles with a trailer coupled: the vehicle
is adjusted to normal level regardless of the
drive program selected (
Ypage 132). The
vehicle remains at the normal level, even if the
drive program is changed.
During the adjustment, the Lowering
mes-
sage appears in the multifunction display.
If you press the %ora button on the
multifunction steering wheel, the message will
disappear.
AMG adaptive sport suspension sys-
tem
General notes
iThe AMG adaptive sport suspension system
is available for Mercedes-AMG vehicles and
for the Mercedes-AMG GLE 43 4MATIC.
The electronically controlled damping system
works continuously. This improves driving
safety and ride comfort.
The damping is tuned individually to each wheel
and depends on:
Ryour driving style, e.g. sporty
Rthe road surface condition, e.g. bumps
Ryour individual selection of Sport, Sport + or
Comfort
The suspension setting can be adjusted using
the corresponding button in the center console
or the DYNAMIC SELECT controller
(
Ypage 132).
Each time you start the engine with the Smart-
Key or the Start/Stop button, Comfort mode is
activated. For further information about starting
the engine, see (
Ypage 126).
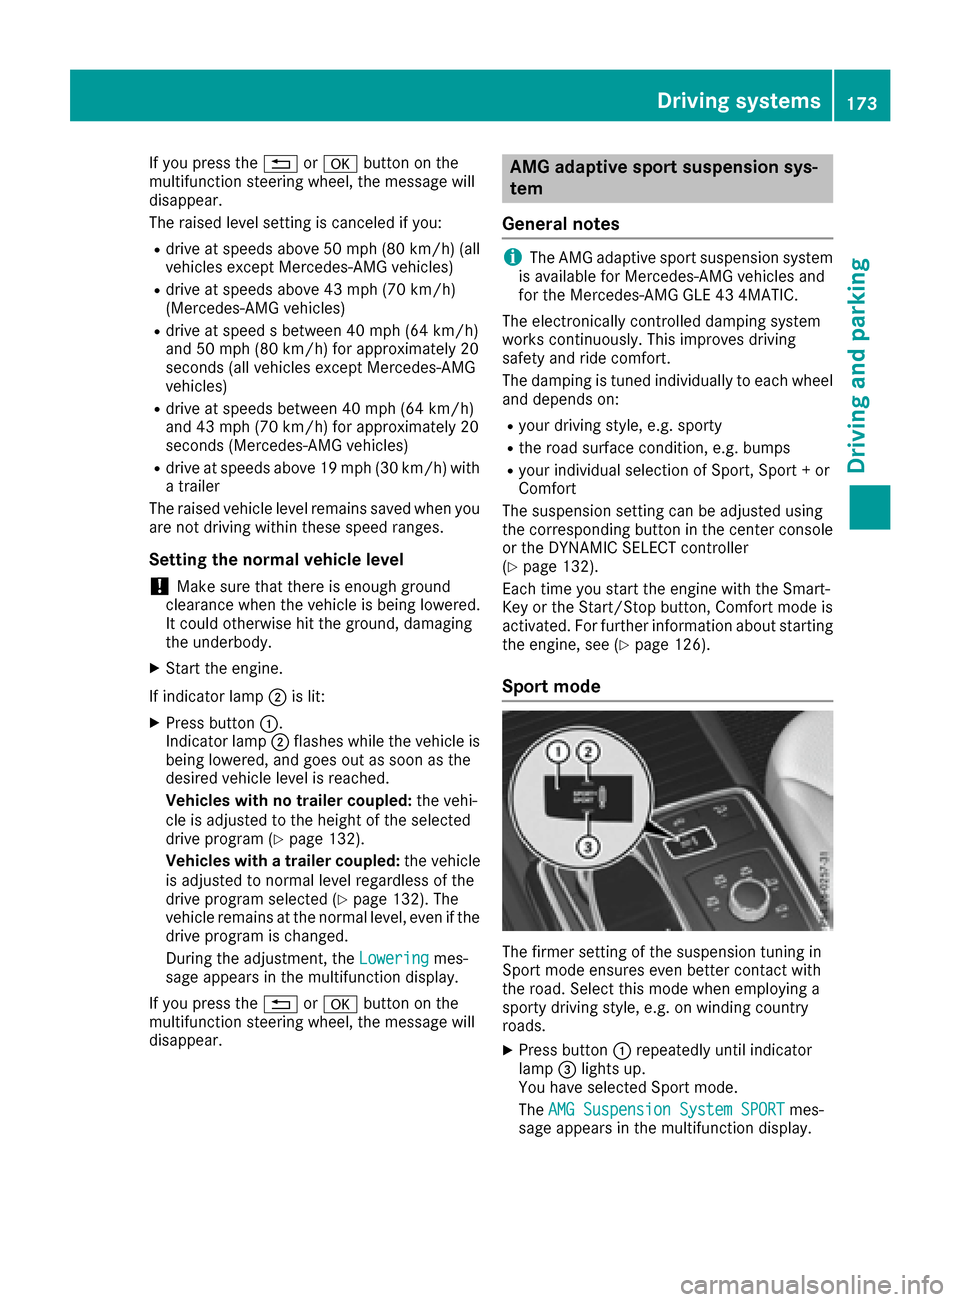
Sport mode
The firmer setting of the suspension tuning in
Sport mode ensures even better contact with
the road. Select this mode when employing a
sporty driving style, e.g. on winding country
roads.
XPress button :repeatedly until indicator
lamp =lights up.
You have selected Sport mode.
The AMG Suspension System SPORT
mes-
sage appears in the multifunction display.
Driving systems173
Driving and parking
Z
Page 188 of 366
Rif there is a sudden change in temperature,
e.g. when driving into a heated garage in win-ter
Rif the camera lenses are dirty or covered
Rif the vehicle components in which the cam-
eras are installed are damaged. In this event,
have the camera position and setting checked
at a qualified specialist workshop
Do not use the 360° camera in this case. You
can otherwise injure others or cause damage to objects or the vehicle.
Guide lines are always shown at road level. In
trailer mode, the guide lines are shown at the
level of the trailer coupling.
The field of vision and other functions of the
camera system may be restricted due to addi-
tional accessories on the rear of the vehicle (e.g.
license plate holder, bicycle rack).
On vehicles with height-adjustable chassis,
depending on technical conditions, leaving the
standard height can result in:
Rinaccuracies in the guide lines
Rinaccuracies in the display of generated
images (top view)
Activation conditions
The 360° camera image can be displayed if:
Ryour vehicle is equipped with a 360° camera
Rthe SmartKey is in position 2in the ignition
lock
Rthe multimedia system is switched on
Switching on the 360° camera
XPress the Øbutton in the center console
for longer than two seconds.
Depending on whether position Dor Ris
engaged, the following is shown:
Ra split screen with top view and the image
from the front camera or
Ra split screen with top view and the image
from the rear view camera
or
XPress the Øbutton in the center console.
The vehicle menu is displayed.
XSelect 360°Cameraand press 7to confirm.
Depending on whether position Dor Ris
engaged, the following is shown:
Ra split screen with top view and the image
from the front camera or
Ra split screen with top view and the image
from the rear view camera
Activating the 360° camera using
reverse gear
The 360° camera images can be automatically
displayed by engaging reverse gear.
XMake sure that the SmartKey is in position 2
in the ignition lock.
XMake sure that the Activation by R gearfunction is selected in the multimedia system;
see the separate operating instructions.
XTo show the 360° camera image: engage
reverse gear.
The multimedia system shows the area
behind the vehicle in split-screen mode. You
see the top view of the vehicle and the image
from the rear view camera.
Selecting the split-screens or 180° view
Selecting split-screen view
XTo switch to the line with the vehicle icons:
slide 5the controller.
XTo select one of the vehicle icons: turn 3
the controller.
XTo switch to 180° View:turn 3 the con-
troller to select 180° View
and press7to
confirm.
iThe 180°Viewoption is only available in the
following views:
RTop view with picture from the rear view
camera
RTop view with picture from the front camera
Displays in the multimedia system
Important safety notes
The camera system may show a distorted view
of obstacles, show them incorrectly or not at all.
Obstacles are not shown by the system in the
following locations:
Runder the front and rear bumpers
Rvery close to the front and rear bumpers
Rin the area immediately above the tailgate
handle
186Driving systems
Driving and parking