2017 MERCEDES-BENZ GLE warning light
[x] Cancel search: warning lightPage 165 of 390
R
LOW RANGE offroad gear (vehicles with the
Offroad Engineering package) ( Y
page 213)R
Differential lock (vehicles with the Off-Road
Engineering package) ( Y
page 212)R
Off-road ABS ( Y
page 63)R
Off-road 4ETS ( Y
page 66)R
Off-road ESP ®
( Y
page 68)R
AIRMATIC package (vehicle level)
( Y
page 180) R
DSR (Downhill Speed Regulation)
( Y
page 210)
Observe the following notes: R
Stop the vehicle before starting to drive along
an off-road route. If necessary, select the off-
road program ( Y
page 212) or shift to the
LOW RANGE off-road gear ( Y
page 213).R
Select a vehicle level that is suitable for the
terrain. To avoid damaging the vehicle, make
sure there is always sufficient ground clear-
ance. R
Check that items of luggage and loads are
stowed safely and are well secured
( Y
page 292). R
Always keep the engine running and in gear
when driving on a downhill gradient. Activate
DSR ( Y
page 210).R
Always keep the engine running and in gear
when driving on a slope. R
Adapt your speed to the terrain. The rougher,
steeper or more ruts on the terrain, the slower
your speed should be. R
Do not jump with the vehicle as this will inter-
rupt the vehicle's propulsion. R
Drive with extreme care on unfamiliar off-road
routes where visibility is poor. For safety rea-
sons, get out of the vehicle first and survey
the off-road route. R
Look out for obstacles, such as rocks, holes,
tree stumps and furrows. R
Always keep the doors, the tailgate, the side
windows and the sliding sunroof closed while
the vehicle is in motion. R
Do not shift the automatic transmission to
transmission position N .R
Observe the notes on off-road fording
( Y
page 161).
i Do not use the HOLD function when driving
off-road, on steep uphill or downhill gradients
or on slippery or loose surfaces. The HOLD function cannot hold the vehicle on such sur-
faces.
Checklist before driving off-road
! If the engine oil warning lamp lights up while
the vehicle is in motion, stop the vehicle in a
safe place as soon as possible. Check the
engine oil level. The engine oil warning lamp
warning must not be ignored. Continuing the
journey while the symbol is displayed could
lead to engine damage. X
Engine oil level: check the engine oil level
and add oil if necessary.
When driving on steep gradients, the engine
oil level must be sufficiently high to ensure a
correct oil supply in the vehicle. X
DEF tank (BlueTEC vehicles): check the
level and add if necessary ( Y
page 150).X
Tire-changing tool kit: check that the jack is
working and make sure you have the lug
wrench, a robust tow cable and a folding
spade in the vehicle. X
Wheels and tires: check the tire tread depth
and tire pressure. X
Check for damage and remove any foreign
objects, e.g. small stones, from the wheels/
tires. X
Replace any missing valve caps. X
Replace dented or damaged wheels. X
Rims: dented or bent rims can result in a loss
of tire pressure and damage the tire bead.
Before driving off-road, check the wheels and
replace them if necessary.
Checklist after driving off-road
! If you detect damage to the vehicle after
driving off-road, have the vehicle checked
immediately at a qualified specialist work-
shop.
Driving over rough terrain places greater
demands on your vehicle than driving on normal
roads. After driving off-road, check the vehicle.
This allows you to detect damage promptly and
reduce the risk of an accident to yourself and
other road users. X
If the Offroad or Offroad Plus drive program
is selected: select the Individual , Sport ,Driving tips 163
Driving and parking Z
Page 167 of 390
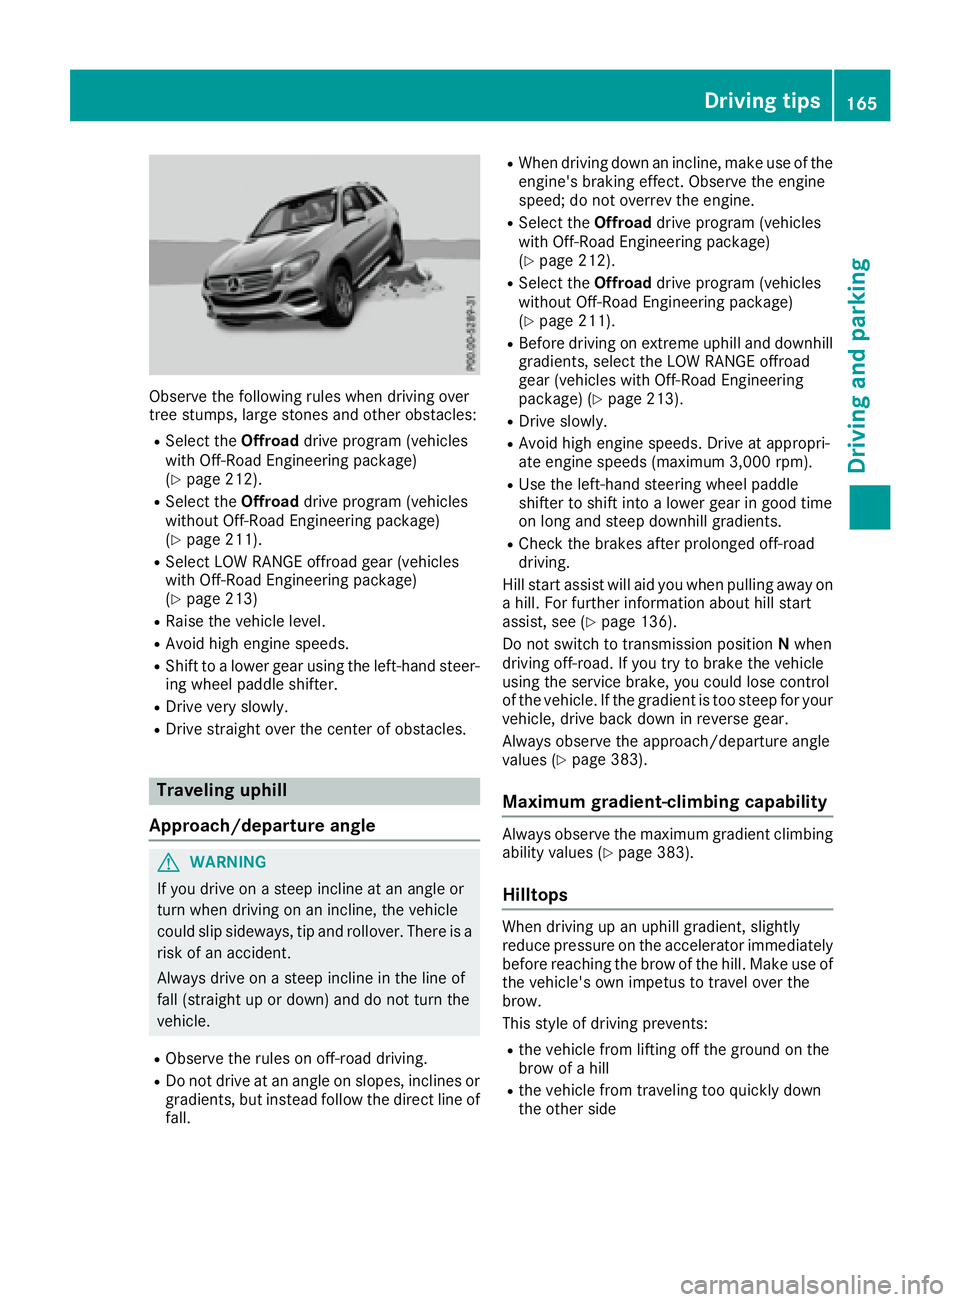
Observe the following rules when driving over
tree stumps, large stones and other obstacles: R
Select the Offroad drive program (vehicles
with Off-Road Engineering package)
( Y
page 212). R
Select the Offroad drive program (vehicles
without Off-Road Engineering package)
( Y
page 211). R
Select LOW RANGE offroad gear (vehicles
with Off-Road Engineering package)
( Y
page 213) R
Raise the vehicle level. R
Avoid high engine speeds. R
Shift to a lower gear using the left-hand steer-
ing wheel paddle shifter. R
Drive very slowly. R
Drive straight over the center of obstacles.
Traveling uphill
Approach/departure angle
G WARNING
If you drive on a steep incline at an angle or
turn when driving on an incline, the vehicle
could slip sideways, tip and rollover. There is a
risk of an accident.
Always drive on a steep incline in the line of
fall (straight up or down) and do not turn the
vehicle. R
Observe the rules on off-road driving. R
Do not drive at an angle on slopes, inclines or
gradients, but instead follow the direct line of
fall. R
When driving down an incline, make use of the
engine's braking effect. Observe the engine
speed; do not overrev the engine. R
Select the Offroad drive program (vehicles
with Off-Road Engineering package)
( Y
page 212). R
Select the Offroad drive program (vehicles
without Off-Road Engineering package)
( Y
page 211). R
Before driving on extreme uphill and downhill
gradients, select the LOW RANGE offroad
gear (vehicles with Off-Road Engineering
package) ( Y
page 213). R
Drive slowly. R
Avoid high engine speeds. Drive at appropri-
ate engine speeds (maximum 3,000 rpm). R
Use the left-hand steering wheel paddle
shifter to shift into a lower gear in good time
on long and steep downhill gradients. R
Check the brakes after prolonged off-road
driving.
Hill start assist will aid you when pulling away on
a hill. For further information about hill start
assist, see ( Y
page 136).
Do not switch to transmission position N when
driving off-road. If you try to brake the vehicle
using the service brake, you could lose control
of the vehicle. If the gradient is too steep for your
vehicle, drive back down in reverse gear.
Always observe the approach/departure angle
values ( Y
page 383).
Maximum gradient-climbing capability Always observe the maximum gradient climbing
ability values ( Y
page 383).
Hilltops When driving up an uphill gradient, slightly
reduce pressure on the accelerator immediately
before reaching the brow of the hill. Make use of
the vehicle's own impetus to travel over the
brow.
This style of driving prevents: R
the vehicle from lifting off the ground on the
brow of a hill R
the vehicle from traveling too quickly down
the other side Driving tips 165
Driving and parking Z
Page 177 of 390
with the curb or other road boundaries. Be par-
ticularly aware of other road users, e.g. cyclists,
that are directly next to your vehicle.
Obstacles such as traffic pylons on the lane or
projecting out into the lane are not detected.
An inappropriate steering intervention, e.g. after
intentionally driving over a lane marking, can be
corrected at any time if you steer slightly in the
opposite direction.
DISTRONIC PLUS with Steering Pilot cannot
continuously keep your vehicle in lane. In some
cases, the steering intervention is not sufficient
to bring the vehicle back to the lane. In such
cases, you must steer the vehicle yourself to
ensure that it does not leave the lane.
The support provided by the system can be
impaired if: R
there is poor visibility, e.g. due to insufficient
illumination of the road, or due to snow, rain,
fog or spray R
there is glare, e.g. from oncoming traffic, the
sun or reflections (e.g. when the road surface
is wet) R
the windshield is dirty, fogged up, damaged or
covered, for instance by a sticker, in the vicin-
ity of the camera R
there are no, several or unclear lane markings
for a lane, e.g. in areas with road construction
work R
the lane markings are worn away, dark or cov-
ered up, e.g. by dirt or snow R
the distance to the vehicle in front is too small
and the lane markings thus cannot be detec-
ted R
the lane markings change quickly, e.g. lanes
branch off, cross on e another or mergeR
the road is narrow and winding R
there are strong shadows cast on the road
The system is switched to passive and no longer
assists you by performing steering interventions
if: R
you actively change lane R
you switch on the turn signal R
take your hands off the steering wheel or do
not steer for a prolonged period of time
i After you have finished changing lanes,
Steering Pilot is automatically active once
more. Steering Pilot cannot provide assistance: R
on very sharp corners R
when towing a trailer R
when a loss of tire pressure or a defective tire
has been detected and displayed
Observe the important safety notes on Distance
Pilot DISTRONIC ( Y
page 168).
The steering interventions are carried out with a
limited steering moment. The system requires
the driver to keep his hands on the steering
wheel and to steer himself.
If you do not steer yourself or if you take your
hands off the steering wheel for a prolonged
period of time, the system will first alert you with
a visual warning. A steering wheel symbol
appears in the multifunction display. If you have
still not started to steer and have not taken hold
of the steering wheel after five seconds at the
latest, a warning tone also sounds to remind you
to take control of the vehicle. Steering Pilot is
then switched to passive. Distance Pilot
DISTRONIC remains active.
Activating Steering Pilot X
Activate Distance Pilot DISTRONIC with
Steering Pilot using the on-board computer
( Y
page 231).
The Steering Pilot On message appears in
the multifunction display. Steering Pilot is
activated.
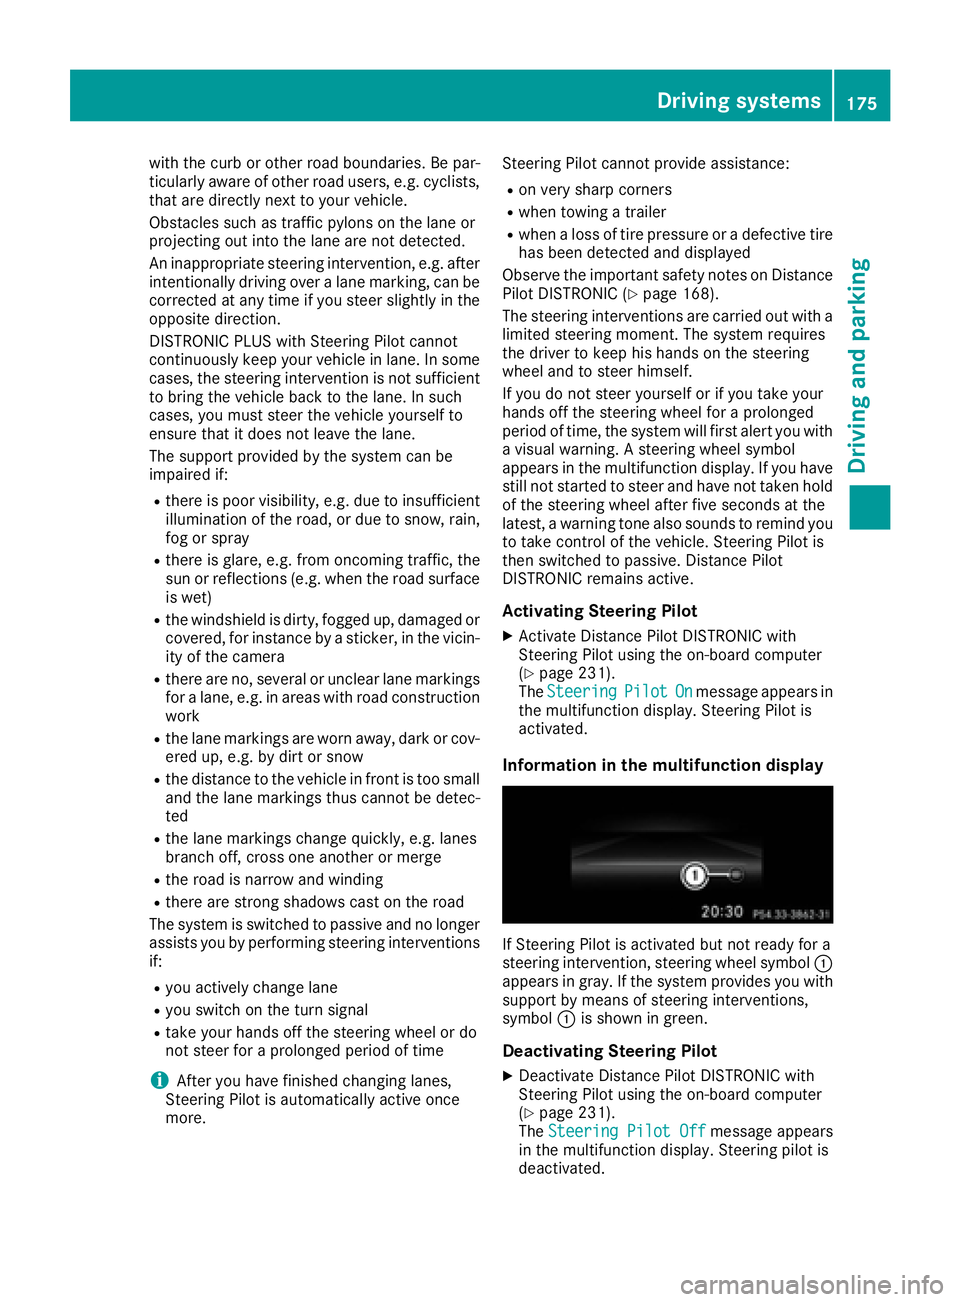
Information in the multifunction display
If Steering Pilot is activated but not ready for a
steering intervention, steering wheel symbol �C
appears in gray. If the system provides you with
support by means of steering interventions,
symbol �C is shown in green.
Deactivating Steering Pilot X
Deactivate Distance Pilot DISTRONIC with
Steering Pilot using the on-board computer
( Y
page 231).
The Steering Pilot Off message appears
in the multifunction display. Steering pilot is
deactivated.Driving systems 175
Driving and parking Z
Page 187 of 390
the immediate vicinity of the vehicle. You
could damage the vehicle or the objects.
The sensors may not detect snow and other
objects that absorb ultrasonic waves.
Ultrasonic sources such as an automatic car
wash, the compressed-air brakes on a truck
or a pneumatic drill could cause PARKTRONIC
to malfunction.
PARKTRONIC may not function correctly on
uneven terrain.
! Fold in the ball coupling if the trailer tow
hitch is not required. PARKTRONIC measures
the minimum detection range to an obstacle
from the bumper, not the ball coupling.
Parking Assist PARKTRONIC is deactivated for
the rear area when you establish an electrical
connection between your vehicle and a trailer.
Parking Assist PARKTRONIC is activated auto-
matically when you: R
switch on the ignition R
shift the transmission to position D , R or NR
release the electric parking brake
Parking Assist PARKTRONIC is deactivated at
speeds above 11 mph (18 km/h). It is reactiva-
ted at lower speeds.
Range of the sensors
General notes Parking Assist PARKTRONIC does not take into
account obstacles located: R
below the detection range, e.g. people, ani-
mals or objects. R
above the detection range, e.g. overhanging
loads, truck overhangs or loading ramps.
�C
Sensors in the front bumper, left-hand side
(example) The sensors must be free from dirt, ice or slush.
They can otherwise not function correctly. Clean
the sensors regularly, taking care not to scratch
or damage them ( Y
page 323).
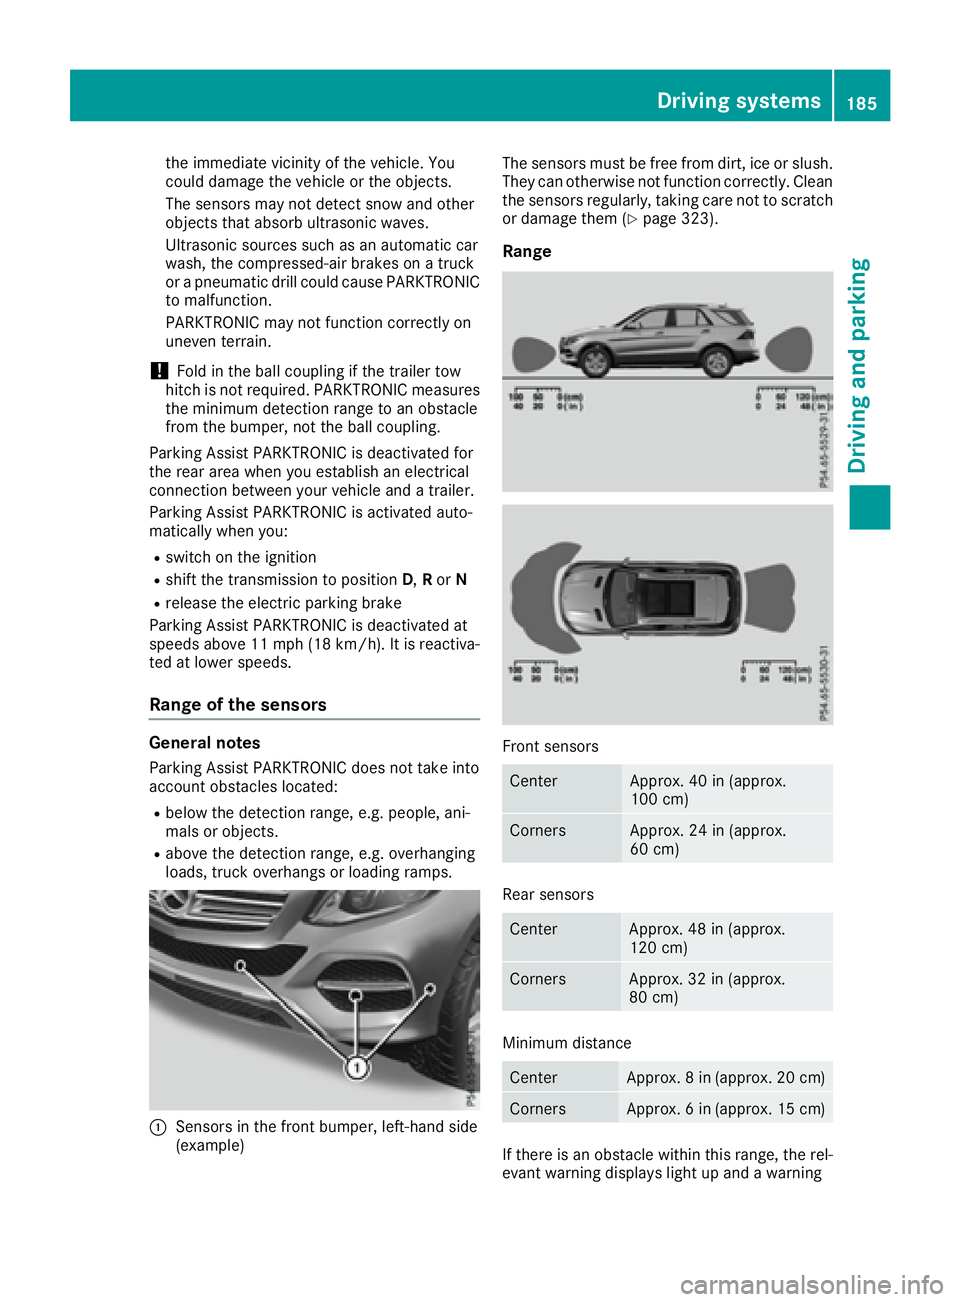
Range
Front sensors
Center Approx. 40 in (approx.
100 cm)
Corners Approx. 24 in (approx.
60 cm)
Rear sensors
Center Approx. 48 in (approx.
120 cm)
Corners Approx. 32 in (approx.
80 cm)
Minimum distance
Center Approx. 8 in (approx. 20 cm)
Corners Approx. 6 in (approx. 15 cm)
If there is an obstacle within this range, the rel-
evant warning displays light up and a warningDriving system s 185
Dr ivi ng an d parking Z
Page 189 of 390
Problems with Parking Assist PARKTRONIC Problem
Possible causes/consequences and �P Solutions
Only the red segments in
the Parking Assist
PARKTRONIC warning
displays are lit. You also
hear a warning tone for
approximately two sec-
onds.
Parking Assist
PARKTRONIC is deacti-
vated after approx-
imately five seconds,
and the indicator lamp in
the Parking Assist
PARKTRONIC button
lights up. Parking Assist PARKTRONIC has malfunctioned and has been deacti-
vated. X
If problems persist, have Parking Assist PARKTRONIC checked at a
qualified specialist workshop.
Only the red segments in
the Parking Assist
PARKTRONIC warning
displays are lit. Parking
Assist PARKTRONIC is
deactivated after
approximately five sec-
onds. The Parking Assist PARKTRONIC sensors are dirty or there is inter-
ference. X
Clean the Parking Assist PARKTRONIC sensors ( Y
page 323).X
Switch the ignition back on.
The problem may be caused by an external source of radio or ultra-
sound waves. X
Check to see if Parking Assist PARKTRONIC works at a different
location.
Parking Pilot
General notes Parking Pilot is an electronic parking aid with
ultrasound. It measures the road on both sides
of the vehicle. A parking symbol indicates a suit-
able parking space. Active steering intervention
and brake application can assist you during
parking. Parking Assist PARKTRONIC is also
available ( Y
page 184).
Important safety notes
Parking Pilot is only an aid. It is not a replace-
ment for your attention to your immediate sur-
roundings. You are always responsible for safe
maneuvering, parking and exiting a parking
space. Make sure that no persons, animals or
objects are in the maneuvering range.
When Parking Assist PARKTRONIC is deactiva-
ted, Parking Pilot is also unavailable. G WARNING
While parking or pulling out of a parking
space, the vehicle swings out and can drive
onto areas of the oncoming lane. This could
result in a collision with another road user.
There is a risk of an accident.
Pay attention to other road users. Stop the
vehicle if necessary or cancel the Active Park-
ing Assist parking procedure.
! If unavoidable, you should drive over obsta-
cles such as curbs slowly and not at a sharp
angle. Otherwise, you may damage the
wheels or tires.
Parking Pilot may show parking spaces which
are not suitable for parking, e.g.: R
where parking or stopping is prohibited R
in front of driveways or entrances and exits R
on unsuitable surfacesDriving systems 187
Driving and parking Z
Page 204 of 390
Vehicles in the monitoring range are then not
indicated.
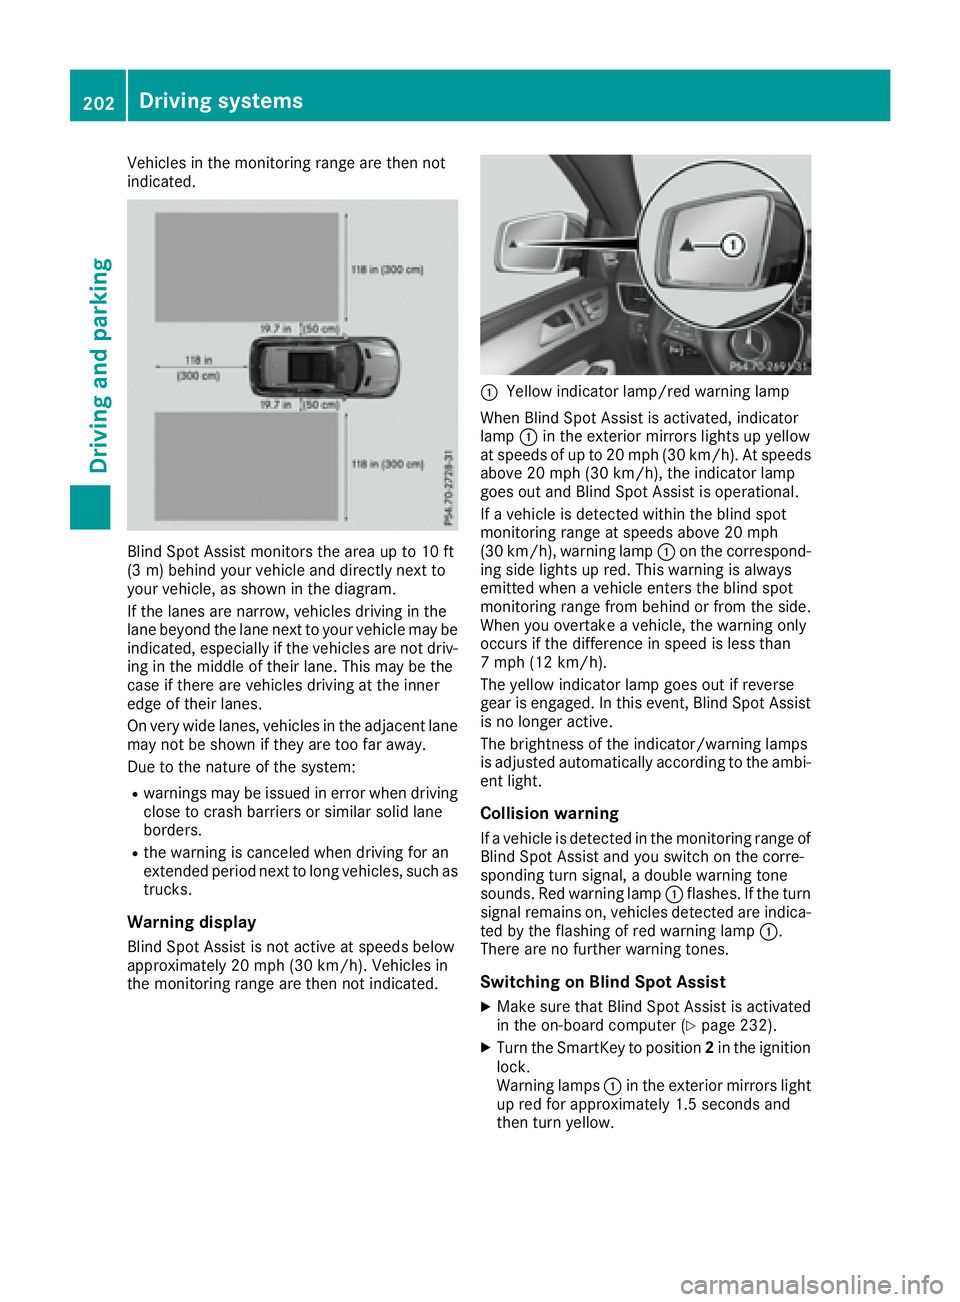
Blind Spot Assist monitors the area up to 10 ft
(3 m) behind your vehicle and directly next to
your vehicle, as shown in the diagram.
If the lanes are narrow, vehicles driving in the
lane beyond the lane next to your vehicle may be
indicated, especially if the vehicles are not driv-
ing in the middle of their lane. This may be the
case if there are vehicles driving at the inner
edge of their lanes.
On very wide lanes, vehicles in the adjacent lane
may not be shown if they are too far away.
Due to the nature of the system: R
warnings may be issued in error when driving
close to crash barriers or similar solid lane
borders. R
the warning is canceled when driving for an
extended period next to long vehicles, such as
trucks.
Warning display
Blind Spot Assist is not active at speeds below
approximately 20 mph (30 km/h). Vehicles in
the monitoring range are then not indicated. �C
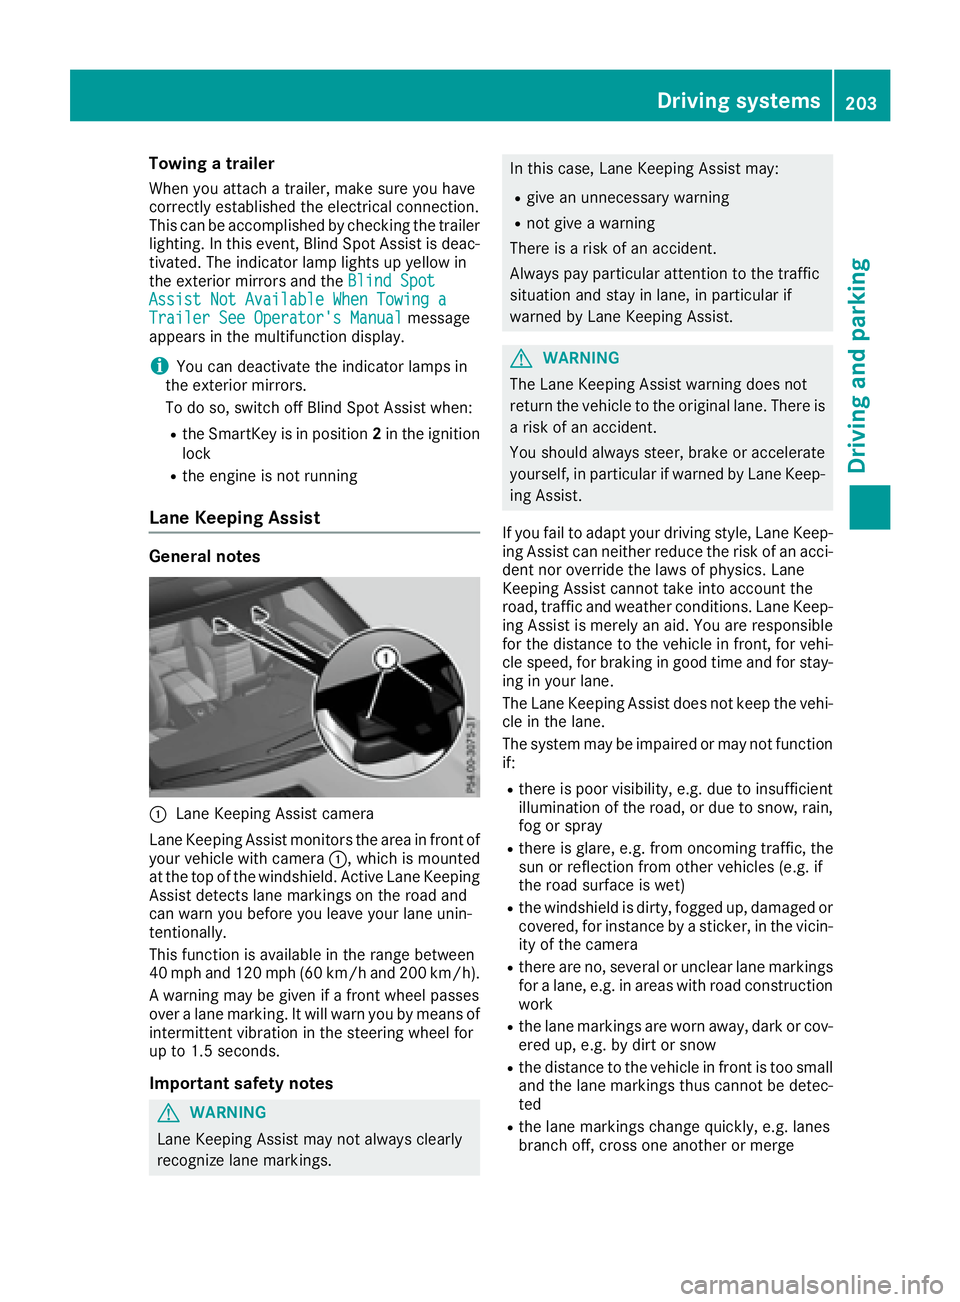
Yellow indicator lamp/red warning lamp
When Blind Spot Assist is activated, indicator
lamp �C in the exterior mirrors lights up yellow
at speeds of up to 20 mph (30 km/h). At speeds
above 20 mph (30 km/h), the indicator lamp
goes out and Blind Spot Assist is operational.
If a vehicle is detected within the blind spot
monitoring range at speeds above 20 mph
(30 km/h), warning lamp �C on the correspond-
ing side lights up red. This warning is always
emitted when a vehicle enters the blind spot
monitoring range from behind or from the side.
When you overtake a vehicle, the warning only
occurs if the difference in speed is less than
7 mph (12 km/h).
The yellow indicator lamp goes out if reverse
gear is engaged. In this event, Blind Spot Assist
is no longer active.
The brightness of the indicator/warning lamps
is adjusted automatically according to the ambi-
ent light.
Collision warning If a vehicle is detected in the monitoring range of
Blind Spot Assist and you switch on the corre-
sponding turn signal, a double warning tone
sounds. Red warning lamp �C flashes. If the turn
signal remains on, vehicles detected are indica-
ted by the flashing of red warning lamp �C .
There are no further warning tones.
Switching on Blind Spot Assist X
Make sure that Blind Spot Assist is activated
in the on-board computer ( Y
page 232).X
Turn the SmartKey to position 2 in the ignition
lock.
Warning lamps �C in the exterior mirrors light
up red for approximately 1.5 seconds and
then turn yellow.202
Driving systems
Driving and parking
Page 205 of 390
Towing a trailer When you attach a trailer, make sure you have
correctly established the electrical connection.
This can be accomplished by checking the trailer
lighting. In this event, Blind Spot Assist is deac-
tivated. The indicator lamp lights up yellow in
the exterior mirrors and the Blind Spot
Assist Not Available When Towing a
Trailer See Operator's Manual message
appears in the multifunction display.
i You can deactivate the indicator lamps in
the exterior mirrors.
To do so, switch off Blind Spot Assist when: R
the SmartKey is in position 2 in the ignition
lock R
the engine is not running
Lane Keeping Assist General notes
�C
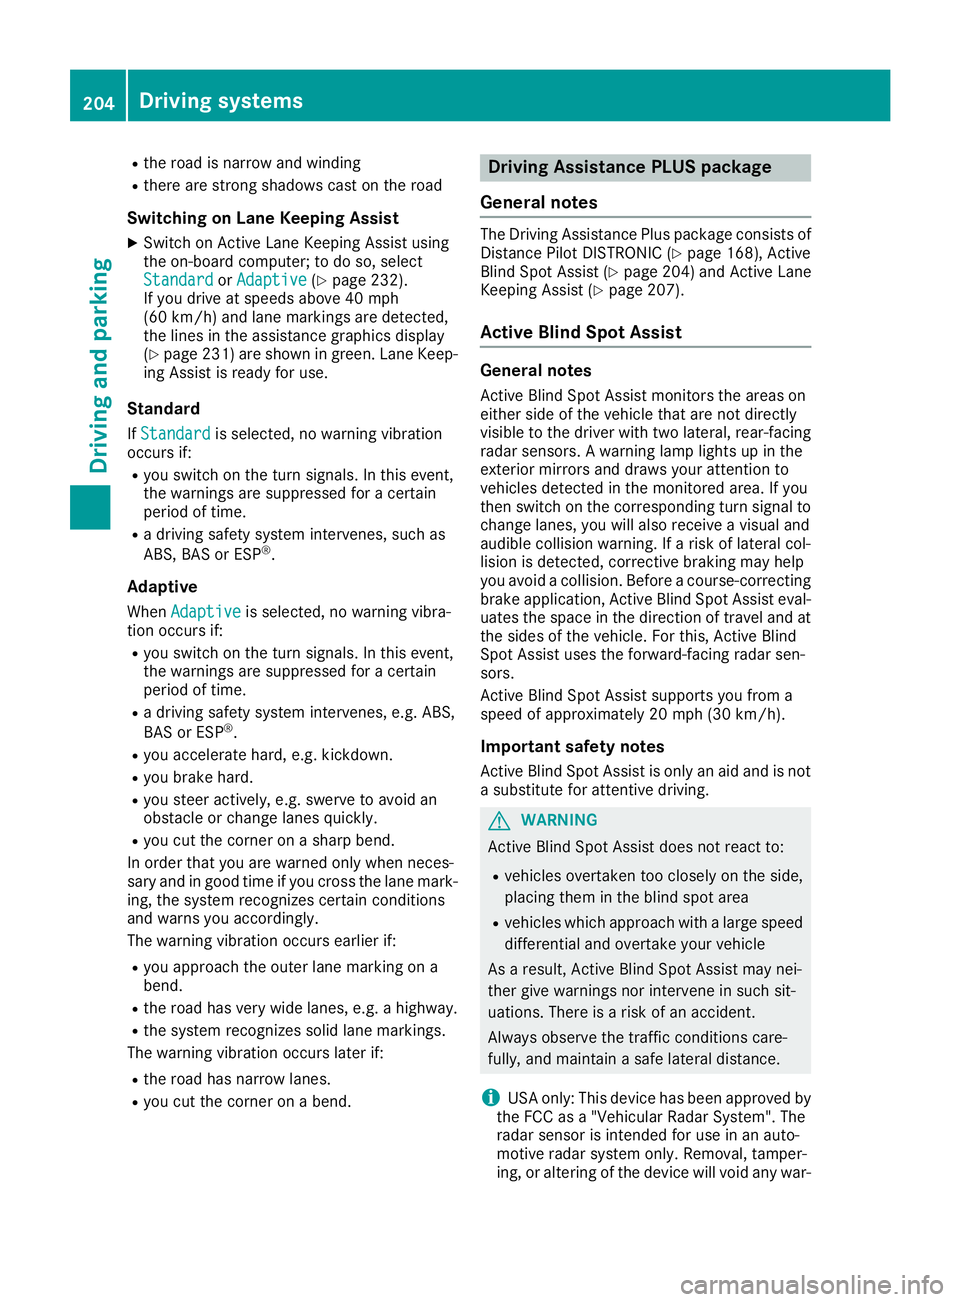
Lane Keeping Assist camera
Lane Keeping Assist monitors the area in front of
your vehicle with camera �C , which is mounted
at the top of the windshield. Active Lane Keeping
Assist detects lane markings on the road and
can warn you before you leave your lane unin-
tentionally.
This function is available in the range between
40 mph and 120 mph (60 km/h and 200 km/h).
A warning may be given if a front wheel passes
over a lane marking. It will warn you by means of
intermittent vibration in the steering wheel for
up to 1.5 second s.
Im portant safety notes
G WARNING
Lane Keeping Assist may not always clearly
recognize lane markings. In this case, Lane Keeping Assist may: R
give an unnecessary warning R
not give a warning
There is a risk of an accident.
Always pay particular attention to the traffic
situation and stay in lane, in particular if
warned by Lane Keeping Assist.
G WARNING
The Lane Keeping Assist warning does not
return the vehicle to the original lane. There is
a risk of an accident.
You should always steer, brake or accelerate
yourself, in particular if warned by Lane Keep-
ing Assist.
If you fail to adapt your driving style, Lane Keep-
ing Assist can neither reduce the risk of an acci-
dent nor override the laws of physics. Lane
Keeping Assist cannot take into account the
road, traffic and weather conditions. Lane Keep-
ing Assist is merely an aid. You are responsible
for the distance to the vehicle in front, for vehi-
cle speed, for braking in good time and for stay-
ing in your lane.
The Lane Keeping Assist does not keep the vehi-
cle in the lane.
The system may be impaired or may not function
if: R
there is poor visibility, e.g. due to insufficient
illumination of the road, or due to snow, rain,
fog or spray R
there is glare, e.g. from oncoming traffic, the
sun or reflection from other vehicles (e.g. if
the road surface is wet) R
the windshield is dirty, fogged up, damaged or
covered, for instance by a sticker, in the vicin-
ity of the camera R
there are no, several or unclear lane markings
for a lane, e.g. in areas with road construction
work R
the lane markings are worn away, dark or cov-
ered up, e.g. by dirt or snow R
the distance to the vehicle in front is too small
a nd the lane markings thus cannot be detec-
ted R
the lane markings change quickly, e.g. lanes
branch off, cross one another or mergeDriving systems 203
Driving and parking Z
Page 206 of 390
R
the road is narrow and winding R
there are strong shadows cast on the road
Switching on Lane Keeping Assist X
Switch on Active Lane Keeping Assist using
the on-board computer; to do so, select
Standard or Adaptive ( Y
page 232).
If you drive at speeds above 40 mph
(60 km/h) and lane markings are detected,
the lines in the assistance graphics display
( Y
page 231) are shown in green. Lane Keep-
ing Assist is ready for use.
Standard If Standard is selected, no warning vibration
occurs if: R
you switch on the turn signals. In this event,
the warnings are suppressed for a certain
period of time. R
a driving safety system intervenes, such as
ABS, BAS or ESP ®
.
Adaptive When Adaptive is selected, no warning vibra-
tion occurs if: R
you switch on the turn signals. In this event,
the warnings are suppressed for a certain
period of time. R
a driving safety system intervenes, e.g. ABS,
BAS or ESP ®
.R
you accelerate hard, e.g. kickdown. R
you brake hard. R
you steer actively, e.g. swerve to avoid an
obstacle or change lanes quickly. R
you cut the corner on a sharp bend.
In order that you are warned only when neces-
sary and in good time if you cross the lane mark-
ing, the system recognizes certain conditions
and warns you accordingly.
The warning vibration occurs earlier if: R
you approach the outer lane marking on a
bend. R
the road has very wide lanes, e.g. a highway. R
the system recognizes solid lane markings.
The warning vibration occurs later if: R
the road has narrow lanes. R
you cut the corner on a bend. Driving Assistance PLUS package
General notes The Driving Assistance Plus package consists of
Distance Pilot DISTRONIC ( Y
page 168), Active
Blind Spot Assist ( Y
page 204) and Active Lane
Keeping Assist ( Y
page 207).
Active Blind Spot Assist General notes Active Blind Spot Assist monitors the areas on
either side of the vehicle that are not directly
visible to the driver with two lateral, rear-facing
radar sensors. A warning lamp lights up in the
exterior mirrors and draws your attention to
vehicles detected in the monitored area. If you
then switch on the corresponding turn signal to
change lanes, you will also receive a visual and
audible collision warning. If a risk of lateral col-
lision is detected, corrective braking may help
you avoid a collision. Before a course-correcting
brake application, Active Blind Spot Assist eval-
uates the space in the direction of travel and at
the sides of the vehicle. For this, Active Blind
Spot Assist uses the forward-facing radar sen-
sors.
Active Blind Spot Assist supports you from a
speed of approximately 20 mph (30 km/h).
Important safety notes Active Blind Spot Assist is only an aid and is not
a substitute for attentive driving.
G WARNING
Active Blind Spot Assist does not react to: R
vehicles overtaken too closely on the side,
placing them in the blind spot area R
vehicles which approach with a large speed
differential and overtake your vehicle
As a result, Active Blind Spot Assist may nei-
ther give warnings nor intervene in such sit-
uations. There is a risk of an accident.
Always observe the traffic conditions care-
fully, and maintain a safe lateral distance.
i USA only: This device has been approved by
the FCC as a "Vehicular Radar System". The
radar sensor is intended for use in an auto-
motive radar system only. Removal, tamper-
ing, or altering of the device will void any war-204
Driving system s
Dr ivi ng an d parking