2017 MERCEDES-BENZ GLE COUPE park assist
[x] Cancel search: park assistPage 205 of 366
XEstablish the electrical connection between
the vehicle and the trailer.
XCheck that the trailer lighting system is work-
ing.
XPush the combination switch upwards/down-wards and check whether the corresponding
turn signal on the trailer flashes.
A trailer that is connected is recognized only
when the electrical connection is established
correctly and when the lighting system is work-
ing properly. The function of other systems also
depends on this, for example:
RESP®
RParking Assist PARKTRONIC
RParking Pilot
RActive Blind Spot Assist
RActive Lane Keeping Assist
iVehicles with the AIRMATIC package: if you
couple up a trailer, the vehicle always remains
at normal level. When coupling up a trailer,
please observe the following:
RIf the normal level has not been set man-
ually, the vehicle is automatically lowered
to normal level. This is the case if a speed of
5 mph (8 km/h) is reached.
RThe Sport drive program is not available.
These restrictions apply to all accessories
powered through a connection to the trailer
power socket of your vehicle, e.g. a bicycle
carrier.
Observe the maximum permissible trailer
dimensions (wi
dth and length).
Most U.S. states and all Canadian provinces
require by law:
RSafety chains between the towing vehicle and
the trailer. The chains should be cross-wound
under the trailer drawbar. They must be fas-
tened to the vehicle's trailer coupling, not to
the bumper or the axle.
Leave enough play in the chains to make tight
cornering possible.
RA separate brake system for certain types of
trailer.
RSafety switch for braked trailers. Check the
specific legal requirements applicable to your
state.
If the trailer becomes detached from the tow-
ing vehicle, the safety switch applies the
trailer brakes.
Towing a trailer
There are numerous legal requirements con-
cerning the towing of a trailer, e.g. speed restric- tions. Make sure that your car/trailer combina-
tion complies with the local regulations:
Rin your place of residence
Rin the location to which you are driving
The police and local authorities can provide reli- able information.
Observe the following when towing a trailer:
RTo gain driving experience and to become
accustomed to the new handling characteris-
tics, you should practice the following in a
traffic-free location:
-cornering
-stopping
-backing up
RBefore driving, check:
-trailer tow hitch
-safety switch for braked trailers
-safety chains
-electrical connections
-lights
-wheels
RAdjust the exterior mirrors to provide an
unobstructed view of the rear section of the
trailer.
RIf the trailer has electronically controlled
brakes, pull away carefully. Brake manually
using the brake controller and check whether
the brakes function correctly.
RSecure any objects on the trailer to prevent
the cargo from slipping when the vehicle is in
motion.
RWhen you couple up a trailer, check at regular
intervals that the load is firmly secured. If the
tra
iler is equipped with trailer lights and
brakes, check the trailer to ensure that these
are working.
RBear in mind that the handling will be less
stable when towing a trailer than when driving
without one. Avoid sudden steering move-
ments.
RThe vehicle/trailer combination is heavier,
accelerates more slowly, has a decreased
gradient climbing capability and a longer
braking distance.
It is more susceptible to side winds and
requires more careful steering.
Towing a trailer203
Driving an d parking
Z
Page 211 of 366
Possible displays in the multifunction dis-
play:
RZGearshift recommendation, when shifting
manually (Ypage 136)
Rj Parking Pilot (Ypage 177)
RCRUISECruise control (Ypage 157)
R_ Adaptive Highbeam Assist
(Ypage 108)
Rè ECO start/stop function (Ypage 129)
RëHOLD function (Ypage 167)
RaDistance Pilot DISTRONIC Steering Pilot
(Ypage 214)
RDSRDownhill Speed Regulation
(Ypage 168)
Menus and submenus
Menu overview
Press the =or; button on the steering
wheel to call up the menu bar and select a menu.
Operating the on-board computer (
Ypage 207).
Depending on the equipment installed in the
vehicle, you can call up the following menus:
RTripmenu (Ypage 209)
RNavimenu (navigation instructions)
(Ypage 210)
RAudiomenu (Ypage 211)
RTelmenu (telephone) (Ypage 212)
RDriveAssistmenu (assistance)
(Ypage 213)
RServ.menu (Ypage 213)
RSett.menu (settings) (Ypage 215)
RAMGmenu (Mercedes-AMG vehicles)
(Ypage 218)
Trip menu
Standard display
XPress and hold the %button on the steer-
ing wheel until the Tripmenu with trip odom-
eter :and odometer ;appears.
Trip computer "From Start" or "From
Reset"
:Distance
;Driving time
=Average speed
?Average fuel consumption
XPress the =or; button on the steering
wheel to select the Tripmenu.
XPress the9or: button to select
From startor From reset.
The values in the From
Startsubmenu are cal-
culated from the start of a journey, while the
values in the From Reset
submenu are calcu-
lated from the last time the submenu was reset
(
Ypage 210).
The From Start
trip computer is automatically
reset if:
Rthe ignition has been switched off for more
than four hours.
R999 hours have been exceeded.
R9,999 miles have been exceeded.
The From reset
trip computer is automatically
reset if the value exceeds 9,999 hours or
99,999 miles.
ECO display
The ECO display is not available for Mercedes-
AMG vehicles.
XPress the =or; button on the steering
wheel to select the Tripmenu.
XPress the9or: button to select ECODISPLAY.
If the ignition remains switched off for longer
than four hours, the ECO display will be auto-
matically reset.
For more information on the ECO display, see
(
Ypage 149).
Menus and submenus209
On-board computer and displays
Z
Page 229 of 366
Display messagesPossible causes/consequences andMSolutions
The yellow!warning lamp lights up and th ered F (USAonly)
or ! (Canada only) indicator lamp flashes .
It is no tpossibl eto apply th eelectric parking brak emanually.
XShift th etransmission to position P.
XVisitaqualified specialist workshop .
$(USA
only)
J( Canada
only)
Check Brake Fluid
Level
There is no tenough brak efluid in th ebrak efluid reservoir .In addition ,
th e$ (USAonly) or J(Canada only) warning lamp lights up in
th einstrumen tcluste rand awarning tone sounds.
GWARNIN G
The braking effec tmay be impaired.
There is aris kof an accident.
XPull ove rand stop th evehicl esafely as soo nas possible, payin g
attention to roa dand traffic conditions. Do no tcontinu edrivin g
under any circumstances.
XSecur eth evehicl eagainst rollin gaway (Ypage 145).
XConsult aqualified specialist workshop .
XDo notadd brak efluid .This does no tcorrec tth emalfunction .
#
CheckBrakePadWear
The brak epads/linings hav ereached their wear limit.
US Aonly: th e$ red brak esystem warning lamp is lit while th e
engin eis running.
XVisit aqualified specialist workshop .
G
Inoperative
Oneor mor emain features of th embrace system are malfunctioning .
XVisitaqualified specialist workshop .
ActiveBrakeAssistFunctionsCurrentlyLimitedSee Opera‐tor's Manual
Active Brake Assis tis temporarily inoperative.
Possibl ecauses are:
Rth eradar sensor system is temporarily inoperative, e.g. due to elec -
tromagneti cradiation emitted by nearby TV or radi ostation sor
other source sof electromagneti cradiation
Rth esystem is outside th eoperating temperature range
Rth eon-boar dvoltag eis to olow.
Whe nth ecauses state dabov eno longer apply, th edisplay message
disappears.
Active Brake Assis tis operational again .
If th edisplay message does no tdisappear :
XPull overand stop th evehicl esafely as soo nas possible, payin g
attention to roa dand traffic conditions.
XSecur eth evehicl eagainst rollin gaway (Ypage 145).
XRestart th eengine.
Display messages22 7
On-board computer and displays
Z
Page 243 of 366

Display messagesPossible causes/consequences andMSolutions
Blind SpotAssistinoperativeorActiveBlind Spo tAssistinoperative
Blind Spot Assis tor Active Blind Spot Assis tis malfunctioning .
The yellow 9indicator lamp salso ligh tup in th eexterio rmirrors.
XVisit aqualified specialist workshop .
ParkingPilot Can ‐celedThe driver's door is open .
XRepeat theparking gap measuremen tand parking process wit hth e
driver's door closed .
You haveinadvertentl ytouched th emultifunction steering whee lwhile
steering intervention was active .
XWhilesteering intervention is active ,mak esur ethat th emultifunc-
tion steering whee lis no ttouched unintentionally.
The vehicl ehas started to skid and ES P®has intervened.
XUse Parking Pilotagain later (Ypage 177).
ParkingPilot Inop‐erativ ePARKTRONI CParking Assis tis malfunctioning or faulty.
XFollow th einstruction sand helpful hints in th e"Problem swit h
PARKTRONI CParking Assist" section (Ypage 177).
If th emultifunction display still shows th edisplay message :
XVisitaqualified specialist workshop .
Parking Pilotis unavailable or malfunctioning .
XSwitchoff th eignition and restar tth eengine.
If th eParking Pilo tcontinues to be unavailable (the jsymbol does
no tappear in th emultifunction display):
XVisit aqualified specialist workshop .
ParkingPilot Fin ‐ishedThe vehicleis parked. Awarning tone also sounds.
The display message disappear sautomatically.
Distance Pilot offDistanc ePilo tDISTRONI Cis deactivated.
If awarning tone also sounds, Distanc ePilo thas deactivated auto -
matically (
Ypage 159).
Distance Pilotavailable againDistancePilo tDISTRONI Cis operational again after having been tem-
porarily unavailable .You can no wreactivat eDistanc ePilo t
DISTRONI C (
Ypage 159).
Display messages241
On-board computer and displays
Z
Page 291 of 366

Information on Roadside Assistance
(Ypage 26).
Downloading routes
Downloading routes allows you to transfer and
save predefined routes in the navigation sys-
tem.
A route can be prepared and sent by either a
customer service representative or under "Own-
ers Online" at http://www.mbusa.com.
Each route can include up to four way points.
Once a route has been received by the naviga-
tion system, you will see theDo
youwanttostart route guidance? DestinationReceived destination has been savedin "Previous destinations".message on
the multimedia system display.
The route is saved.
XTo start route guidance: selectYes.
An overview of the route is shown in the dis-
play.
If you select No
, the saved route can be called
up later in the navigation menu.
XSelect Start.
Route guidance starts.
Downloaded and saved routes can be called up
again.
Speed alert
You can define the upper speed limit, which
must not be exceeded by the vehicle.
If this selected speed is exceeded by the vehicle,
a message will be sent to the Customer Assis-
tance Center. The Customer Assistance Center
then forwards this information to you.
You can select the way in which you receive this
information beforehand. Possible options
include text message, e-mail or an automated
call.
The data you receive contains the following
information:
Rthe location where the speed limit was excee-
ded
Rthe time at which the speed limit was excee-
ded
Rthe selected speed limit which was exceeded
Geo fencing
Geo fencing allows you to select areas which the
vehicle should not enter or leave. You will be
informed if the vehicle crosses the boundaries
of the selected areas. You can select the way in
which you receive this information beforehand.
Possible options include text message, e-mail or an automated call.
The area can be determined as either a circle or
a polygon with a maximum of ten corners. You
can specify up to ten areas simultaneously. Dif-
ferent settings are possible for each area.
These settings can be called up under "Owners
Online" at http://www.mbusa.com.
Alternatively, you can trigger an MB Info call and
inform the customer service representative that
you wish to activate geo fencing.
Currently inactive areas can be activated by text
message.
Triggering the vehicle alarm
With this function, you can trigger the vehicle's
panic alarm via text message. An alarm sounds
and the exterior lighting flashes. Depending on
the setting, the panic alarm lasts five or ten sec-onds. Afterwards, the alarm switches off.
Garage door opener
General notes
The HomeLink®garage door opener integrated
in the rear-view mirror allows you to operate up
to three different door and gate systems.
Use the integrated garage door opener only on
garage doors that:
Rhave safety stop and reverse features and
Rmeet current U.S. federal safety standards
Once programed, the integrated garage door
opener in the rear-view mirror will assume the
function of the garage door system's remote
control. Please also read the operating instruc-
tions for the garage door system.
When programming a garage door opener, park
the vehicle outside the garage. Do not run the
engine while programming.
Certain garage door drives are incompatible
with the integrated garage door opener. If you
have difficulty programing the integrated garage
Features289
Stowage and features
Z
Page 313 of 366
XWhen the tire pressure is correct, unscrew the
filler hose from the valve of the sealed tire.
XScrew the valve cap onto the tire valve of the
sealed tire.
XPull the tire sealant bottle out of the tire infla-
tion compressor.
The filler hose remains attached to the tire
sealant bottle.
XDrive to the nearest qualified specialist work-
shop and have the tire changed there.
XHave the tire sealant bottle replaced as soon
as possible at a qualified specialist workshop.
XHave the tire sealant bottle replaced every
four years at a qualified specialist workshop.
Battery (vehicle)
12 V battery - important safety notes
Special tools and expert knowledge are required
when working on the battery, e.g. removal and
installation. You should therefore have all work
involving the battery carried out at a qualified
specialist workshop.
GWARNING
Work carried out incorrectly on the battery
can lead, for example, to a short circuit and
thus damage the vehicle electronics. This can
lead to function restrictions applying to
safety-relevant systems, e.g the lighting sys-
tem, the ABS (anti-lock braking system) or the
ESP
®(Electronic Stability Program). The oper-
ating safety of your vehicle may be restricted.
You could lose control of the vehicle, for
example:
Rwhen braking
Rin the event of abrupt steering maneuvers
and/or when the vehicle's speed is not
adapted to the road conditions
There is a risk of an accident.
In the event of a short circuit or a similar inci-
dent, contact a qualified specialist workshop
immediately. Do not drive any further. You
should have all work involving the battery car- ried out at a qualified specialist workshop. For further information about ABS and ESP
®,
see (Ypage 61) and (Ypage 64).
GWARNING
Electrostatic build-up can lead to the creation of sparks, which could ignite the highly explo-
sive gases of a battery. There is a risk of an
explosion.
Before handling the battery, touch the vehicle
body to remove any existing electrostatic
build-up.
The highly flammable gas mixture forms when
charging the battery as well as when jump-start-
ing.
Always make sure that neither you nor the bat-
tery is electrostatically charged. A build-up of
electrostatic charge can be caused, for exam-
ple:
Rby wearing clothing made from synthetic
fibers
Rdue to friction between clothing and seats
Rif you push or pull the battery across the car-
pet or other synthetic materials
Rif you wipe the battery with a cloth
GWARNING
During the charging process, a battery produ-
ces hydrogen gas. If a short circuit occurs or
sparks are created, the hydrogen gas can
ignite. There is a risk of an explosion.
RMake sure that the positive terminal of a
connected battery does not come into con- tact with vehicle parts.
RNever place metal objects or tools on a bat-
tery.
RIt is important that you observe the descri-
bed order of the battery terminals when
connecting and disconnecting a battery.
RWhen jump-starting, make sure that the
battery poles with identical polarity are
connected.
RIt is particularly important to observe the
described order when connecting and dis-
connecting the jumper cables.
RNever connect or disconnect the battery
terminals while the engine is running.
Battery (vehicle)311
Breakdown assistance
Z
Page 314 of 366
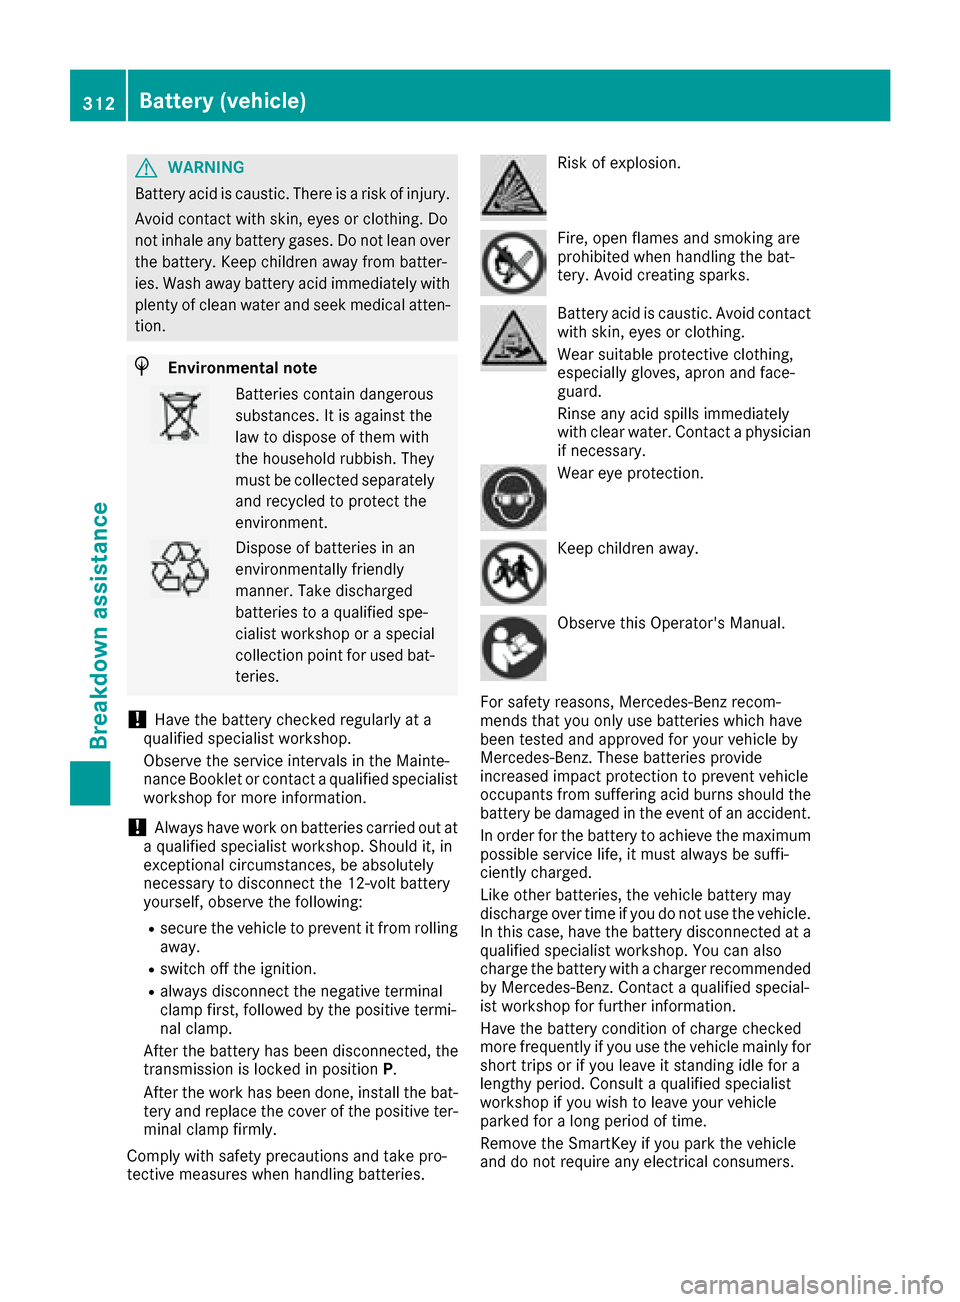
GWARNING
Battery acid is caustic. There is a risk of injury.
Avoid contact with skin, eyes or clothing. Do
not inhale any battery gases. Do not lean over
the battery. Keep children away from batter-
ies. Wash away battery acid immediately with
plenty of clean water and seek medical atten-
tion.
HEnvironmental note
Batteries contain dangerous
substances. It is against the
law to dispose of them with
the household rubbish. They
must be collected separately and recycled to protect the
environment.
Dispose of batteries in an
environmentally friendly
manner. Take discharged
batteries to a qualified spe-
cialist workshop or a special
collection point for used bat-
teries.
!Have the battery checked regularly at a
qualified specialist workshop.
Observe the service intervals in the Mainte-
nance Booklet or contact a qualified specialist
workshop for more information.
!Always have work on batteries carried out at
a qualified specialist workshop. Should it, in
exceptional circumstances, be absolutely
necessary to disconnect the 12-volt battery
yourself, observe the following:
Rsecure the vehicle to prevent it from rolling
away.
Rswitch off the ignition.
Ralways disconnect the negative terminal
clamp first, followed by the positive termi-
nal clamp.
After the battery has been disconnected, the
transmission is locked in position P.
After the work has been done, install the bat-
tery and replace the cover of the positive ter-
minal clamp firmly.
Comply with safety precautions and take pro-
tective measures when handling batteries.
Risk of explosion.
Fire, open flames and smoking are
prohibited when handling the bat-
tery. Avoid creating sparks.
Battery acid is caustic. Avoid contact
with skin, eyes or clothing.
Wear suitable protective clothing,
especially gloves, apron and face-
guard.
Rinse any acid spills immediately
with clear water. Contact a physician
if necessary.
Wear eye protection.
Keep children away.
Observe this Operator's Manual.
For safety reasons, Mercedes-Benz recom-
mends that you only use batteries which have
been tested and approved for your vehicle by
Mercedes-Benz. These batteries provide
increased impact protection to prevent vehicle
occupants from suffering acid burns should the
battery be damaged in the event of an accident.
In order for the battery to achieve the maximum
possible service life, it must always be suffi-
ciently charged.
Like other batteries, the vehicle battery may
discharge over time if you do not use the vehicle.
In this case, have the battery disconnected at a
qualified specialist workshop. You can also
charge the battery with a charger recommended
by Mercedes-Benz. Contact a qualified special-
ist workshop for further information.
Have the battery condition of charge checked
more frequently if you use the vehicle mainly for
short trips or if you leave it standing idle for a
lengthy period. Consult a qualified specialist
workshop if you wish to leave your vehicle
parked for a long period of time.
Remove the SmartKey if you park the vehicle
and do not require any electrical consumers.
312Battery (vehicle)
Breakdown assistance
Page 315 of 366
The vehicle will then use very little energy, thus
conserving battery power.
If the power supply has been interrupted, e.g. ifyou reconnect the battery, you will have to:
Rset the clock; see the Digital Operator's Man-
ual
On vehicles with a multimedia system and
navigation system, the clock is set automati-
cally.
Rreset the function for folding the exterior mir-
rors in/out automatically, by folding the mir-
rors out once (
Ypage 100).
Charging the 12 V battery
GWARNING
During charging and jump-starting, explosive
gases can escape from the battery. There is a risk of an explosion.
Particularly avoid fire, open flames, creating
sparks and smoking. Ensure there is sufficient
ventilation while charging and jump-starting.
Do not lean over a battery.
GWARNING
Battery acid is caustic. There is a risk of injury.
Avoid contact with skin, eyes or clothing. Do
not inhale any battery gases. Do not lean over
the battery. Keep children away from batter-
ies. Wash away battery acid immediately with
plenty of clean water and seek medical atten-
tion.
GWARNING
A discharged battery can freeze at tempera-
tures below freezing point. When jump-start-
ing the vehicle or charging the battery, gases
can escape from the battery. There is a risk of an explosion.
Allow the frozen battery to thaw out before
charging it or jump-starting.
!Only use battery chargers with a maximum
charging voltage of 14.8 V.
!Only charge the battery using the jump-
starting connection point.
The jump-starting connection point is in the
engine compartment (
Ypage 313).
XOpen the hood.
XConnect the battery charger to the positive
terminal and ground point in the same order
as when connecting the donor battery in the
jump-starting procedure (
Ypage 313).
Keep away from fire and open flames. Do not
lean over a battery. Never charge the battery if it
is still installed in the vehicle, unless you use a
battery charger which has been tested and
approved by Mercedes-Benz. A battery charger
unit specially adapted for Mercedes-Benz vehi-
cles and tested and approved by Mercedes-
Benz is available as an accessory. It permits the
charging of the battery in its installed position.
Contact an authorized Mercedes-Benz Center
for further information and availability. Read the
battery charger's operating instructions before
charging the battery.
If, at low temperatures, the indicator lamps/
warning lamps in the instrument cluster do not
light up, it is highly likely that the discharged
battery has frozen. In this case you may neither
jump-start the vehicle nor charge the battery.
The service life of a thawed-out battery may be
shorter. The starting characteristics can be
impaired, particularly at low temperatures. Have
the thawed-out battery checked at a qualified
specialist workshop.
Jump-starting
For the jump-starting procedure, use only the jump-starting connection point in the engine com-
partment, consisting of a positive terminal and a ground point.
GWARNING
Battery acid is caustic. There is a risk of injury.
Jump-starting313
Breakdown assistance
Z