2017 MERCEDES-BENZ GLE COUPE height
[x] Cancel search: heightPage 99 of 366
Steering wheel
Important safety notes
GWARNING
You could lose control of your vehicle if you do the following while driving:
Radjust the driver's seat, head restraint,
steering wheel or mirrors
Rfasten the seat belt
There is a risk of an accident.
Adjust the driver's seat, head restraint, steer-
ing wheel and mirror and fasten your seat belt before starting the engine.
GWARNING
Children could injure themselves if they
adjust the steering wheel. There is a risk of
injury.
When leaving the vehicle, always take the
SmartKey with you and lock the vehicle. Never
leave children unsupervised in the vehicle.
The electrically adjustable steering wheel can
still be adjusted when there is no SmartKey in
the ignition lock.
Adjusting the steering wheel man-
ually
GWARNING
If the steering wheel is unlocked while the
vehicle is in motion, it could change position
unexpectedly. This could cause you to lose
control of the vehicle. There is a risk of an
accident.
Before starting off, make sure the steering
wheel is locked. Never unlock the steering
wheel while the vehicle is in motion.
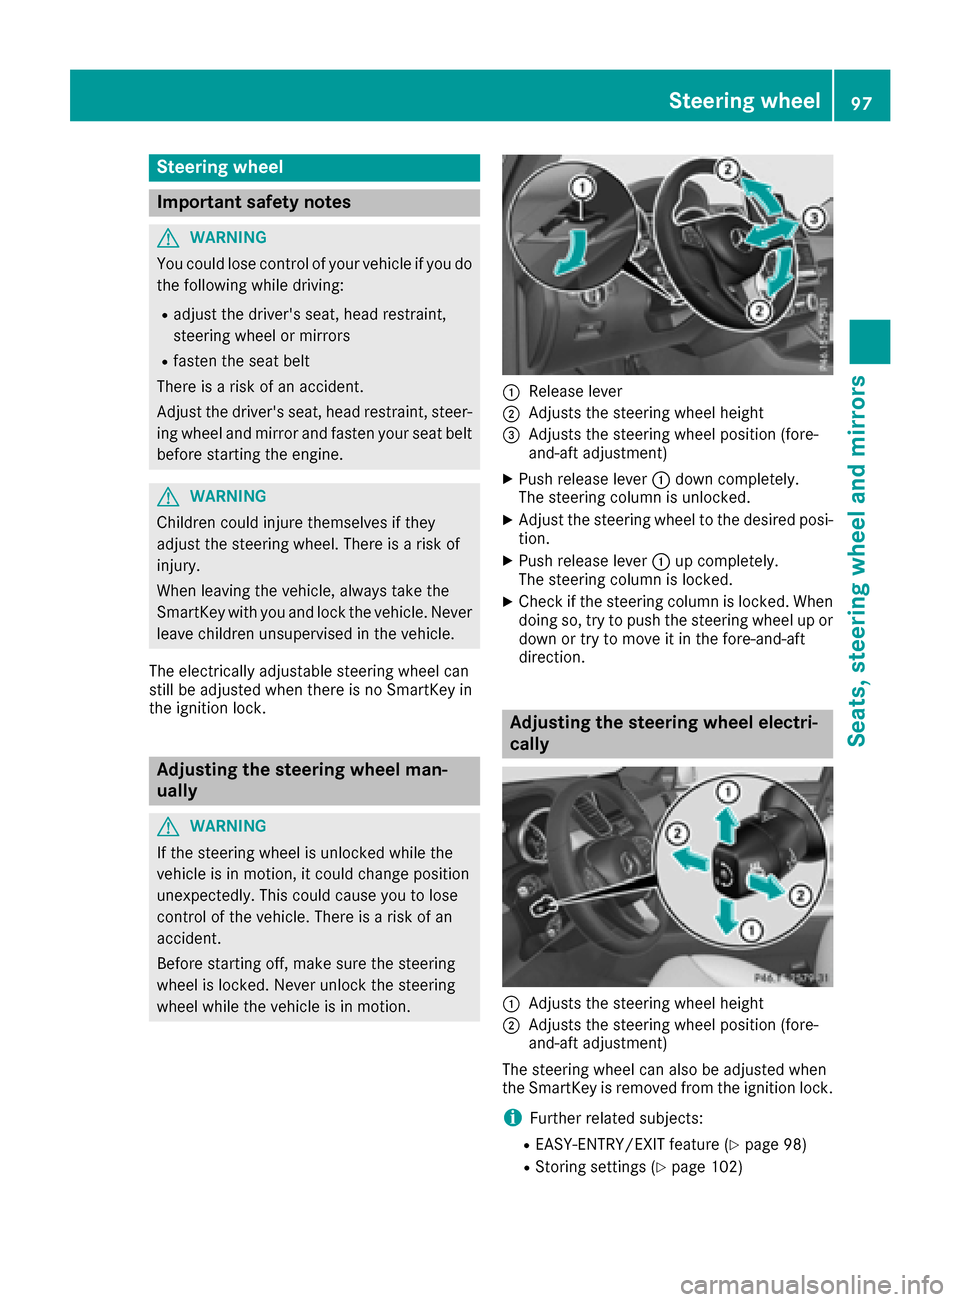
:Release lever
;Adjusts the steering wheel height
=Adjusts the steering wheel position (fore-
and-aft adjustment)
XPush release lever :down completely.
The steering column is unlocked.
XAdjust the steering wheel to the desired posi-
tion.
XPush release lever :up completely.
The steering column is locked.
XCheck if the steering column is locked. When
doing so, try to push the steering wheel up or down or try to move it in the fore-and-aft
direction.
Adjusting the steering wheel electri-
cally
:Adjusts the steering wheel height
;Adjusts the steering wheel position (fore-
and-aft adjustment)
The steering wheel can also be adjusted when
the SmartKey is removed from the ignition lock.
iFurther related subjects:
REASY-ENTRY/EXIT feature (Ypage 98)
RStoring settings (Ypage 102)
Steering wheel97
Seats, steering wheel and mirrors
Z
Page 174 of 366
cle could rollover more easily, for example on
a bend. There is a risk of an accident.
Always select as low a vehicle level as possi-
ble and adjust your driving style.
GWARNING
When you drive with the chassis lowered or
raised, the vehicle's braking and driving char-
acteristics can be significantly impaired. You
could also exceed the permissible vehicle
height if the chassis is raised. There is a risk of an accident.
Adjust the vehicle level before pulling away.
GWARNING
Due to the high center of gravity, the vehicle
may start to skid and roll over in the event of
an abrupt steering maneuver and/or when
the vehicle's speed is not adapted to the road
conditions. There is a risk of an accident.
Always adapt your speed and driving style to
the vehicle's driving characteristics and to the
prevailing road and weather conditions.
!When driving on extremely rough terrain,
select a high vehicle level in good time. Make
sure there is always sufficient ground clear-
ance. You will otherwise damage the vehicle.
RUtility vehicles have a significantly higher roll- over rate than other types of vehicles.
Failure to operate this vehicle safely may
result in an accident, rollover of the vehicle,
and severe or fatal injury.
RIn a rollover crash, an unbelted person is sig-
nificantly more likely to die than a person
wearing a seat belt.
You and all vehicle occupants should always
wear your seat belts.
General notes
Only select raised level if this is appropriate for
the road conditions. Otherwise, fuel consump-
tion may increase and handling may be affected.
Make changes to the vehicle level while the
vehicle is in motion. This enables the vehicle to
adjust to the new level as quickly as possible.
The vehicle level may change visibly if you park
the vehicl
e and the outside temperature
changes. If the temperature drops, the vehicle level is lower; with an increase in temperature,
the vehicle level rises.
If you unlock the vehicle or open a door, the
vehicle begins to compensate for load discrep-
ancies while still parked. However, for signifi-
cant level changes, such as after the vehicle has
been stationary for a long period, the engine
must be on. For safety reasons, the vehicle is
only lowered when the doors are closed. Low-
ering is interrupted if a door is opened, and it
continues once the door has been closed.
Vehicles with no trailer coupled:
below a
speed of 40 mph (64 km/h), you can choose
between the normal and raised vehicle level.
Select the normal vehicle level for normal road
surfaces and the raised vehicle level for driving
with snow chains or on particularly poor road
surfaces. Your selection remains stored even if
you remove the SmartKey from the ignition lock.
If you try to select raised level at a speed above
40 mph (64 km/h), the Drive More Slowly
message appears in the multifunction display.
Vehicles with a trailer coupled: below a speed
of 19 mph (30 km/h), you can choose between
the normal and raised vehicle level.
Setting the raised vehicle level
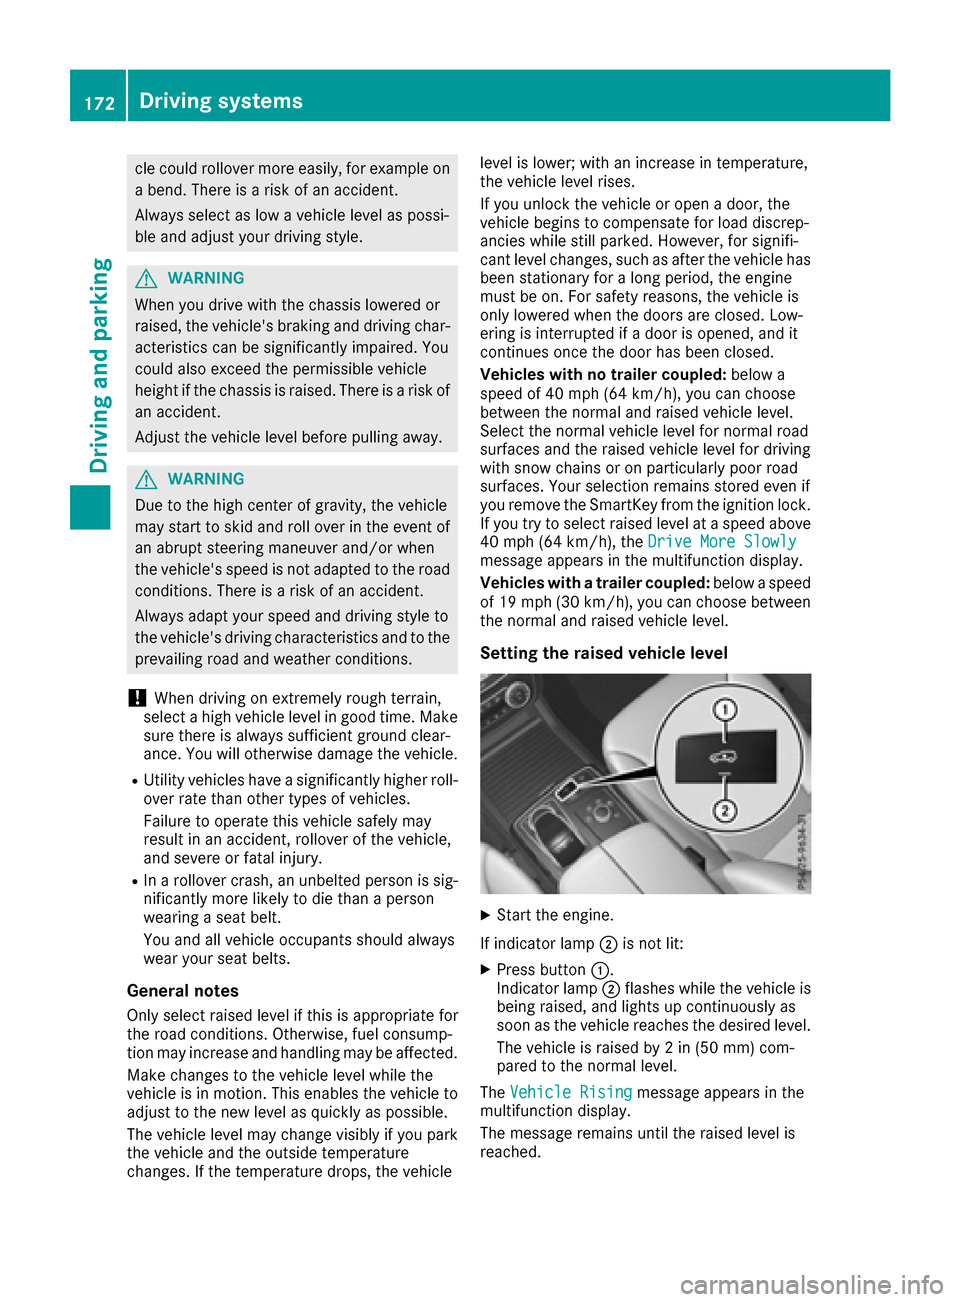
XStart the engine.
If indicator lamp ;is not lit:
XPress button :.
Indicator lamp ;flashes while the vehicle is
being raised, and lights up continuously as
soon as the vehicle reaches the desired level.
The vehicle is raised by 2 in (50 mm) com-
pared to the normal level.
The Vehicle Rising
message appears in the
multifunction display.
The message remains until the raised level is
reached.
172Driving systems
Driving and parking
Page 175 of 366
If you press the%ora button on the
multifunction steering wheel, the message will
disappear.
The raised level setting is canceled if you:
Rdrive at speeds above 50 mph (80 km/h) (all
vehicles except Mercedes-AMG vehicles)
Rdrive at speeds above 43 mph (70 km/h)
(Mercedes-AMG vehicles)
Rdrive at speed s between 40 mph (64 km/h)
and 50 mph (80 km/h) for approximately 20
seconds (all vehicles except Mercedes-AMG
vehicles)
Rdrive at speeds between 40 mph (64 km/h)
and 43 mph (70 km/h) for approximately 20
seconds (Mercedes-AMG vehicles)
Rdrive at speeds above 19 mph (30 km/h) with
a trailer
The raised vehicle level remains saved when you
are not driving within these speed ranges.
Setting the normal vehicle level
!Make sure that there is enough ground
clearance when the vehicle is being lowered.
It could otherwise hit the ground, damaging
the underbody.
XStart the engine.
If indicator lamp ;is lit:
XPress button :.
Indicator lamp ;flashes while the vehicle is
being lowered, and goes out as soon as the
desired vehicle level is reached.
Vehicles with no trailer coupled: the vehi-
cle is adjusted to the height of the selected
drive program (
Ypage 132).
Vehicles with a trailer coupled: the vehicle
is adjusted to normal level regardless of the
drive program selected (
Ypage 132). The
vehicle remains at the normal level, even if the
drive program is changed.
During the adjustment, the Lowering
mes-
sage appears in the multifunction display.
If you press the %ora button on the
multifunction steering wheel, the message will
disappear.
AMG adaptive sport suspension sys-
tem
General notes
iThe AMG adaptive sport suspension system
is available for Mercedes-AMG vehicles and
for the Mercedes-AMG GLE 43 4MATIC.
The electronically controlled damping system
works continuously. This improves driving
safety and ride comfort.
The damping is tuned individually to each wheel
and depends on:
Ryour driving style, e.g. sporty
Rthe road surface condition, e.g. bumps
Ryour individual selection of Sport, Sport + or
Comfort
The suspension setting can be adjusted using
the corresponding button in the center console
or the DYNAMIC SELECT controller
(
Ypage 132).
Each time you start the engine with the Smart-
Key or the Start/Stop button, Comfort mode is
activated. For further information about starting
the engine, see (
Ypage 126).
Sport mode
The firmer setting of the suspension tuning in
Sport mode ensures even better contact with
the road. Select this mode when employing a
sporty driving style, e.g. on winding country
roads.
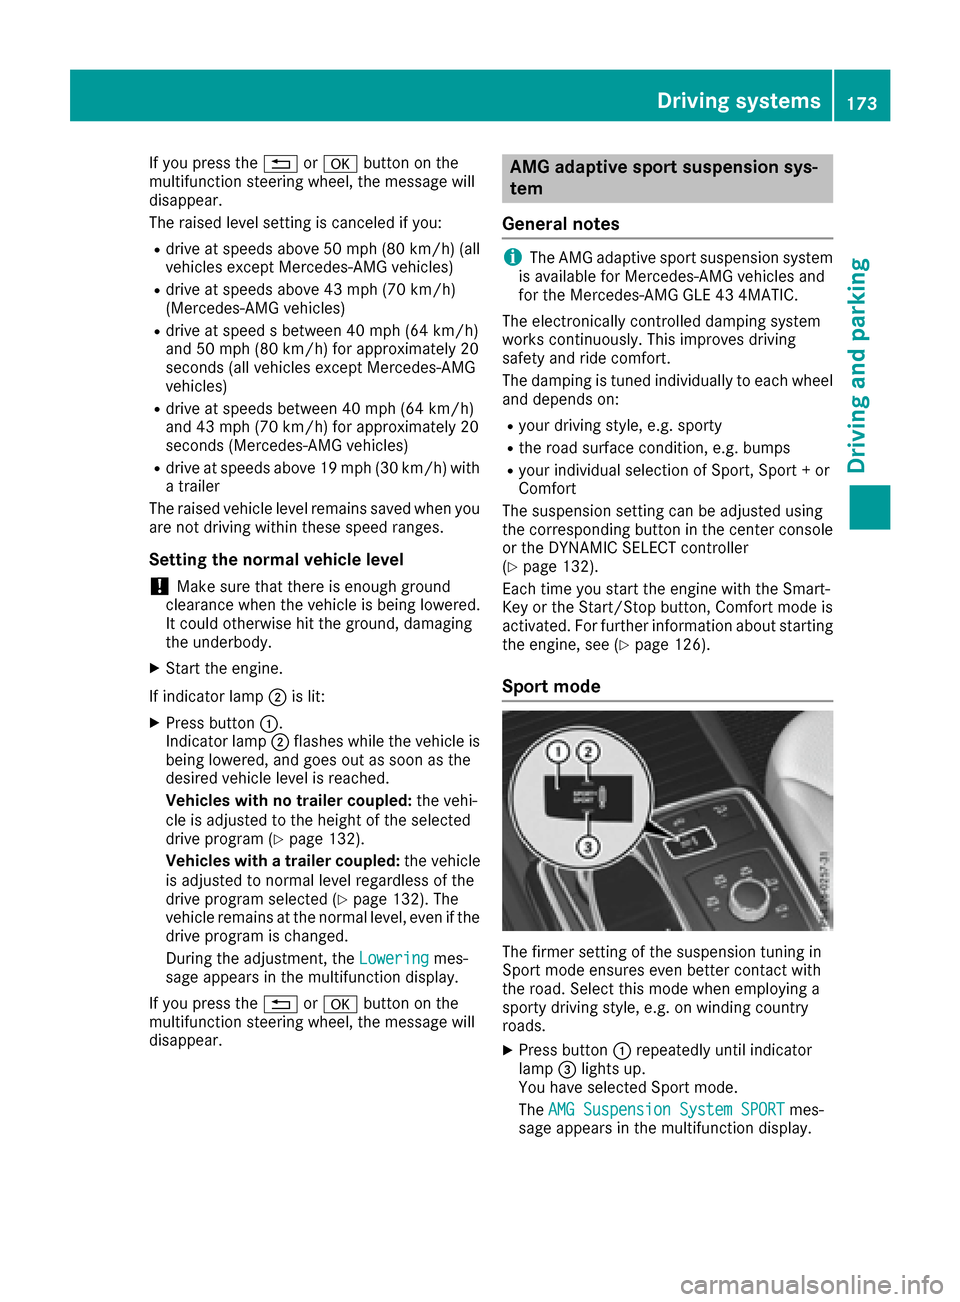
XPress button :repeatedly until indicator
lamp =lights up.
You have selected Sport mode.
The AMG Suspension System SPORT
mes-
sage appears in the multifunction display.
Driving systems173
Driving and parking
Z
Page 183 of 366

Canceling Parking Pilot
XStop the movement of the multifunction
steering wheel or steer yourself.
Parking Pilot is immediately canceled. The
Parking
PilotCanceledmessage appears
in the multifunction display.
or
XPress the Parking Assist PARKTRONIC button
(Ypage 176).
Parking Assist PARKTRONIC is switched off
and Parking Pilot is immediately canceled.
The Parking Pilot Canceled
message
appears in the multifunction display.
Parking Pilot is canceled automatically if:
Rthe electric parking brake is engaged
Rtransmission position Pis selected
Rparking using Parking Pilot is no longer pos-
sible
Ryou are driving faster than 6 mph (10 km/h)
Ra wheel spins, ESP®intervenes or fails. The
÷ warning lamp lights up in the instrument
cluster
A warning tone sounds. The parking symbol dis-
appears and the multifunction display shows the
Parking Pilot Canceled
message.
When Parking Pilot is canceled, you must steer
and brake again yourself.
If a system malfunction occurs, the vehicle is
braked to a standstill. To drive on, depress the
accelerator again.
Rear view camera
General notes
Rear view camera :is an optical parking and
maneuvering aid. It shows the area behind your vehicle with guide lines in the multimedia sys-
tem.
The area behind the vehicle is displayed as a
mirror image, as in the rear view mirror.
iThe text shown in the multimedia system
display depends on the language setting. The
following are examples of rear view camera
displays in the multimedia system.
Important safety notes
The rear view camera is only an aid. It is not a
replacement for your attention to your immedi-
ate surroundings. You are always responsible
for safe maneuvering and parking. When maneu-
vering or parking, make sure that there are no
persons, animals or objects in the area in which you are maneuvering.
Under the following circumstances, the rear
view camera will not function, or will function in
a limited manner:
Rif the trunk lid is open
Rin heavy rain, snow or fog
Rat night or in very dark places
Rif the camera is exposed to very bright light
Rif the area is lit by fluorescent bulbs or LED
lighting (the display may flicker)
Rif there is a sudden change in temperature,
e.g. when driving into a heated garage in win- ter
Rif the camera lens is dirty or obstructed
Observe the notes on cleaning
(
Ypage 303)
Rif the rear of your vehicle is damaged. In this
event, have the camera position and setting
checked at a qualified specialist workshop
The field of vision and other functions of the rear
view camera may be restricted due to additional
accessories on the rear of the vehicle (e.g.
license plate holder, bicycle rack).
For technical reasons, leaving the standard
height can result in inaccuracies in the guide
lines on vehicles with a height-adjustable chas-
sis.
iThe rear view camera is protected from rain-
drops and dust. When the rear view camera is
switched on, the Mercedes emblem opens
with the rear view camera in the cover on the tailgate.
Driving systems181
Driving and parking
Z
Page 188 of 366
Rif there is a sudden change in temperature,
e.g. when driving into a heated garage in win-ter
Rif the camera lenses are dirty or covered
Rif the vehicle components in which the cam-
eras are installed are damaged. In this event,
have the camera position and setting checked
at a qualified specialist workshop
Do not use the 360° camera in this case. You
can otherwise injure others or cause damage to objects or the vehicle.
Guide lines are always shown at road level. In
trailer mode, the guide lines are shown at the
level of the trailer coupling.
The field of vision and other functions of the
camera system may be restricted due to addi-
tional accessories on the rear of the vehicle (e.g.
license plate holder, bicycle rack).
On vehicles with height-adjustable chassis,
depending on technical conditions, leaving the
standard height can result in:
Rinaccuracies in the guide lines
Rinaccuracies in the display of generated
images (top view)
Activation conditions
The 360° camera image can be displayed if:
Ryour vehicle is equipped with a 360° camera
Rthe SmartKey is in position 2in the ignition
lock
Rthe multimedia system is switched on
Switching on the 360° camera
XPress the Øbutton in the center console
for longer than two seconds.
Depending on whether position Dor Ris
engaged, the following is shown:
Ra split screen with top view and the image
from the front camera or
Ra split screen with top view and the image
from the rear view camera
or
XPress the Øbutton in the center console.
The vehicle menu is displayed.
XSelect 360°Cameraand press 7to confirm.
Depending on whether position Dor Ris
engaged, the following is shown:
Ra split screen with top view and the image
from the front camera or
Ra split screen with top view and the image
from the rear view camera
Activating the 360° camera using
reverse gear
The 360° camera images can be automatically
displayed by engaging reverse gear.
XMake sure that the SmartKey is in position 2
in the ignition lock.
XMake sure that the Activation by R gearfunction is selected in the multimedia system;
see the separate operating instructions.
XTo show the 360° camera image: engage
reverse gear.
The multimedia system shows the area
behind the vehicle in split-screen mode. You
see the top view of the vehicle and the image
from the rear view camera.
Selecting the split-screens or 180° view
Selecting split-screen view
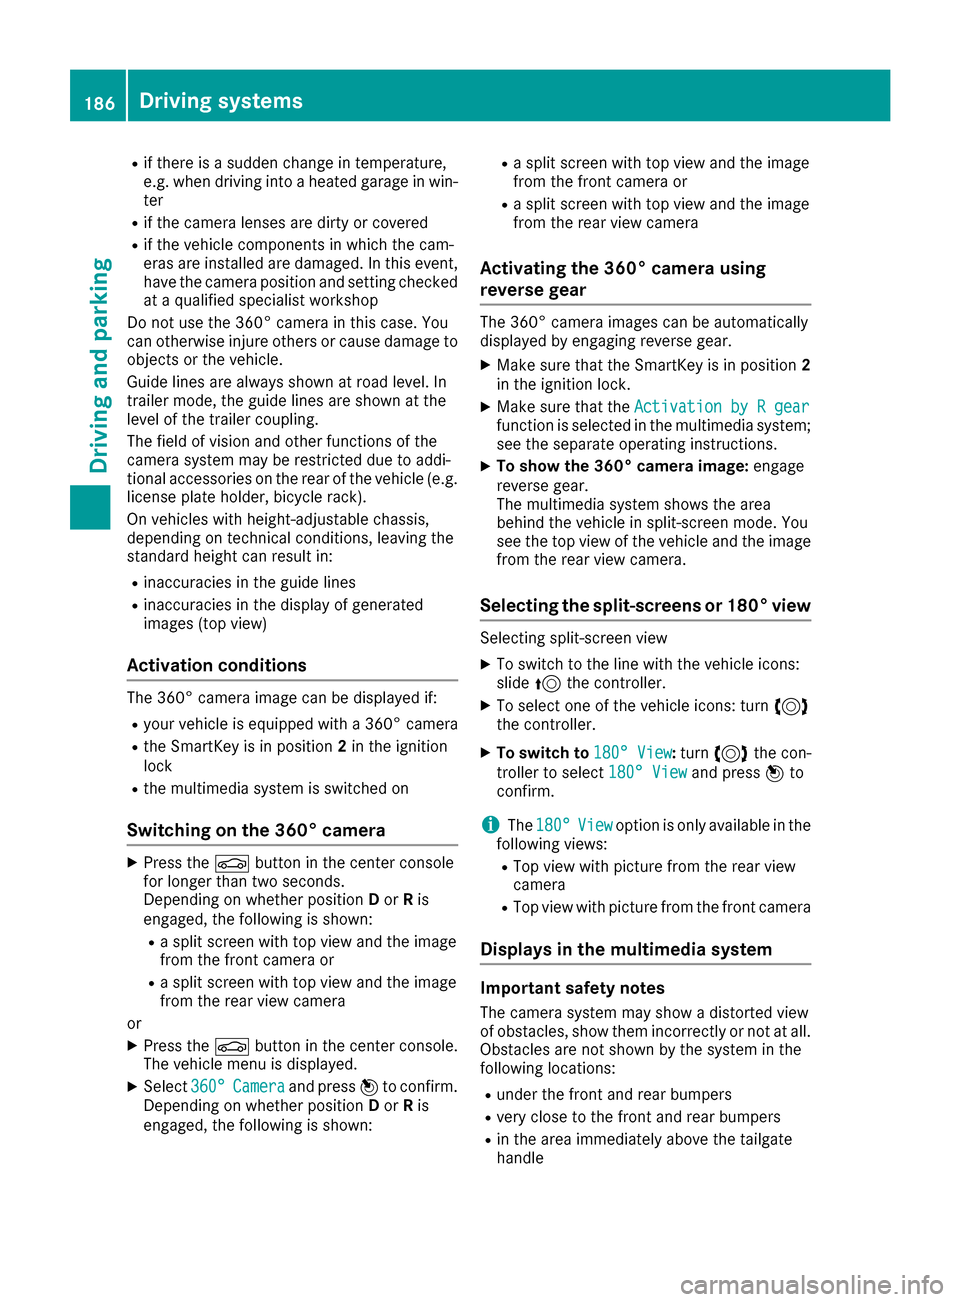
XTo switch to the line with the vehicle icons:
slide 5the controller.
XTo select one of the vehicle icons: turn 3
the controller.
XTo switch to 180° View:turn 3 the con-
troller to select 180° View
and press7to
confirm.
iThe 180°Viewoption is only available in the
following views:
RTop view with picture from the rear view
camera
RTop view with picture from the front camera
Displays in the multimedia system
Important safety notes
The camera system may show a distorted view
of obstacles, show them incorrectly or not at all.
Obstacles are not shown by the system in the
following locations:
Runder the front and rear bumpers
Rvery close to the front and rear bumpers
Rin the area immediately above the tailgate
handle
186Driving systems
Driving and parking
Page 202 of 366
Please observe the manufacturer's operating
instructions for the trailer coupling if a detach-
able trailer coupling is used.
Couple and uncouple the trailer carefully. If you
do not couple the trailer to the towing vehicle
correctly, the trailer could become detached.
Make sure that the following values are not
exceeded:
Rthe permissible trailer drawbar noseweight
Rthe permissible trailer load
Rthe permissible rear axle load of the towing
vehicle
Rthe maximum permissible gross vehicle
weight of both the towing vehicle and the
trailer
The applicable permissible values, which must
not be exceeded, can be found:
Rin the vehicle documents
Ron the identification plates for the trailer tow
hitch and the trailer
Ron the vehicle identification plate
If the values differ, the lowest value applies.
When towing a trailer, your vehicle's handling
characteristics will be different in comparison
with when driving without a trailer.
The vehicle/trailer combination:
Ris heavier
Ris restricted in its acceleration and gradient-
climbing capability
Rhas an increased braking distance
Ris affected more by strong crosswinds
Rdemands more sensitive steering
Rhas a larger turning circle
This could impair the handling characteristics.
When towing a trailer, always adjust your speed
to the current road and weather conditions. Do
not exceed the maximum permissible speed for
your vehicle/trailer combination.
Notes on towing a trailer
General notes
!If you have a trailer tow hitch retrofitted,
changes to the cooling system and drive train
may be necessary, depending on the vehicle
type. If you have a trailer tow hitch retrofitted,
observe the anchorage points on the chassis
frame.
RDo not exceed the legally prescribed maxi-
mum speed for vehicle/trailer combinations
in the relevant country.
This lowers the risk of an accident.
ROnly install an approved trailer coupling on
your vehicle.
Further information on availability and on
installation is available from any authorized
Mercedes-Benz Center.
RThe bumpers of your vehicle are not suitable
for installing detachable trailer couplings.
RDo not install hired trailer couplings or other
detachable trailer couplings on the bumpers
of your vehicle.
RIf you no longer need the ball coupling,
remove it from the ball coupling recess. This
will reduce the risk of damage to the ball cou-
pling.
When towing a trailer, set the tire pressure on
the rear axle of the towing vehicle for the max-
imum load. You will find the values in the tire
pressure table in the fuel filler flap of the vehicle (
Ypage 339).
Please note that when towing a trailer, the fol-
lowing driving systems have limited availability
or are not available at all:
RParking Assist PARKTRONIC (Ypage 174)
RBlind Spot Assist (Ypage 191)
RActive Lane Keeping Assist (Ypage 197)
On vehicles without level control, the height of
the ball coupling will alter according to the load
placed on the vehicle. If necessary, use a trailer
with a height-adjustable drawbar.
You will find installing dimensions and loads
under "Technical data" (
Ypage 361).
Driving tips
Observe the information on ESP®trailer stabili-
zation (Ypage 66) and on pulling away with a
trailer (Ypage 128).
The maximum permissible speed for vehicle/
trailer combinations depends on the type of
trailer. Before beginning the journey, check the
trailer's documents to see what the maximum
permissible speed is. Observe the legally pre-
scribed maximum speed in the relevant country.
200Towing a trailer
Driving and parking
Page 297 of 366

XMake sure that the windshield wipers are
turned off.
XPull release lever:on the hood.
The hood is released.
XReach into the gap, pull hood catch handle ;
up and lift the hood.
If you lift the hood by approximately 15 in
(40 cm), the hood is opened and held open
automatically by the gas-filled strut.
Closing the hood
XLower the hood and let it fall from a height of
approximately 8 in (20 cm).
XCheck that the hood has engaged properly.
If the hood can be raised slightly, it is not
properly engaged. Open it again and close it
with a little more force.
Radiator
Vehicles with a diesel engine: do not cover
the radiator, for example with a winter front or
bug cover. The readings of the on-board-diag-
nostic system may otherwise be inaccurate.
Some of these readings are required by law and
must be accurate at all times.
Engine oil
Important safety notes
GWARNING
Certain components in the engine compart-
ment, such as the engine, radiator and parts
of the exhaust system, can become very hot.
Working in the engine compartment poses a
risk of injury.
Where possible, let the engine cool down and touch only the components described in the
following.
GWARNING
If engine oil comes into contact with hot com- ponents in the engine compartment, it may
ignite. There is a risk of fire and injury.
Make sure that engine oil is not spilled next to
the filler neck. Let the engine cool down and
thoroughly clean the engine oil off the com-
ponents before starting the engine.
General notes
Depending on your driving style, the vehicle
consumes up to 0.9 US qt (0.8 liters) of oil per
600 miles (1,000 km). The oil consumption may
be higher than this when the vehicle is new or if
you frequently drive at high engine speeds.
Depending on the engine, the oil dipstick may be
in a different location.
When checking the oil level:
Rpark the vehicle on a level surface.
Rthe engine should be switched off for approx-
imately five minutes if the engine is at normal
operating temperature.
Rif the engine is not at normal operating tem-
perature, e.g. if the engine was only started
briefly, wait about 30 minutes before carrying
out the measurement.
Engine compartment295
Maintenance and care
Z
Page 326 of 366
To avoid hazardous situations:
Rnever install snow chains to the front
wheels
Ralways install snow chains in pairs to the
rear wheels.
!You must drive at raised vehicle level (height
1) if snow chains have been installed. The
vehicle may otherwise be damaged.
!Vehicles with ADS (Adaptive Damping
System): do not use the sport mode when
driving with snow chains mounted. The vehi-
cle may otherwise be damaged.
For safety reasons, Mercedes-Benz recom-
mends that you only use snow chains that have
been specially approved for your vehicle by
Mercedes-Benz, or are of a corresponding
standard of quality. For more information,
please contact a qualified specialist workshop.
Install the snow chains on all driven wheels for
maximum tractive power and driving stability. If
you own snow chains for two driven wheels only,
install the snow chains to the wheels on the rear
axle. The vehicle then remains more stable
under braking.
If you intend to mount snow chains, please bear
the following points in mind:
RSnow chains may not be mounted on all
wheel/tire combinations. Permissible
wheel/tire combinations (
Ypage 345).
ROnly use snow chains when driving on roads
completely covered by snow. Remove the
snow chains as soon as possible when you
come to a road that is not snow-covered.
RLocal regulations may restrict the use of snow chains. Observe the appropriate regulations if
you wish to mount snow chains.
RDo not exceed the maximum permissible
speed of 30 mph (50 km/h).
RNever use Parking Pilot when snow chains are
installed (Ypage 177).
You may wish to deactivate ESP®when pulling
away with snow chains installed (Ypage 65).
You can thereby allow the wheels to spin in a
controlled manner, achieving an increased driv-
ing force (cutting action).
Information about driving with an emergency
spare wheel (
Ypage 346).
Tire pressure
Tire pressure specifications
Important safety notes
GWARNING
Underinflated or overinflated tires pose the
following risks:
Rthe tires may burst, especially as the load
and vehicle speed increase.
Rthe tires may wear excessively and/or
unevenly, which may greatly impair tire
traction.
Rthe driving characteristics, as well as steer-
ing and braking, may be greatly impaired.
There is a risk of an accident.
Follow recommended tire inflation pressures
and check the pressure of all the tires includ-
ing the spare wheel:
Rmonthly, at least
Rif the load changes
Rbefore beginning a long journey
Runder different operating conditions, e.g.
off-road driving
If necessary, correct the tire pressure.
The data on the Tire and Loading Information
placard and tire pressure table shown here are
examples. Tire pressure specifications are vehi-
cle-specific and may deviate from the data
shown here. The tire pressure specifications
that are valid for your vehicle can be found on
the Tire and Loading Information placard and
tire pressure table on the vehicle.
General notes
The recommended tire pressures for the tires
mounted at the factory can be found on the
labels described here.
Operation with emergency spare wheel:
Information on operation with the emergency
spare wheel can be found under "Emergency
spare wheel" (
Ypage 346).
Operation with a trailer: the applicable value
for the rear axle is the maximum tire pressure
value stated in the table inside the fuel filler flap.
324Tire pressure
Wheels and tires