2017 MERCEDES-BENZ GLE COUPE engine
[x] Cancel search: enginePage 165 of 366
the cruise control lever up:or down ;to
the pressure point.
Every time the cruise control lever is pressed
up : or down ;, the last speed stored is
increased or reduced.
iIf you accelerate to overtake, Distance Pilot
DISTRONIC adjusts the vehicle's speed to the
last speed stored after you have finished over-
taking.
Setting a specified minimum distance
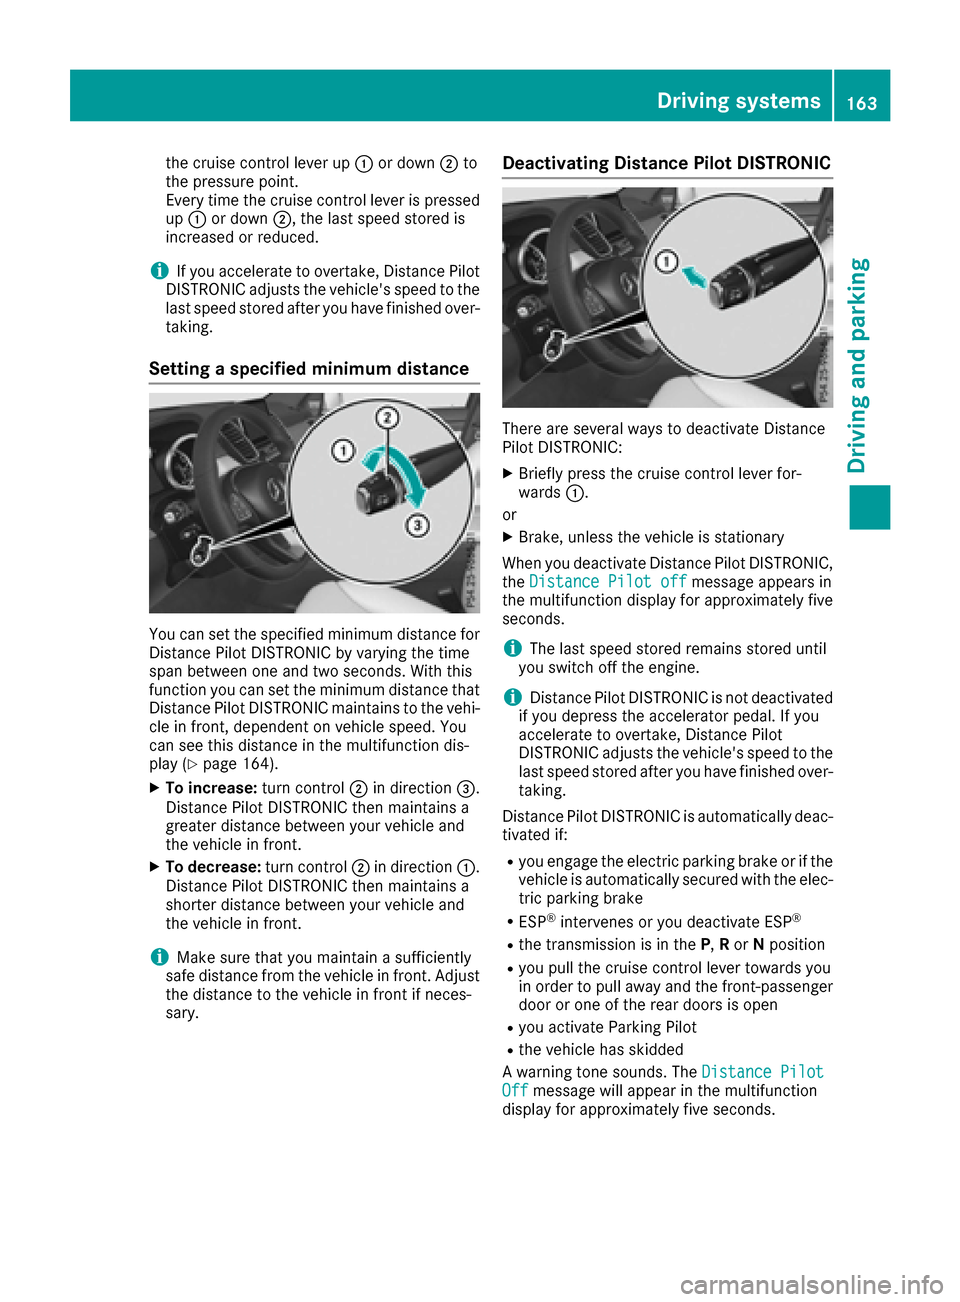
You can set the specified minimum distance for
Distance Pilot DISTRONIC by varying the time
span between one and two seconds. With this
function you can set the minimum distance that
Distance Pilot DISTRONIC maintains to the vehi-
cle in front, dependent on vehicle speed. You
can see this distance in the multifunction dis-
play (
Ypage 164).
XTo increase: turn control;in direction =.
Distance Pilot DISTRONIC then maintains a
greater distance between your vehicle and
the vehicle in front.
XTo decrease: turn control;in direction :.
Distance Pilot DISTRONIC then maintains a
shorter distance between your vehicle and
the vehicle in front.
iMake sure that you maintain a sufficiently
safe distance from the vehicle in front. Adjust
the distance to the vehicle in front if neces-
sary.
Deactivating Distance Pilot DISTRONIC
There are several ways to deactivate Distance
Pilot DISTRONIC:
XBriefly press the cruise control lever for-
wards :.
or
XBrake, unless the vehicle is stationary
When you deactivate Distance Pilot DISTRONIC,
the Distance Pilot off
message appears in
the multifunction display for approximately five
seconds.
iThe last speed stored remains stored until
you switch off the engine.
iDistance Pilot DISTRONIC is not deactivated
if you depress the accelerator pedal. If you
accelerate to overtake, Distance Pilot
DISTRONIC adjusts the vehicle's speed to the
last speed stored after you have finished over-
taking.
Distance Pilot DISTRONIC is automatically deac-
tivated if:
Ryou engage the electric parking brake or if the
vehicle is automatically secured with the elec- tric parking brake
RESP®intervenes or you deactivate ESP®
Rthe transmission is in the P,R or Nposition
Ryou pull the cruise control lever towards you
in order to pull away and the front-passenger
door or one of the rear doors is open
Ryou activate Parking Pilot
Rthe vehicle has skidded
A warning tone sounds. The Distance Pilot
Offmessage will appear in the multifunction
display for approximately five seconds.
Driving system s163
Driving an d parking
Z
Page 166 of 366
Distance Pilot DISTRONIC is automatically deac-
tivated if:
Ryou activate DSR
Ryou activate the Off-Road Program+ (vehicleswith the Off-Road Engineering package)
The à DSR symbol appears in the multifunc-
tion display.
Displays in the instrument cluster
Displays in the speedometer
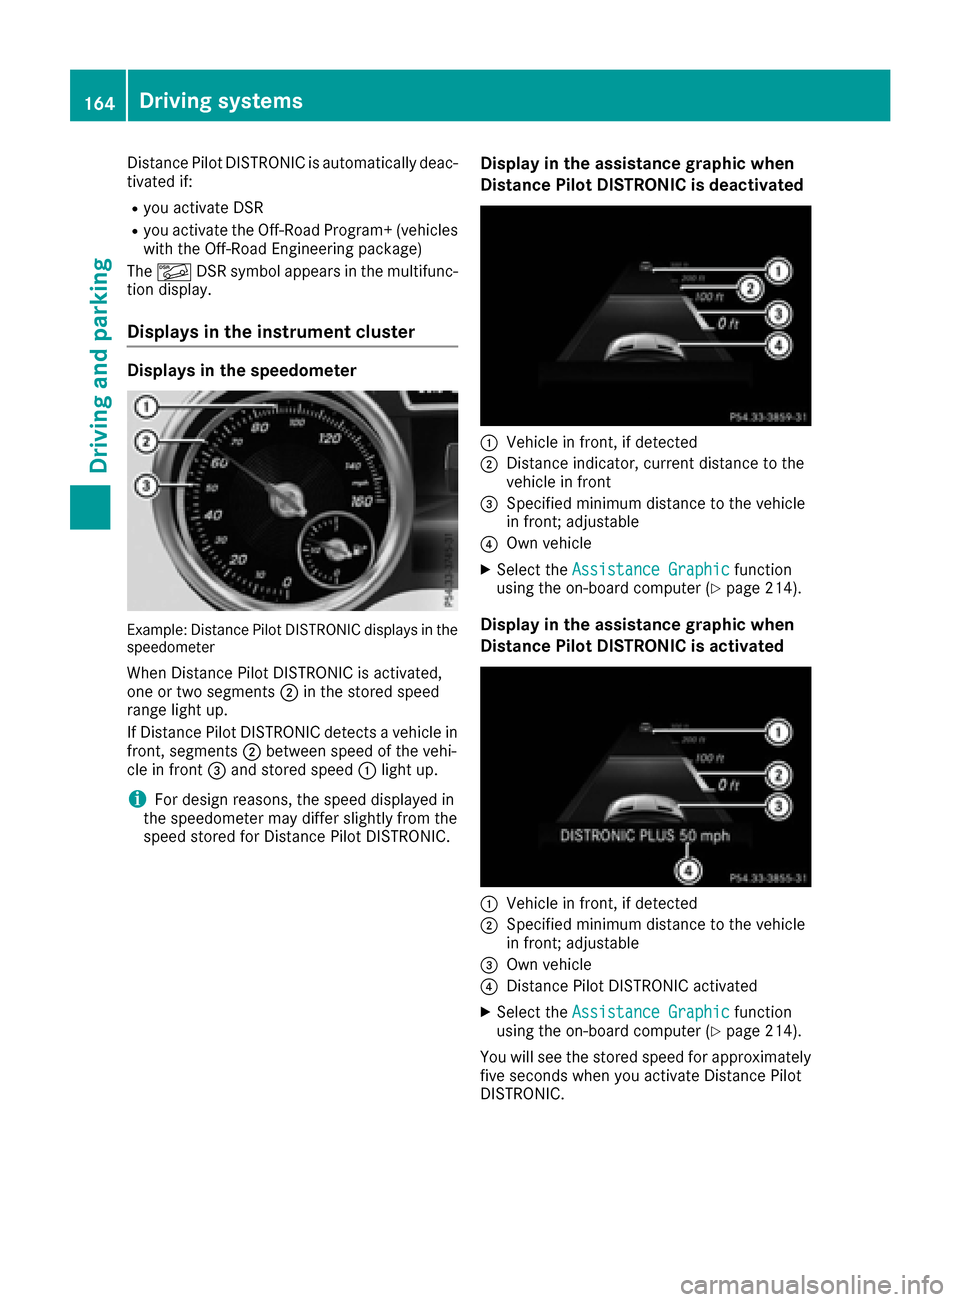
Example: Distance Pilot DISTRONIC displays in the
speedometer
When Distance Pilot DISTRONIC is activated,
one or two segments ;in the stored speed
range light up.
If Distance Pilot DISTRONIC detects a vehicle in
front, segments ;between speed of the vehi-
cle in front =and stored speed :light up.
iFor design reasons, the speed displayed in
the speedometer may differ slightly from the
speed stored for Distance Pilot DISTRONIC.
Display in the assistance graphic when
Distance Pilot DISTRONIC is deactivated
:Vehicle in front, if detected
;Distance indicator, current distance to the
vehicle in front
=Specified minimum distance to the vehicle
in front; adjustable
?Own vehicle
XSelect the Assistance Graphicfunction
using the on-board computer (Ypage 214).
Display in the assistance graphic when
Distance Pilot DISTRONIC is activated
:Vehicle in front, if detected
;Specified minimum distance to the vehicle
in front; adjustable
=Own vehicle
?Distance Pilot DISTRONIC activated
XSelect the Assistance Graphicfunction
using the on-board computer (Ypage 214).
You will see the stored speed for approximately
five seconds when you activate Distance Pilot
DISTRONIC.
164Driving system s
Driving an d parking
Page 169 of 366
When Distance Pilot DISTRONIC is deactivated
or not available, Steering Pilot is deactivated
automatically.
HOLD function
General notes
The HOLD function can assist the driver in the
following situations:
Rwhen pulling away, especially on steep slopes
Rwhen maneuvering on steep slopes
Rwhen waiting in traffic
The vehicle is kept stationary without the driver having to depress the brake pedal.
The braking effect is canceled and the HOLD
function deactivated when you depress the
accelerator pedal to pull away.
iDo not use the HOLD function when driving
off-road, on steep uphill or downhill gradients
or on slippery or loose surfaces. The HOLD
function cannot hold the vehicle on such sur-
faces.
Important safety notes
GWARNING
When leaving the vehicle, it can still roll away despite being braked by the HOLD function if:
Rthere is a malfunction in the system or in
the voltage supply.
Rthe HOLD function has been deactivated by
pressing the accelerator pedal or the brake
pedal, e.g. by a vehicle occupant.
Rthe electrical system in the engine com-
partment, the battery or the fuses have
been tampered with.
Rthe battery is disconnected
There is a risk of an accident.
If you wish to exit the vehicle, always turn off the HOLD function and secure the vehicle
against rolling away.
!When DISTRONIC PLUS or the HOLD func-
tion is activated, the vehicle brakes automat-
ically in certain situations. To avoid damage to the vehicle, deactivate
DISTRONIC PLUS and the HOLD function in
the following or similar situations:
Rwhen towing the vehicle
Rin the car wash
Deactivating the HOLD function (
Ypage 167).
Activation conditions
You can activate the HOLD function if:
Rthe vehicle is stationary
Rthe engine is running or if it has been auto-
matically switched off by the ECO start/stop
function
Rthe driver's door is closed or your seat belt is
fastened
Rthe electric parking brake is released
Rthe transmission is in position D,Ror N
RDistance Pilot DISTRONIC is deactivated
Activating the HOLD function
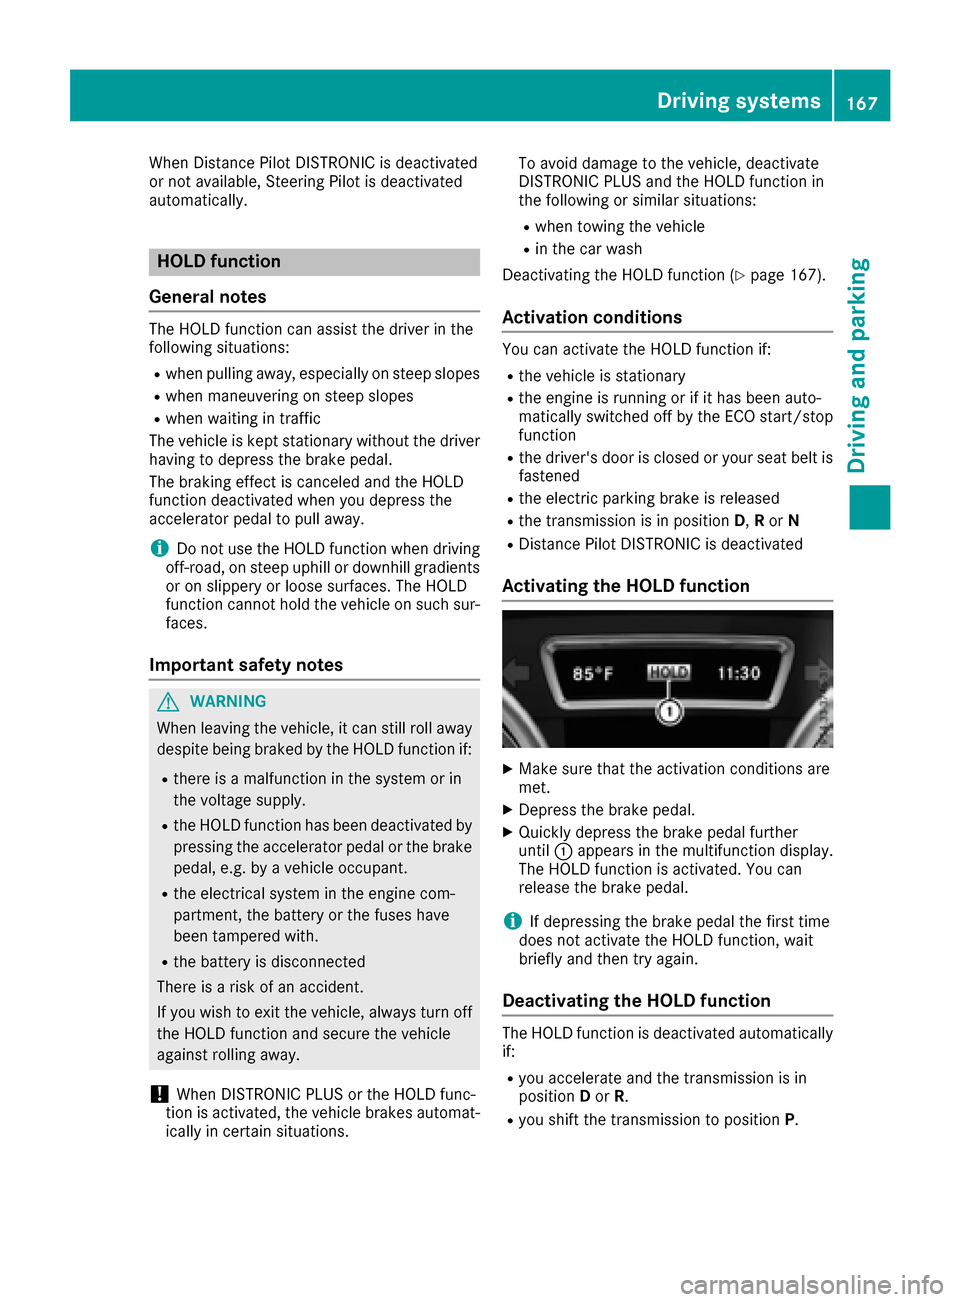
XMake sure that the activation conditions are
met.
XDepress the brake pedal.
XQuickly depress the brake pedal further
until :appears in the multifunction display.
The HOLD function is activated. You can
release the brake pedal.
iIf depressing the brake pedal the first time
does not activate the HOLD function, wait
briefly and then try again.
Deactivating the HOLD function
The HOLD function is deactivated automatically
if:
Ryou accelerate and the transmission is in
position Dor R.
Ryou shift the transmission to position P.
Driving systems167
Driving and parking
Z
Page 171 of 366
set speed suitable for the prevailing conditions
and when necessary, apply the brakes manually.
Activating DSR
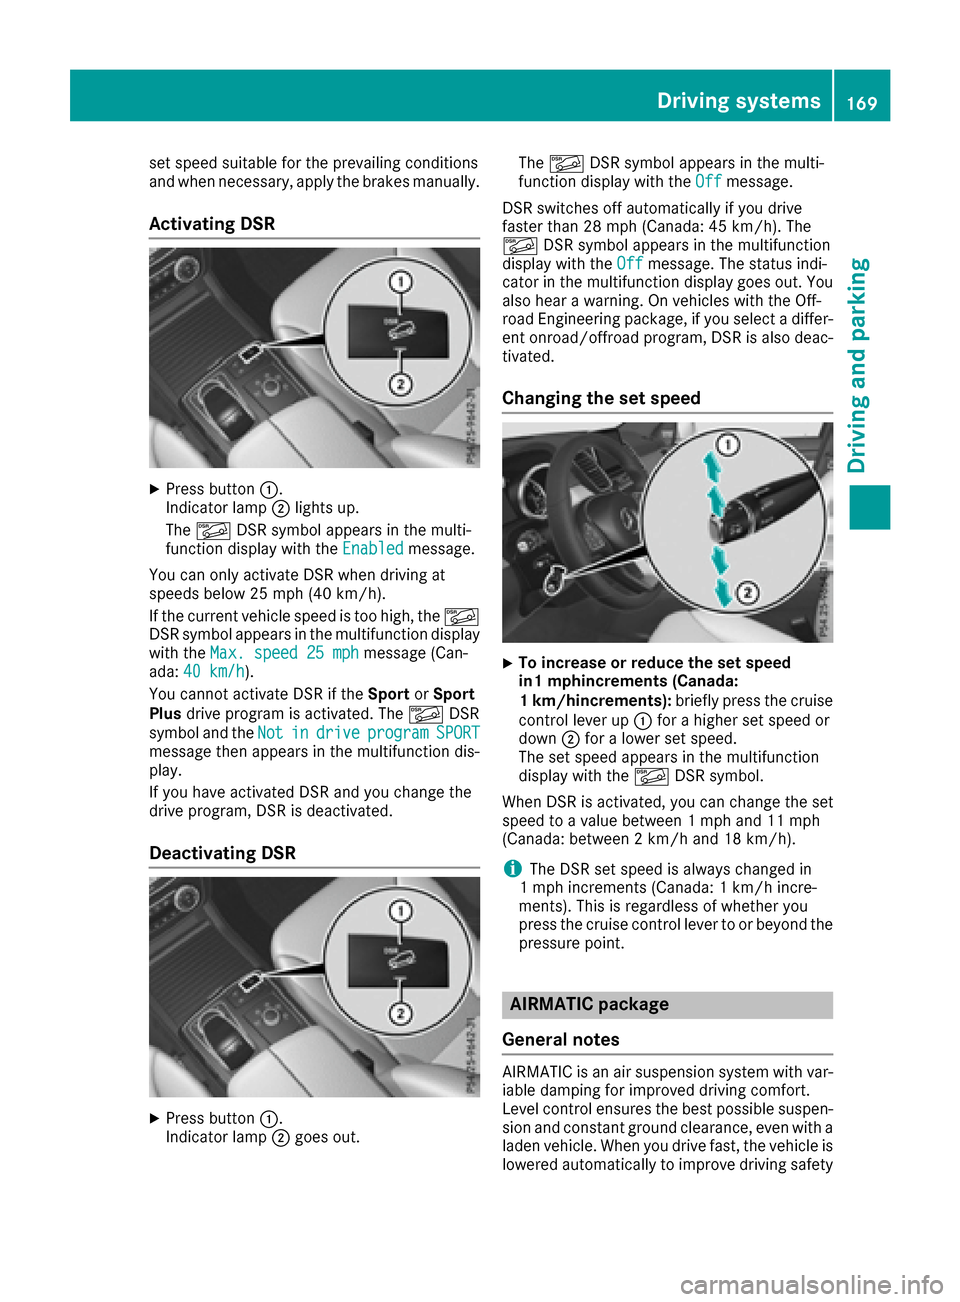
XPress button:.
Indicator lamp ;lights up.
The à DSR symbol appears in the multi-
function display with the Enabled
message.
You can only activate DSR when driving at
speeds below 25 mph (40 km/h).
If the current vehicle speed is too high, the Ã
DSR symbol appears in the multifunction display
with the Max. speed 25 mph
message (Can-
ada: 40 km/h).
You cannot activate DSR if the SportorSport
Plus drive program is activated. The ÃDSR
symbol and the Not
indriveprogramSPORTmessage then appears in the multifunction dis-
play.
If you have activated DSR and you change the
drive program, DSR is deactivated.
Deactivating DSR
XPress button:.
Indicator lamp ;goes out. The
à DSR symbol appears in the multi-
function display with the Off
message.
DSR switches off automatically if you drive
faster than 28 mph (Canada: 45 km/h). The
à DSR symbol appears in the multifunction
display with the Off
message. The status indi-
cator in the multifunction display goes out. You
also hear a warning. On vehicles with the Off-
road Engineering package, if you select a differ-
ent onroad/offroad program, DSR is also deac-
tivated.
Changing the set speed
XTo increase or reduce the set speed
in1 mphincrements (Canada:
1 km/hincrements): briefly press the cruise
control lever up :for a higher set speed or
down ;for a lower set speed.
The set speed appears in the multifunction
display with the ÃDSR symbol.
When DSR is activated, you can change the set
speed to a value between 1 mph and 11 mph
(Canada: between 2 km/h and 18 km/h).
iThe DSR set speed is always changed in
1 mph increments (Canada: 1 km/h incre-
ments). This is regardless of whether you
press the cruise control lever to or beyond the pressure point.
AIRMATIC package
General notes
AIRMATIC is an air suspension system with var-
iable damping for improved driving comfort.
Level control ensures the best possible suspen-
sion and constant ground clearance, even with a
laden vehicle. When you drive fast, the vehicle is
lowered automatically to improve driving safety
Driving systems169
Driving and parking
Z
Page 172 of 366
and to reduce fuel consumption. There is also
the option to manually adjust the vehicle level.
AIRMATIC consists of:
Rlevel settings
Rlevel control and
RADS PLUS (Adaptive Damping System)
All vehicles (except Mercedes-AMG vehi-
cles): your vehicle may also be equipped with
the ACTIVE CURVE SYSTEM (
Ypage 171).
Mercedes-AMG vehicles: your vehicle is equip-
ped with the ACTIVE CURVE SYSTEM.
(
Ypage 171).
Observe the notes on driving with a trailer
(
Ypage 200).
The vehicle level can be set using the DYNAMIC
SELECT controller (
Ypage 132) or the level but-
ton (Ypage 171). The setting always corre-
sponds to the last selected function.
Important safety notes
GWARNING
When the vehicle is being lowered, people
could become trapped if their limbs are
between the vehicle body and the wheels or
underneath the vehicle. There is a risk of
injury.
Make sure no one is underneath the vehicle or
in the immediate vicinity of the wheel arches
when the vehicle is being lowered.
If you unlock the vehicle or open a door, the
vehicle begins to compensate for load discrep-
ancies while still parked. However, for signifi-
cant level changes, such as after the vehicle has
been stationary for a long period, the engine
must be on. For safety reasons, the vehicle is
only lowered when the doors are closed. Low-
ering is interrupted if a door is opened, and it
continues once the door has been closed.
ADS PLUS (Adaptive Damping System)
General notes
ADS PLUS automatically controls the calibration
of the dampers. The damping characteristics
adapt to the current operating and driving sit-
uation. The damping is tuned individually to each wheel
and depends on:
Ryour driving style, e.g. sporty
Rthe road surface conditions
Rthe drive program selected
Rthe vehicle level setting
Selecting Comfort mode
In the Comfort drive program, the driving char-
acteristics of your vehicle are more comforta-
ble. Therefore, select this mode if you favor a
more comfortable driving style. Also select the
Comfort drive program when driving fast on
straight roads, e.g. on straight stretches of high-
way.
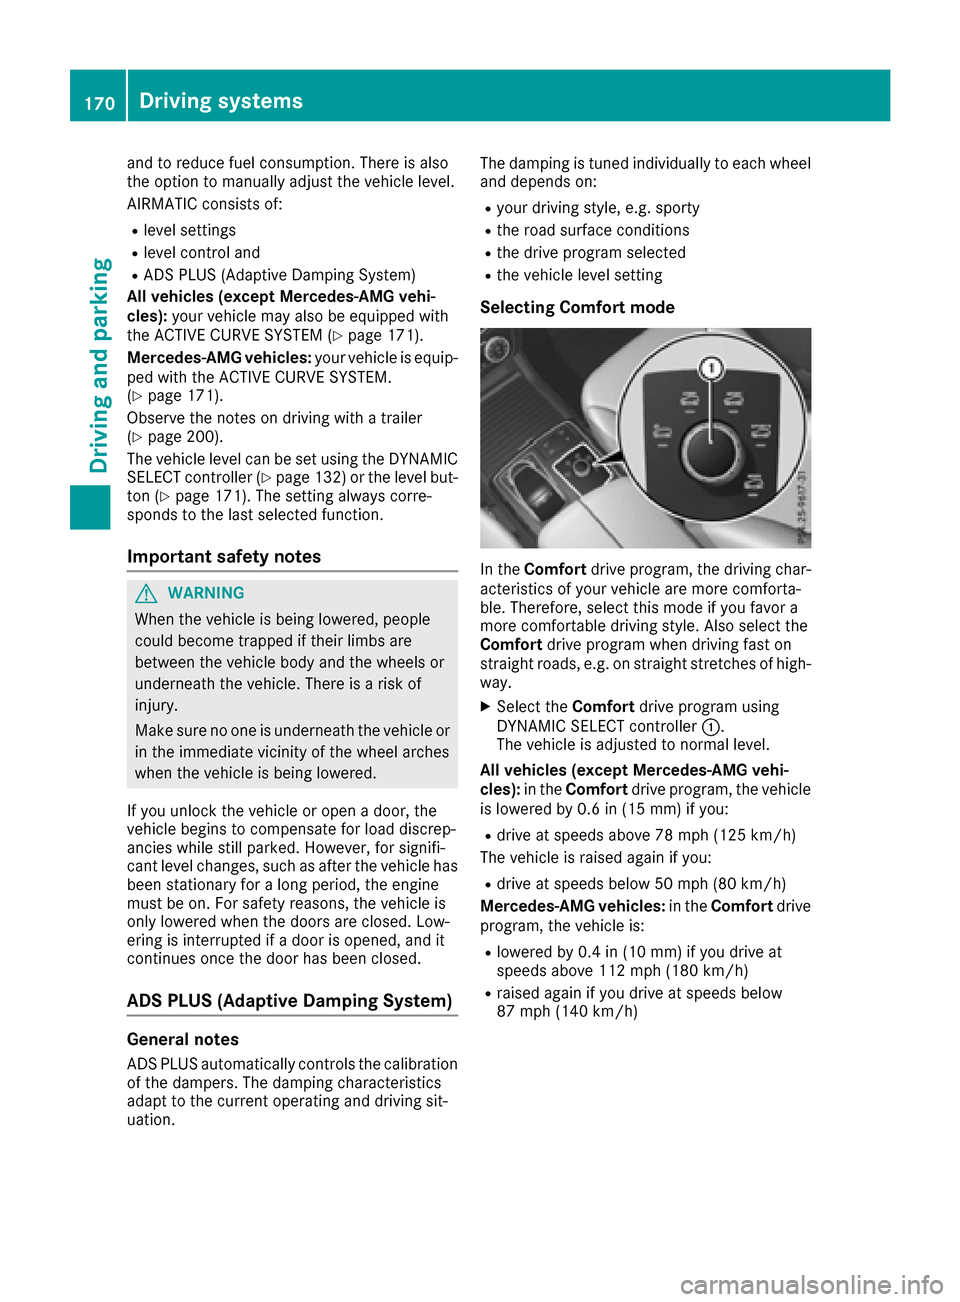
XSelect the Comfortdrive program using
DYNAMIC SELECT controller :.
The vehicle is adjusted to normal level.
All vehicles (except Mercedes-AMG vehi-
cles): in theComfort drive program, the vehicle
is lowered by 0.6 in (15 mm) if you:
Rdrive at speeds above 78 mph (125 km/h)
The vehicle is raised again if you:
Rdrive at speeds below 50 mph (80 km/h)
Mercedes-AMG vehicles: in theComfort drive
program, the vehicle is:
Rlowered by 0.4 in (10 mm) if you drive at
speeds above 112 mph (180 km/h)
Rraised again if you drive at speeds below
87 mph (140km/ h)
170Driving systems
Driving and parking
Page 174 of 366
cle could rollover more easily, for example on
a bend. There is a risk of an accident.
Always select as low a vehicle level as possi-
ble and adjust your driving style.
GWARNING
When you drive with the chassis lowered or
raised, the vehicle's braking and driving char-
acteristics can be significantly impaired. You
could also exceed the permissible vehicle
height if the chassis is raised. There is a risk of an accident.
Adjust the vehicle level before pulling away.
GWARNING
Due to the high center of gravity, the vehicle
may start to skid and roll over in the event of
an abrupt steering maneuver and/or when
the vehicle's speed is not adapted to the road
conditions. There is a risk of an accident.
Always adapt your speed and driving style to
the vehicle's driving characteristics and to the
prevailing road and weather conditions.
!When driving on extremely rough terrain,
select a high vehicle level in good time. Make
sure there is always sufficient ground clear-
ance. You will otherwise damage the vehicle.
RUtility vehicles have a significantly higher roll- over rate than other types of vehicles.
Failure to operate this vehicle safely may
result in an accident, rollover of the vehicle,
and severe or fatal injury.
RIn a rollover crash, an unbelted person is sig-
nificantly more likely to die than a person
wearing a seat belt.
You and all vehicle occupants should always
wear your seat belts.
General notes
Only select raised level if this is appropriate for
the road conditions. Otherwise, fuel consump-
tion may increase and handling may be affected.
Make changes to the vehicle level while the
vehicle is in motion. This enables the vehicle to
adjust to the new level as quickly as possible.
The vehicle level may change visibly if you park
the vehicl
e and the outside temperature
changes. If the temperature drops, the vehicle level is lower; with an increase in temperature,
the vehicle level rises.
If you unlock the vehicle or open a door, the
vehicle begins to compensate for load discrep-
ancies while still parked. However, for signifi-
cant level changes, such as after the vehicle has
been stationary for a long period, the engine
must be on. For safety reasons, the vehicle is
only lowered when the doors are closed. Low-
ering is interrupted if a door is opened, and it
continues once the door has been closed.
Vehicles with no trailer coupled:
below a
speed of 40 mph (64 km/h), you can choose
between the normal and raised vehicle level.
Select the normal vehicle level for normal road
surfaces and the raised vehicle level for driving
with snow chains or on particularly poor road
surfaces. Your selection remains stored even if
you remove the SmartKey from the ignition lock.
If you try to select raised level at a speed above
40 mph (64 km/h), the Drive More Slowly
message appears in the multifunction display.
Vehicles with a trailer coupled: below a speed
of 19 mph (30 km/h), you can choose between
the normal and raised vehicle level.
Setting the raised vehicle level
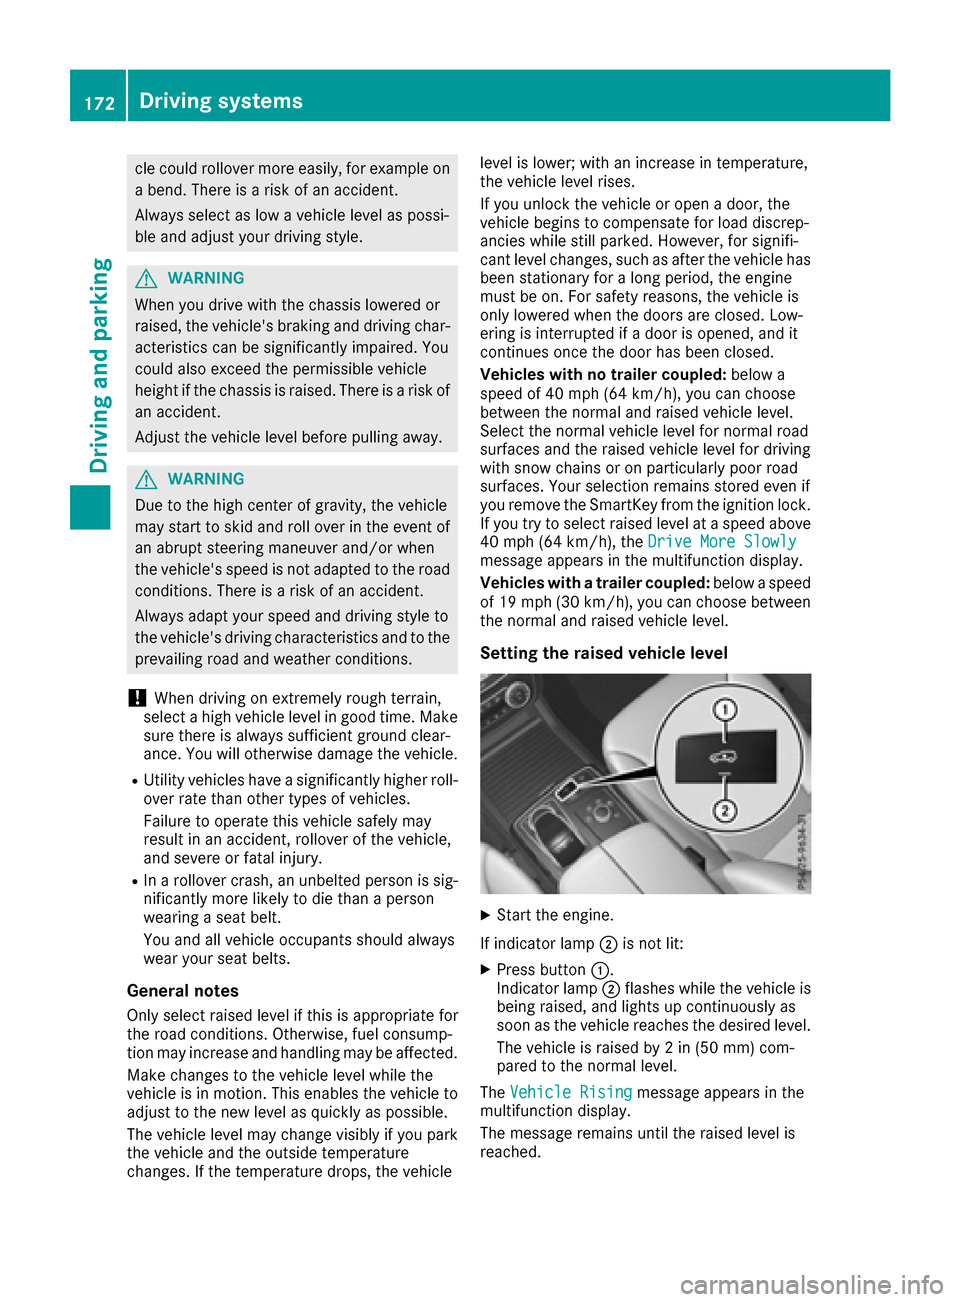
XStart the engine.
If indicator lamp ;is not lit:
XPress button :.
Indicator lamp ;flashes while the vehicle is
being raised, and lights up continuously as
soon as the vehicle reaches the desired level.
The vehicle is raised by 2 in (50 mm) com-
pared to the normal level.
The Vehicle Rising
message appears in the
multifunction display.
The message remains until the raised level is
reached.
172Driving systems
Driving and parking
Page 175 of 366
If you press the%ora button on the
multifunction steering wheel, the message will
disappear.
The raised level setting is canceled if you:
Rdrive at speeds above 50 mph (80 km/h) (all
vehicles except Mercedes-AMG vehicles)
Rdrive at speeds above 43 mph (70 km/h)
(Mercedes-AMG vehicles)
Rdrive at speed s between 40 mph (64 km/h)
and 50 mph (80 km/h) for approximately 20
seconds (all vehicles except Mercedes-AMG
vehicles)
Rdrive at speeds between 40 mph (64 km/h)
and 43 mph (70 km/h) for approximately 20
seconds (Mercedes-AMG vehicles)
Rdrive at speeds above 19 mph (30 km/h) with
a trailer
The raised vehicle level remains saved when you
are not driving within these speed ranges.
Setting the normal vehicle level
!Make sure that there is enough ground
clearance when the vehicle is being lowered.
It could otherwise hit the ground, damaging
the underbody.
XStart the engine.
If indicator lamp ;is lit:
XPress button :.
Indicator lamp ;flashes while the vehicle is
being lowered, and goes out as soon as the
desired vehicle level is reached.
Vehicles with no trailer coupled: the vehi-
cle is adjusted to the height of the selected
drive program (
Ypage 132).
Vehicles with a trailer coupled: the vehicle
is adjusted to normal level regardless of the
drive program selected (
Ypage 132). The
vehicle remains at the normal level, even if the
drive program is changed.
During the adjustment, the Lowering
mes-
sage appears in the multifunction display.
If you press the %ora button on the
multifunction steering wheel, the message will
disappear.
AMG adaptive sport suspension sys-
tem
General notes
iThe AMG adaptive sport suspension system
is available for Mercedes-AMG vehicles and
for the Mercedes-AMG GLE 43 4MATIC.
The electronically controlled damping system
works continuously. This improves driving
safety and ride comfort.
The damping is tuned individually to each wheel
and depends on:
Ryour driving style, e.g. sporty
Rthe road surface condition, e.g. bumps
Ryour individual selection of Sport, Sport + or
Comfort
The suspension setting can be adjusted using
the corresponding button in the center console
or the DYNAMIC SELECT controller
(
Ypage 132).
Each time you start the engine with the Smart-
Key or the Start/Stop button, Comfort mode is
activated. For further information about starting
the engine, see (
Ypage 126).
Sport mode
The firmer setting of the suspension tuning in
Sport mode ensures even better contact with
the road. Select this mode when employing a
sporty driving style, e.g. on winding country
roads.
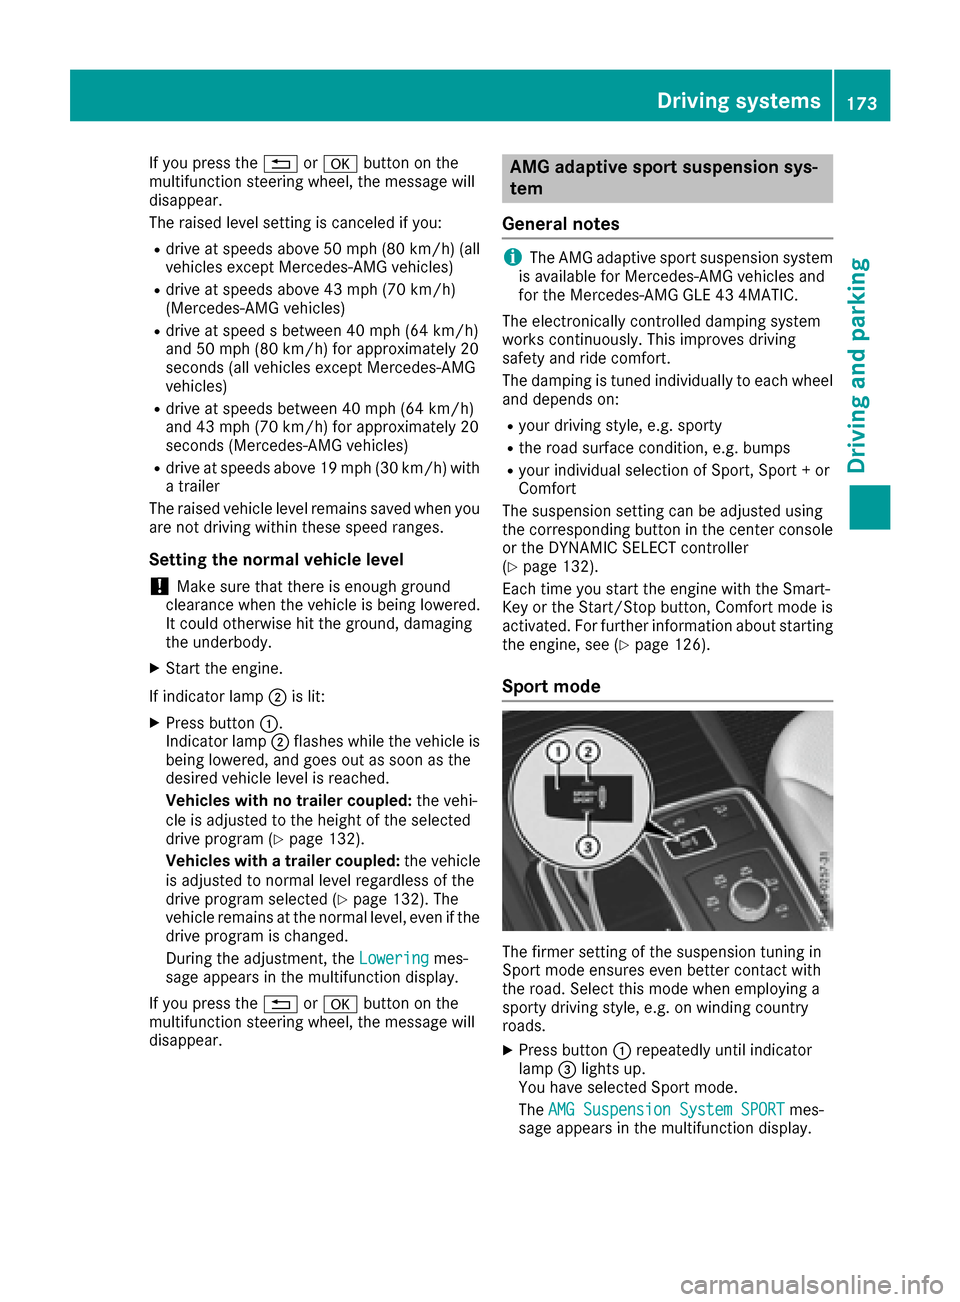
XPress button :repeatedly until indicator
lamp =lights up.
You have selected Sport mode.
The AMG Suspension System SPORT
mes-
sage appears in the multifunction display.
Driving systems173
Driving and parking
Z
Page 177 of 366
The sensors must be free from dirt, ice or slush.
They can otherwise not function correctly. Clean
the sensors regularly, taking care not to scratch
or damage them (
Ypage 303).
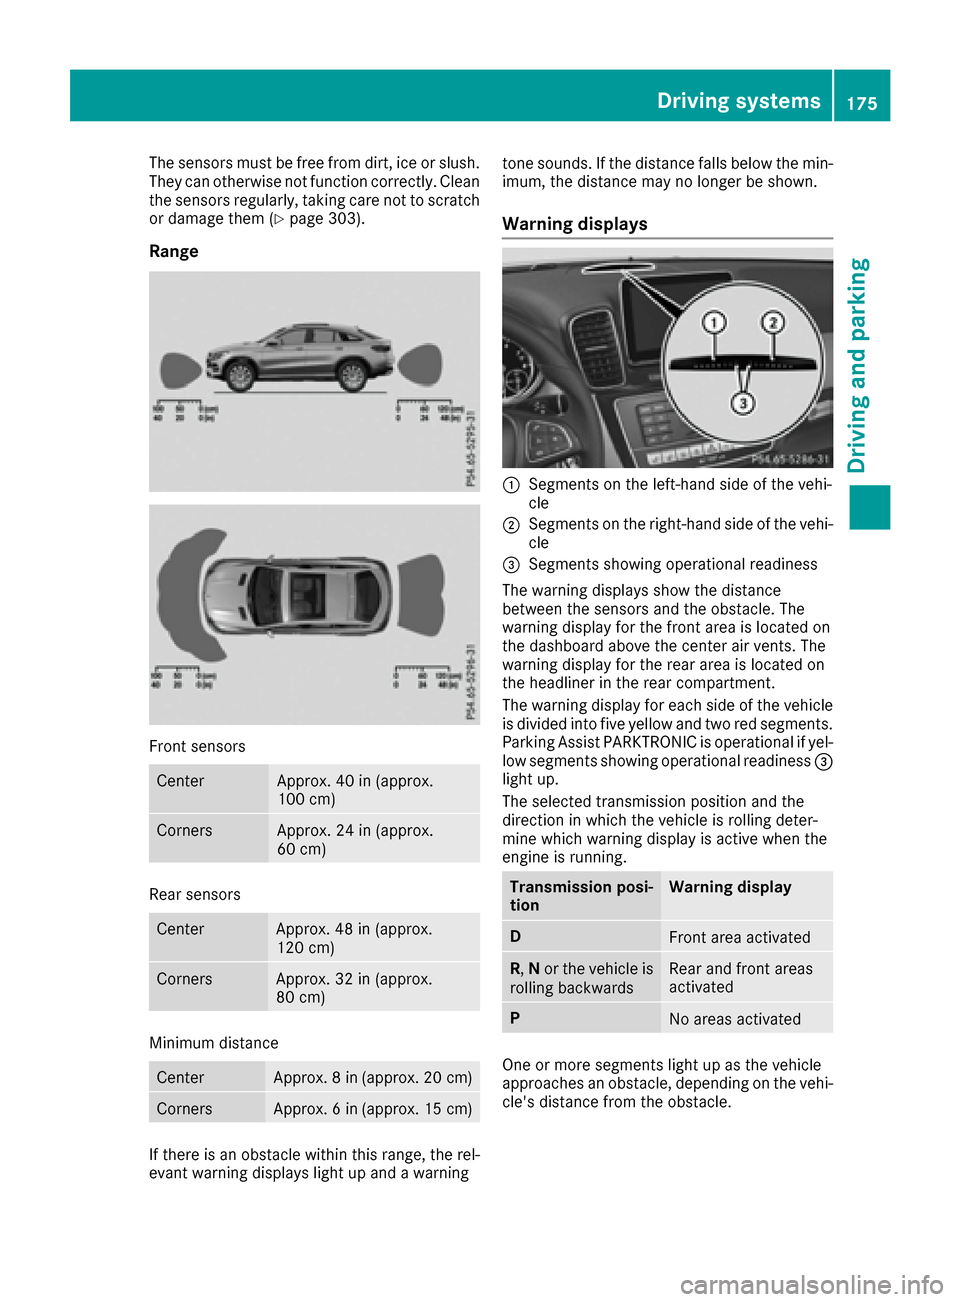
Range
Front sensors
CenterApprox. 40 in (approx.
100 cm)
CornersApprox. 24 in (approx.
60 cm)
Rear sensors
CenterApprox. 48 in (approx.
120 cm)
CornersApprox. 32 in (approx.
80 cm)
Minimum distance
CenterApprox. 8 in (approx. 20 cm)
CornersApprox. 6 in (approx. 15 cm)
If there is an obstacle within this range, the rel-
evant warning displays light up and a warningtone sounds. If the distance falls below the min-
imum, the distance may no longer be shown.
Warning displays
:Segments on the left-hand side of the vehi-
cle
;Segments on the right-hand side of the vehi-
cle
=Segments showing operational readiness
The warning displays show the distance
between the sensors and the obstacle. The
warning display for the front area is located on
the dashboard above the center air vents. The
warning display for the rear area is located on
the headliner in the rear compartment.
The warning display for each side of the vehicle
is divided into five yellow and two red segments. Parking Assist PARKTRONIC is operational if yel-
low segments showing operational readiness =
light up.
The selected transmission position and the
direction in which the vehicle is rolling deter-
mine which warning display is active when the
engine is running.
Transmission posi-
tionWarning display
DFront area activated
R, Nor the vehicle is
rolling backwardsRear and front areas
activated
PNo areas activated
One or more segments light up as the vehicle
approaches an obstacle, depending on the vehi-
cle's distance from the obstacle.
Driving systems175
Driving and parking
Z