2017 MERCEDES-BENZ GLC SUV Audio
[x] Cancel search: AudioPage 218 of 374
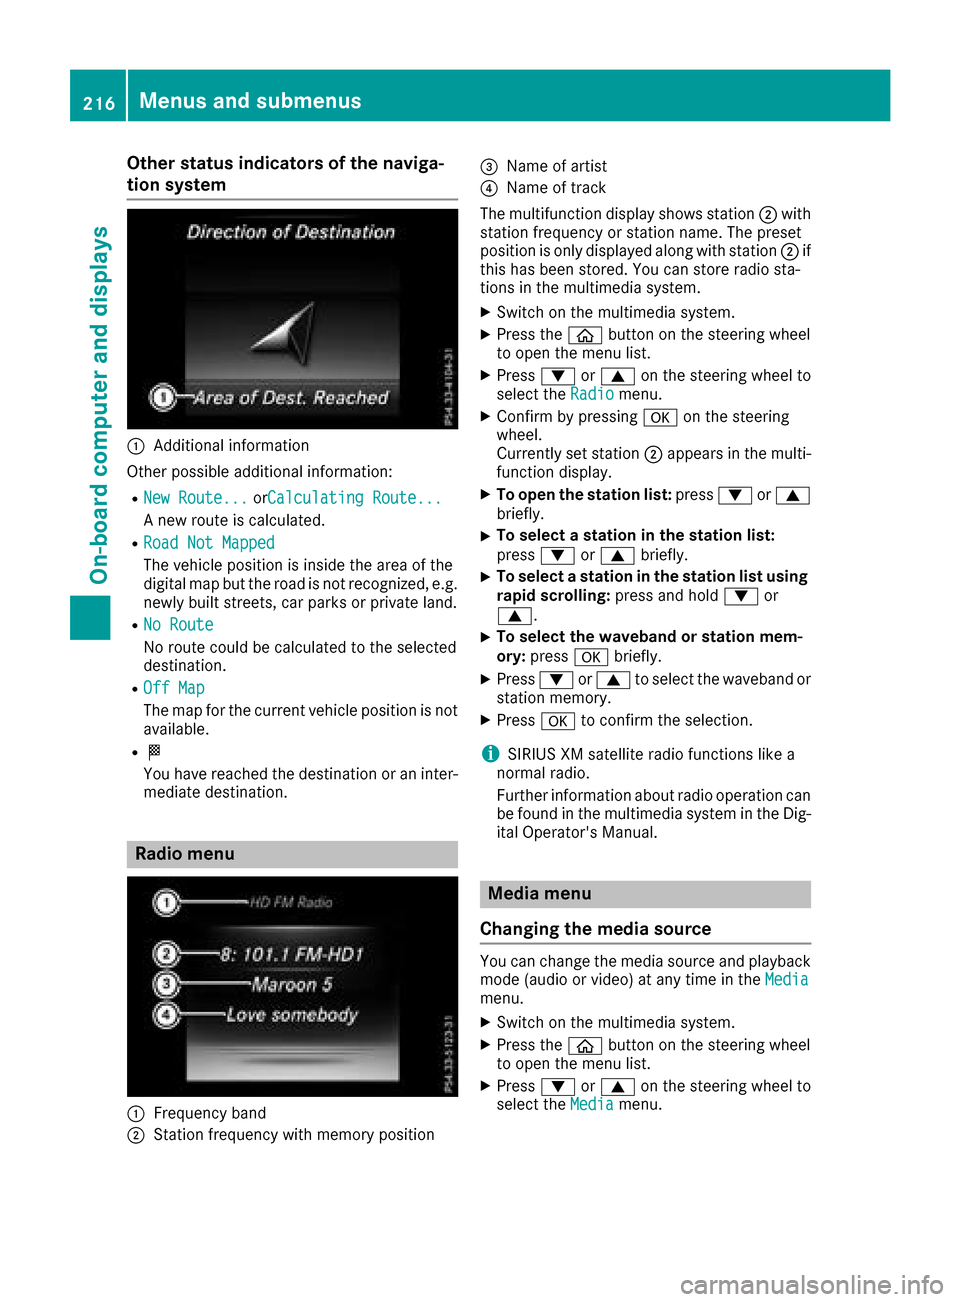
Other status indicators of the naviga-
tion system
:Additional information
Other possible additional information:
RNew Route...orCalculating Route...
A new route is calculated.
RRoad Not Mapped
The vehicle position is inside the area of the
digital map but the road is not recognized, e.g. newly built streets, car parks or private land.
RNo Route
No route could be calculated to the selected
destination.
ROff Map
The map for the current vehicle position is not
available.
RO
You have reached the destination or an inter-
mediate destination.
Radio menu
:Frequency band
;Station frequency with memory position
=Name of artist
?Name of track
The multifunction display shows station ;with
station frequency or station name. The preset
position is only displayed along with station ;if
this has been stored. You can store radio sta-
tions in the multimedia system.
XSwitch on the multimedia system.
XPress the òbutton on the steering wheel
to open the menu list.
XPress :or9 on the steering wheel to
select the Radiomenu.
XConfirm by pressing aon the steering
wheel.
Currently set station ;appears in the multi-
function display.
XTo open the station list: press:or9
briefly.
XTo select a station in the station list:
press :or9 briefly.
XTo select a station in the station list using
rapid scrolling: press and hold:or
9.
XTo select the waveband or station mem-
ory: press abriefly.
XPress :or9 to select the waveband or
station memory.
XPress ato confirm the selection.
iSIRIUS XM satellite radio functions like a
normal radio.
Further information about radio operation can
be found in the multimedia system in the Dig-
ital Operator's Manual.
Media menu
Changing the media source
You can change the media source and playback
mode (audio or video) at any time in the Media
menu.
XSwitch on the multimedia system.
XPress theòbutton on the steering wheel
to open the menu list.
XPress :or9 on the steering wheel to
select the Mediamenu.
216Menus and submenus
On-board computer and displays
Page 219 of 374
XConfirmbypressing aon the steering
wheel.
XTo open the media sources list: pressa
brie fly.
The listshows the following media sources,
for example:
RCD or DVD (DVD only in the COMAND mul-
tim edia system)
RSDcard
RMedia Register (only in the COMAND mul-
tim edia system)
RUSB storage device
RBluetooth®capab leaudio device
Please observe further information on media
support and media operation inthe multimedia
system (see the Digital Operator's Manual).
Operating an audio player or audio
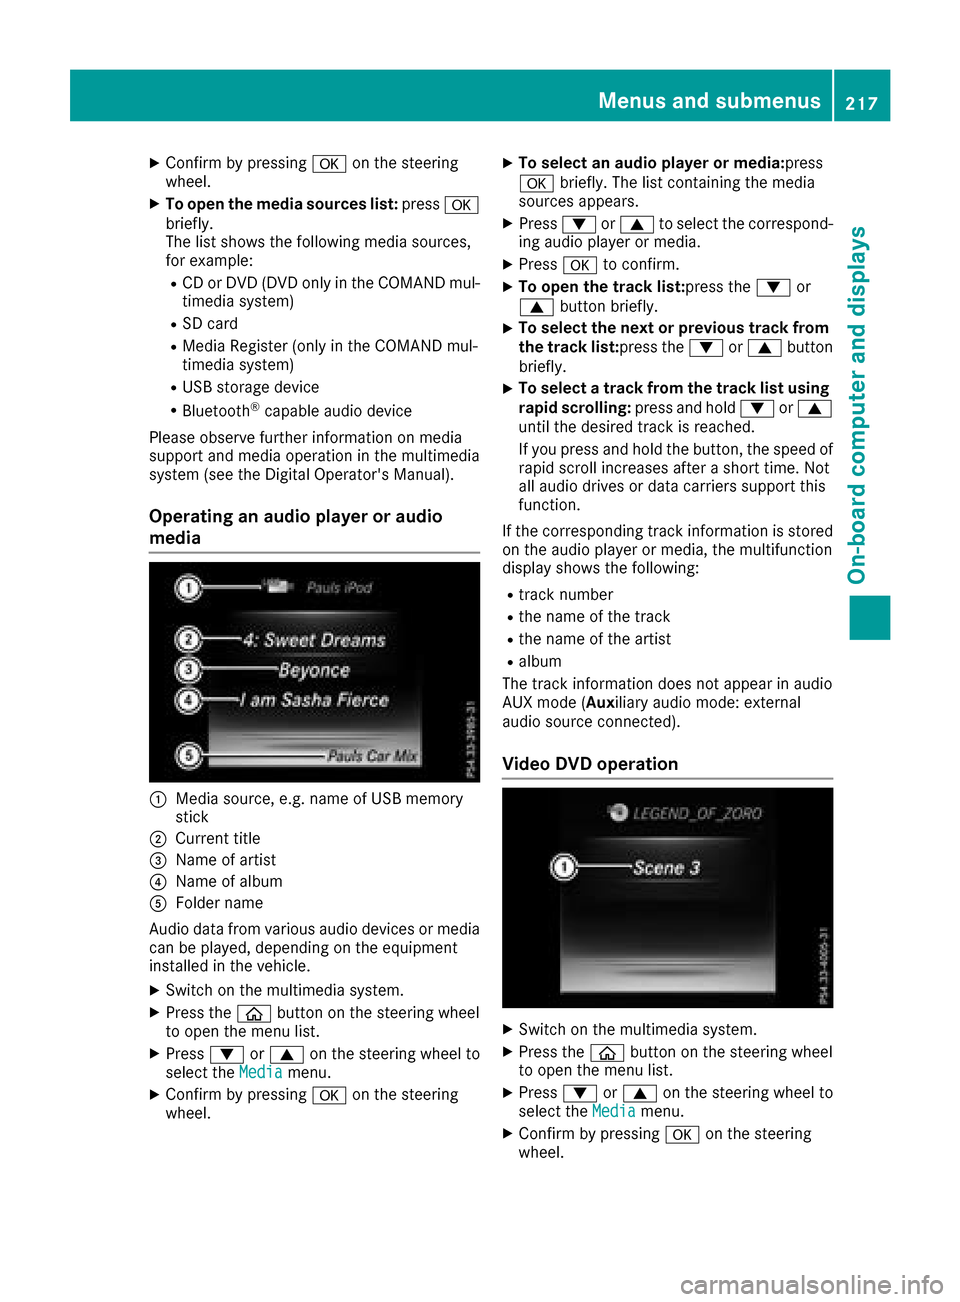
media
:Media source, e.g. name of USB memory
stick
;Current tit le
=Name of artist
?Name of album
AFolder name
Aud iodata from various audio devices or media
can beplayed, dependin g on theequipment
installed inthe veh icle.
XSwit ch on the multimed iasystem.
XPress the òbutton on the steering wheel
to open the menu list.
XPress :or9 on the steering wheel to
select the Mediamenu.
XConfirmbypressing aon the steering
wheel.
XTo select an audio player ormedia: press
a briefly. The list containing the media
sources appears.
XPress :or9 to select the correspond-
ing audio player or media.
XPress ato confirm.
XTo open the track list: press the:or
9 button briefly.
XTo select the next orprevious track fr om
the track list: press the :or9 button
briefly.
XTo select a track fr om the track list using
ra pid scrolling: press and hold :or9
unt ilthe desired track isreached.
If you press and hold the button, the speed of
rapid scroll increases after a short time. Not
all audio drives or data carriers support this
function.
If the corresponding track information isstored
on the audio player or media, the multifunction
display shows the following:
Rtrack number
Rthe name of the track
Rthe name of the artist
Ralbum
The track information does not appear inaudio
AUX mode (Aux iliary audio mode: external
audio source connect ed).
Video DVD operation
XSwitch on the multimedia system.
XPress the òbutton on the steering wheel
to open the menu list.
XPress :or9 on the steering wheel to
select the Mediamenu.
XConfirmbypressing aon the steering
wheel.
Menus and submenus217
On-board computer and displays
Z
Page 271 of 374
Operating system
Overview
General notes
Wearing polarized sunglasses may impair your
ability to read the display.
The display has an automatic temperature-con-
trolled switch-off feature. The brightness is
automatically reduced if the temperature is too
high. The display may temporarily switch off
completely.
Cleaning instructions
!Do not touch the display. The display has a
very sensitive high-gloss surface; there is a
risk of scratching. If you have to clean the
screen, however, use a mild cleaning agent
and a soft, lint-free cloth.
The display must be switched off and have
cooled down before you start cleaning. Do not
apply pressure to the display surface when
cleaning it, as this could cause irreversible dam-
age to the display.
Switching the multimedia system
on/off
XPress the Übutton on the center console
to the right of the controller.
Adjusting the volume
XTurn the thumbwheel to the right of the con-
troller.
The volume is adjusted:
Rfor the currently selected media source
Rduring traffic or navigation announcements
Rin hands-free mode during a phone call
Switching the sound on or off
XPress the thumbwheel to the right of the con-
troller.
or
XPress the 8button on the multifunction
steering wheel.
If the audio output is switched off, the status
line will show the 8symbol. If you switch
the media source or change the volume, the
sound is automatically switched on.
iNavigation announcements will be heard
even if the sound is muted.
Functions
The multimedia system has the following func-
tions:
RRadio mode
RMedia mode with media search
RSound systems
RNavigation system
COMAND: navigation via the hard drive
Audio 20: navigation via SD card
RCommunication functions
RSIRIUS Weather (COMAND)
RVehicle functions with system settings
RFavorites functions
Controller
The controller in the center console lets you:
Rselect menu items on the display
Renter characters
Rselect a destination on the map
Rsave entries
The controller can be:
Rturned 3
Rslid left or right 1
Rslid forwards or back 4
Rslid diagonally2
Rpressed briefly or pressed and held 7
Back button
You can use the%button to exit a menu or to
call up the basic display of the current operating
mode.
XTo exit the menu: briefly press the%
button.
The multimedia system changes to the next
higher menu level in the current operating
mode.
XTo call up the basic display: press the%
button for longer than two seconds.
The multimedia system changes to the basic
display of the current operating mode.
Operating system269
Multimedia system
Z
Page 272 of 374
Touchpad
Switching the touchpad on/off
Multimedia system:
XSelect VehicleQSystem Set‐tingsQTouchpadQActivate Touch‐pad.
The touchpad is switched on Oor off ª.
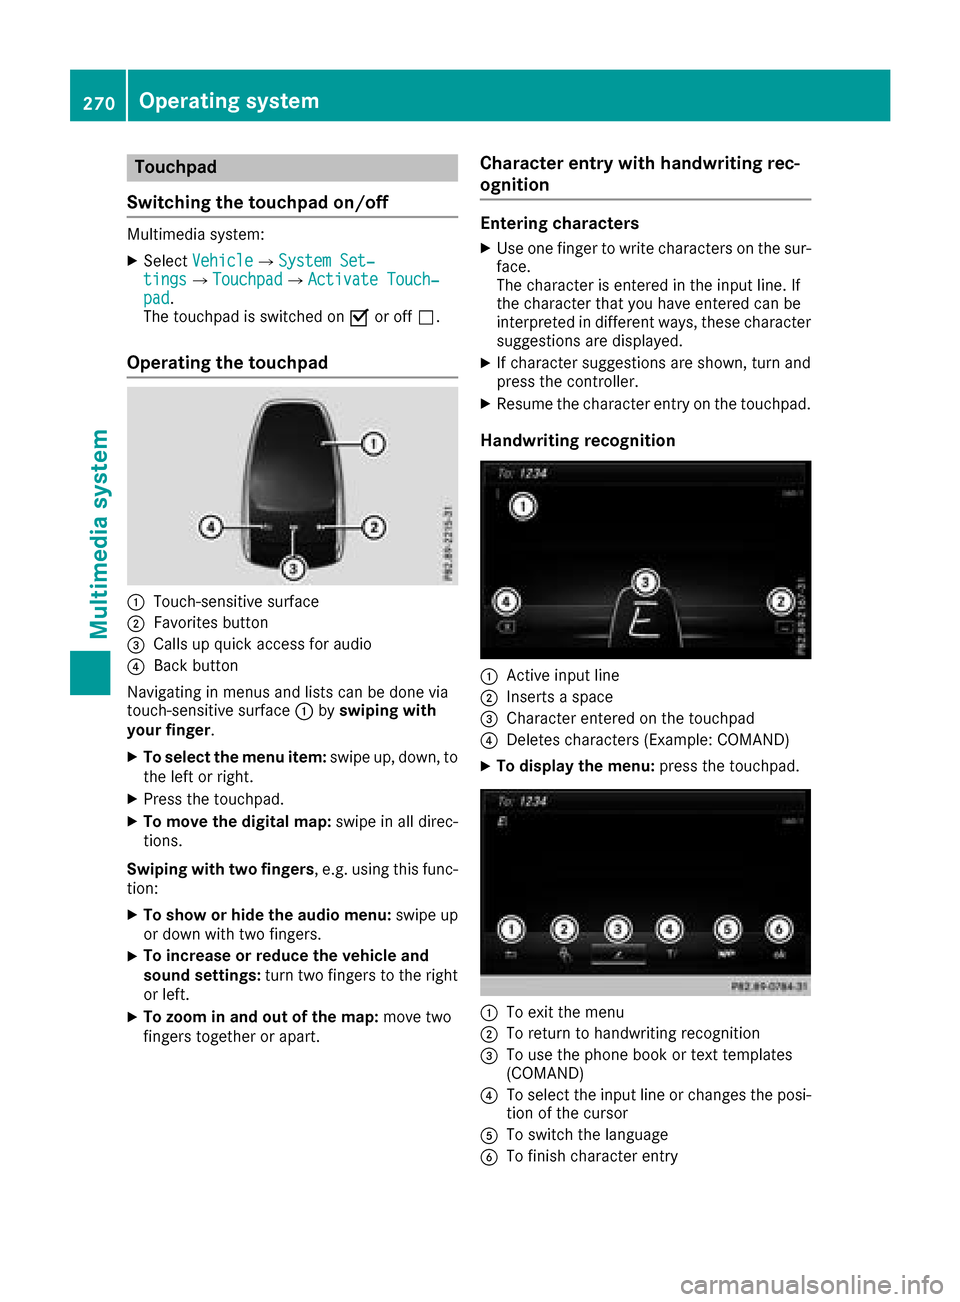
Operating the touchpad
:Touch-sensitive surface
;Favorites button
=Calls up quick access for audio
?Back button
Navigating in menus and lists can be done via
touch-sensitive surface :byswiping with
your finger.
XTo select the menu item: swipe up, down, to
the left or right.
XPress the touchpad.
XTo move the digital map: swipe in all direc-
tions.
Swiping with two fingers , e.g. using this func-
tion:
XTo show or hide the audio menu: swipe up
or down with two fingers.
XTo increase or reduce the vehicle and
sound settings: turn two fingers to the right
or left.
XTo zoom in and out of the map: move two
fingers together or apart.
Character entry with handwriting rec-
ognition
Entering characters
XUse one finger to write characters on the sur-
face.
The character is entered in the input line. If
the character that you have entered can be
interpreted in different ways, these character
suggestions are displayed.
XIf character suggestions are shown, turn and
press the controller.
XResume the character entry on the touchpad.
Handwriting recognition
:Active input line
;Inserts a space
=Character entered on the touchpad
?Deletes characters (Example: COMAND)
XTo display the menu: press the touchpad.
:To exit the menu
;To return to handwriting recognition
=To use the phone book or text templates
(COMAND)
?To select the input line or changes the posi-
tion of the cursor
ATo switch the language
BTo finish character entry
270Operating system
Multimedia system
Page 273 of 374
XTo select the input line:selectp.
XSwipe up or down.
XTo move the cursor within the input line:
select p.
XSwipe to the left or right.
XTo delete characters: swipe to the left if an
input line is selected.
XTo confirm the entry: press the touchpad.
Switching the text reader function of the
handwriting recognition on/off
Multimedia system:
XSelectVehicleQSystem Set‐tingsQTouchpadQRead Out Hand‐writing Recognition.
The read-aloud function is switched on Oor
off ª.
Quick access for audio
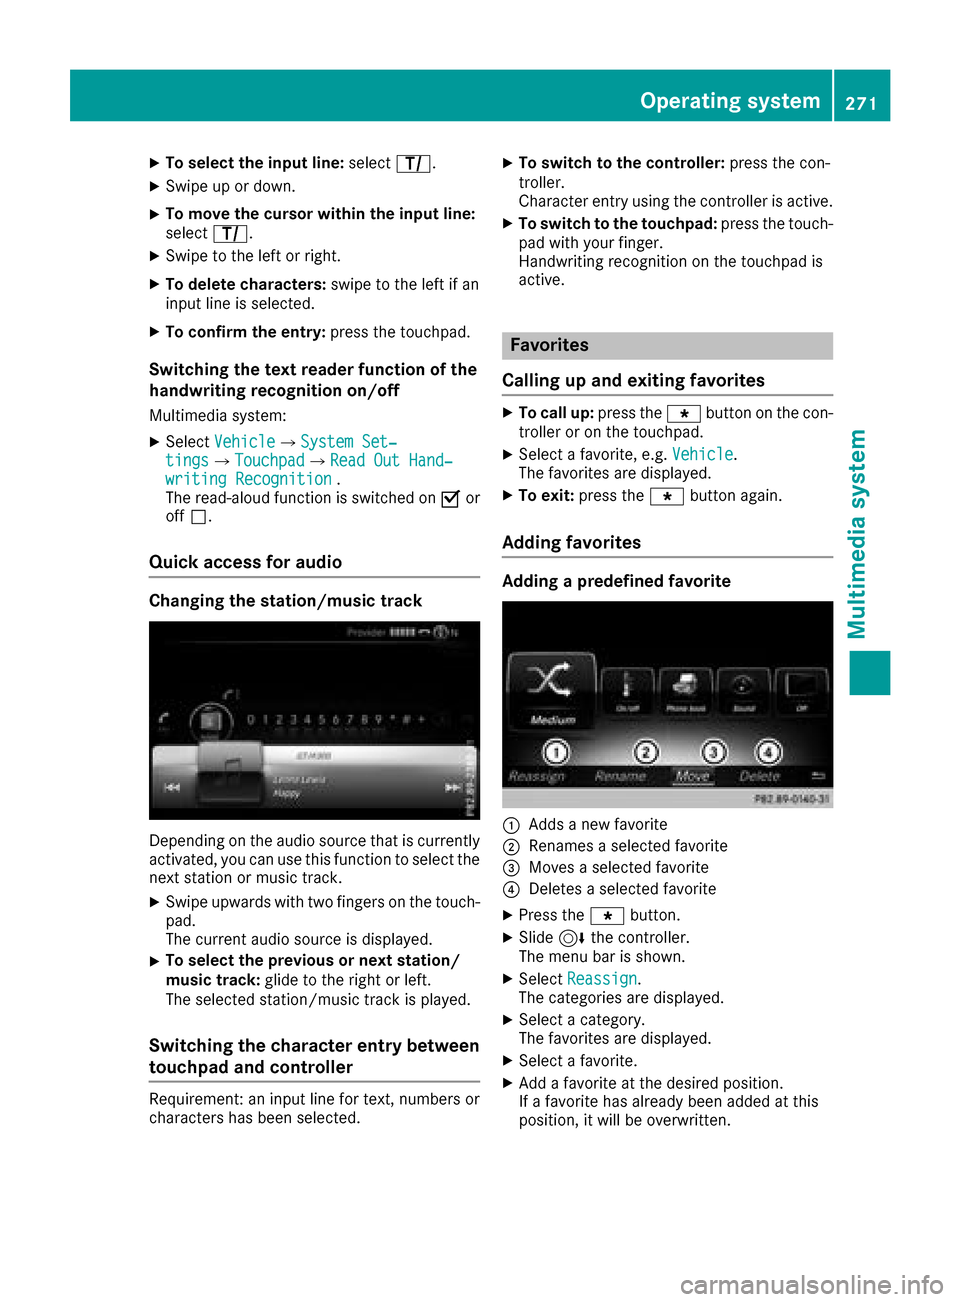
Changing the station/music track
Depending on the audio source that is currently
activated, you can use this function to select the
next station or music track.
XSwipe upwards with two fingers on the touch-
pad.
The current audio source is displayed.
XTo select the previous or next station/
music track: glide to the right or left.
The selected station/music track is played.
Switching the character entry between
touchpad and controller
Requirement: an input line for text, numbers or
characters has been selected.
XTo switch to the controller: press the con-
troller.
Character entry using the controller is active.
XTo switch to the touchpad: press the touch-
pad with your finger.
Handwriting recognition on the touchpad is
active.
Favorites
Calling up and exiting favorites
XTo call up: press thegbutton on the con-
troller or on the touchpad.
XSelect a favorite, e.g. Vehicle.
The favorites are displayed.
XTo exit: press the gbutton again.
Adding favorites
Adding a predefined favorite
:Adds a new favorite
;Renames a selected favorite
=Moves a selected favorite
?Deletes a selected favorite
XPress the gbutton.
XSlide6the controller.
The menu bar is shown.
XSelect Reassign.
The categories are displayed.
XSelect a category.
The favorites are displayed.
XSelect a favorite.
XAdd a favorite at the desired position.
If a favorite has already been added at this
position, it will be overwritten.
Operating system271
Multimedia system
Z
Page 275 of 374
XTo set the intensity: turn the controller when
the atomizer is switched on.
XTo exit the menu:press the%button.
Switching the ionization on/off
The ionization has a cleansing effect on the air in
the vehicle interior. Further information
(
Ypage 129).
XCall up the climate control menu
(Ypage 272).
XTo select Ionization: turn and press the
controller.
The setting element is active.
XTo switch the ionization on or off: turn the
controller.
XTo exit the menu: press the%button.
Settings in the bottom bar of the cli-
mate control menu
Switching cooling with air dehumidifica-
tion on/off
XCall up the climate control menu
(Ypage 272).
XSlide6the controller repeatedly until the
bottom bar is activated.
XTo select OA/C: turn and press the control-
ler.
XSwitch cooling with air dehumidification on
O or off ª.
iThe current status of the cooling function is
displayed in the climate control bar: A/C ON
– activated, A/C OFF – deactivated.
iDeactivating the cooling with air dehumidi-
fication function reduces fuel consumption.
Synchronizing the climate control set-
tings
Use OSync(synchronization) to select the cli-
mate control setting for all zones together Oor
separately ª.
XCall up the climate control menu
(Ypage 272).
XSlide6the controller repeatedly until the
bottom bar is activated.
XTo select OSync: turn and press the con-
troller.
XSwitch the synchronization function on Oor
off ª. For further information on synchronizing climate
control settings, see (
Ypage 126).
Navigation mode
Important safety notes
GWARNING
If you operate information systems and com-
munication equipment integrated in the vehi-
cle while driving, you will be distracted from
traffic conditions. You could also lose control
of the vehicle. There is a risk of an accident.
Only operate the equipment when the traffic
situation permits. If you are not sure that this
is possible, park the vehicle paying attention
to traffic conditions and operate the equip-
ment when the vehicle is stationary.
You must observe the legal requirements for the
country in which you are currently driving when
operating the navigation system.
General notes
Among other things, correct functioning of the
navigation system depends on GPS reception. In
certain situations, GPS reception may be
impaired, there may be interference or there
may be no reception at all, e.g. in tunnels or
parking garages.
Audio 20 is equipped with Garmin
®MAP PILOT
(see the manufacturer's operating instructions).
The Garmin
®MAP PILOT operating instructions
are stored on the SD card as a PDF file. The SD
card box contains a quick guide.
The following descriptions apply to navigation
with COMAND. Further information can be
found in the Digital Operator's Manual.
Selecting a route type and route options
Multimedia system:
XSelect NaviQNavigation.
XSelectOptionsQRoute Settings.
iIf route guidance is active, first slide 6the
controller and show the menu.
XSelect a route type.
Operating system273
Multimedia system
Z
Page 277 of 374
Connecting a mobile phone
Requirements
For telephony via the Bluetooth®interface, you
require a Bluetooth®-capable mobile phone. The
mobile phone must support Hands-Free Profile
1.0 or above.
Multimedia system:
XSelect VehicleQSystem Set‐tingsQActivate Bluetooth.
XActivate Bluetooth®O.
Mobile phone:
XActivate Bluetooth®and, if necessary, Blue-
tooth®visibility for other devices (see the
manufacturer's operating instructions).
The Bluetooth
®device names for all of one man-
ufacturer's products might be identical. To
make it possible to clearly identify your mobile
phone, change the device name (see the man-
ufacturer's operating instructions).
If the mobile phone supports the PBAP (Phone
B ook Access Profile) and MAP (M essage
Access Profile) Bluetooth
®profiles, the follow-
ing information will be transmitted after you
connect:
RPhone book
RCall lists
RMessages
iFurther information on suitable mobile
phones can be obtained on the Internet at:
http://www.mercedes-benz.com/
connect
iIn the USA, you can get in touch with the
Mercedes-Benz Customer Assistance Center
on 1-800-FOR-MERCedes (1-800-367-6372 ).
In Canada, you can get in touch with the Cus-
tomer Relations Center on 1-800-387-0100.
Searching for and authorizing a mobile
phone
Before using your mobile phone with the multi-
media system for the first time, you will need to
search for the phone and then authorize (con-
nect) it. Depending on the mobile phone, author- ization either takes place by means of Secure
Simple Pairing or by entering a passkey. The
multimedia system automatically makes the
procedure that is relevant for your mobile phone available. The mobile phone is always connec-
ted automatically after authorization. Further
information on using a mobile phone with the
multimedia system (see the Digital Operator's
Manual).
If the multimedia system does not detect your
mobile phone, this may be due to particular
security settings on your mobile phone (see the
manufacturer's operating instructions).
Only one mobile phone can be connected to the
multimedia system at any one time.
Searching for a mobile phone
Audio 20:
XSelect
Tel/®QConnectDeviceQSearch for PhonesQStartSearch.
The available mobile phones are displayed.
COMAND:
XSelect PhoneQConnectDeviceQSearch for PhonesQStartSearch.
The available mobile phones are displayed.
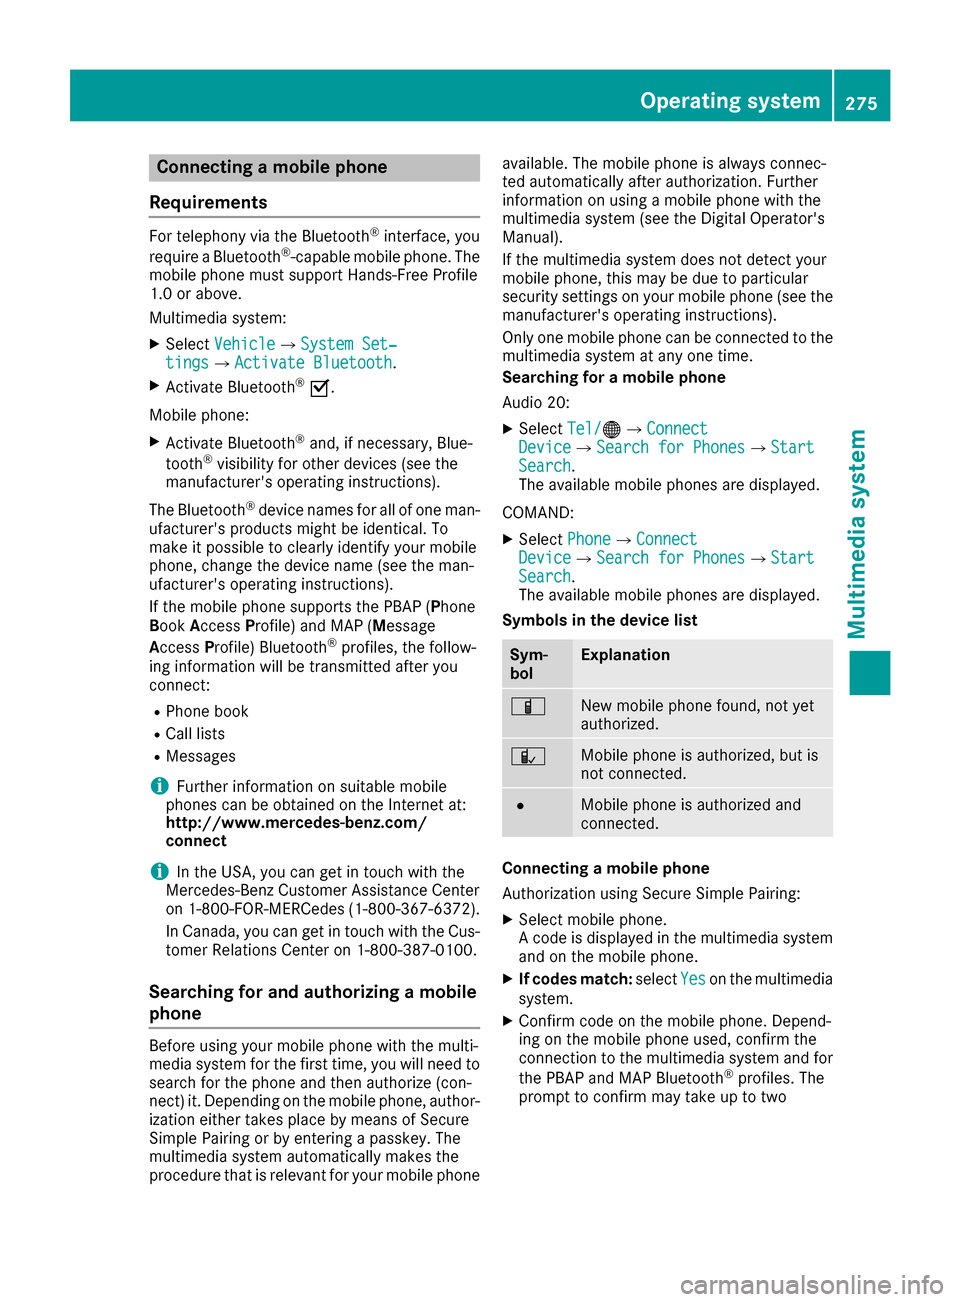
Symbols in the device list
Sym-
bolExplanation
ÏNew mobile phone found, not yet
authorized.
ÑMobile phone is authorized, but is
not connected.
#Mobile phone is authorized and
connected.
Connecting a mobile phone
Authorization using Secure Simple Pairing:
XSelect mobile phone.
A code is displayed in the multimedia system
and on the mobile phone.
XIf codes match: selectYeson the multimedia
system.
XConfirm code on the mobile phone. Depend-
ing on the mobile phone used, confirm the
connection to the multimedia system and for
the PBAP and MAP Bluetooth
®profiles. The
prompt to confirm may take up to two
Operating system275
Multimedia system
Z
Page 298 of 374
The system offers various services, e.g.:
RAutomatic and manual emergency call
RRoadside Assistance call
RInfo call
You can find information and a description of all
available features under "Owners Online" at
http://www.mbusa.com.
System self-test
After you have switched on the ignition, the sys- tem carries out a self-diagnosis.
A malfunction in the system has been detected
if one of the following occurs:
RThe indicator lamp in the SOS button does not
come on during the system self-test.
RThe indicator lamp in the FRoadside
Assistance button does not light up during
self-diagnosis of the system.
RThe indicator lamp in the ïInfo call button
does not light up during the system self-diag-
nosis
RThe indicator lamp in one or more of the fol-
lowing buttons continues to light up red after
the system self-diagnosis:
-SOS button
-F Roadside Assistance call button
-Info call button ï
Rafter the system self-diagnosis, the Inoper‐ativeorServiceNotActivatedmessage
appears in the multifunction display.
If a malfunction is indicated as outlined above,
the system may not operate as expected. In the
event of an emergency, help will have to be
summoned by other means.
Have the system checked at the nearest
Mercedes-Benz Service Center or contact the
following service hotlines:
Mercedes-Benz Customer Assistance Center at
1-800-FOR-MERCedes (1-800-367-6372) or
1-866-990-9007
Emergency call
Important safety notes
GWARNING
It can be dangerous to remain in the vehicle,
even if you have pressed the SOS button in an emergency if:
Ryou see smoke inside or outside of the vehi-
cle, e.g. if there is a fire after an accident
Rthe vehicle is on a dangerous section of
road
Rthe vehicle is not visible or cannot easily beseen by other road users, particularly when
dark or in poor visibility conditions
There is a risk of an accident and injury.
Leave the vehicle immediately in this or simi-
lar situations as soon as it is safe to do so.
Move to a safe location along with other vehi-
cle occupants. In such situations, secure the
vehicle in accordance with national regula-
tions, e. g. with a warning triangle.
General notes
Observe the notes on system activation
(Ypage 295).
An emergency call is dialed automatically if an
air bag or Emergency Tensioning Device is trig-
gered. You cannot end an automatically trig-
gered emergency call yourself.
An emergency call can also be initiated man-
ually.
As soon as the emergency call has been initi-
ated, the indicator lamp in the SOS button
flashes. The Connecting Call
message
appears in the multifunction display.
The audio output is muted.
Once the connection has been made, the Call
Connectedmessage appears in the multifunc-
tion display.
All important information on the emergency is
transmitted, for example:
RCurrent location of the vehicle (as determined
by the GPS system)
RVehicle identification number
RInformation on the severity of the accident
Shortly after the emergency call has been initi-
ated, a voice connection is automatically estab-
296Features
Stowage and features