2017 MERCEDES-BENZ GLC change time
[x] Cancel search: change timePage 166 of 374
DISTRONI C PLUS
General notes DISTRONIC PLU S regulates th e speed and auto-
matically helps you maintain th e distanc e from
th e vehicle detecte d in front. Vehicles are detec -
te d wit h th e aid of th e radar sensor system.
DISTRONIC PLU S brake s automatically so that
th e set speed is no t exceeded.
Change into a lowe r gear in goo d time on lon g
and steep downhill gradients. Thi s is especially
important if th e vehicle is laden. By doin g so, you
will mak e use of th e braking effect of th e engine.
Thi s relieves th e load on th e brake syste m and
prevents th e brake s from overheatin g and wear -
in g to o quickly.
If DISTRONIC PLU S detects that there is a ris k of
a collision , you will be warned visually and
acoustically. DISTRONIC PLU S canno t preven t a
collision without your intervention . An intermit -
tent warnin g tone will then soun d and th e dis -
tanc e warnin g lamp will ligh t up in th e instru-
men t cluster. Brak e immediately in order to
increase th e distanc e to th e vehicle in fron t or
take evasiv e action provided it is saf e to do so.
DISTRONIC PLU S operates in th e speed range
between 0 mph (0 km/ h) an d 120 mph
(200 km/h).
Do not use DISTRONIC PLUS whil e driving on
roa ds with steep gradients.
As DISTRONIC PLUS transmits radar waves, it
can resemble the radar detectors of the respon-
sible authorities. You can refer to the relevant
chapter in the Operator's Manual if questions
are asked about this.
i USA only: This device has been approved by
the FCC as a "Vehicular Radar System". The
radar sensor is intended for use in an auto-
motive radar system only. Removal, tamper-
ing, or altering of the device will void any war-
ranties, and is not permitted by the FCC. Do
not tamper with, alter, or use in any non-
approved way.
Any unauthorized modification to this device
could void the user's authority to operate the
equipment.
i Canada only: This device complies with
RSS-210 of Industry Canada. Operation is
subject to the following two conditions:
1. This device may not cause interference,
and 2. This device must accept any interference
received, including interference that may
cause undesired operation of the device.
Removal, tampering, or altering of the device
will void any warranties, and is not permitted.
Do not tamper with, alter, or use in any non-
approved way.
Any unauthorized modification to this device
could void the user's authority to operate the
equipment.
Important safety notes
G WARNING
DISTRONIC PLUS does not react to: R
people or animals R
stationary obstacles on the road, e.g. stop-
ped or parked vehicles R
oncoming and crossing traffic
As a result, DISTRONIC PLUS may neither give
warnings nor intervene in such situations.
There is a risk of an accident.
Always pay careful attention to the traffic sit-
uation and be ready to brake.
G WARNING
DISTRONIC PLUS cannot always clearly iden-
tify other road users and complex traffic sit-
uations.
In such cases, DISTRONIC PLUS may: R
give an unnecessary warning and then
brake the vehicle R
neither give a warning nor intervene R
accelerate or brake unexpectedly
There is a risk of an accident.
Continue to drive carefully and be ready to
brake, in particular when warned to do so by
DISTRONIC PLUS.
G WARNING
DISTRONIC PLUS brakes your vehicle with up
to 50% of the maximum possible deceleration.
If this braking force is insufficient, DISTRONIC
PLUS warns you visually and audibly. There is
a risk of an accident.164
Driving systems
Driving and parking
Page 167 of 374
In such cases, apply the brakes yourself and
try to take evasive action.
! When DISTRONIC PLUS or the HOLD func-
tion is activated, the vehicle brakes automat-
ically in certain situations.
To avoid damage to the vehicle, deactivate
DISTRONIC PLUS and the HOLD function in
the following or similar situations: R
when towing the vehicle R
in the car wash
DISTRONIC PLUS can neither reduce the risk of
an accident if you fail to adapt your driving style
nor override the laws of physics. DISTRONIC
PLUS cannot take account of road, weather and
traffic conditions. DISTRONIC PLUS is only an
aid. You are responsible for maintaining a safe
distance to the vehicle in front, for vehicle
speed, for braking in good time and for staying in
lane.
Do not use DISTRONIC PLUS: R
in road and traffic conditions which do not
allow you to maintain a constant speed, e.g. in
heavy traffic or on winding roads R
on slippery road surfaces. Braking or accel-
erating could cause the drive wheels to lose
traction and the vehicle could then skid R
in poor visibility, e.g. due to fog, heavy rain or
snow
DISTRONIC PLUS may not detect narrow vehi-
cles driving in front, e.g. motorcycles, or vehi-
cles driving on a different line.
In particular, the detection of obstacles can be
impaired if: R
there is dirt on the sensors or anything else
covering the sensors R
there is snow or heavy rain R
there is interference by other radar sources R
there are strong radar reflections, for exam-
ple in parking garages
If DISTRONIC PLUS no longer detects a vehicle
in front, DISTRONIC PLUS may unexpectedly
accelerate the vehicle to the stored speed. This speed may: R
be too high if you are driving in a filter lane or
an exit lane R
be so high in the right lane that you pass vehi-
cles driving on the left (left-hand drive coun-
tries) R
be so high in the left lane that you pass vehi-
cles driving on the right (in countries where
they drive on the left)
If there is a change of drivers, advise the new
driver of the speed stored.
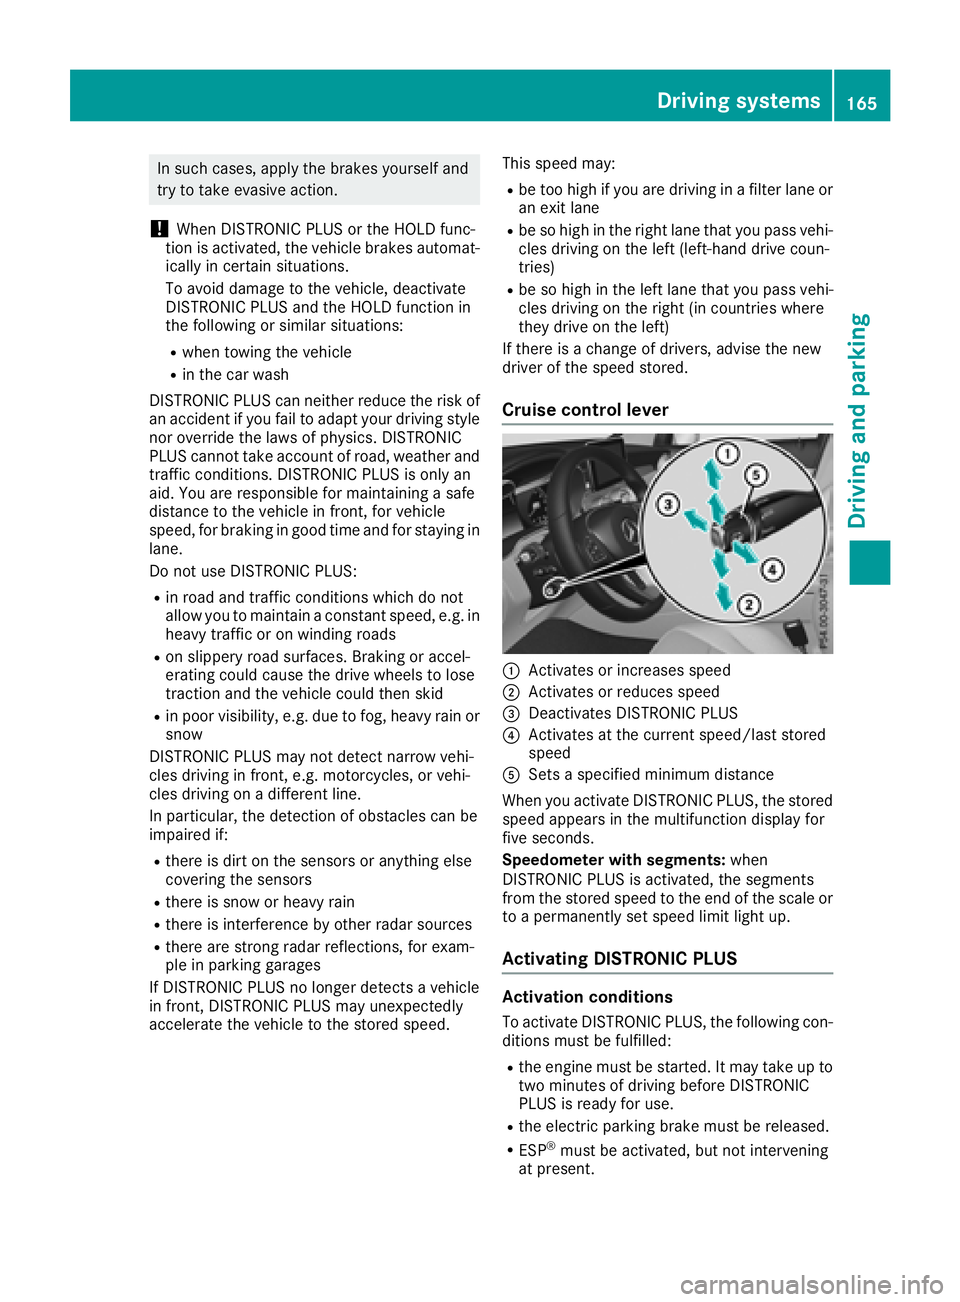
Cruise control lever
�C
Activates or increases speed �D
Activates or reduces speed �
Page 169 of 374
between your vehicle and the vehicle in front
becomes too small.
When you change lanes, DISTRONIC PLUS mon-
itors the left lane (on left-hand-drive vehicles) or
the right lane (on right-hand-drive vehicles).
Stopping
G WARNING
When leaving the vehicle, even if it is braked
only by DISTRONIC PLUS, it could roll away if: R
there is a malfunction in the system or in
the voltage supply. R
DISTRONIC PLUS has been deactivated
with the cruise control lever, e.g. by a vehi-
cle occupant or from outside the vehicle. R
the electrical system in the engine com-
partment, the battery or the fuses have
been tampered with. R
the battery is disconnected. R
the accelerator pedal has been depressed,
e.g. by a vehicle occupant.
There is a risk of an accident.
If you wish to exit the vehicle, always turn off
DISTRONIC PLUS and secure the vehicle
against rolling away.
For further information on deactivating
DISTRONIC PLUS ( Y
page 169).
If DISTRONIC PLUS detects that the vehicle in
front has stopped, it will cause your vehicle to
brake and come to a halt.
Once your vehicle is stationary, it remains sta-
tionary and you do not need to depress the
brake.
After a time, the electric parking brake secures
the vehicle and relieves the service brake.
Depending on the specified minimum distance,
your vehicle will come to a standstill at a suffi-
cient distance behind the vehicle in front. The
specified minimum distance is set using the
control on the cruise control lever. When DISTRONIC PLUS is activated, the trans-
mission is shifted automatically to position �] ,
if: R
the driver's seat belt is not fastened and the
driver's door is open. R
the engine is switched off, unless it is auto-
matically switched off by the ECO start/stop
function.
The electric parking brake secures the vehicle
automatically if DISTRONIC PLUS is activated
when the vehicle is stationary and: R
a system malfunction occurs. R
the power supply is insufficient.
If a malfunction occurs, the transmission may
also be shifted to position �] automatically.
Setting a speed X
Push the cruise control lever up �C for a
higher speed or down �D for a lower speed.X
To adjust the set speed in 1 mph incre-
ments (1 km/h increments): briefly push
the cruise control lever up �C or down �D to
the pressure point.
Every time the cruise control lever is pressed
up �C or down �D the last speed stored is
increased or reduced. X
To adjust the set speed in 5 mph incre-
ments (10 km/h increments): briefly push
the cruise control lever up �C or down �D
beyond the pressure point.
Every time the cruise control lever is pressed
up �C or down �D , the last speed stored is
increased or reduced.
i If you accelerate to overtake, DISTRONIC
PLUS adjusts the vehicle's speed back to the
last speed stored after you have finished over-
taking.
Setting a specified minimum distance You can set the specified minimum distance for
DISTRONIC PLUS by varying the time span
between one and two seconds. With this func-
tion, you can set the minimum distance that
DISTRONIC PLUS maintains to the vehicle in
front, depending on the driving speed. You can
see this distance in the multifunction display
( Y
page 168).
Make sure that you maintain the minimum dis-
tance to the vehicle in front as required by law.Driving systems 167
Driving and parking Z
Page 172 of 374
DISTRONIC PLUS with Steering Assist and
Stop&Go Pilot helps you keep the vehicle in the
center of the lane by means of moderate steer-
ing interventions in a speed range from
0–125 mph (0–200 km/h).
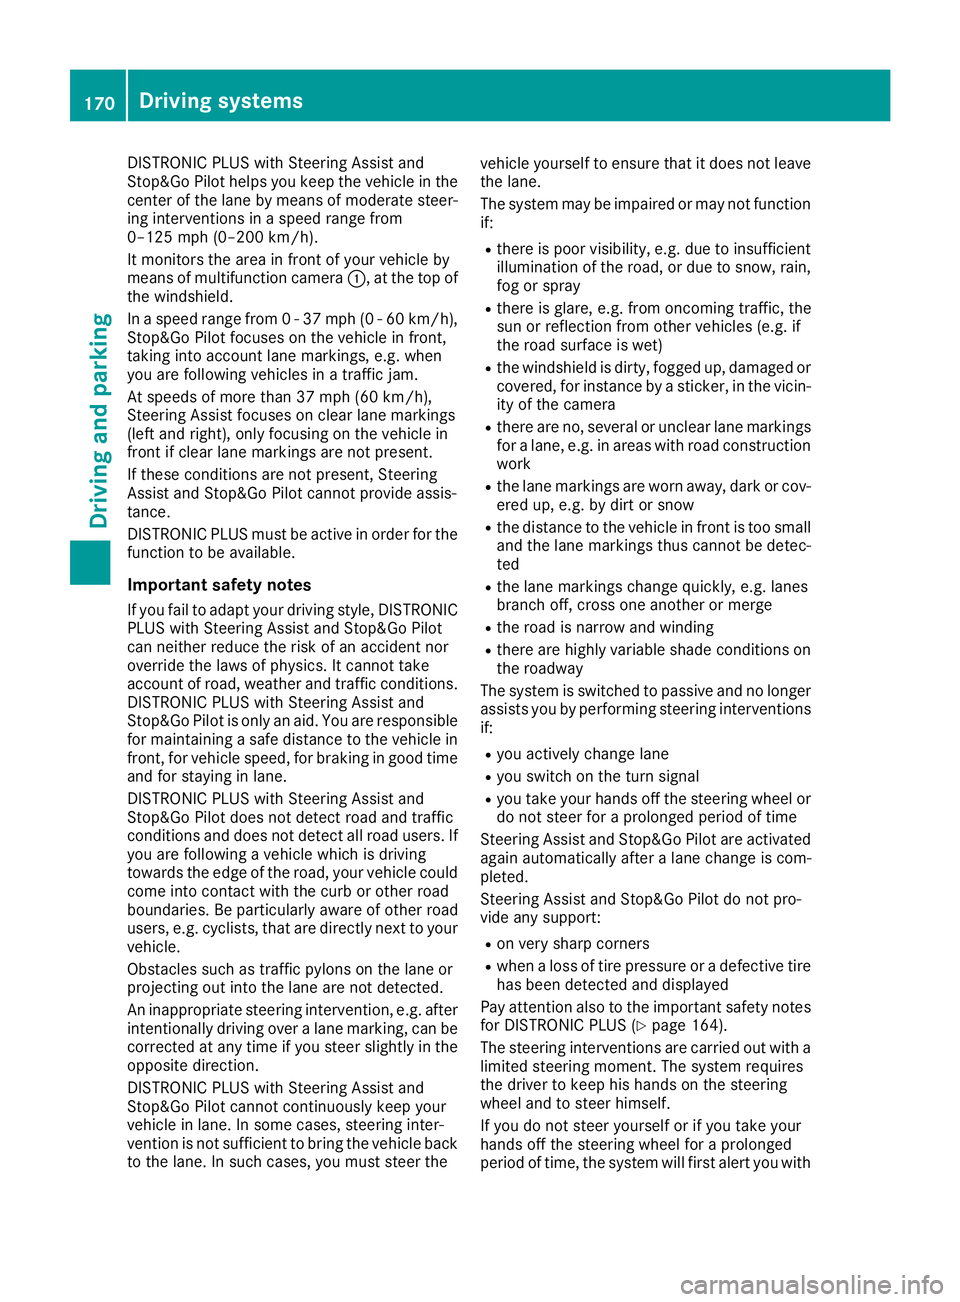
It monitors the area in front of your vehicle by
means of multifunction camera �C , at the top of
the windshield.
In a speed range from 0 - 37 mph (0 - 60 km/h),
Stop&Go Pilot focuses on the vehicle in front,
taking into account lane markings, e.g. when
you are following vehicles in a traffic jam.
At speeds of more than 37 mph (60 km/h),
Steering Assist focuses on clear lane markings
(left and right), only focusing on the vehicle in
front if clear lane markings are not present.
If these conditions are not present, Steering
Assist and Stop&Go Pilot cannot provide assis-
tance.
DISTRONIC PLUS must be active in order for the
function to be available.
Important safety notes If you fail to adapt your driving style, DISTRONIC
PLUS with Steering Assist and Stop&Go Pilot
can neither reduce the risk of an accident nor
override the laws of physics. It cannot take
account of road, weather and traffic conditions.
DISTRONIC PLUS with Steering Assist and
Stop&Go Pilot is only an ai d. Y ou are responsible
fo
r maintaining a safe distance to the vehicle in
front, for vehicle speed, for braking in good time
and for staying in lane.
DISTRONIC PLUS with Steering Assist and
Stop&Go Pilot does not detect road and traffic
conditions and does not detect all road users. If
you are following a vehicle which is driving
towards the edge of the road, your vehicle could
come into contact with the curb or other road
boundaries. Be particularly aware of other road
users, e.g. cyclists, that are directly next to your
vehicle.
Obstacles such as traffic pylons on the lane or
projecting out into the lane are not detected.
An inappropriate steering intervention, e.g. after
intentionally driving over a lane marking, can be
corrected at any time if you steer slightly in the
opposite direction.
DISTRONIC PLUS with Steering Assist and
Stop&Go Pilot cannot continuously keep your
vehicle in lane. In some cases, steering inter-
vention is not sufficient to bring the vehicle back
to the lane. In such cases, you must steer the vehicle yourself to ensure that it does not leave
the lane.
The system may be impaired or may not function
if: R
there is poor visibility, e.g. due to insufficient
i llumination of the road, or due to snow, rain,
fog or spray R
there is glare, e.g. from oncoming traffic, the
sun or reflection from other vehicles (e.g. if
the road surface is wet) R
the windshield is dirty, fogged up, damaged or
covered, for instance by a sticker, in the vicin-
ity of the camera R
there are no, several or unclear lane markings
for a lane, e.g. in areas with road construction
work R
the lane markings are worn away, dark or cov-
ered up, e.g. by dirt or snow R
the distance to the vehicle in front is too small
and the lane markings thus cannot be detec-
ted R
the lane markings change quickly, e.g. lanes
branch off, cross one another or merge R
the road is narrow and winding R
there are highly variable shade conditions on
the roadway
The system is switched to passive and no longer
assists you by performing steering interventions
if: R
you actively change lane R
you switch on the turn signal R
you take your hands off the steering wheel or
do not steer for a prolonged period of time
Steering Assist and Stop&Go Pilot are activated
again automatically after a lane chang e is com-
p leted.
Steering Assist and Stop&Go Pilot do not pro-
vide any support: R
on very sharp corners R
when a loss of tire pressure or a defective tire
has been detected and displayed
Pay attention also to the important safety notes
for DISTRONIC PLUS ( Y
page 164).
The steering interventions are carried out with a
limited steering moment. The system requires
the driver to keep his hands on the steering
wheel and to steer himself.
If you do not steer yourself or if you take your
hands off the steering wheel for a prolonged
period of time, the system will first alert you with170
Driving system s
Dr ivi ng an d parking
Page 183 of 374
The Park Assist Active Accelerate
and Brake Observe Surroundings mes-
sage appears in the multifunction display.
i You will achieve the best results by waiting
for the steering procedure to complete before
pulling away. X
Drive forwards and be ready to brake at all
times.
Active Parking Assist brakes the vehicle to a
standstill when the vehicle approaches the
rear border of the parking space.
Maneuvering may be required in tight parking
spaces.
The Park Assist Active Select R Observe
Surroundings message appears in the multi-
function display.
As soon as the parking procedure is complete,
the Park Assist Switched Off message
appears and a warning tone sounds. The vehicle
is now parked.
The vehicle is kept stationary without the driver
having to depress the brake pedal. The braking
effect is canceled when you depress the accel-
erator pedal.
Active Parking Assist no longer supports you
with steering interventions and brake applica-
tions. When Active Parking Assist is finished,
you must steer and brake again yourself.
PARKTRONIC is still available.
Parking tips: R
The way your vehicle is positioned in the park-
ing space after parking is dependent on vari-
ous factors. These include the position and
shape of the vehicles parked in front and
behind it and the conditions of the location. It
may be the case that Active Parking Assist
guides you too far into a parking space, or not
far enough into it. In some cases, it may also
lead you across or onto the curb. If necessary,
you should cancel the parking procedure with
Active Parking Assist. R
You can also preselect transmission position
�[ . The vehicle redirects and does not drive
as far into the parking space. Should the
transmission change take place too early, the
parking procedure will be canceled. A sensi-
ble parking position can no longer be ach-
ieved from this position. Exiting a parking space In order that Active Parking Assist can support
you when you exit the parking space: R
the border of the parking space must be high
enough at the front and the rear. A curb is too
small, for example. R
the border of the parking space must not be
too wide. Your vehicle can be maneuvered
into a position at a maximum of 45° to the
starting position in the parking space. R
a maneuvering distance of at least 3.3 ft
(1.0 m) must be available.
Active Parking Assist can only assist you with
exiting a parking space if you have parked the
vehicle parallel to the direction of travel using
Active Parking Assist.
i If PARKTRONIC detects obstacles, Active
Parking Assist brakes automatically whilst the
vehicle exits the parking space. You are
responsible for braking in good time. X
Start the engine. X
Release the electric parking brake. X
Switch on the turn signal in the direction you
are pulling away. X
Shift the transmission to position �[ or �^ .
The Start Park Assist? Yes: OK No: �8
message appears on the multifunction dis-
play. X
To cancel the procedure: press the �8
button on the multifunction steering wheel or
pull away.
or X
To exit a parking space using Active Park-
ing Assist: press the �v button on the mul-
tifunction steering wheel.
The Park Assist Active Accelerate
and Brake Observe Surroundings mes-
sage appears on the multifunction display. X
Let go of the multifunction steering wheel. X
Pull away, being ready to brake at all times. Do
not exceed a maximum speed of approx-
imately 6 mph (10 km/ h) when exiting a park-
ing space. Otherwise Active Parking Assist
will be canceled. X
Depending on the message or as required,
shift the transmission to position �[ or �^ .
Active Parking Assist immediately steers in
the other direction. The Park Assist
Active Accelerate and Brake ObserveDriving systems 181
Driving and parking Z
Page 185 of 374
R
if there is a sudden change in temperature,
e.g. when driving into a heated garage in win-
ter R
if the camera lens is dirty or obstructed
Observe the notes on cleaning
( Y
page 316) R
if the rear of your vehicle is damaged. In this
case, have the camera position and setting
checked at a qualified specialist workshop
The field of vision and other functions of the rear
view camera may be restricted due to additional
accessories on the rear of the vehicle (e.g.
license plate holder, rear bicycle rack).
The rear view camera is protected from rain-
drops and dust by means of a flap. When the rear
view camera is activated, this flap opens.
The flap closes again when: R
you have finished the maneuvering process R
you switch off the engine R
you open the cargo compartment
Observe the notes on cleaning ( Y
page 316).
For technical reasons, the flap may remain open
briefly after the rear view camera has been
deactivated.
Activating/deactivating the rear view
camera
X
To activate: make sure that the Activa‐
tion by R gear function is selected in the
multimedia system (see the Digital Operator's
Manual). X
Engage reverse gear.
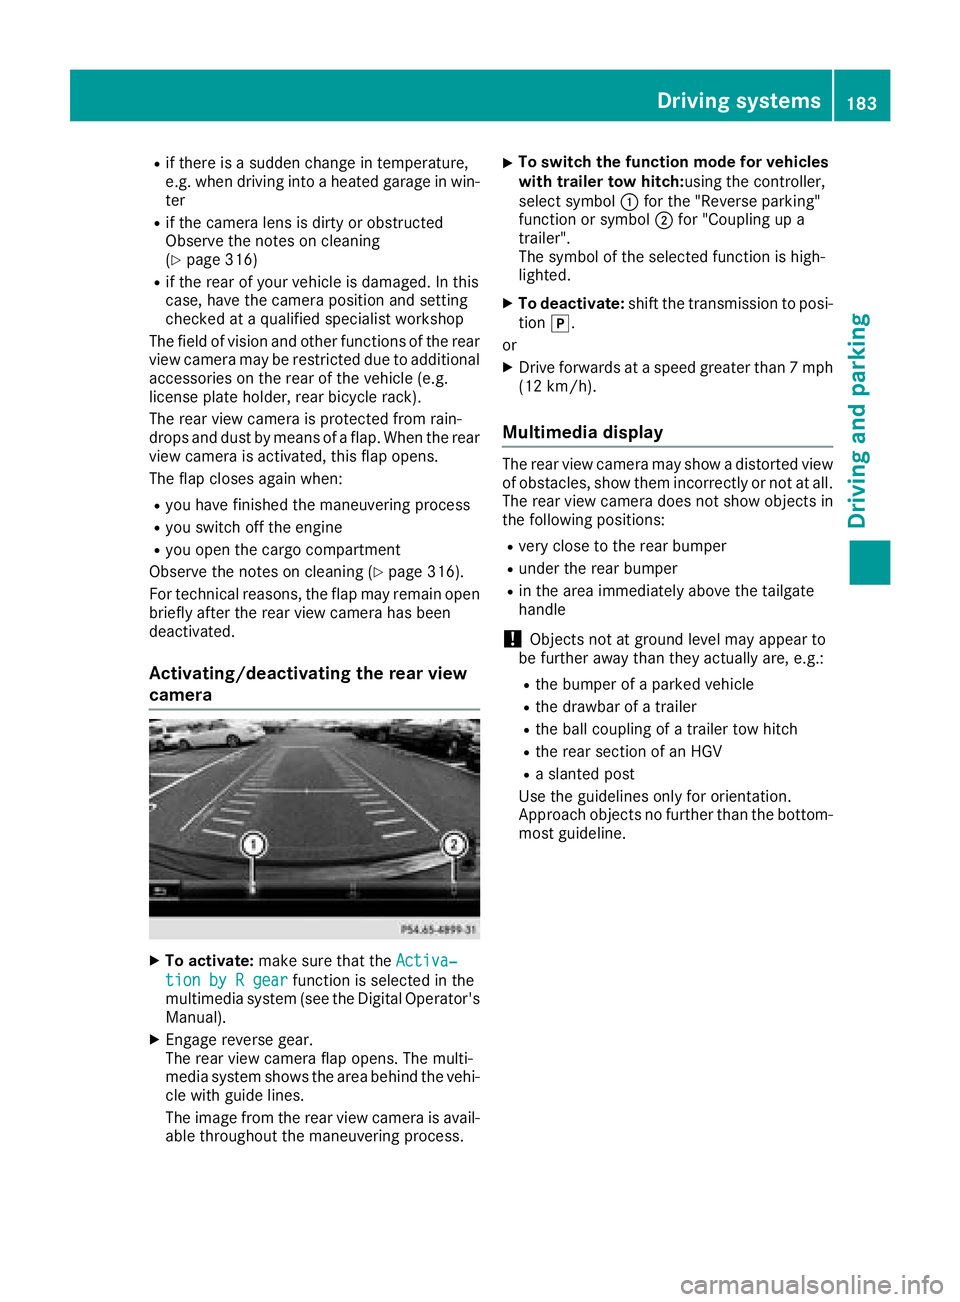
The rear view camera flap opens. The multi-
media system shows the area behind the vehi-
cle with guide lines.
The image from the rear view camera is avail-
able throughout the maneuvering process. X
To switch the function mode for vehicles
with trailer tow hitch: using the controller,
select symbol �C for the "Reverse parking"
function or symbol �D for "Coupling up a
trailer".
The symbol of the selected function is high-
lighted. X
To deactivate: shift the transmission to posi-
tion �] .
or X
Drive forwards at a speed greater than 7 mph
(12 km/h).
Multimedia display The rear view camera may show a distorted view
of obstacles, show them incorrectly or not at all.
The rear view camera does not show objects in
the following positions: R
very close to the rear bumper R
under the rear bumper R
in the area immediately above the tailgate
handle
! Objects not at ground level may appear to
be further away than they actually are, e.g.: R
the bumper of a parked vehicle R
the drawbar of a trailer R
the ball coupling of a trailer tow hitch R
the rear section of an HGV R
a slanted post
Use the guidelines only for orientation.
Approach objects no further than the bottom-
most guideline.Driving systems 183
Driving and parking Z
Page 189 of 374
360° camera
General notes The 360° camera is a system consisting of four
cameras.
The system processes images from the follow-
ing cameras: R
Rear view camera R
Front camera R
Two side cameras in the exterior mirrors
The cameras cover the immediate surroundings
of the vehicle. The system supports you, for
example when parking or if vision is restricted at
an exit.
You can show images from the 360° camera in
full-screen mode or in seven different split-
screen views on the multimedia system. A split-
screen view also includes a top view of the vehi-
cle. This view is calculated from the data sup-
plied by the installed cameras (virtual camera).
The seven split-screen views are: R
Top view and picture from the rear view cam-
era (130° viewing angle) R
Top view and image from the front camera
(130° viewing angle without displaying the
maximum steering wheel angle) R
Top view and enlarged rear view R
Top view and enlarged front view R
Top view and trailer view (vehicles with trailer
tow hitch) R
Top view and images from the rear-facing side
cameras (rear wheel view) R
Top view and images from the forward-facing
side cameras (front wheel view)
When the function is active and you shift the
transmission from �[ or �^ to �\\ , the guide
lines are hidden in the multimedia system.
When you change between transmission posi-
tions �[ and �^ , you see the previously selec-
ted front or rear view.
Distances measured by PARKTRONIC will also
be optically displayed: R
in split screen view as red or yellow brackets
around the vehicle icon in the top view, or R
at the bottom right as red or yellow brackets
around the vehicle symbol in full-screen mode
The line thickness and color of the brackets
show how far the vehicle is from an object. R
yellow brackets with thin lines: PARKTRONIC
is active R
yellow brackets with normal lines: an object is
present in close range of the vehicle R
red line: an object is present in the immediate
close range of the vehicle
Important safety notes The 360°camera is only an aid and may show a
distorted view of obstacles, show them incor-
rectly or not at all. The 360°camera is not a
substitute for attentive driving.
You are always responsible for safe maneuver-
ing and parking. Make sure that there are no
persons, animals or objects in the maneuvering
area while maneuvering and parking in parking
spaces.
You are always responsible for safety, and must
always pay attention to your surroundings when
parking and maneuvering. This applies to the
areas behind, in front of and beside the vehicle.
You could otherwise endanger yourself and oth-
ers.
The 360° camera will not function or will func-
tion in a limited manner: R
if the doors are open R
if the exterior mirrors are folded in R
if the tailgate is open R
in heavy rain, snow or fog R
at night or in very dark places R
if the cameras are exposed to very bright light R
if the area is lit by fluorescent bulbs or LED
lighting (the display may flicker) R
if the camera lenses fog up, e.g. when driving
into a heated garage in winter, causing a rapid
change in temperature R
if the camera lenses are dirty or covered R
if the vehicle components in which the cam-
eras are installed are damaged. In this case,
have the camera position and setting checked
at a qualified specialist workshop
Do not use the 360° camera in this case. You
can otherwise injure others or cause damage to
objects or the vehicle.
The guide lines in the multimedia system display
show the distances to your vehicle. The distan-
ces only apply to road level.
In trailer mode, the guide lines are shown at the
level of the trailer tow hitch.Driving systems 187
Driving and parking Z
Page 198 of 374
This function is available in the range between
40 mph and 120 mph (60 km/ ha nd 200 km/h).
A warning may be given if a front wheel passes
over a lane marking. It will warn you by means of
intermittent vibration in the steering wheel for
up to 1.5 seconds.
Important safety notes
G WARNING
Lane Keeping Assist may not always clearly
recognize lane markings.
In this case, Lane Keeping Assist may: R
give an unnecessary warning R
not give a warning
There is a risk of an accident.
Always pay particular attention to the traffic
situation and stay in lane, in particular if
warned by Lane Keeping Assist.
G WARNING
The Lane Keeping Assist warning does not
return the vehicle to the original lane. There is
a risk of an accident.
You should always steer, brake or accelerate
yourself, in particular if warned by Lane Keep-
ing Assist.
Lane Keeping Assist can neither reduce the risk
of an accident if you fail to adapt your driving
style nor override the laws of physics. Lane
Keeping Assist cannot take into account the
road, traffic and weather conditions. Lane Keep-
ing Assist is merely an aid. You are responsible
for the distance to the vehicle in front, for vehi-
cle speed, for braking in good time and for stay-
ing in your lane.
The Lane Keeping Assist does not keep the vehi-
cle in the lane.
The system may be impaired or may not function
if: R
there is poor visibility, e.g. due to insufficient
illumination of the road, or due to snow, rain,
fog or spray R
there is glare, e.g. from oncoming traffic, the
sun or reflection from other vehicles (e.g. if
the road surface is wet) R
the windshield is dirty, fogged up, damaged or
covered, for instance by a sticker, in the vicin-
ity of the camera R
there are no, several or unclear lane markings
for a lane, e.g. in areas with road construction
work R
the lane markings are worn away, dark or cov-
e red up, e.g. by dirt or snow R
the distance to the vehicle in front is too small
and the lane markings thus cannot be detec-
ted R
the lane markings change quickly, e.g. lanes
branch off, cross one another or merge R
the road is narrow and winding R
there are highly variable shade conditions on
the roadway
Activating/deactivating Lane Keeping
Assist
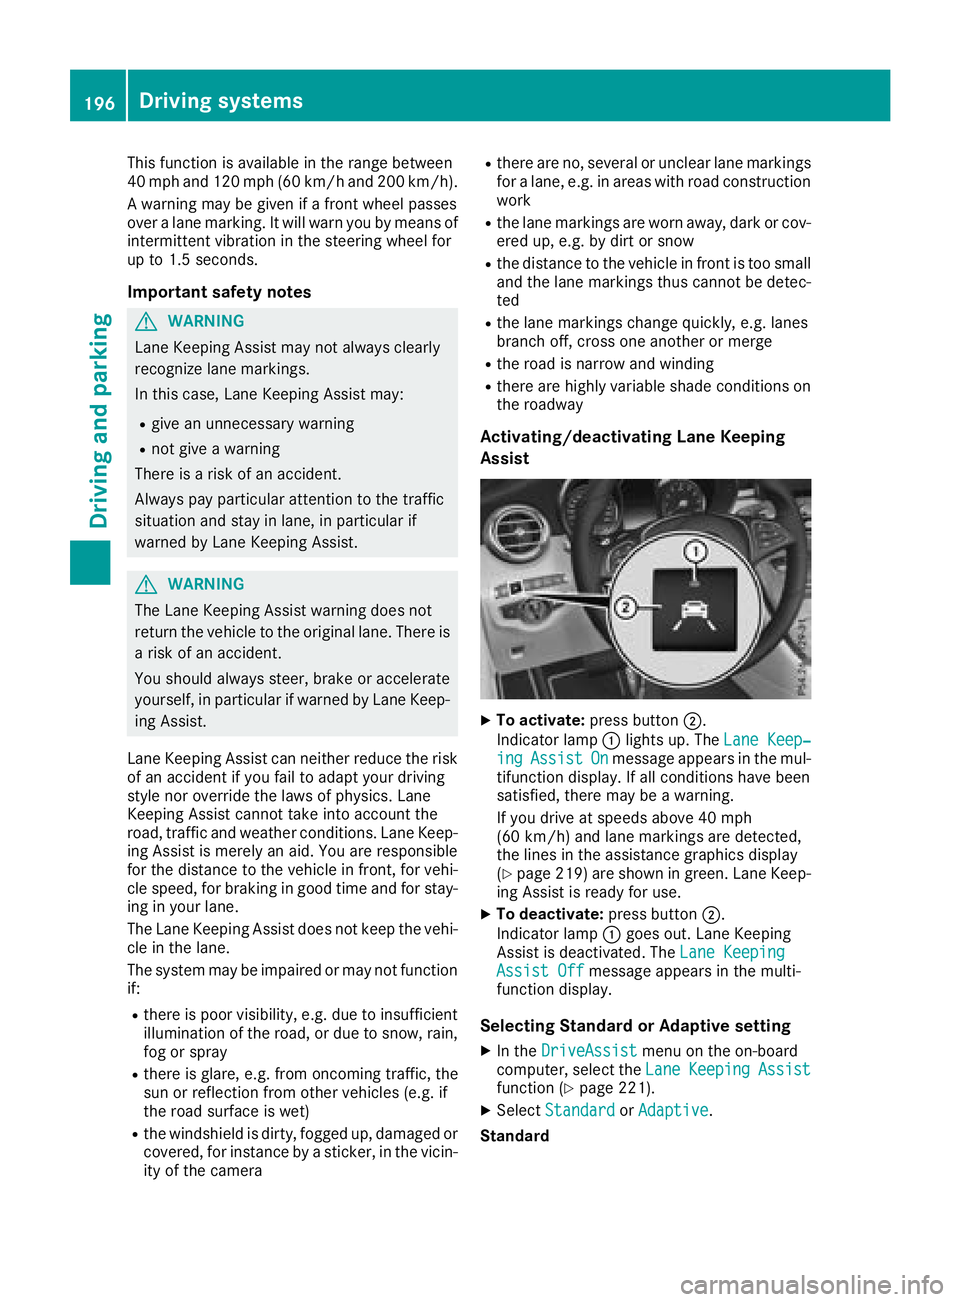
X
To activate: press button �D .
Indicator lamp �C lights up. The Lane Keep‐
ing Assist On message appears in the mul-
tifunction display. If all conditions have been
satisfied, there may be a warning.
If you drive at speeds above 40 mph
(60 km/h) and lane markings are detected,
the lines in the assistance graphics display
( Y
page 219) are shown in green. Lane Keep-
ing Assist is ready for use. X
To deactivate: press button �D .
Indicator lamp �C goes out. Lane Keeping
Assist is deactivated. The Lane Keeping
Assist Off message appears in the multi-
function display.
Selecting Standard or Adaptive setting X
In the DriveAssist menu on the on-board
computer, select the Lane Keeping Assist
function ( Y
page 221). X
Select Standard or Adaptive .
Standard196
Driving systems
Driving an d parking