2017 MERCEDES-BENZ GLC tow bar
[x] Cancel search: tow barPage 207 of 374
X
Switch off the engine. X
Close the doors and tailgate. X
Couple up the trailer. X
Establish the electrical connection between
the vehicle and the trailer. X
Check that the trailer lighting system is work-
ing. X
Push the combination switch upwards/down-
wards and check whether the corresponding
turn signal on the trailer flashes.
A trailer that is connected is recognized only
when the electrical connection is established
correctly and when the lighting system is work-
ing properly. The function of other systems also
depends on this, for example: R
ESP ®
R
PARKTRONIC R
Active Parking Assist R
Active Blind Spot Assist R
Active Lane Keeping Assist
Vehicles with AIR BODY CONTROL: if you couple
up a trailer, the vehicle always remains at high-
way level. Observe the following note when cou-
pling up a trailer: R
Unless highway level has been set manually,
the vehicle is automatically lowered to high-
way level. If a speed of 5 mph (8 km/h) has
been reached, this may be the case.
These restrictions apply to accessories that are
supplied with power via the trailer socket in your
vehicle, e.g. a rear bicycle rack.
Observe the maximum permissible trailer
dimensions (width and length).
Most U.S. states and all Canadian provinces
require by law: R
Safety chains between the towing vehicle and
the trailer. The chains should be cross-wound
under the trailer drawbar. They must be fas-
tened to the vehicle's trailer coupling, not to
the bumper or the axle.
Leave enough play in the chains to make tight
cornering possible. R
A separate brake system for certain types of
trailer. R
Safety switch for braked trailers. Check the
specific legal requirements applicable to your
state.
If the trailer becomes detached from the tow-
ing vehicle, the safety feature applies the
trailer brakes. Towing a trailer There are several legal requirements for towing
a trailer, e.g. the maximum permissible speed.
Make sure that your car/trailer combination
complies with the local regulations: R
in your place of residence R
at your destination
The police and local authorities can provide reli-
able information.
To accumulate driving experience and accustom
yourself to the new handling characteristics,
practice the following at a location where there
is no traffic: R
Cornering R
Stopping R
Backing up
Check the following before the journey: R
Trailer tow hitch R
Safety switch for braked trailers R
Safety chains R
Electrical connections R
Lighting system R
Wheels and tires R
Load securing
Adjust the exterior mirrors so that you have a
clear view of the rear section of the trailer.
If the trailer is equipped with electronically con-
trolled brakes, pull away carefully in the car/
trailer combination. Brake manually using the
brake controller and check whether the brakes
function correctly.
Regularly check that the load is secure.
When towing a trailer, your vehicle's handling
characteristics will be different in comparison
with when driving without a trailer.
The vehicle/trailer combination: R
is heavier R
is restricted in its acceleration and gradient-
climbing capability R
has an increased braking distance R
is affected more by strong crosswinds R
demands more sensitive steering R
has a larger turning circle
Avoid sudden steering movements.
Avoid braking abruptly. If possible, brake gently
at first to allow the trailer to run on. Then,
increase the braking force rapidly.Towing a trailer 205
Driving and parking Z
Page 208 of 374
When overtaking, pay particular attention to the
extended length of your vehicle/trailer combi-
nation.
Due to the length of the vehicle/trailer combi-
nation, you require additional road space when
overtaking before you can change back to the
original lane.
If the automatic transmission repeatedly shifts
between gears on uphill or downhill gradients,
shift to a lower gear.
Driving in a lower gear and at a reduced speed
decreases the risk of engine damage.
If the coolant temperature increases signifi-
cantly when climate control is switched on,
switch climate control off.
Coolant heat can also be dissipated by opening
the windows and switching the ventilation
blower and the interior temperature to the high-
est level.
Decoupling a trailer
G WARNING
If you uncouple a trailer with the overrun
brake engaged, you could trap your hand
between the vehicle and the trailer drawbar.
There is a risk of injury.
Do not uncouple a trailer if the overrun brake
is engaged.
G WARNING
Vehicles with level control:
The vehicle is lowered as soon as you discon-
nect the trailer cable. This could result in your
limbs or those of other people that are
between the vehicle body and tires or under-
neath the vehicle being trapped. There is a
risk of injury.
Make sure that nobody is in the immediate
vicinity of the wheel housings or under the
vehicle when you disconnect the trailer cable.
! Do not disconnect a trailer with an engaged
overrun brake. Otherwise, your vehicle could
be damaged by the rebounding of the overrun
brake. X
Apply the vehicle's parking brake manually. X
Shift the transmission to position �] . X
Close all doors and the tailgate. X
Switch off the engine. X
Secure the vehicle and trailer against rolling
away. X
Remove the trailer cable. X
Remove the safety chains, if there are any. X
Uncouple the trailer.
Removing the ball coupling X
Observe the manufacturer's installation
instructions. X
Press the protective cap into the ball coupling
recess. X
Make sure that the protective cap is firmly in
place.
Observe the loading guidelines ( Y
page 278)
and the safety notes regarding stowage spaces
( Y
page 278).
Information on cleaning and care of the trailer
tow hitch ( Y
page 316).
Trailer power supply
! Accessories with a maximum power con-
sumption of 180 W can be connected to the
permanent power supply.
You must not charge a trailer battery using the
power supply.
The trailer socket of your vehicle is equipped at
the factory with a permanent power supply.
The permanent power supply is supplied via
trailer socket pin 4.
The trailer's permanent power supply is
switched off in the event of low vehicle supply
voltage and after six hours at the latest.
A qualified specialist workshop can provide
more information about installing the trailer
electrics.
Permissible trailer loads and trailer
drawbar noseweights
Weight specifications
The gross trailer weight is calculated as the
weight of the trailer plus the weight of the load
and the trailer's equipment.206
Towing a trailer
Driving and parking
Page 209 of 374
You will find permissible trailer loads under
"Technical data" ( Y
page 371).
Loading a trailer R
When loading the trailer, make sure that nei-
ther the permissible gross trailer weight nor
the permissible gross vehicle weight are
exceeded. The permissible gross vehicle
weight is indicated on the identification plate
on the B-pillar on the driver's side of the vehi-
cle.
You can find the maximum permissible values
on the type plates of your vehicle and the
trailer. When calculating how much weight
the vehicle and trailer may carry, pay atten-
tion to the respective lowest values. R
The trailer drawbar load on the ball coupling
must be added to the rear axle load to avoid
exceeding the permissible gross axle weight.
The permissible gross vehicle weight is indi-
cated on the identification plate on the B-pil-
lar on the driver's side of the vehicle.
Mercedes-Benz recommends a trailer load
where the trailer drawbar noseweight accounts
for 8% to 15% of the permissible gross trailer
weight.
Additional accessories, passengers and load
reduce the permissible trailer load and nose-
weight that your vehicle can tow.
Checking the vehicle and trailer weight R
Have the towing vehicle, including the driver,
passengers and load, and completely loaded
trailer weighed on a suitable weighing
machine. This will allow you to ensure that the
weights of the towing vehicle and trailer com-
ply with the maximum permissible values. R
Check the gross axle weight rating of the front
and rear axles, the gross weight of the trailer
and trailer drawbar load. Towing a trailer 207
Driving and parking Z
Page 326 of 374
If your clothes are soiled with tire sealant, have
them cleaned with perchloroethylene at a dry
cleaner as soon as possible.
Tire pressure not reached If a tire pressure of 200 kPa (2.0 bar/29 psi) has
not been attained after ten minutes: X
Switch off the tire inflation compressor. X
Unscrew the filler hose from the valve of the
faulty tire.
Tire sealant may escape when the filler hose is
unscrewed. X
Very slowly drive forwards or reverse approx-
imately 30 ft (10 m). X
Pump up the tire again.
After a maximum of ten minutes, the tire pres-
sure must be at least 200 kPa (2.0 bar/
29 psi).
G WARNING
If the required tire pressure is not reached
after the specified time, the tire is too badly
damaged. The tire sealant cannot repair the
tire in this instance. Damaged tires and a tire
pressure that is too low can significantly
impair the vehicle's braking and driving char-
acteristics. There is a risk of accident.
Do not continue driving. Contact a qualified
specialist workshop.
Tire pressure reached
G WARNING
A tire temporarily sealed with tire sealant
impairs the driving characteristics and is not
suitable for higher speeds. There is a risk of
accident.
You should therefore adapt your driving style
accordingly and drive carefully. Do not exceed
the specified maximum speed with a tire that
has been repaired using tire sealant.
The maximum permissible speed for a tire
sealed with tire sealant is 50 mph (80 km/h).
The upper part of the TIREFIT sticker must be
affixed to the instrument cluster in the driver's
field of vision. If a tire pressure of 200 kPa (2.0 bar/29 psi) has
been attained after ten minutes: X
Switch off the tire inflation compressor. X
Unscrew the filler hose from the valve of the
faulty tire.
Tire sealant may escape when the filler hose is
unscrewed. X
Stow the tire sealant bottle and the tire infla-
tion compressor. X
Pull away immediately .X
Stop after driving for approximately ten
minutes and check the tire pressure with the
tire inflation compressor.
The tire pressure must now be at least
130 kPa (1.3 bar/19 psi).
G WARNING
If the required tire pressure is not reached
after driving for a short period, the tire is too
badly damaged. The tire sealant cannot repair
the tire in this instance. Damaged tires and a
tire pressure that is too low can significantly
impair the vehicle's braking and driving char-
acteristics. There is a risk of accident.
Do not continue driving. Contact a qualified
specialist workshop.
In cases such as the one mentioned above, con-
tact an authorized Mercedes-Benz Center. Or
call 1-800-FOR-MERCedes (in the USA) or
1-800-387-0100 (in Canada). X
Correct the tire pressure if it is still at least
130 kPa (1.3 bar/19 psi). See the Tire and
Loading Information placard on the B-pillar on
the driver's side or the tire pressure table in
the fuel filler flap for values. X
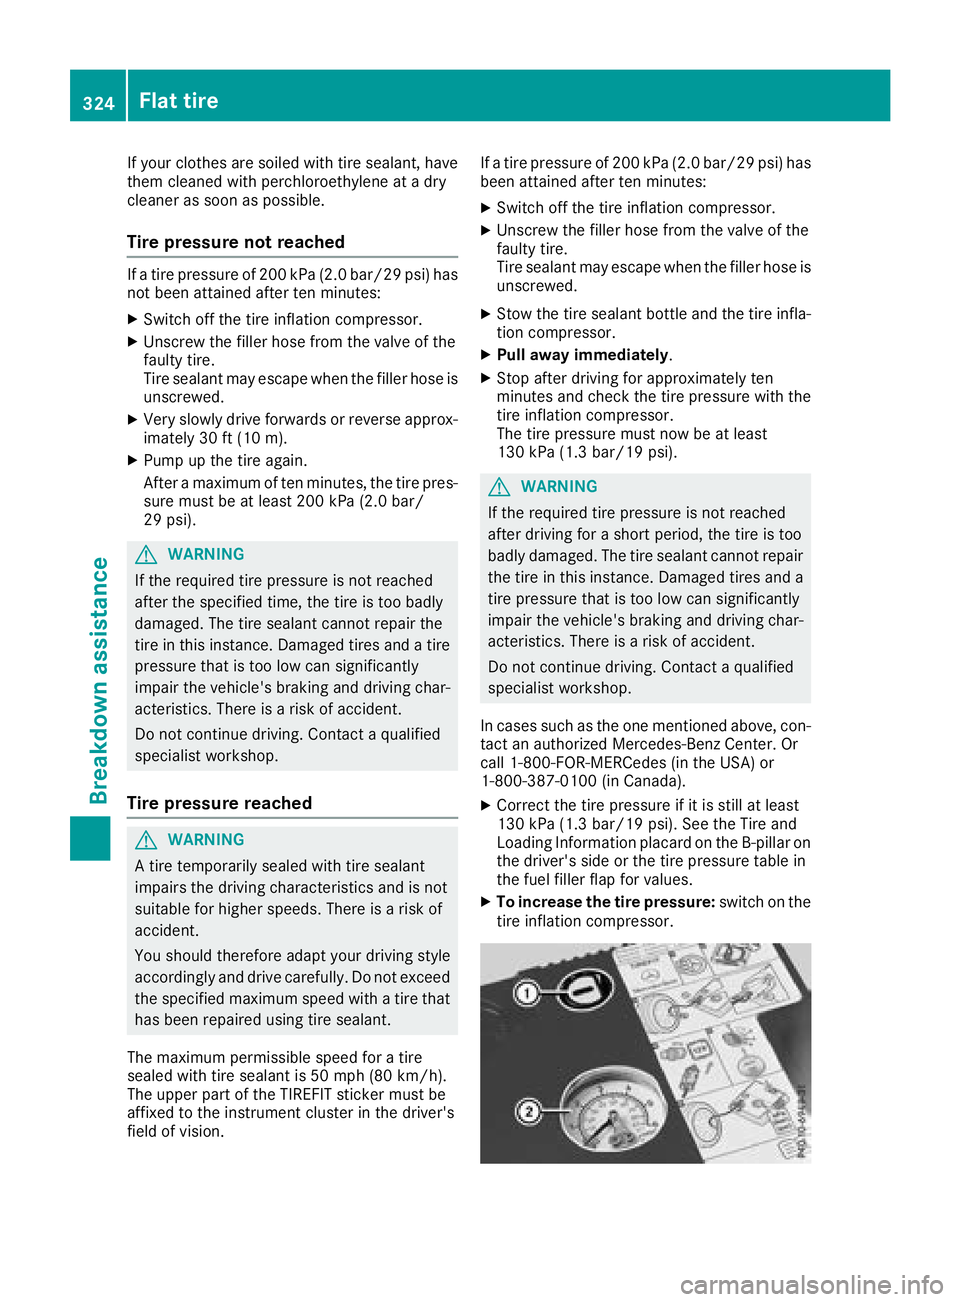
To increase the tire pressure: switch on the
tire inflation compressor.324
Flat tire
Breakdown assistance
Page 334 of 374
X
Remove th e towin g eye from th e retainer
( Y
page 320).X
Mercedes-AM G vehicles: use a suitable
object, e.g. a screwdriver, to pry off cover �C
on th e fron t bumper from underneath. Tak e
th e cover from th e opening , but do no t
remove it .
Press th e mar k on cover �C on th e rear
bumper inward and remove .X
All other vehicles: press th e mar k on
cover �C inward and remove .X
Screw in th e towin g eye clockwise as far as it
will go and tighten it .
Vehicles wit h a trailer to w hitch do no t hav e a
bracke t for th e screw-in towin g eye at th e back.
Connect th e towbar to th e trailer to w hitch
( Y
page 204).
Removing the towing eye X
Unscrew and remove th e towin g eye.X
Attac h cover �C to th e bumper and press until
it engages.
Towing a vehicle with both axles on
the ground The automatic transmission automatically shifts
to position �] when you open th e driver' s or
front-passenger door or when you remove th e
SmartKey from th e ignition lock. It is essential to
observ e th e followin g steps to ensur e that th e
automatic transmission remain s in position �\\
during towing. X
Mak e sur e that th e vehicl e is stationary.X
Turn th e SmartKey to position �H in th e igni-
tion lock. X
Depress and hold th e brak e pedal .X
Shift th e automatic transmission to position
�\\ .X
Leav e th e SmartKey in position �H in th e igni-
tion lock. X
Releas e th e brak e pedal .X
Releas e th e electric parking brake.X
Switc h on th e hazard warning lamp s
( Y
page 113).
In order to signal a chang e of direction when
towin g th e vehicl e wit h th e hazard warning
lamp s switched on , use th e combination switch
as usual. In this case, only th e indicator lamp s for th e direction of travel flash. Afte r resetting
th e combination switch , th e hazard warning
lamp start s flashin g again .
Transporting the vehicle
General notes
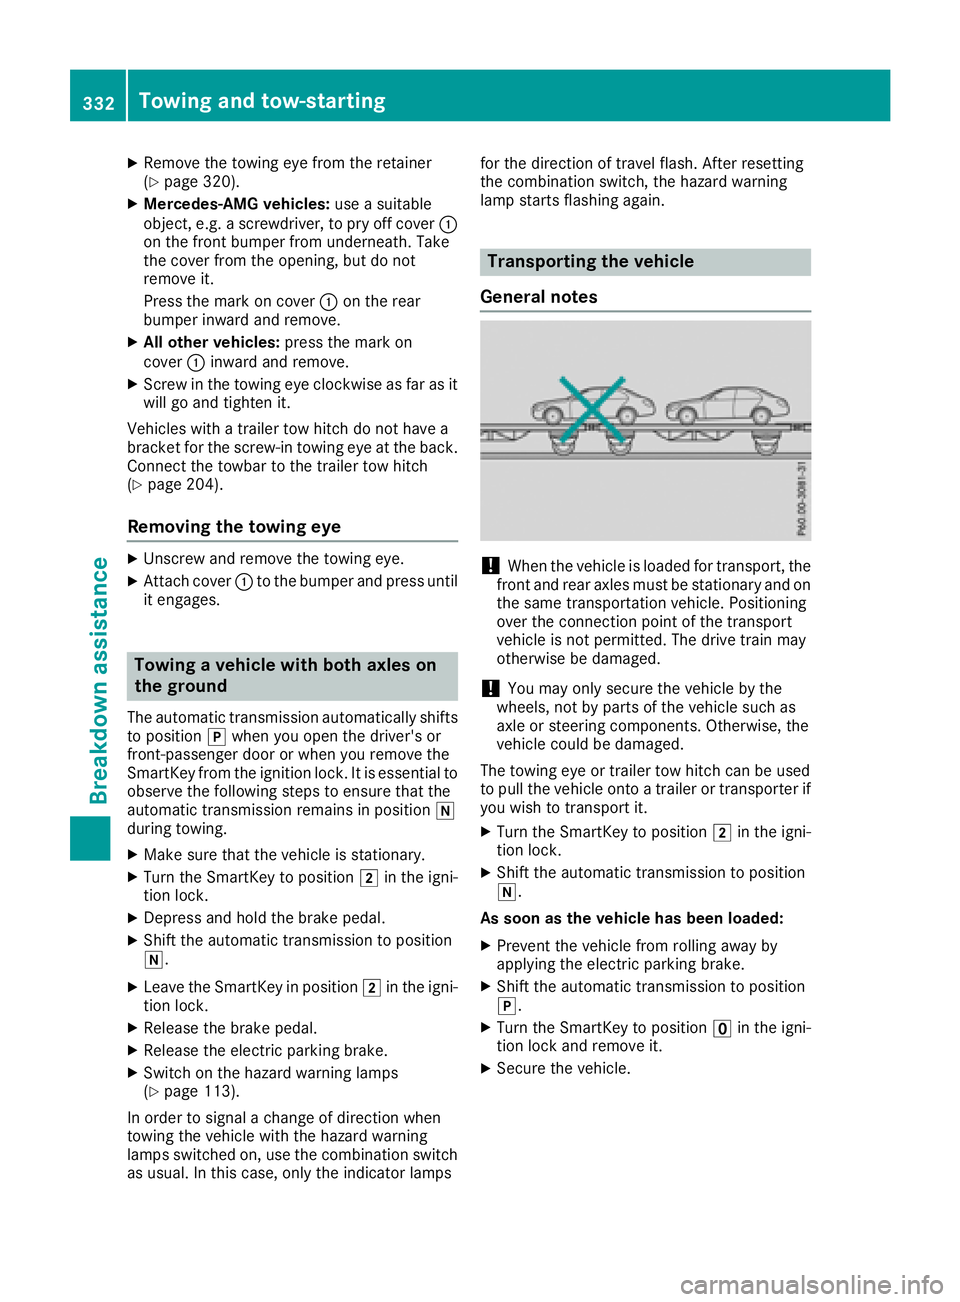
! When th e vehicl e is loade d for transport, th e
fron t and rear axles mus t be stationary and on
th e sam e transportation vehicle. Positioning
ove r th e connection poin t of th e transpor t
vehicl e is no t permitted. The driv e train may
otherwise be damaged.
! You may only secure th e vehicl e by th e
wheels, no t by part s of th e vehicl e suc h as
axl e or steering components. Otherwise, th e
vehicl e could be damaged.
The towin g eye or trailer to w hitch can be used
to pull th e vehicl e onto a trailer or transporte r if
you wish to transpor t it .X
Turn th e SmartKey to position �H in th e igni-
tion lock. X
Shift th e automatic transmission to position
�\\ .
As soon as th e vehicle ha s been loaded:X
Preven t th e vehicl e from rollin g away by
applyin g th e electric parking brake. X
Shift th e automatic transmission to position
�] . X
Turn th e SmartKey to position �
Page 373 of 374
Mercedes-AMG
GLC 43 4MATIC
Wheelbase
113.1 in (2873 mm)
Turning circle
39.7 ft (12.10 m)
Maximum roof load
165 lb (75 kg)
Maximum trunk
load
All other models
Vehicle length
183.3 in (4656 mm)
Vehicle width
including exterior
mirrors 82.5 in (2096 mm)
Vehicle height
65.5 in (1664 mm)
Wheelbase
113.1 in (2873 mm)
Turning circle
38.7 ft (11.80 m)
Maximum roof load
165 lb (75 kg)
Maximum trunk
load 220 lb (100 kg)
Trailer tow hitch
Trailer loads
Permissible trailer load, braked (at a
minimum gradient-climbing capability
of 12% from a standstill) Model
All models
3501 lb (1588 kg)
Maximum drawbar noseweight
! Use a drawbar noseweight as close as pos-
sible to the maximum permissible nose-
weight. Do not use a noseweight of less than
50 kg, otherwise the trailer may come loose.
Note that the payload and the rear axle load
are reduced by the actual payload.
Towing a trailer is not possible with all models.
Further information ( Y
page 203).
The drawbar load reduces the permissible over-
all load and rear axle load. The drawbar load acts from above onto the ball
head on the trailer tow hitch.
The trailer drawbar noseweight is not included in
the towing weight.
Model Permissible nose-
weight
All models
280 lbs (127 kg)
The actual noseweight may not be higher than
the value which is given. The value can be found
on the trailer tow hitch or trailer identification
plates. The lowest weight applies.
The maximum permissible trailer drawbar nose-
weight is the maximum weight with which the
trailer drawbar can be loaded. The permissible
trailer drawbar noseweight is the limit for
Mercedes-Benz-approved trailer couplings.
Gross rear axle weight rating when
towing a trailer Missing values were not available at time of
going to print.
Model Gross axle weight
rating
GLC 300 d 4MATIC
Mercedes-AMG
GLC 43 4MATIC 2822 lbs (1280 kg)
All other models
2755 lbs (1250 kg)
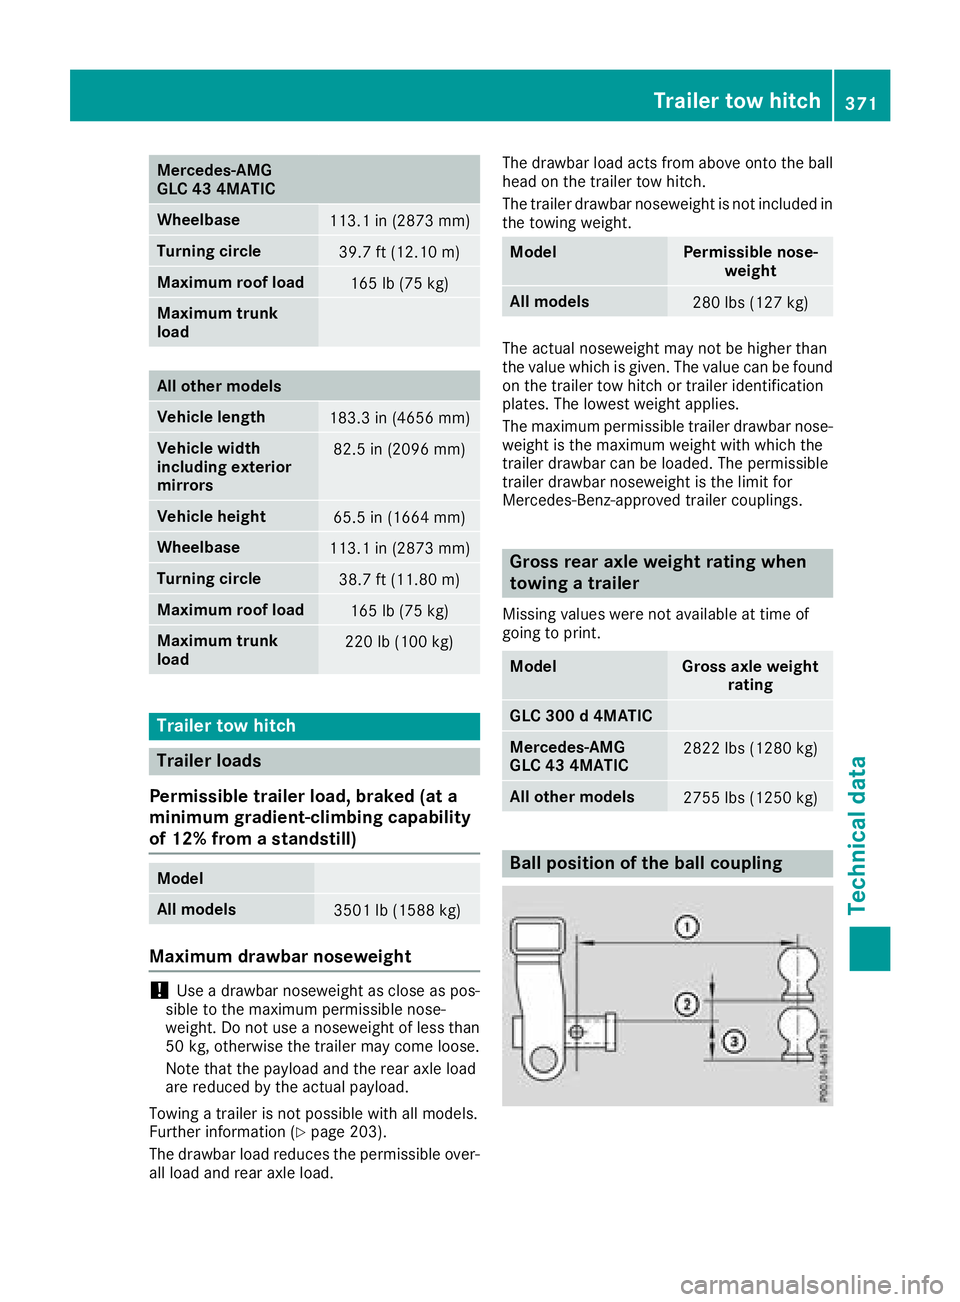
Ball position of the ball coupling Trailer tow hitch 371
Technical data Z