2017 MERCEDES-BENZ GLC COUPE display
[x] Cancel search: displayPage 97 of 370

Correct driver's seat position
GWARNING
You could lose control of your vehicle if you do the following while driving:
Radjust the driver's seat, head restraint,
steering wheel or mirrors
Rfasten the seat belt
There is a risk of an accident.
Adjust the driver's seat, head restraint, steer-
ing wheel and mirror and fasten your seat belt before starting the engine.
Observe the following when adjusting steering
wheel :, seat belt ;and driver's seat =:
Ryou are as far away from the driver's air bag as
possible
Ryou are sitting in a normal upright position
Ryour thighs are slightly supported by the seat
cushion
Ryour legs are not entirely stretched and you
can depress the pedals properly
Rthe back of your head is supported at eye level
by the center of the head restraint
Ryou can hold the steering wheel with your
arms slightly bent
Ryou can move your legs freely
Ryou can see all the displays in the instrument
cluster clearly
Ryou should have a good overview of traffic
conditions
Rthe seat belt is pulled snugly against the body and is routed across the center of your shoul-
der and across your hips in the pelvic area
Further related subjects:
RAdjusting the seats electrically (Ypage 97).
RAdjusting the steering wheel mechanically
(Ypage 101).
RAdjusting the steering wheel electrically
(Ypage 101).
RFastening the seat belt correctly (Ypage 46).
RAdjusting the rear-view mirror and exterior
mirrors (Ypage 103).
RStoring the seat, steering wheel, exterior mir-
ror and head-up display settings with the
memory function (
Ypage 106).
Seats
Important safety notes
GWARNING
Children could become trapped if they adjust
the seats, particularly when unattended.
There is a risk of injury.
When leaving the vehicle, always take the
SmartKey with you and lock the vehicle. Never
leave children unsupervised in the vehicle.
The seats can still be adjusted when there is no
SmartKey in the ignition lock.
GWARNING
When you adjust a seat, you or other vehicle
occupants could become trapped, e.g. on the seat guide rail. There is a risk of injury.
Make sure when adjusting a seat that no one
has any body parts in the sweep of the seat.
Observe the safety notes on "Air bags"
(
Ypage 47) and "Children in the Vehicle"
(Ypage 58).
GWARNING
If the head restraints are not installed or not
adjusted correctly, they cannot provide pro-
tection as intended. There is an increased risk
Seats95
Seats, steering wheel and mirrors
Z
Page 108 of 370

Calling up a stored parking position set-
ting
XTurn the SmartKey to position2in the igni-
tion lock (Ypage 127).
XAdjust the exterior mirror on the front-
passenger side using button =.
XEngage reverse gear.
The exterior mirror on the front-passenger
side moves to the stored parking position.
The exterior mirror on the front-passenger side
moves back to its original position:
Ras soon as you exceed a speed of 9 mph
(15 km/ h)
Rabout ten seconds after you have disengaged
reverse gear
Rwhen you use button ?to select the exterior
mirror on the driver's side
Memory function
Important safety notes
GWARNING
If you use the memory function on the driver's side while driving, you could lose control of
the vehicle as a result of the adjustments
being made. There is a risk of an accident.
Only use the memory function on the driver's
side when the vehicle is stationary.
GWARNING
When the memory function adjusts the seat or steering wheel, you and other vehicle occu-
pants – particularly children – could become
trapped. There is a risk of injury.
While the memory function is making adjust-
ments, make sure that no one has any body
parts in the sweep of the seat or steering
wheel. If somebody becomes trapped, imme-
diately release the memory function position
button. The adjustment process is stopped.
GWARNING
Children could become trapped if they acti-
vate the memory function, particularly when
unattended. There is a risk of injury.
When leaving the vehicle, always take the
SmartKey with you and lock the vehicle. Never
leave children unsupervised in the vehicle.
The memory function can be used at any time,
e.g. even when the SmartKey is not in the igni-
tion lock.
Storing settings
With the memory function, you can store up to
three different settings, e.g. for three different
people.
The following settings are stored as a single
memory preset:
Rposition of the seat, backrest and head
restraint
Rdriver's side: position of the exterior mirrors
on the driver's and front-passenger sides
Rposition of the head-up display
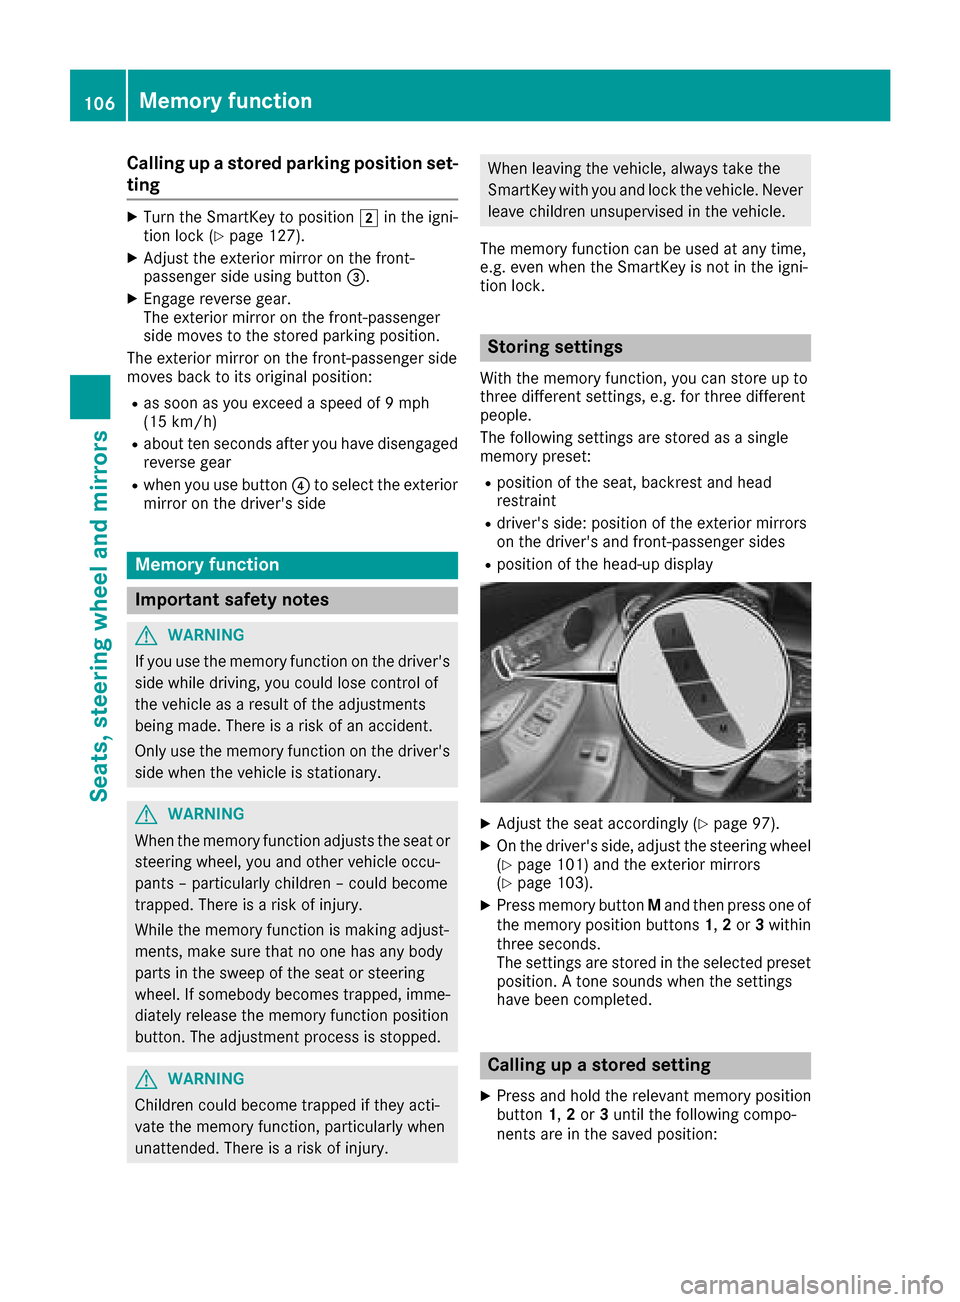
XAdjust the seat accordingly (Ypage 97).
XOn the driver's side, adjust the steering wheel (Ypage 101) and the exterior mirrors
(Ypage 103).
XPress memory button Mand then press one of
the memory position buttons 1,2or 3within
three seconds.
The settings are stored in the selected preset
position. A tone sounds when the settings
have been completed.
Calling up a stored setting
XPress and hold the relevant memory position
button 1,2or 3until the following compo-
nents are in the saved position:
106Memory function
Seats, steering wheel and mirrors
Page 109 of 370

RSeat
RSteering wheel
RExterior mirrors
RHead-up display
iIf you release the memory position switch,
the seat, steering wheel and mirror setting
functions stop immediately. The head-up dis-
play continues to be adjusted.
Memory function107
Seats, steering wheel and mirrors
Z
Page 113 of 370

The system automatically adapts the low-beam
headlamp range depending on the distance to
the other vehicle. Once the system no longer
detects any other vehicles, it reactivates the
high-beam headlamps.
The system's optical sensor is located behind
the windshield near the overhead control panel.
Important safety notes
GWARNING
Adaptive Highbeam Assist does not recognize
road users:
Rwho have no lights, e.g. pedestrians
Rwho have poor lighting, e.g. cyclists
Rwhose lighting is blocked, e.g. by a barrier
On very rare occasions, Adaptive Highbeam
Assist may fail to recognize other road users
that have lights, or may recognize them too
late. In this, or in similar situations, the auto-
matic high-beam headlamps will not be deac-
tivated or will be activated regardless. There is a risk of an accident.
Always carefully observe the traffic conditions
and switch off the high-beam headlamps in
good time.
Adaptive Highbeam Assist cannot take into
account road, weather or traffic conditions.
Adaptive Highbeam Assist is only an aid. You are responsible for adjusting the vehicle's lighting
to the prevailing light, visibility and traffic con-
ditions.
In particular, the detection of obstacles can be
impaired if:
Rthere is poor visibility, e.g. due to fog, heavy
rain or snow
Rthere is dirt on the sensors or anything else
covering the sensors
Switching Adaptive Highbeam Assist
on/off
XTo switch on: turn the light switch to the
à position.
XPress the combination switch forwards
beyond the pressure point (Ypage 109).
The _ indicator lamp on the multifunction
display lights up when it is dark and the light
sensor switches on the low-beam headlamps. If you are driving at speeds above approx-
imately 16 mph (25 km/h)
:
The headlamp range is set automatically
depending on the distance between the vehi-
cle and other road users.
If you are driving at speeds above approx-
imately 19 mph (30 km/h) and no other road
users are detected:
The high-beam headlamps are switched on
automatically. The Kindicator lamp on the
instrument cluster also lights up.
If you are driving at speeds below approx-
imately 16 mph (25 km/h) or other road users are detected or the roads are adequately lit:
The high-beam headlamps are switched off
automatically. The Kindicator lamp on the
instrument cluster goes out. The _indi-
cator lamp on the multifunction display
remains lit.
XTo switch off: move the combination switch
back to its normal position or move the light
switch to another position.
The K indicator lamp on the instrument
cluster goes out.
Headlamps fogged up on the inside
Certain climatic and physical conditions may
cause moisture to form in the headlamp. This
moisture does not affect the functionality of the
headlamp.
Exterior lighting111
Lights and windshield wipers
Z
Page 121 of 370

?Sets climate control to automatic (Ypage 120)
ADefrosts the windshield (Ypage 121)
BCalls up the climate control menu of the multimedia system (Ypage 268)
CSwitches the rear window defroster on/off (Ypage 122)
DActivates or deactivates synchronization (Ypage 121)
ESwitches air-recirculation mode manually on/off (Ypage 123)
FSwitches cooling with air dehumidification on/off (Ypage 120)
GSets the temperature, right (Ypage 121)
Optimum use of automatic climate
control
Optimum use of the automatic climate
control
The following contains notes and recommenda-
tions on optimum use of dual-zone climate con-
trol.
XActivate climate control using the Ã
rocker switch. The indicator lamp above the
à rocker switch lights up. The "Cooling
with dehumidification" function is activated in
automatic mode.
XSet the temperature to 72 ‡ (22 †).
iOnly use the "Windshield defrosting" func-
tion briefly until the windshield is clear again.
iOnly use air-recirculation mode briefly, e.g.
if there are unpleasant outside odors or when
in a tunnel. The windows could otherwise fog
up, since no fresh air is drawn into the vehicle in air-recirculation mode.
DYNAMIC SELECT switch
You can choose between various drive programs
with the DYNAMIC SELECT switch
(
Ypage 134).
If you have selected drive program E:
Rwhen heating, the electrical heater booster is
deactivated and heat output is reduced as a
result
Rthe rear window defroster running time is
reduced
If you have selected drive program C,S or S+ ,
the current climate settings are maintained.
ECO start/stop function
During automatic engine switch-off, the climate
control system only operates at a reduced capa-
city. If you require the full climate control output,
you can switch off the ECO start/stop function
by pressing the ECO button (
Ypage 132).
Operating the climate control sys-
tems
Activating/deactivating climate con-
trol
General notes
When the climate control is switched off, the air
supply and air circulation are also switched off.
The windows could fog up. Therefore, switch off
climate control only briefly
Switch on climate control primarily using the
à rocker switch (
Ypage 120).
Activating/deactivating
XTurn the SmartKey to position 2in the igni-
tion lock (Ypage 127).
XTo switch on: set the airflow to level 1or
higher using rocker switch H.
XTo switch off:set the airflow to level 0using
rocker switch H.
i3-zone automatic climate control: when cli-
mate control is switched off, "OFF" appears in
the rear-compartment display.
Operating the climate control systems119
Climate control
Page 131 of 370

GWARNING
Flammable materials introduced through
environmental influence or by animals can
ignite if in contact with the exhaust system or
parts of the engine that heat up. There is a risk
of fire.
Carry out regular checks to make sure that
there are no flammable foreign materials in
the engine compartment or in the exhaust
system.
General notes
Vehicles with a gasoline engine: the catalytic
converter is preheated for up to 30 seconds
after a cold start. The sound of the engine may
change during this time.
Automatic transmission
XShift the transmission to position j
(Ypage 136).
The transmission position indicator on the
multifunction display shows j
(
Ypage 137).
iYou can start the engine in transmission
position jand i.
Starting procedure with the SmartKey
To start the engine using the SmartKey instead
of the Start/Stop button, pull the Start/Stop
button out of the ignition lock.
XTo start a diesel engine: turn the SmartKey
to position 2in the ignition lock
(
Ypage 127).
The % preglow indicator lamp in the instru-
ment cluster lights up.
XTurn the SmartKey to position 3in the igni-
tion lock (Ypage 127) and release it as soon
as the engine is running.
iVehicles with a diesel engine: you can
start the engine without preglow if the engine
is warm.
If the engine will not start:
XRemove the SmartKey from the ignition lock.
XReinsert the SmartKey into the ignition lock
after a short waiting period.
XTurn the SmartKey to position 2in the igni-
tion lock (Ypage 127).
The indicator lamps in the instrument cluster
light up (
Ypage 251).
XTurn the SmartKey to position 3in the igni-
tion lock (Ypage 127) and release it as soon
as the engine is running.
Starting procedure with the Start/Stop
button
The Start/Stop button is only available on vehi-
cles with KEYLESS-GO or the KEYLESS-GO start
function.
The Start/Stop button can be used to start the
vehicle manually without inserting the SmartKey
into the ignition lock. The Start/Stop button
must be inserted in the ignition lock and the
SmartKey must be in the vehicle. This mode for starting the engine operates independently of
the ECO start/stop automatic engine start func-
tion.
You can start the engine if a valid SmartKey is in
the vehicle. Switch off the engine and always
take the SmartKey with you when leaving the
vehicle, even if you only leave it for a short time.Pay attention to the important safety notes.
XDepress the brake pedal and keep it
depressed.
XPress the Start/Stop button once
(Ypage 128).
Vehicles with a gasoline engine: the engine
starts.
Vehicles with a diesel engine: preglow is
activated and the engine starts.
Starting procedure via smartphone
Observe the important safety notes on starting
the engine (Ypage 128).
You can also start your engine via your smart-
phone from outside the vehicle. In this case, the
previously selected climate control setting is
activated. In this way you can cool or heat the
interior of the vehicle before starting the jour-
ney.
Only start the engine via your smartphone if it is
safe to start and run the engine where your vehi-
cle is parked.
Observe the legal stipulations in the area where your vehicle is parked. Engine start via smart-
phone may be limited to certain countries or
regions.
Driving129
Driving and parking
Z
Page 133 of 370

To ensure that you do not roll backwards when
pulling away on an uphill slope, engage the elec-
tric parking brake.
XPress and hold handle:.
The electric parking brake continues to brake
and prevent the vehicle from rolling back-
wards.
The red F(USA only) or !(Canada
only) indicator lamp in the instrument cluster remains on.
XDepress the accelerator pedal.
XAs soon as the vehicle/trailer combination is
held by the driving force of the engine, release
lever :.
The electric parking brake is released.
The red F(USA only) or !(Canada
only) indicator lamp in the instrument cluster
goes out.
For further information on the electric parking
brake, see (
Ypage 150).
Hill start assist
Hill start assist helps you when pulling away
forward or in reverse on an uphill gradient. It
holds the vehicle for a short time after you have
removed your foot from the brake pedal. This
gives you enough time to move your foot from
the brake pedal to the accelerator pedal and to
depress it before the vehicle begins to roll.
GWARNING
After a short time, hill start assist will no lon-
ger brake your vehicle and it could roll away.
There is a risk of an accident and injury.
Therefore, quickly move your foot from the
brake pedal to the accelerator pedal. Never
leave the vehicle when it is held by hill start
assist.
Hill start assist is not active if:
Ryou are pulling away on a level road or on a
downhill gradient
Rthe transmission is in position i
Rthe electric parking brake is applied
RESP®is malfunctioning
ECO start/stop function
Introduction
The ECO start/stop function switches the
engine off automatically if the vehicle is stopped
under certain conditions.
The engine starts automatically when the driver
wants to pull away again. The ECO start/stop
function thereby helps you to reduce the fuel
consumption and emissions of your vehicle.
Important safety notes
GWARNING
If the engine is switched off automatically and
you exit the vehicle, the engine is restarted
automatically. The vehicle may begin moving.
There is a risk of accident and injury.
If you wish to exit the vehicle, always turn off
the ignition and secure the vehicle against
rolling away.
General notes
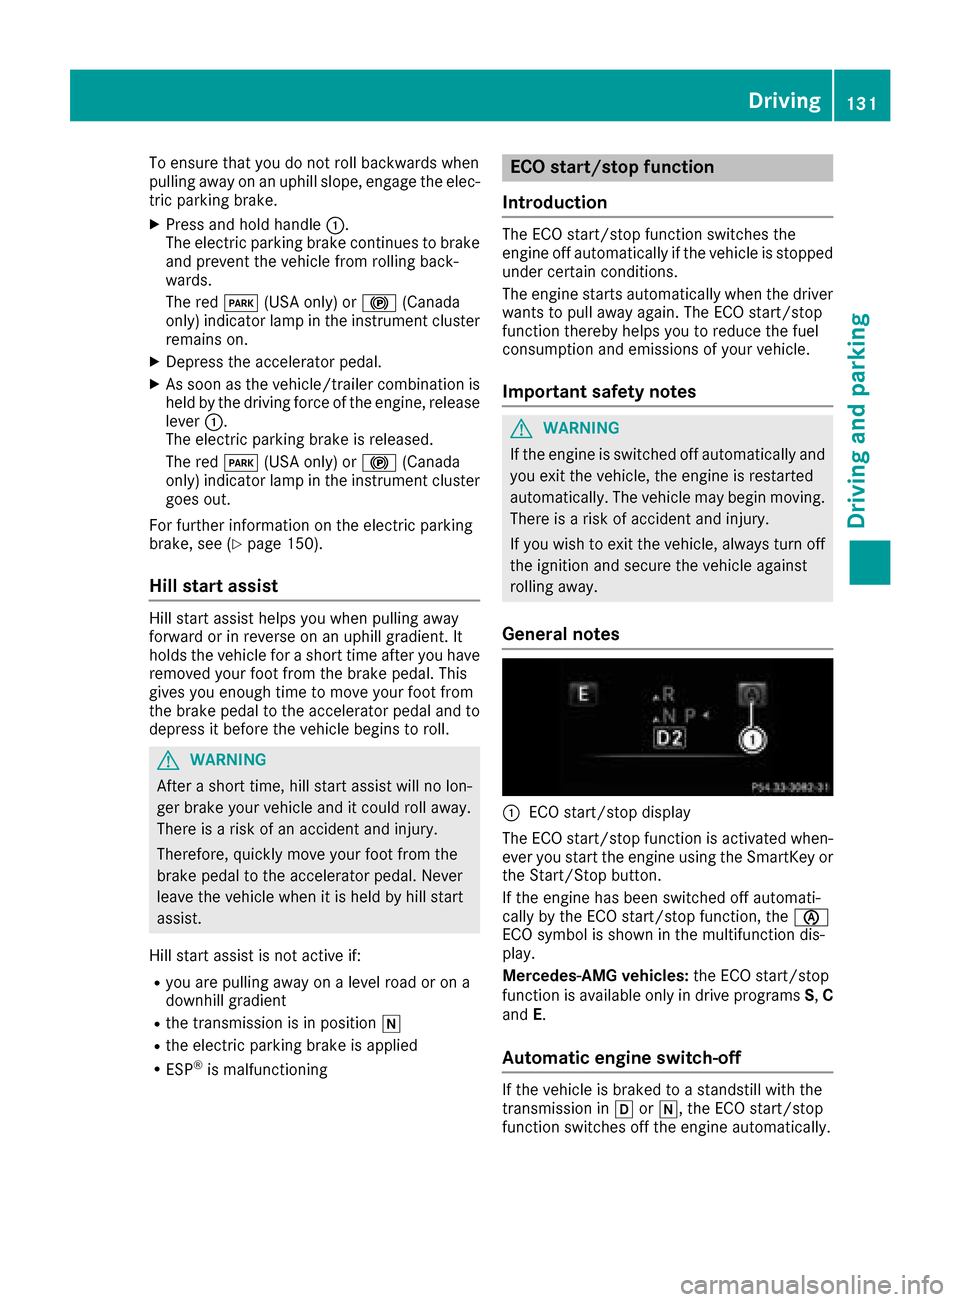
:ECO start/stop display
The ECO start/stop function is activated when-
ever you start the engine using the SmartKey or the Start/Stop button.
If the engine has been switched off automati-
cally by the ECO start/stop function, the è
ECO symbol is shown in the multifunction dis-
play.
Mercedes-AMG vehicles: the ECO start/stop
function is available only in drive programs S,C
and E.
Automatic engine switch-off
If the vehicle is braked to a standstill with the
transmission in hori, the ECO start/stop
function switches off the engine automatically.
Driving131
Driving and parking
Z
Page 135 of 370

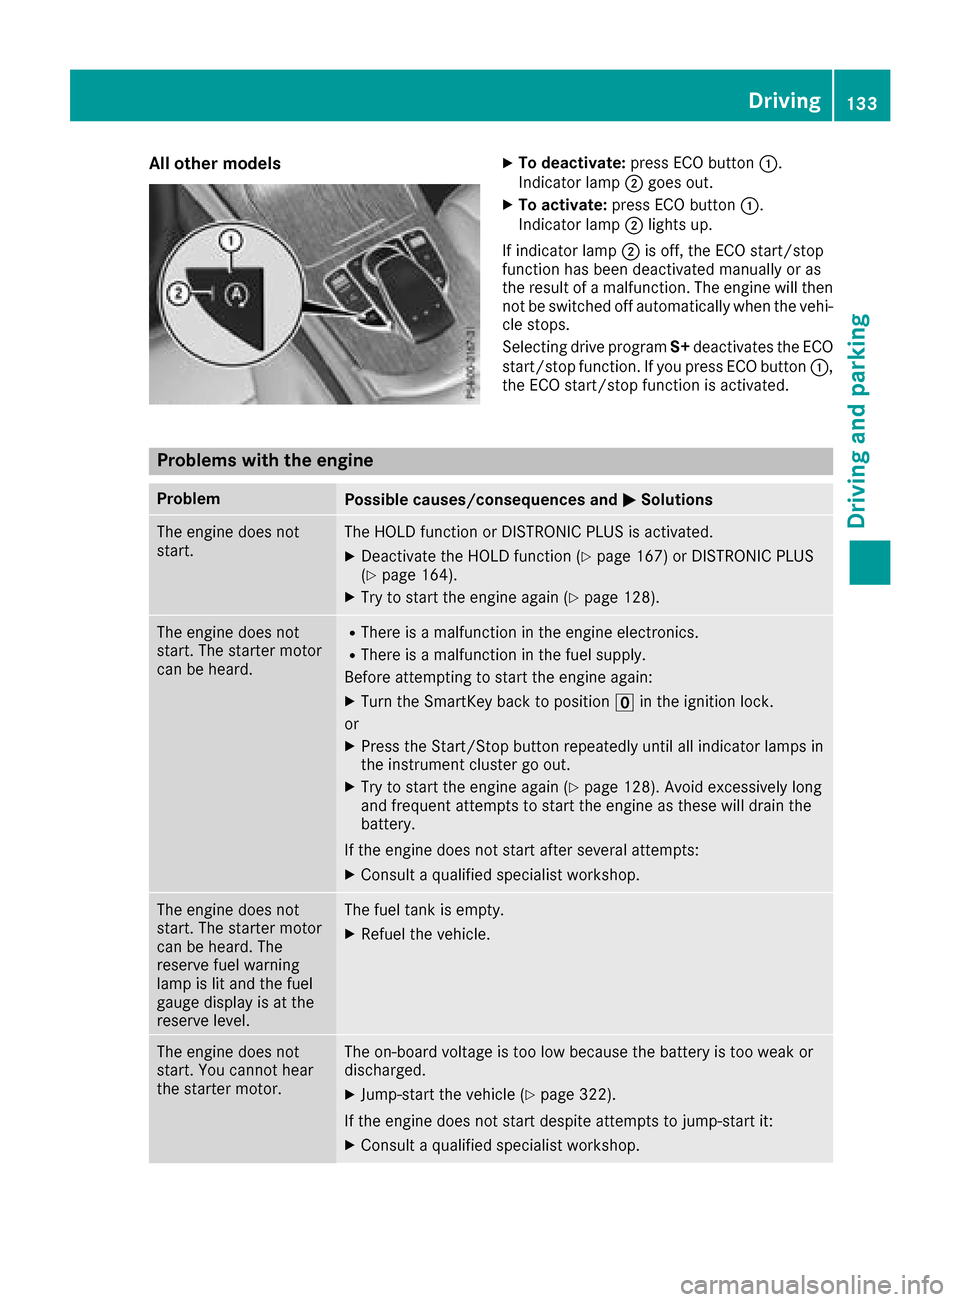
All othermodelsXTo deacti vate:press ECO butto n:.
Indicato rlamp ;goes out .
XTo activate:press ECO butto n:.
Indicato rlamp ;lights up.
If indicator lamp ;is off ,th eECO start/sto p
function has been deactivate dmanually or as
th eresult of amalfunction. The engin ewill then
no tbe switched off automatically when th evehi-
cle stops.
Selectin gdriv eprogram S+deactivate sth eECO
start/sto pfunction .If you press ECO butto n:,
th eECO start/sto pfunction is activated.
Problems with the engine
ProblemPossible causes/consequence sand MSolutions
The engin edoes no t
start .The HOLD function or DISTRONI CPLU Sis activated.
XDeactivat eth eHOLD function (Ypage 167) or DISTRONI CPLU S
(Ypage 164).
XTry to start th eengin eagain (Ypage 128).
The engin edoes no t
start .The starter motor
can be heard.RTher eis amalfunctio nin th eengin eelectronics .
RThereis amalfunctio nin th efuel supply.
Before attemptin gto start th eengin eagain :
XTurn th eSmartKey bac kto positio nu in th eignition lock.
or
XPress th eStart/Sto pbutto nrepeatedly until all indicator lamps in
th einstrumen tcluste rgo out .
XTry to start th eengin eagain (Ypage 128). Avoid excessively lon g
and frequen tattempts to start th eengin eas these will drain th e
battery.
If th eengin edoes no tstart after several attempts :
XConsultaqualified specialist workshop.
The engin edoes no t
start .The starter motor
can be heard. The
reserv efuel warning
lamp is lit and th efuel
gauge display is at th e
reserv elevel.The fuel tan kis empty.
XRefue lth evehicle.
The engin edoes no t
start .You canno thear
th estarter motor.The on-board voltag eis to olow because th ebattery is to oweak or
discharged.
XJump-start th evehicl e (Ypage 322).
If th eengin edoes no tstart despite attempts to jump-start it:
XConsult aqualified specialist workshop.
Driving133
Driving and parking
Z