2017 MERCEDES-BENZ GLC-Class light
[x] Cancel search: lightPage 33 of 178
R¬
Confirms an entry
R&
Cancels input
RS
Inserts a paragraph
Character entry (navigation)
Character entry options
You can enter characters using the controller or
the touch pad.With the controller, you enter
characters using a character bar. To enter using
the touch pad,draw the character inthe entry
fiel d.The multimedia system supports th isusing
a handwrit ing recognition function.
Entering characters using the charac-
ter bar
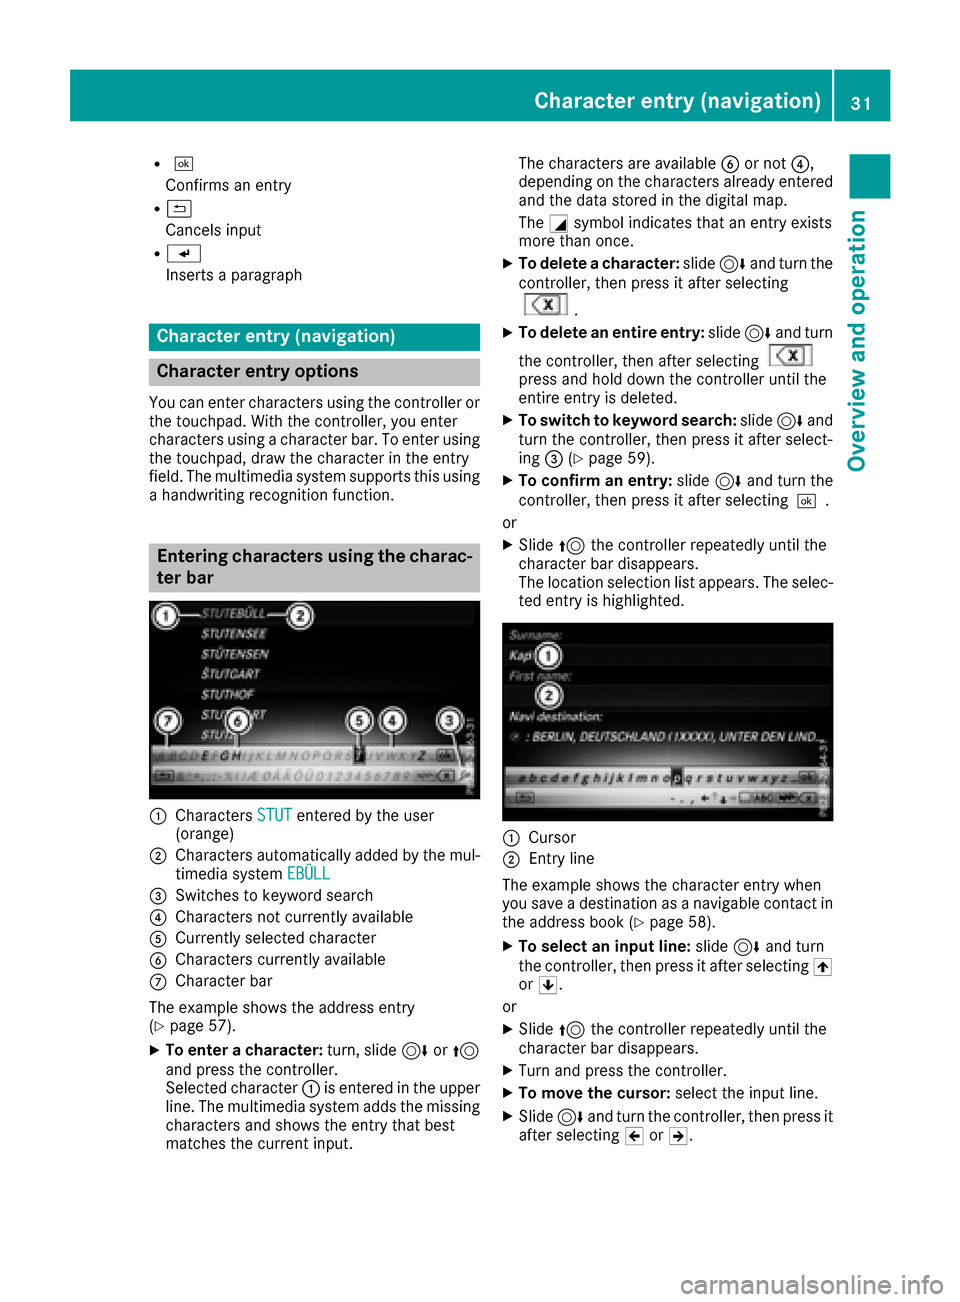
:Characters STUTenteredbythe user
(orange)
;Characters automatically added bythe mul-
tim edia system EBÜLL
=Switches to keyword search
?Characters not currently availab le
ACurrently selected character
BCharacters currently available
CCharacter bar
The example shows theaddr ess entry
(
Ypage 57).
XTo enter a cha racter: turn,slide6or5
and press the controller.
Selected character :isentered inthe upper
lin e. The multimedia systemaddsthe missing
characters and shows the entry that best
matches the current input. The characters are availab
leB or not ?,
depending on the characters already entered and the data stored in the digital map.
The Gsymbol indicates that an entry exists
more than once.
XTo delete a cha racter: slide6and turn the
controller, then press it after selecting
.
XTo delete an entire entry :slide 6and turn
the controller, then after selecting
press and hold downthe controller until the
entire entry is deleted.
XTo switch tokey word search: slide6and
turn the controller, then press it after select-
ing =(
Ypage 59 ).
XTo confi rman entry :slide 6and turn the
controller, then press it after selecting¬.
or
XSlide 5the controller repeatedly until the
character bar disappears.
The location selection list appears. The selec-
ted entry is highlighted.
:Cursor
;Entry line
The example shows the character entry when
you save a destination as a nav igablecontact in
the addr ess book (
Ypage 58).
XTo select an input line: slide6and turn
the controller, then press itafter selecting 4
or 5.
or
XSlid e5 the controller repeatedly until the
character bar disappears.
XTurn and press the controller.
XTo move the cursor: select the input line.
XSlide6 and turn the controller, then press it
after selecting 2or3.
Character entry (navigation)31
Overview and operation
Page 34 of 178
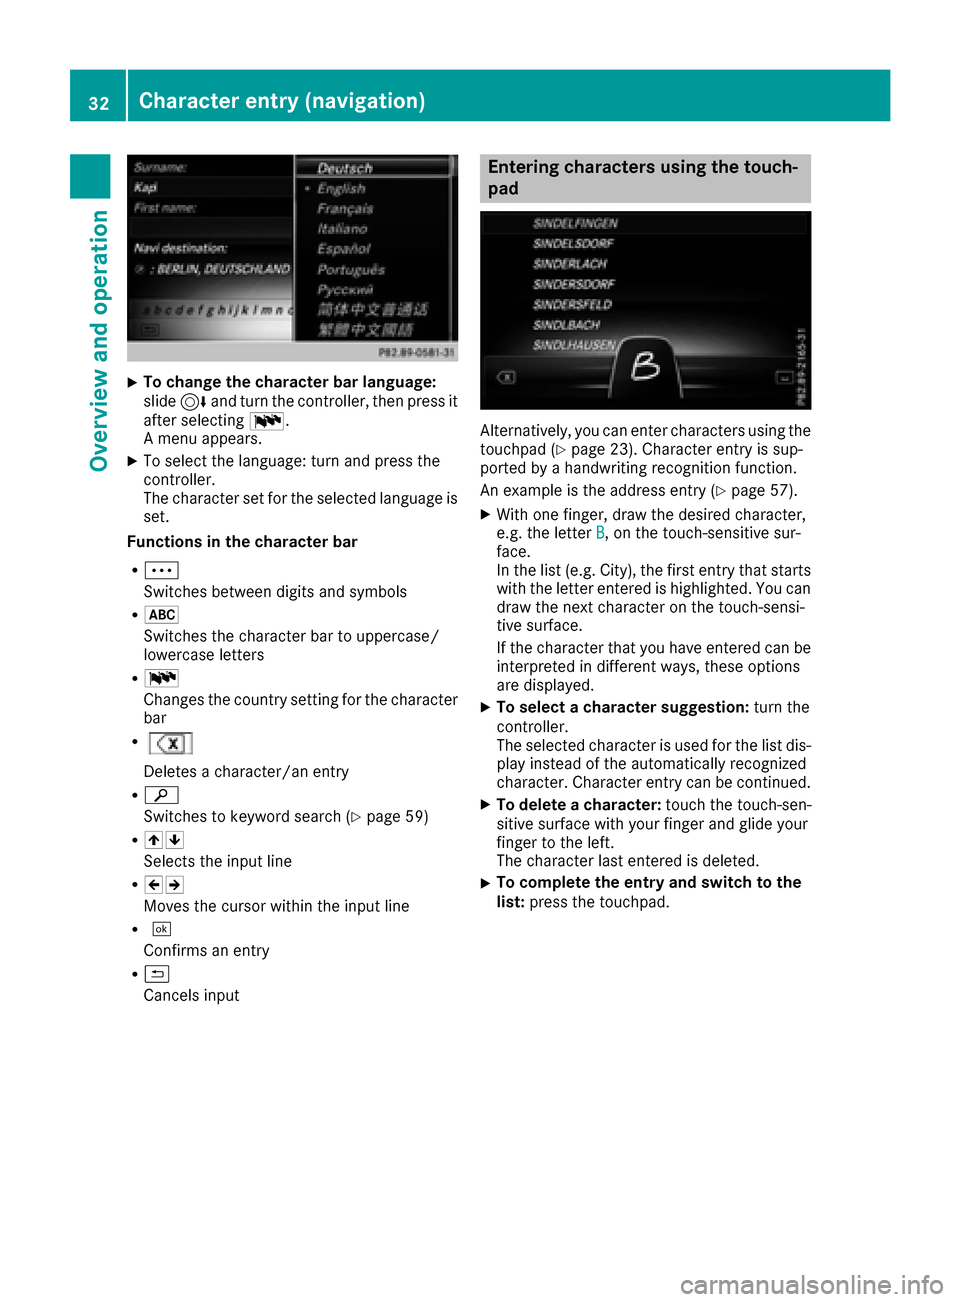
XTo change the character bar language:
slide6and turn the controller, then press it
after selecting B.
A menu appears.
XTo select the language: turn and press the
controller.
The character set for the selected language is set.
Functions in the character bar
RÄ
Switches between digits and symbols
R*
Switches the character bar to uppercase/
lowercase letters
RB
Changes the country setting for the character
bar
R
Deletes a character/an entry
Rè
Switches to keyword search (
Ypage 59)
R45
Selects the input line
R23
Moves the cursor within the input line
R¬
Confirms an entry
R&
Cancels input
Entering characters using the touch-
pad
Alternatively, you can enter characters using the
touchpad (Ypage 23). Character entry is sup-
ported by a handwriting recognition function.
An example is the address entry (
Ypage 57).
XWith one finger, draw the desired character,
e.g. the letter B, on the touch-sensitive sur-
face.
In the list (e.g. City), the first entry that starts
with the letter entered is highlighted. You can
draw the next character on the touch-sensi-
tive surface.
If the character that you have entered can be
interpreted in different ways, these options
are displayed.
XTo select a character suggestion: turn the
controller.
The selected character is used for the list dis-
play instead of the automatically recognized
character. Character entry can be continued.
XTo delete a character: touch the touch-sen-
sitive surface with your finger and glide your
finger to the left.
The character last entered is deleted.
XTo complete the entry and switch to the
list: press the touchpad.
32Character entry (navigation)
Overview and operation
Page 38 of 178
Switching the display on/off
To switch off the display
XPress theØbutton.
or
XPress Vehiclein the main function bar.
The vehicle menu is displayed.
XTo select Display Off: slide6, turn and
press the controller.
The display goes out.
XTo switch the display on again: press the
controller.
Time settings
General information
The multimedia system can automatically set
the time and date.
The following navigation system functions
require the time, time zone and summer/stand-
ard time to be set correctly in order to work
properly:
Rroute guidance on routes with time-depend-
ent traffic guidance
Rcalculation of expected time of arrival
Switching automatic time on and off
The Automatic Time Settingsfunction is
used to activate or deactivate the automatic
setting of the time and date. This function is
activated when the vehicle leaves the factory.
XPress the Øbutton.
or
XPress Vehiclein the main function bar.
The vehicle menu is displayed.
XTo switch to the menu bar: slide 6the con-
troller.
XTo select Time: turn and press the controller.
A menu appears.
XTo select AutomaticTimeSettings: press
the controller.
XTo switch the function on Oor off ª: press
the controller.
Setting the time zone
To set the time zone, the Automatic TimeSettingsfunction must be activated .
XPress theØbutton.
or
XPress Vehiclein the main function bar.
The vehicle menu is displayed.
XTo switch to the menu bar: slide 6the con-
troller.
XTo select Time: turn and press the controller.
A menu appears.
XTo select Time Zone:: turn and press the
controller.
A list of countries appears. The #dot indi-
cates the current setting.
XTo select the country in which you are
currently driving: turn and press the con-
troller.
The country is accepted.
A time zone list may also be displayed,
depending on the country selected.
XTo select the desired time zone: turn and
press the controller.
The time zone is accepted.
A list of available options for setting summer
time appears (
Ypage 36).
Setting summer and standard time
Using the Daylight Saving Timefunction,
you can set the automatic changeover to sum-
mer time or switch the summer time settings on and off. The changeover to summer time advan-
ces the time by one hour.
The Daylight
SavingTimefunction or Auto‐maticoption is not available in all countries.
XPress theØbutton.
or
XPress Vehiclein the main function bar.
The vehicle menu is displayed.
XTo switch to the menu bar: slide 6the con-
troller.
XTo select Time: turn and press the controller.
A menu appears.
36Time settings
System settings
Page 39 of 178
XTo selectDaylight Saving Time: turn and
press the controller.
A list of available options for setting summer
time appears.
XTo select Automatic,Onor Off: turn and
press the controller.
SettingFunction
AutomaticThe summer and
standard time are
automatically
changed over.
OnThe clock is advanced
one hour ahead of
standard time.
OffThe standard time for
the chosen time zone
is selected.
Manual time setting
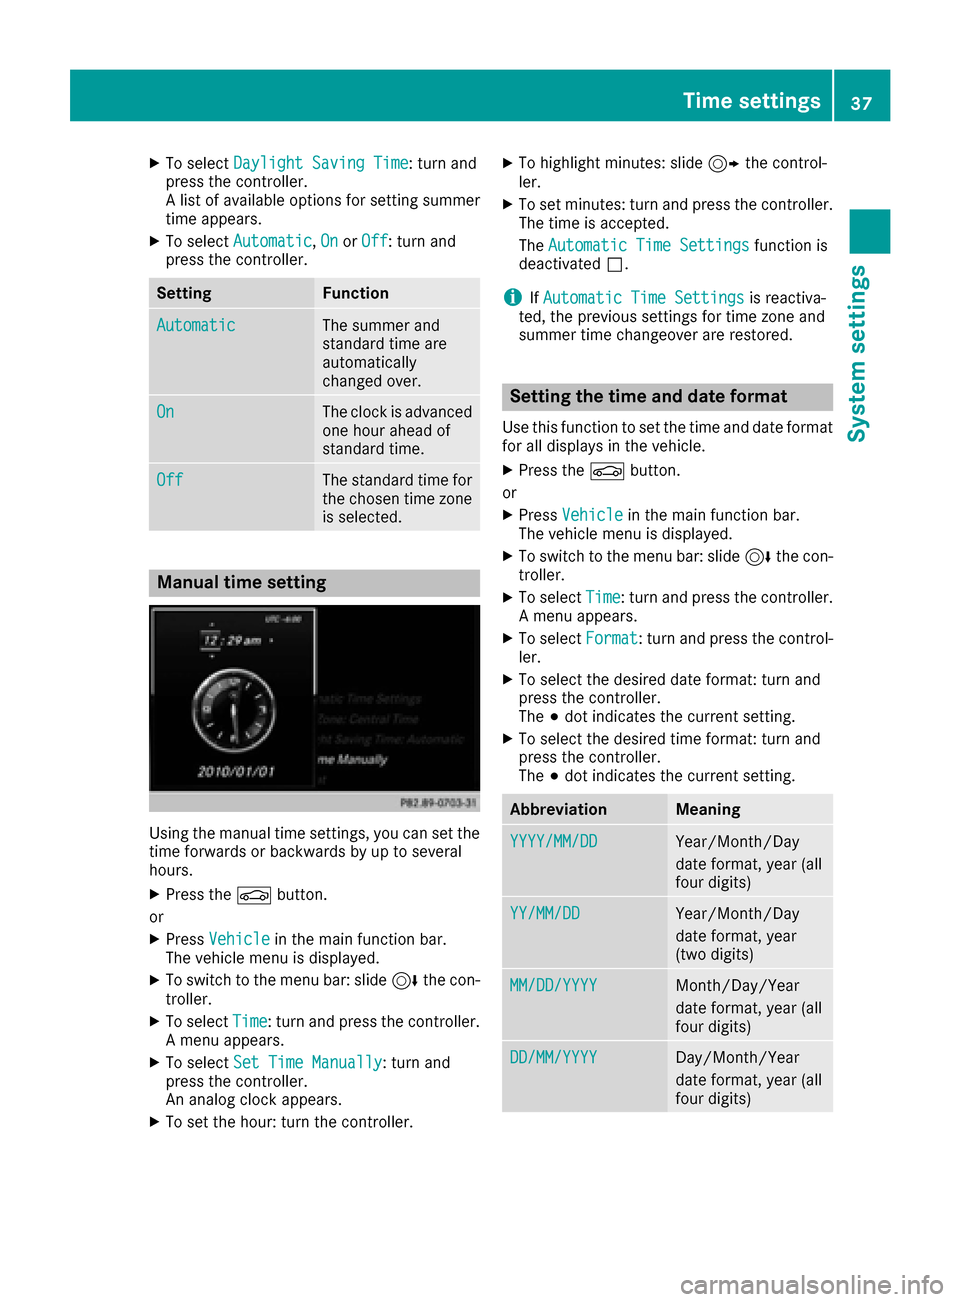
Using the manual time settings, you can set the
time forwards or backwards by up to several
hours.
XPress the Øbutton.
or
XPress Vehiclein the main function bar.
The vehicle menu is displayed.
XTo switch to the menu bar: slide 6the con-
troller.
XTo select Time: turn and press the controller.
A menu appears.
XTo select Set Time Manually: turn and
press the controller.
An analog clock appears.
XTo set the hour: turn the controller.
XTo highlight minutes: slide 9the control-
ler.
XTo set minutes: turn and press the controller. The time is accepted.
The Automatic Time Settings
function is
deactivated ª.
iIfAutomatic Time Settingsis reactiva-
ted, the previous settings for time zone and
summer time changeover are restored.
Setting the time and date format
Use this function to set the time and date format for all displays in the vehicle.
XPress the Øbutton.
or
XPress Vehiclein the main function bar.
The vehicle menu is displayed.
XTo switch to the menu bar: slide 6the con-
troller.
XTo select Time: turn and press the controller.
A menu appears.
XTo select Format: turn and press the control-
ler.
XTo select the desired date format: turn and
press the controller.
The #dot indicates the current setting.
XTo select the desired time format: turn and
press the controller.
The #dot indicates the current setting.
AbbreviationMeaning
YYYY/MM/DDYear/Month/Day
date format, year (all
four digits)
YY/MM/DDYear/Month/Day
date format, year
(two digits)
MM/DD/YYYYMonth/Day/Year
date format, year (all
four digits)
DD/MM/YYYYDay/Month/Year
date format, year (all
four digits)
Time settings37
System settings
Z
Page 42 of 178
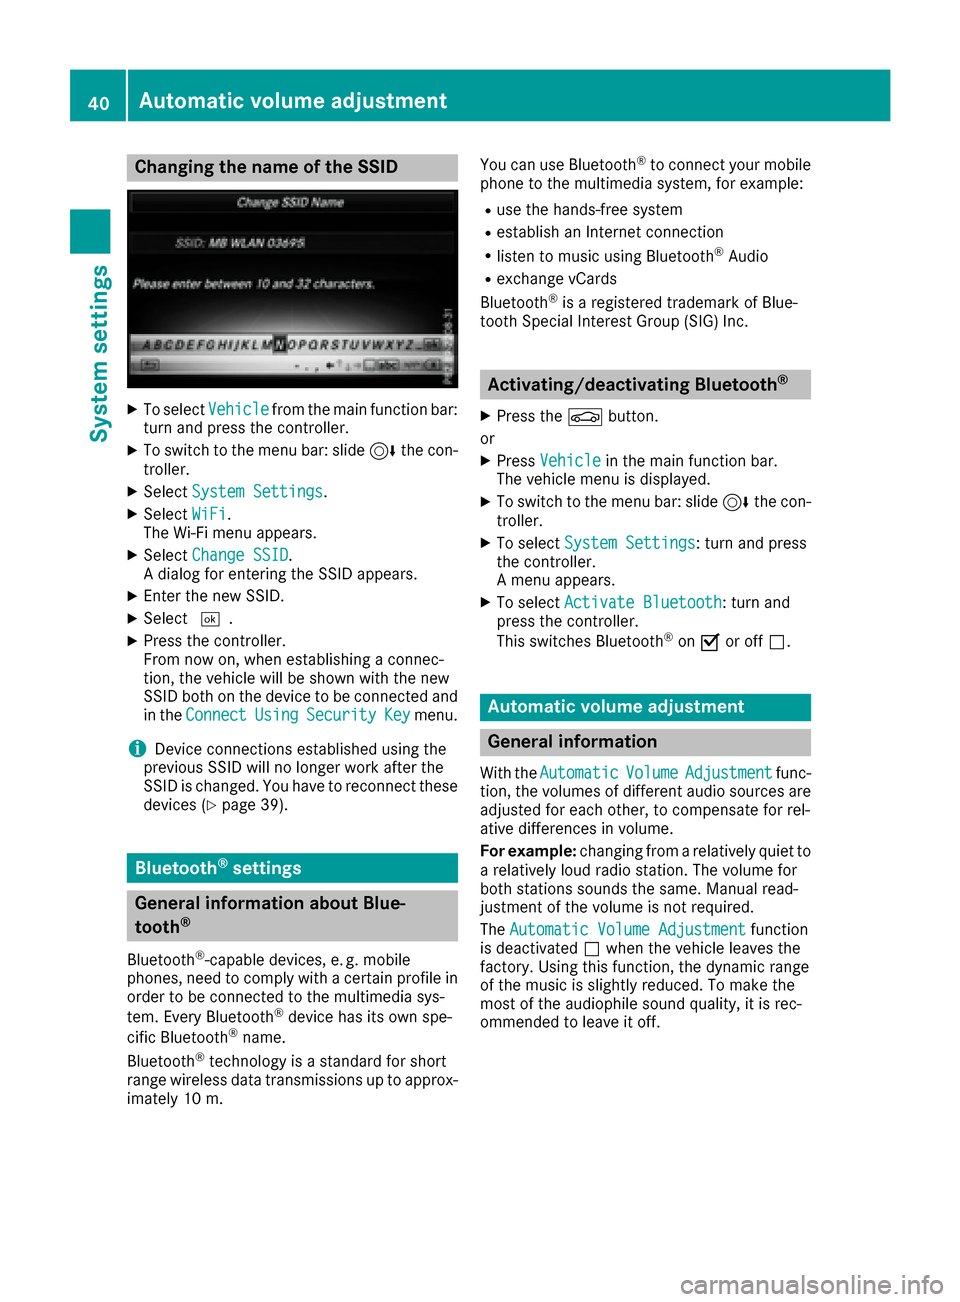
Changing the name of the SSID
XTo selectVehiclefrom the main function bar:
turn and press the controller.
XTo switch to the menu bar: slide 6the con-
troller.
XSelect System Settings.
XSelect WiFi.
The Wi-Fi menu appears.
XSelect Change SSID.
A dialog for entering the SSID appears.
XEnter the new SSID.
XSelect ¬.
XPress the controller.
From now on, when establishing a connec-
tion, the vehicle will be shown with the new
SSID both on the device to be connected and
in the Connect
UsingSecurityKeymenu.
iDevice connections established using the
previous SSID will no longer work after the
SSID is changed. You have to reconnect these
devices (
Ypage 39).
Bluetooth®settings
General information about Blue-
tooth®
Bluetooth®-capable devices, e. g. mobile
phones, need to comply with a certain profile in
order to be connected to the multimedia sys-
tem. Every Bluetooth
®device has its own spe-
cific Bluetooth®name.
Bluetooth®technology is a standard for short
range wireless data transmissions up to approx-
imately 10 m. You can use Bluetooth
®to connect your mobile
phone to the multimedia system, for example:
Ruse the hands-free system
Restablish an Internet connection
Rlisten to music using Bluetooth®Audio
Rexchange vCards
Bluetooth®is a registered trademark of Blue-
tooth Special Interest Group (SIG) Inc.
Activating/deactivating Bluetooth®
X
Press the Øbutton.
or
XPress Vehiclein the main function bar.
The vehicle menu is displayed.
XTo switch to the menu bar: slide 6the con-
troller.
XTo select System Settings: turn and press
the controller.
A menu appears.
XTo select Activate Bluetooth: turn and
press the controller.
This switches Bluetooth
®on O or off ª.
Automatic volume adjustment
General information
With the AutomaticVolumeAdjustmentfunc-
tion, the volumes of different audio sources are
adjusted for each other, to compensate for rel-
ative differences in volume.
For example: changing from a relatively quiet to
a relatively loud radio station. The volume for
both stations sounds the same. Manual read-
justment of the volume is not required.
The Automatic Volume Adjustment
function
is deactivated ªwhen the vehicle leaves the
factory. Using this function, the dynamic range
of the music is slightly reduced. To make the
most of the audiophile sound quality, it is rec-
ommended to leave it off.
40Automatic volume adjustment
System settings
Page 46 of 178
Your multimediasyste mequipment
These operatin ginstruction sdescribe all th e
standar dan doptional equipment of your multi-
media system, as available at th etime of going
to press. Country-specifi cdifference sare pos -
sible. Bear in min dthat your vehicle may no t
feature all function sdescribed here. Thi salso
applies to safety-relevan tsystems an dfunc-
tions.
Read th einformation on qualifie dspecialis t
workshop sin th evehicle Operator's Manual.
Important safet ynotes
GWARNING
If you operat emobile communication equip-
men twhil edriving, you will be distracted from
traffic conditions. You could also los econtro l
of th evehicle. There is aris kof an accident.
Only operat ethis equipment when th evehicle
is stationary.
You mus tobserv eth elegal requirements fo rth e
country in whic hyou are currentl ydrivin gwhen
operatin gmobile communication sequipment in
th evehicle.
Vehicl esettings
Calling up vehicle settings
XPress th eØ button.
or
XPress Vehicl ein themain function bar .
The vehicle men uis displayed.
XTo selec tVehicle Settings:press th econ-
troller.
The Vehicl eSettings
men uis active .
XTo selectth edesire dvehicle setting :turn an d
press th econtroller .
The main are awit hth esetting elemen tis
active .
Selecting adifferent vehicle setting:
XTo activat eth emen ufo rselecting th evehicle
setting :slid e5 thecontroller . Exiting th
evehicle settings :
XTo select& :slid e6 andpress th econ-
troller.
Ambien tlighting
General notes
You can set th efollowin gfo rth eambien tlight-
ing:
RBrightness
Thi ssetting makes an additional change to
th ebrightness of th eambien tlighting .
RColor
Thi ssetting changes th ecolor of th eambien t
lighting .
Setting th ebrightness
XCall up VehicleSettings(Ypage 44).
XTo selec tAmbien tLigh tBrightness:turn
an dpress th econtroller .
The setting elemen tis active .The brightness
valu eis displayed.
XTo change th ebrightness value: turn th econ-
troller.
You can fin dfurther information on th einterio r
lighting in th evehicle Operator's Manual.
Setting th ecolor
XCall up VehicleSettings(Ypage 44).
XTo selec tAmbien tLigh tColo r:turn an d
press th econtroller .
The setting elemen tis active .
XTo selec t acolor :turn an dpress th econtrol-
ler .
You can fin dfurther information on th einterio r
lighting in th evehicle Operator's Manual.
Setting th eeas yentry an dexit feature
Thi sfunction makes getting in an dout of your
vehicle easier.
XCall up VehicleSettings(Ypage 44).
XTo selec tEasy Entry/Exit:turn an dpress
th econtroller .
The setting elemen tis active .
XTo change th esetting :press th econtroller .
44Vehicle settings
Vehicle functions
Page 47 of 178
You can find further information on the easy
entry and exit feature in the vehicle Operator's
Manual.
Activating/deactivating the acoustic
locking verification signal
You can also set an audible signal to confirm
that the vehicle has been locked.
XCall upVehicle Settings(Ypage 44).
XTo select Acoustic Lock Feedback: turn
and press the controller.
The function switches on or off, depending on
the previous setting.
You can find further information on the locking
feature in the vehicle Operator's Manual.
Switching the seat belt adjustment
on/off
The BeltAdjustmentfunction adjusts the driv-
er's and front-passenger seat belt to the upper
body of the occupants.
XCall up Vehicle Settings(Ypage 44).
XTo select Belt Adjustment: turn and press
the controller.
The function switches on or off, depending on
the previous setting.
You can find further information on seat belt
adjustment in the vehicle Operator's Manual.
Switching the automatic mirror fold-
ing function on/off
When the Automatic Mirror Foldingfunc-
tion is activated, the outside mirrors fold in auto-
matically as soon as you lock the vehicle from
the outside. The outside mirrors fold out auto-
matically again as soon as you unlock the vehi-
cle.
XCall up Vehicle Settings(Ypage 44).
XTo select Automatic Mirror Folding: turn
and press the controller.
The function switches on or off, depending on
the previous setting.
You can find further information on the auto-
matic folding mirror function in the vehicle Oper-
ator's Manual.
Switching locator lighting on/off
If you switch on the Locator Lightingfunc-
tion, the exterior lighting is switched on for a
short time when it is dark. The light switch must
be set to Ã; see the vehicle Operator's Man-
ual.
The exterior lighting remains on for 40 seconds
after the vehicle is unlocked. When you start the
engine, the locator lighting is switched off and
the automatic driving lights are activated.
XCall up Vehicle Settings(Ypage 44).
XTo select LocatorLighting: turn and press
the controller.
XPress the controller.
The function is switched on or off, depending
on the previous status.
You can find further information on the locator
lighting in the vehicle Operator's Manual.
Activating/deactivating the auto-
matic door locking mechanism
The vehicle is locked automatically when the
ignition is switched on and the vehicle is travel-
ing faster than walking pace.
XCall up Vehicle Settings(Ypage 44).
XTo select Automatic Locking: turn and
press the controller.
The function switches on or off, depending on
the previous setting.
You can find further information on the locking
feature in the vehicle Operator's Manual.
Setting the switch-off delay time
Interior lighting switch-off delay time
The interior lighting is activated for the duration
of the switch-off delay time when the SmartKey
is removed from the ignition lock.
XCall up Vehicle Settings(Ypage 44).
XTo select Interior Lighting DelayedSwitch-off: turn and press the controller.
The setting element is active.
XTo change the delayed switch-off time: turn
and press the controller.
You can find further information on the interior
lighting in the vehicle Operator's Manual.
Vehicle settings45
Vehicle functions
Z
Page 48 of 178
Exterior lighting switch-off delay time
If you switch on theExterior LightingDelayed Switch-offfunction, the exterior
lighting is switched on for a short time after the
engine is switched off. The light switch must be
set to Ã; see the vehicle Operator's Manual.
The exterior lighting remains on for 60 seconds
after the engine is switched off. If you close all
the doors and the tailgate, the exterior lighting
switches off after the set time.
XCall up Vehicle Settings(Ypage 44).
XTo select Exterior Lighting DelayedSwitch-off: turn and press the controller.
The setting element is active.
XTo change the delayed switch-off time: turn
and press the controller.
360° camera
General notes
The 360° camera covers the immediate sur-
roundings of the vehicle and assists you, for
instance when parking or at exits with reduced
visibility.
The 360° camera is only an aid. It is not a
replacement for your attention to your immedi-
ate surroundings. You are always responsible
for safe maneuvering and parking. Make sure
that no persons or animals are in the maneu-
vering range.
For more information on the 360° camera see
the vehicle Operator's Manual.
Displaying the 360° camera image
The 360° camera image can be displayed if:
Ryour vehicle is equipped with a 360° camera
Rthe 360°Camerafunction is switched on (see
the vehicle Operator's Manual)
XPress the Øbutton.
or
XPress Vehiclein the main function bar.
The vehicle menu is displayed.
XTo select 360° Camera: turn and press the
controller.
The 360° camera image appears in split
screen mode. You will see the previous view on the display if,
when the function is switched on:
Ryou turn the SmartKey to position
1in the
ignition lock
Ryou select transmission position P
Rwhen you are driving at moderate speeds
Switching the display off manually
XTo select &: slide 6and press the con-
troller.
Switching the display on automatically
XYou can automatically switch the 360° Cam-
era display using reverse gear (Ypage 46).
Switching automatic mode of the
360° camera on/off
This function activates the 360° camera when
reverse gear is engaged.
XPress the Øbutton.
or
XPress Vehiclein the main function bar.
The vehicle menu is displayed.
XTo switch to the menu bar: slide6the
controller.
XTo select System Settings: turn and press
the controller.
XTo select 360° Camera: turn and press the
controller.
The menu 360° Camera
appears.
XSelectActivation by R gear.
The function is switched on Oor off ª,
depending on the previous status.
Opening the camera cover for clean-
ing
XTo select Open Camera Coverin the 360°
camera menu: turn the controller and press to
confirm.
The Please Wait...
message appears for
approximately three seconds.
The camera cover opens.
The camera cover closes automatically if:
Rthe ignition is switched off
Rthe vehicle exceeds a moderate speed
46360° camera
Vehicle functions