Page 99 of 482
Interiorstowage compa rtments
Overview ofthe front stowage compa rt‐
ments
Observ eth e no tes on loading theve hicle
(
→page 95).
1St ow age compartment in the doors
2St ow age/telephone compartment in the
armrest with multimedia connections and
stow age compartment, forex ample, for an
MP3 pla yer
3Stow age compartment in the front center
console with a USB port (depending on the
ve hicle's equipment)
4Glo vebox
Locking/unlocking thegl ove box
Obser vethe no tes on loading theve hicle
(
→page 95).
#Tu rn the mechanical key a quarter turn clock‐
wise 2(to lock) or counter-clockwise 1(to
unlock).
Opening theey eglasses box
Obser vethe no tes on loading theve hicle
(
→page 95).
#To open: press button 1.
Opening thesto wage compa rtment in the
re ar armrest
Observ eth e no tes on loading theve hicle
(
→page 95).
Seats and stowing 97
Page 100 of 482

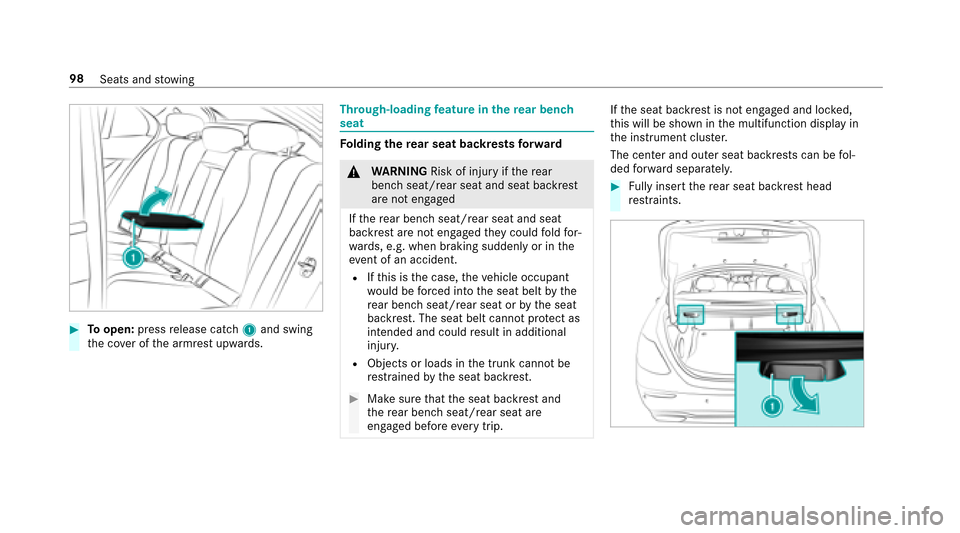
#Toopen: pressrelease cat ch1 and swing
th e co ver of the armrest upwards.
Through-loading feature in there ar ben ch
seat
Fo lding there ar seat backrests forw ard
&
WARNING Risk of injury ifth ere ar
bench seat/rear seat and seat backrest
are not engaged
If th ere ar bench seat/rear seat and seat
backrest are not engaged they could fold for‐
wa rds, e.g. when braking suddenly or in the
ev ent of an accident.
RIfth is is the case, theve hicle occupant
wo uld beforc ed into the seat belt bythe
re ar bench seat/rear seat or bythe seat
backrest. The seat belt cann otprotect as
intended and could result in additional
injur y.
RObjects or loads in the trunk cannot be
re stra ined bythe seat backrest.
#Make sure that the seat backrest and
th ere ar bench seat/rear seat are
engaged before everytrip.
Ifth e seat backrest is not engaged and loc ked,
th is will be shown in the multifunction display in
th e instrument clus ter.
The center and outer seat backrests can be fol‐
ded forw ard separatel y.
#Fully inse rtthere ar seat backrest head
re stra ints.
98
Seats and stowing
Page 101 of 482
#Left andright seat backres t:pull release
le ve r1.
#Cen ter seat backres t:pull seat backrest 2
re lease 3forw ard.
#Foldthe cor responding seat backrest
fo rw ard. Fo
lding there ar seat backrest back
* NO
TEDama getothe seat belt
The seat belt could become trapped and thus
damaged when folding back the seat back‐
re st.
#Make sure that the seat belt is not trap‐
ped when folding back the seat back‐
re st.
If th e seat backrest is not engaged and loc ked,
th is will be shown in the multifunction display in
th e instrument clus ter.
#Mo vethe driver's or front passenger seat for‐
wa rds, if necessar y.
#Fold cor responding seat backrest 1back
until it engages.
Left and right seat backrests: ifth e seat
backrest is not cor rectly loc ked, this will be
shown in the multifunction display in the
instrument clus ter.
Center seat backres t:ifth e seat backrest is
not cor rectly loc ked, red lock verification
indicator 2will be visible.
Seats and stowing 99
Page 102 of 482
Lockingthe center rear seat backrest
Lock the center seat backrest if youwa ntto
secure the cargo compartment from unauthor‐
ized access. The center seat backrest can then
only be folded forw ard toget her with the left seat
backrest.
Bo th seat backrests must be engaged and joined
to ge ther.#Fo ldthe center and left seat backrest
fo rw ard.
#To lock: slide catch 1up.
The release mechanism of the center seat
backrest is loc ked.
#To unlock :slide catch 1down.
Overview ofthe tie-down eyes
Obser vethe no tes on loading theve hicle
(→page 95).
1Ti e-down eyes (vehicles with thro ugh-loading
fe ature in there ar bench seat)
100
Seats and stowing
Page 103 of 482

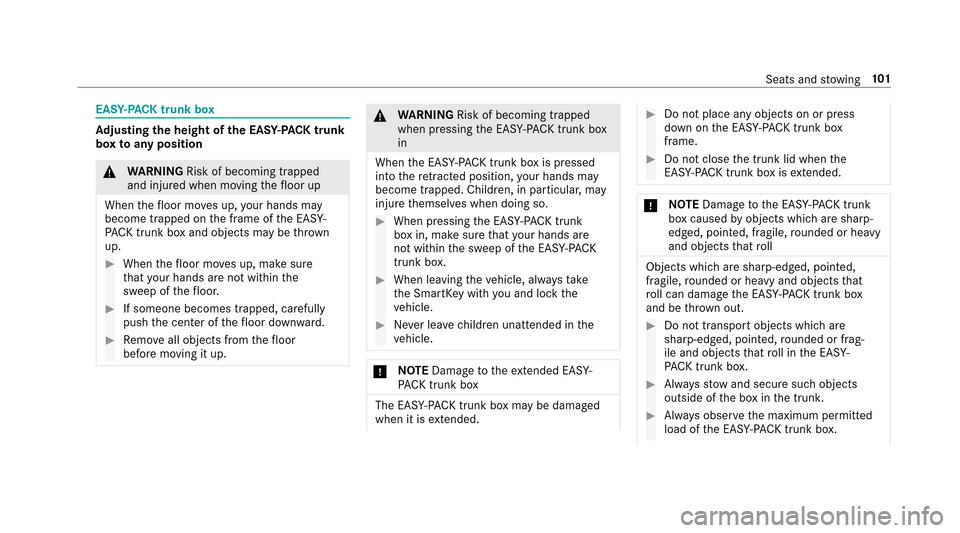
EASY-PA CK trunk box
Adjusting the height of the EA SY-PAC K trunk
box toany position
&
WARNING Risk of becoming trapped
and injure d when moving thefloor up
When thefloor mo ves up, your hands may
become trapped on the frame of the EA SY-
PA CK trun kbo xan dobject sma ybe throw n
up.
#When thefloor mo ves up, make sure
th at your hands are notwithin the
sweep of thefloor.
#If someone becomes trapped, carefully
push the center of thefloor down ward.
#Re mo veall objects from thefloor
before moving it up.
& WARNING Risk of becoming trapped
when pressing the EA SY-PAC K trunk box
in
When the EA SY-PACK tr unkbox is pressed
into there tracted position, your hands may
become trapped. Children, in particular, may
injure themselves when doing so.
#When pressing the EA SY-PAC K trunk
box in, make sure that your hands are
not within the sweep of the EA SY-PACK
tr unk box.
#When leaving theve hicle, alw aysta ke
th e SmartK eywith you and lock the
ve hicle.
#Ne ver lea vechildren unatte nded inthe
ve hicle.
* NO
TEDama getotheex tended EAS Y-
PA CK tr unk box
The EA SY-PAC K trunk box may be damage d
when it is extended.
#Do not place any objects on or press
down on the EA SY-PAC K trunk box
frame.
#Do not close the trunk lid when the
EAS Y-PA CK tr unk box is extended.
* NO
TEDama getothe EA SY-PAC K trunk
box caused byobjects which are sharp-
edged, pointed, fragile, rounded or heavy
and objects that roll
Objects which are sharp-edged, pointed,
fragile, rounded or heavy and objects that
ro ll can damage the EA SY-PAC K trunk box
and be thro wn out.
#Do not transport objects which are
sharp-edged, pointe d,rounded or frag‐
ile and objects that roll in the EA SY-
PA CK tr unk box.
#Alwaysstow and secure such objects
outside of the box in the trunk.
#Alw ays obser vethe maximum permitted
load of the EA SY-PAC K trunk box.
Seats and stowing 10
1
Page 104 of 482
#Do not usethe EA SY-PAC K trunk box
when there ar seats are folded for‐
wa rds.
The maximum permitted load of the EA SY-PAC K
trunk box is 22 lbs (10 kg).To prev ent the box
from being overloaded, the box floor lo wersonto
th e trunk floor when the load reaches appr ox‐
imately 11lbs (5 kg).
#Pull the box out using handle 2.
#Toincrease the load capacit y:press the
center of floor 1down tothe desired posi‐
tion and box size.
#To reduce the load capacity: press button
3.
#To sto w:press the box in comple tely using
handle 2, until it loc ksin place.
% Obser vethe no tes on cleaning the EA SY-
PA CK tr unk box (
→page 315). Installing/removing
the EAS Y-PA CK trun k
bo x
10 2
Seats and stowing
Page 105 of 482
#Toinstall: openrotating catch 6and turn it
outwards.
#Insert brackets 2 of box 1into ou ter holes
3.
#Ra ise box 1and press hooks 5into rear
shelf 4.
#Turn rotating catch 6inwa rdsto thestop.
#To remo ve:turn le ft-hand rotating catch 6
clo ckwise and right-hand rotating catch 6
counter-clo ckwise by90°.
#Lowe r box 1and pull it out of anchorages
4, then pull box 1backwards and out of
holes 3.
Opening thesto wage space under the trunk
floor
* NO
TEDama getothe handle in the trunk
fl oor
If th e handle in the trunk is left pr otru ding,
th e handle may be damaged.
#Un hinge the handle before you close
th e trunk lid and clip it in place.#Pull handle 1up and hook it into rain
trough 2.
Seats and stowing 10
3
Page 106 of 482

Attachin gth ero of rack
&
WARNING Risk of injury by exceeding
th e maximum roof load
When you load thero of, theve hicle center of
gr av ity rises and the driving characteristics
ch ange.
If yo uexc eed the maximum roof load, the
driving characteristics, as well as thesteer‐
ing and braking, will be greatly impaired.
#Ne verexc eed the maximum roof load
and adjust your dr ivingst yle.
Yo uwill find information on the maximum roof
load in the "Technical data" section.
Re quirements
ROnly use roof rack ste sted and appr ovedby
Mercedes-Benz.
RMake sure that you can raise the sliding sun‐
ro of fully and open the trunk lid fully once
th ero of rack is ins talled.
RThe panoramic sliding sunroof cannot be
opened if a roof rack is ins talled. The panor‐ amic sliding sunroof closes again automati‐
cally when it encounters
resis tance.
* NO
TEDama getothe co vers
The co vers may be dama ged and scratched
when being opened.
#Do not use me tallic or hard objects.
#Fo ld co vers 1 carefully up wards in the
direction of the ar row.
#Only secure thero of rack tothe anchorage
points under co vers 1.
#Alw ays comply with thero of rack manufac‐
turer's ins tallation instructions.
#Secure the load on thero of rack .
Cup holder
Installing or removing the cup holder in the
center console
& WARNING ‑ Risk of accident or injury
when using the cup holder while the
ve hicle is moving
The cup holder cannot secure containers
while theve hicle is moving.
If yo u use a cup holder while theve hicle is
moving, the conta iner may be flung around
and liq uidsmay be spilled. The vehicle occu‐
pants may come into contact with the liquid
and if it is hot, they could be scalded. You
10 4
Seats and stowing