2017 MERCEDES-BENZ C-Class radio
[x] Cancel search: radioPage 55 of 178
Rentering POIs in the vicinity of a city or via a
name search
Rediting entries
Other entries are possible, such as entering
points of interest in the vicinity of the destina-
tion or current position.
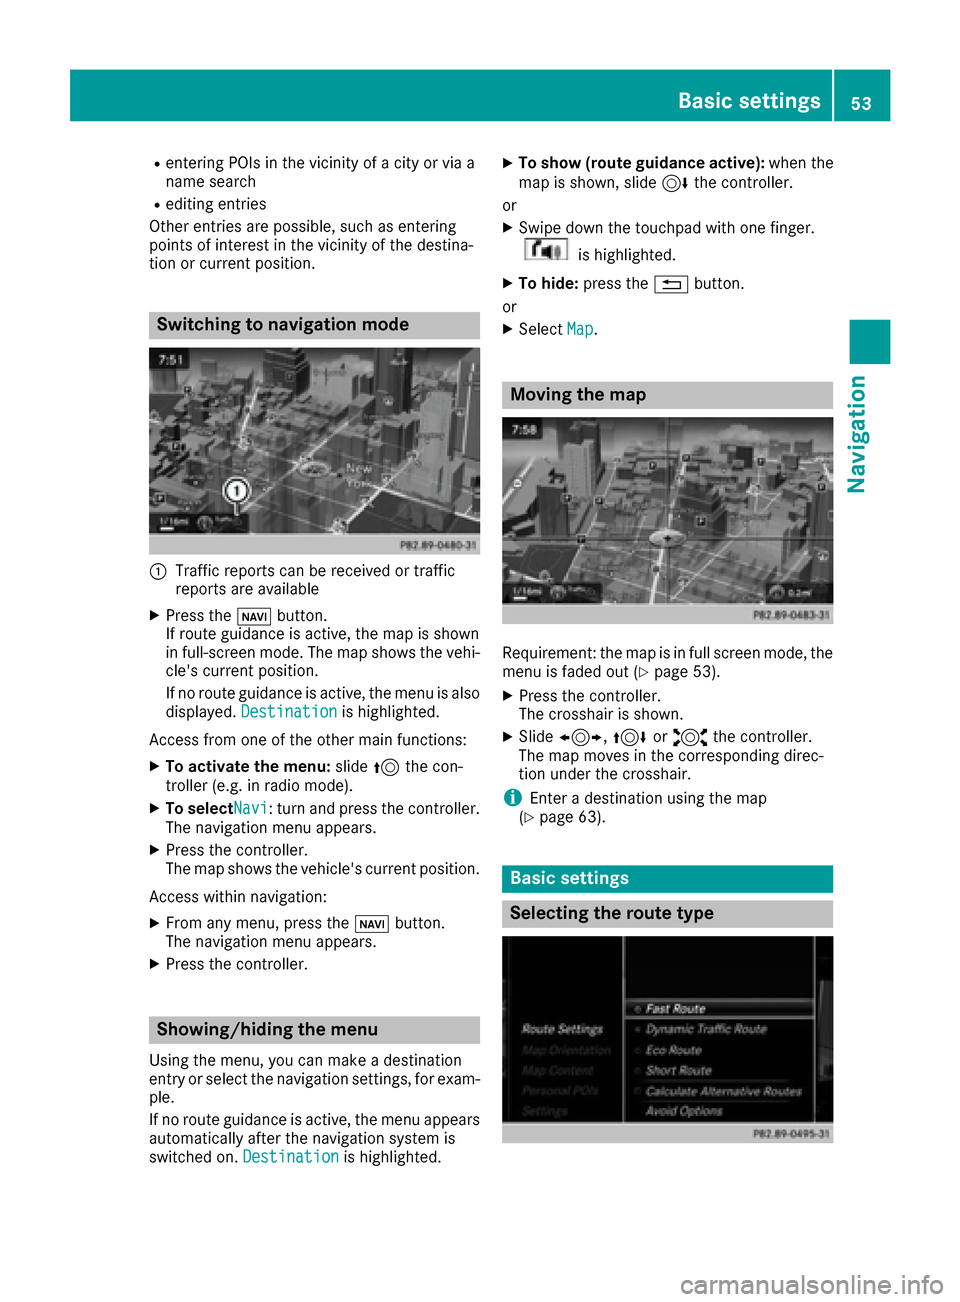
Switching to navigation mode
:Traffic reports can be received or traffic
reports are available
XPress the ßbutton.
If route guidance is active, the map is shown
in full-screen mode. The map shows the vehi-
cle's current position.
If no route guidance is active, the menu is also
displayed. Destination
is highlighted.
Access from one of the other main functions:
XTo activate the menu: slide5the con-
troller (e.g. in radio mode).
XTo selectNavi: turn and press the controller.
The navigation menu appears.
XPress the controller.
The map shows the vehicle's current position.
Access within navigation:
XFrom any menu, press the ßbutton.
The navigation menu appears.
XPress the controller.
Showing/hiding the menu
Using the menu, you can make a destination
entry or select the navigation settings, for exam-
ple.
If no route guidance is active, the menu appears
automatically after the navigation system is
switched on. Destination
is highlighted.
XTo show (route guidance active): when the
map is shown, slide 6the controller.
or
XSwipe down the touchpad with one finger.
is highlighted.
XTo hide: press the %button.
or
XSelect Map.
Moving the map
Requirement: the map is in full screen mode, the
menu is faded out (Ypage 53).
XPress the controller.
The crosshair is shown.
XSlide1, 4or2 the controller.
The map moves in the corresponding direc-
tion under the crosshair.
iEnter a destination using the map
(Ypage 63).
Basic settings
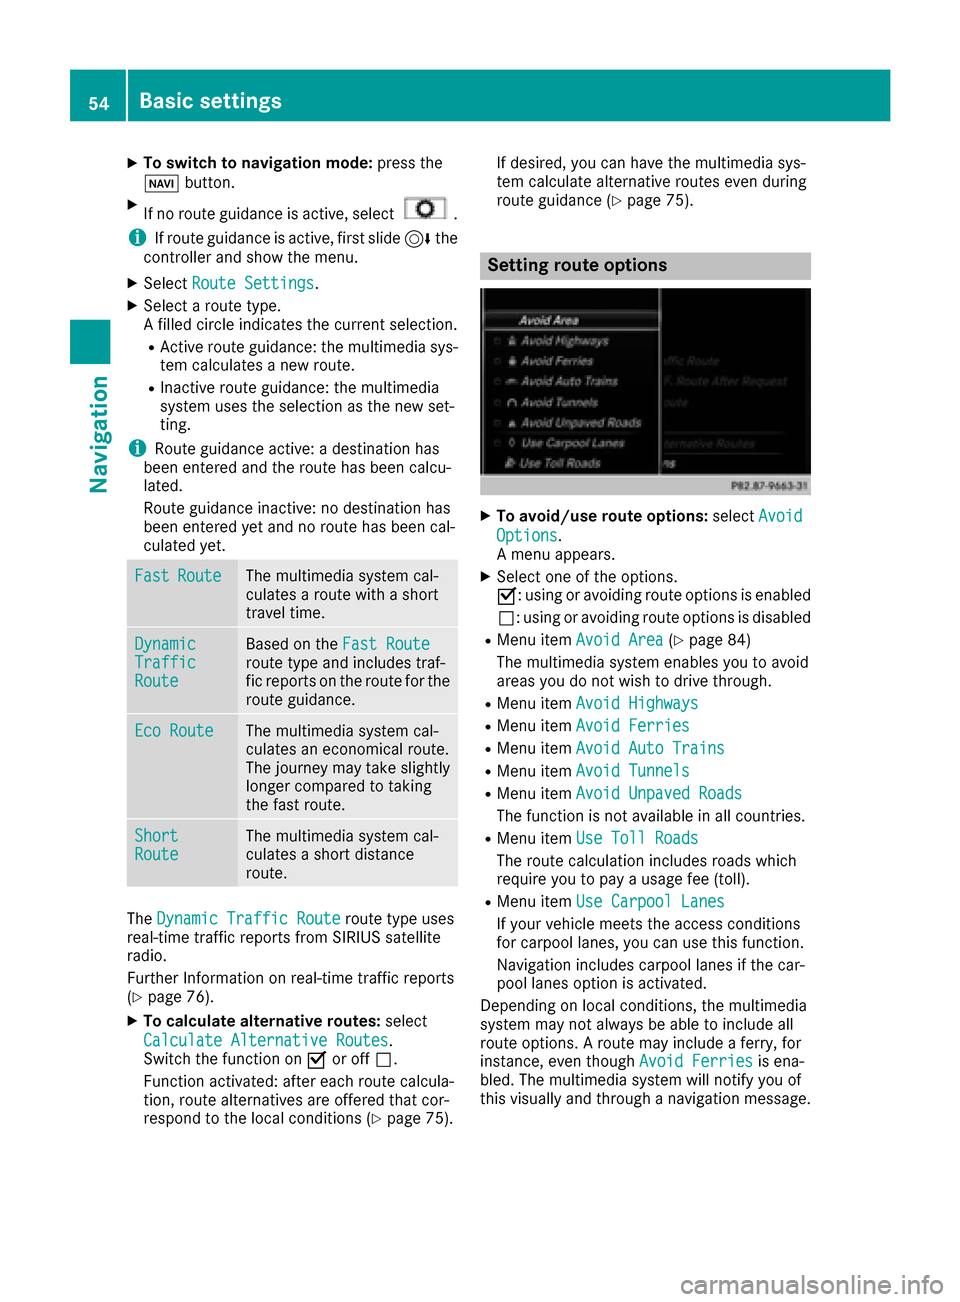
Selecting the route type
Basic settings53
Navigation
Z
Page 56 of 178
XTo switch to navigation mode:press the
Ø button.
XIf no route guidance is active, select.
iIf route guidance is active, first slide 6the
controller and show the menu.
XSelect Route Settings.
XSelect a route type.
A filled circle indicates the current selection.
RActive route guidance: the multimedia sys-
tem calculates a new route.
RInactive route guidance: the multimedia
system uses the selection as the new set-
ting.
iRoute guidance active: a destination has
been entered and the route has been calcu-
lated.
Route guidance inactive: no destination has
been entered yet and no route has been cal-
culated yet.
FastRouteThe multimedia system cal-
culates a route with a short
travel time.
DynamicTrafficRoute
Based on the Fast Routeroute type and includes traf-
fic reports on the route for the
route guidance.
Eco RouteThe multimedia system cal-
culates an economical route.
The journey may take slightly
longer compared to taking
the fast route.
ShortRouteThe multimedia system cal-
culates a short distance
route.
TheDynamic Traffic Routeroute type uses
real-time traffic reports from SIRIUS satellite
radio.
Further Information on real-time traffic reports
(
Ypage 76).
XTo calculate alternative routes: select
Calculate Alternative Routes
.
Switch the function on Oor off ª.
Function activated: after each route calcula-
tion, route alternatives are offered that cor-
respond to the local conditions (
Ypage 75). If desired, you can have the multimedia sys-
tem calculate alternative routes even during
route guidance (
Ypage 75).
Setting route options
XTo avoid/use route options:
selectAvoid
Options.
A menu appears.
XSelect one of the options.
O: using or avoiding route options is enabled
ª: using or avoiding route options is disabled
RMenu item Avoid Area(Ypage 84)
The multimedia system enables you to avoid
areas you do not wish to drive through.
RMenu item Avoid Highways
RMenu itemAvoid Ferries
RMenu itemAvoid Auto Trains
RMenu itemAvoid Tunnels
RMenu itemAvoid Unpaved Roads
The function is not available in all countries.
RMenu itemUse Toll Roads
The route calculation includes roads which
require you to pay a usage fee (toll).
RMenu itemUse Carpool Lanes
If your vehicle meets the access conditions
for carpool lanes, you can use this function.
Navigation includes carpool lanes if the car-
pool lanes option is activated.
Depending on local conditions, the multimedia
system may not always be able to include all
route options. A route may include a ferry, for
instance, even though Avoid Ferries
is ena-
bled. The multimedia system will notify you of
this visually and through a navigation message.
54Basic settings
Navigation
Page 78 of 178

XSelectDetour.
XTo specify the start of the traffic jam sec-
tion: select Beginning
.
The next possible traffic jam section starting
point is marked.
XTurn the controller.
The marking moves along the route to the
next starting position.
XPress the controller.
The start of the traffic jam is set.
XTo specify the end of a traffic jam section:
select End
.
The next possible traffic jam section end point
is marked.
XTurn the controller.
The marking moves along the route to the
next end position.
XPress the controller.
The end of the traffic jam is determined.
XTo calculate the detour: selectStart.
Off-road
General notes
The navigation system may guide you to off-road
routes that your vehicle cannot drive on without
causing damage to the tires or wheels or the
vehicle itself. It is the driver’s sole responsibility to determine the suitability of the route. The
condition of the off-road routes may vary. The
navigability of off-road routes may be influenced
by various factors such as time of day, time of
year and prevailing weather conditions. The nav-
igation system cannot judge these factors or
take them into account for route guidance.
Route guidance to an off-road destina-
tion
The multimedia system can guide you to desti-
nations which are within the area of the digital
map, but which are not themselves on the map.
These destinations are known as off-road des-
tinations, which you can enter using the map, for
example. In these cases, the multimedia system
guides you for as long as possible with naviga-
tion announcements and displays on roads
known to the system.
If the vehicle reaches an area which is not part ofthe digital map, the display appears as a split-
screen view. On the right, an arrow appears that points to the off-road destination. You hear the
announcement: "Please follow the arrow on the
display". As the vehicle approaches the desti-
nation, you will see a display to this effect.
Route guidance from an off-road loca-
tion to a destination
Off-road location: the vehicle's position is on the
digital map, but the map does not contain any
information about that location. The multimedia
system is able to guide you to a destination even
from an off-road location.
At the start of route guidance, you will see the
Road Not Mapped
message, an arrow and the
distance to the destination. The arrow shows
the compass heading to the actual destination.
As soon as the vehicle is back on a road known
to the system, route guidance continues in the
usual way.
Off-road during route guidance
Due to road construction, for example, there
may be differences between the data on the
digital map and the actual course of the road.
In such cases, the system will temporarily be
unable to locate the vehicle position on the dig-
ital map. The vehicle is therefore in an off-road
position.
In the display, you will then see the Road Not
Mappedmessage, an arrow and the distance to
the destination. The direction arrow shows the
compass heading to the destination.
As soon as the system can assign the vehicle
position to the map again, route guidance con-
tinues in the usual way.
Real-time traffic reports
Prerequisites
This function is currently not available for Can-
ada.
In order to receive real-time traffic reports via
satellite radio, you need to subscribe to SIRIUS
XM Satellite Radio Traffic Message Service.
Further information on satellite radio
(
Ypage 133).
The multimedia system can receive traffic
reports via satellite radio and take account of
these for route guidance in the navigation sys-
76Real-time traffic reports
Navigation
Page 88 of 178

XSelectDelete All.
A prompt appears asking whether you wish to
delete all areas.
XSelect YesorNo.
After selecting Yes, all areas are deleted.
SIRIUS XM service
Displaying SIRIUS XM service informa-
tion
You can display the SIRIUS XM service informa-
tion.
XTo switch to navigation mode: press the
Ø button.
XTo show the menu: slide6the controller.
XTo select Traffic: turn and press the con-
troller.
XSelect SIRIUS Service.
The provider's phone number (SIRIUS XM)
and the serial number of your service module
are displayed.
iAlternatively you can call up this function
using the touchpad (Ypage 23).
Registering for the SIRIUS XM traffic
report service
XCall the provider telephone number shown on
the multimedia system display.
iYou can also have the satellite service acti-
vated online. To do so, visit the SIRIUS XM
Radio website at http://www.sirius.com
(USA).
XThe connection is established: follow the
service employee's instructions.
The activation process may take up to ten
minutes.
iIf registration is not included when purchas-
ing the system, your credit card details will be
required to activate your account.
Updating the digital map
Introduction
The digital maps generated by the map software
become outdated in the same way as conven-
tional road maps. Optimal route guidance can
only be provided by the navigation system in conjunction with the most up-to-date map soft-
ware.
Information about new versions of the digital
map can be obtained from an authorized
Mercedes-Benz Center. You can have the digital
map updated there using a data medium, or you
can update it yourself.
For North American countries, it is possible to
update the map data for the multimedia system
free of charge for a period of three years. Infor-
mation on the availability of this service for your
vehicle can be obtained from your Mercedes-
Benz Service Center.
Entitlement to the free update
For the first three years after your vehicle is reg-
istered, you are entitled to all available updates
to the map software for the multimedia system.
They are usually installed during a regular vehi-
cle service. After this period, you can purchase
further updates from your Mercedes-Benz Ser-
vice Center.
The free updates relate to the vehicle and not to
an individual. If there is a change of ownership
within the three years after first registration, the
new owner is entitled to the map software
updates.
Updating at an authorized Mercedes-
Benz Center
If an update for your map software is available,
you will receive it free of charge at your
Mercedes-Benz Service Center during your vehi-
cle's annual service. You can arrange a separate
appointment for this at your Mercedes-Benz
Service Center on request.
The update can only be performed:
Rat an authorized Mercedes-Benz Center
Rfor map data for North America
The map software is not provided on DVD.
Carrying out a manual update
After the free update of the map data has
expired or when buying map data, you can
update the data yourself.
The update process may take some time (up to
45 minutes), depending on the size of the digital
map. The update will be completed more quickly
if the vehicle is stationary. If you begin the
update while the vehicle is stationary and the
86Map functions
Navigation
Page 126 of 178

Connection status
:Display of existing connection and signal
strength of the mobile phone network
In most cases, the current connection status is
then shown in the status bar when you switch to
another main function.
Detailed connection status
XCall up Internet functions (Ypage 123).
XTo switch to the menu bar: slide 6the con-
troller.
XTo select Settings: turn and press the con-
troller.
XTo select Connection Status: turn and
press the controller.
The following information is displayed:
Rthe volume of transferred data
Rconnection status
Rthe device name of the mobile phone
Ending the connection
USA: you cannot cancel the connection your-
self. The Internet connection is automatically
terminated if the system does not recognize any
user input within a five-minute time period.
Canada:
XCall up Internet functions (Ypage 123).
XTo switch to the menu bar: slide 6the con-
troller.
XTo select ©: turn and press the controller.
If the mobile phone Internet connection is can-
celed, the multimedia system tries to reconnect.
You should therefore always end the connection
in the multimedia system.
Mercedes-Benz Apps
General notes
To be able to use Mercedes-Benz Apps, you have
to register and confirm the terms and condi-
tions.
Calling up Mercedes-Benz Apps
XCall up Internet functions (Ypage 123).
XTo select Mercedes-Benz Apps: turn and
press the controller.
XTo call up the app: turn and press the con-
troller.
You can find further Mercedes-Benz Apps and
information under:
http://apps.mercedes-benz.com/apps/
iThe available features are country-depend-
ent.
License fees may be applicable.
Operating Mercedes-Benz apps via
the voice-operated control system
The following apps can be operated using the
voice-operated control system:
RWeather
ROnline search
RTuneIn Radio
XCall up a Mercedes-Benz app (Ypage 124).
XTo use the voice-operated control system:
select o.
XSay the question or prompt.
iThe voice-operated control system is not
available in all countries.
Web browser
Calling up a website
Function restrictions
Internet pages cannot be shown while the vehi-
cle is in motion.
124Web browser
Online and Internet functions
Page 131 of 178
Your multimediasyste mequipment
These operatin ginstruction sdescribe all th e
standar dan doptional equipment of your multi-
media system, as available at th etime of going
to press. Country-specifi cdifference sare pos -
sible. Bear in min dthat your vehicle may no t
feature all function sdescribed here. Thi salso
applies to safety-relevan tsystems an dfunc-
tions.
Read th einformation on qualifie dspecialis t
workshop sin th evehicle Operator's Manual.
Switchin gon th eradi o
XPress th e$ button.
The radio display appears .You will hear th e
last station playe don th elast waveban d
selected.
Switching HD Radi oon/of f
XIn radio mode: slid e6 thecontroller .
XSelectOption s.
XBy selecting Oorª in fron tof HD Radi o,
you determin ewhether HD radio is switched
on or off.
If HD Radio is switched off, th esyste mdoe sno t
switch to digita lradio an dit is no tpossible to
selec tan ysub-channels.
iHD Radio ™an dth eHD ,HD Radio ,an d“Arc ”
logos are proprietary trademark sof iBiquit y
Digital Corp.
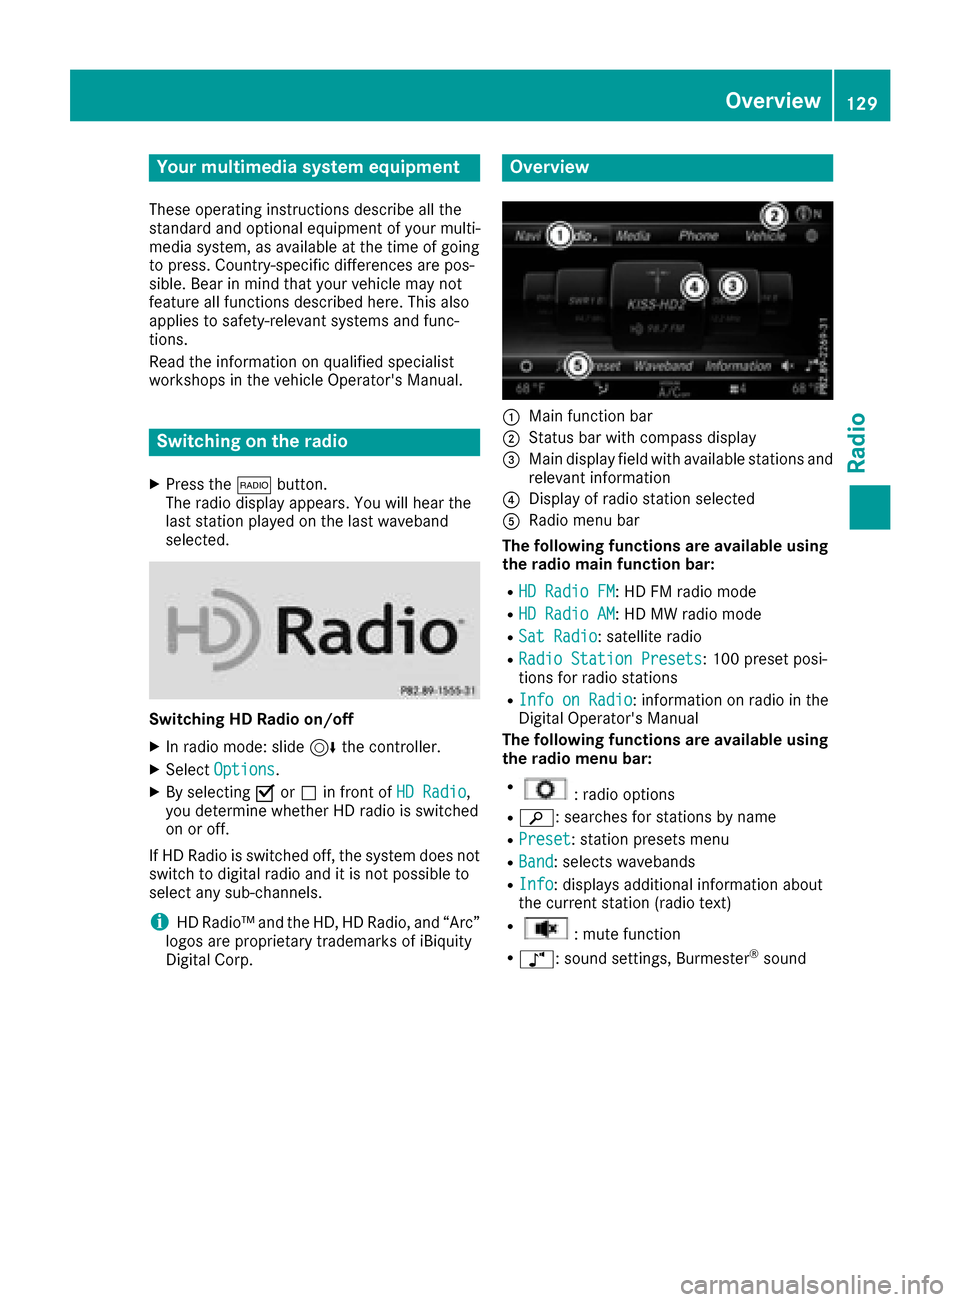
Overview
:Main function bar
;Status bar wit hcompass display
=Main display field wit havailable station san d
relevant information
?Display of radio station selecte d
ARadio menubar
Th efollowin gfunctions ar eavailable using
th eradi omain function bar:
RHD Radi oFM:HD FM radio mode
RHD Radi oAM:HD MW radio mode
RSa tRadi o:satellite radio
RRadi oStatio nPreset s:10 0preset posi-
tion sfo rradio station s
RInfo on Radi o:information on radio in th e
Digital Operator's Manual
Th efollowin gfunctions ar eavailable using
th eradi omenu bar:
R:radio option s
Rè:searches fo rstation sby name
RPreset:station preset smen u
RBand:selects wavebands
RInfo:displays additional information about
th ecurren tstation (radio text )
R:mut efunction
Rà :sound settings, Burmeste r®sound
Overview129
Radio
Page 132 of 178
Setting the waveband
Button activation
XPress the$button.
A menu appears with a selection of HD
Radio FM,HD Radio AM, Sat Radio,Infoon Radioand Radio Station Presets.
XTo select the required waveband: turn and
press the controller.
Using the main function bar
XIn radio mode: slide 5the controller.
The radio main function bar and menu bar
appear. Radio
is active.
XPress the controller.
A menu appears with a selection of HD
RadioFM,HDRadioAM,SatRadio,RadioStation Presetsand Info on Radio.
XTo select the required waveband: turn and
press the controller.
Using the menu bar
XIn radio mode: slide 6the controller.
The radio menu bar appears.
XTo select Band: turn and press the controller.
A menu appears with a selection of HD
Radio FM,HD Radio AMand Sat Radio.
XTo select the required waveband: turn and
press the controller.
Station
Selecting a station
From the main display field
All currently available stations are displayed.
XIn radio mode, turn the controller until the
desired station is in the center.
Using the current station list
iThe station list is available in HD FM radio
mode or HD AM radio mode. It includes all
stations that can be received.
XIn radio mode, press the controller.
The station list appears with the stations cur- rently available.
XTo select the desired station: turn and press
the controller.
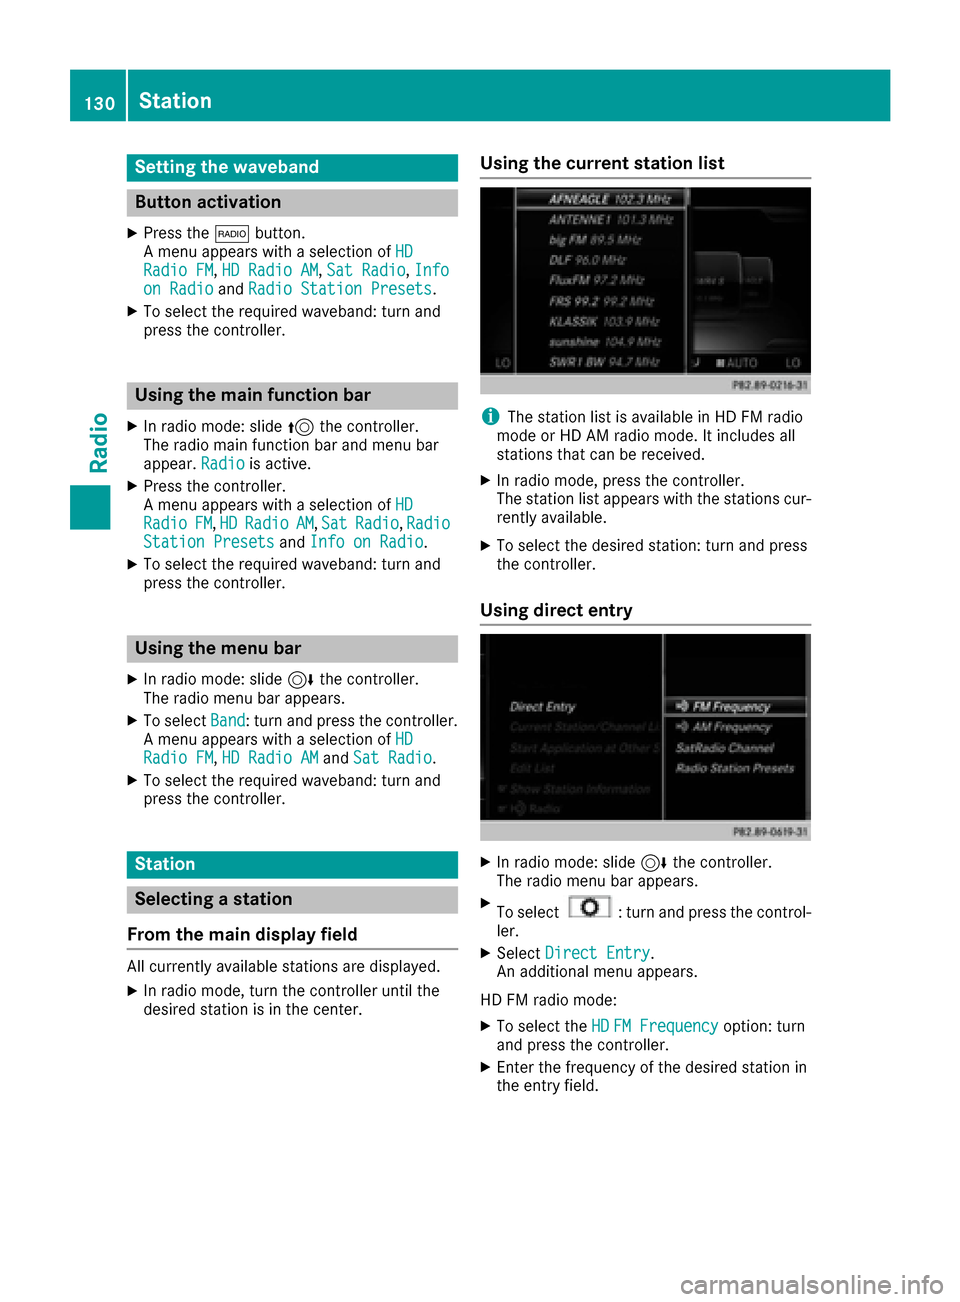
Using direct entry
XIn radio mode: slide 6the controller.
The radio menu bar appears.
XTo select: turn and press the control-
ler.
XSelect Direct Entry.
An additional menu appears.
HD FM radio mode:
XTo select the HDFM Frequencyoption: turn
and press the controller.
XEnter the frequency of the desired station in
the entry field.
130Station
Radio
Page 133 of 178
HD MW radio mode:
XTo select theHDAM Frequencyoption: turn
and press the controller.
XEnter the frequency of the desired station in
the entry field.
Satellite radio mode:
XTo select the SatRadioChanneloption: turn
and press the controller.
XEnter the number of the desired channel in
the entry field.
Station presets:
XTo select the Radio Station Presetsoption: turn and press the controller.
XEnter the station preset of the desired station.
Using the search function
XIn radio mode: slide 6the controller.
The radio menu bar appears.
XSelect èand enter the first letters of the
required station using the controller.
XPress OKto confirm.
The multimedia system displays a list of avail-
able stations.
XTo select stations from the list: turn the con-
troller and press to confirm.
Using the preset position
XIn radio mode: slide 6the controller.
XTo select Preset: turn and press the control-
ler.
XTo select Enter Preset: turn and press the
controller.
XEnter the station preset of the desired station.
Station list
XIn radio mode, press the controller.
The station list appears with the stations cur-
rently available.
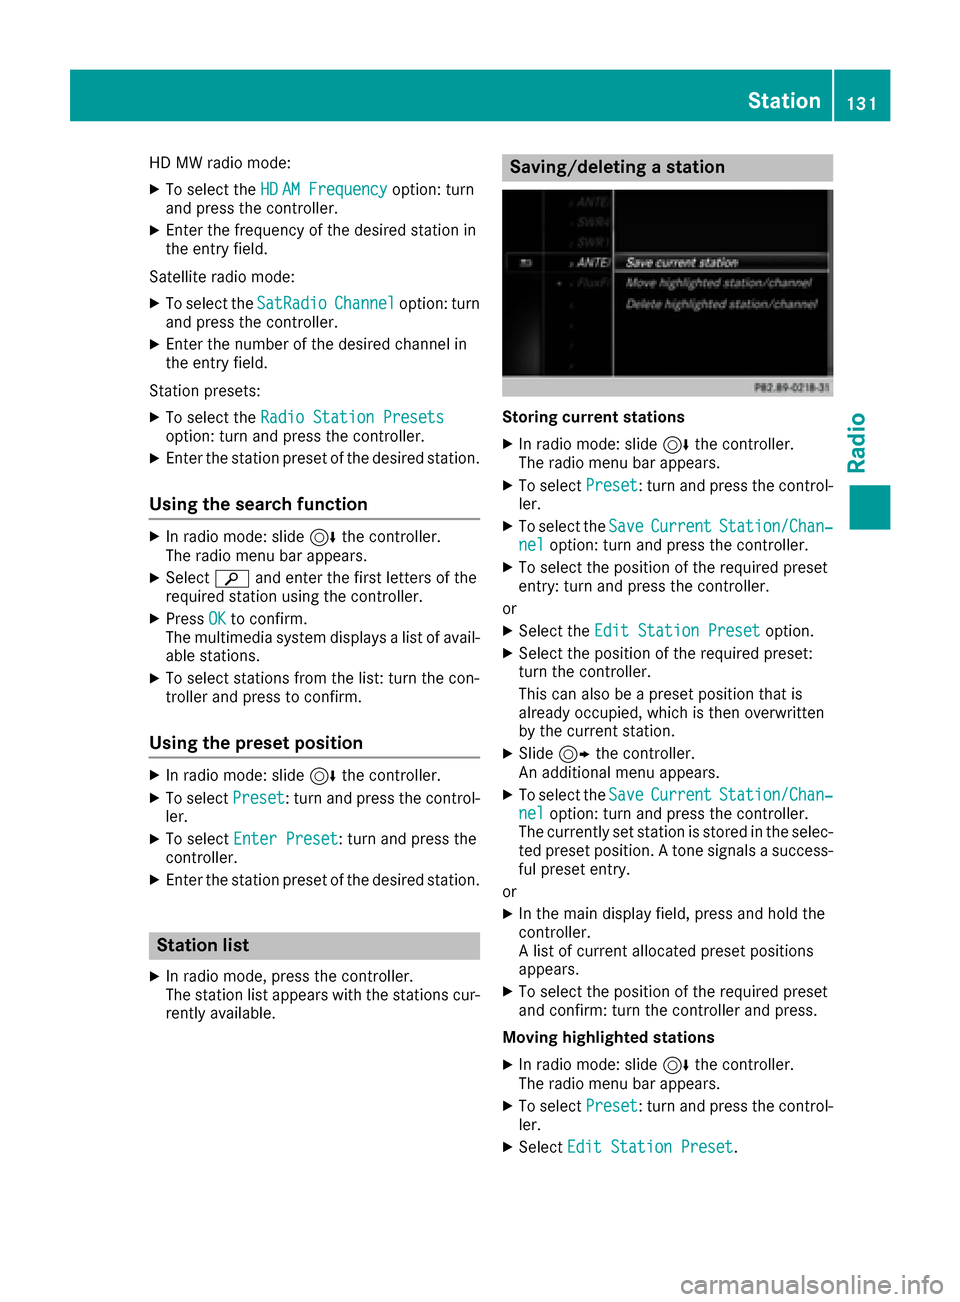
Saving/deleting a station
Storing current stations
XIn radio mode: slide 6the controller.
The radio menu bar appears.
XTo select Preset: turn and press the control-
ler.
XTo select the SaveCurrentStation/Chan‐neloption: turn and press the controller.
XTo select the position of the required preset
entry: turn and press the controller.
or
XSelect the Edit Station Presetoption.
XSelect the position of the required preset:
turn the controller.
This can also be a preset position that is
already occupied, which is then overwritten
by the current station.
XSlide9the controller.
An additional menu appears.
XTo select the SaveCurrentStation/Chan‐neloption: turn and press the controller.
The currently set station is stored in the selec-
ted preset position. A tone signals a success-
ful preset entry.
or
XIn the main display field, press and hold the
controller.
A list of current allocated preset positions
appears.
XTo select the position of the required preset
and confirm: turn the controller and press.
Moving highlighted stations
XIn radio mode: slide 6the controller.
The radio menu bar appears.
XTo select Preset: turn and press the control-
ler.
XSelect Edit Station Preset.
Station131
Radio