2017 MERCEDES-BENZ B-Class flat tire
[x] Cancel search: flat tirePage 187 of 290

Tires
Display messages
Possible causes/consequences and
0050
0050Solutions Please
Please
Correct
Correct Tire
Tire
Pressure
Pressure The tire pressure is too low in at least one of the tires, or the tire
pressure difference between the wheels is too great.
X Check the tire pressures at the next opportunity (Y page 263).
X If necessary, correct the tire pressure.
X Restart the tire pressure monitor (Y page 265).Check Tires Check Tires The tire pressure in one or more tires has dropped significantly. The
wheel position appears in the multifunction display.
A warning tone also sounds.
G WARNING
Tire pressures that are too low pose the following hazards: R they may burst, especially as the load and vehicle speed increase
R they may wear excessively and/or unevenly, which may greatly
impair tire traction.
R the driving characteristics, as well as steering and braking, may be
greatly impaired
There is a risk of an accident.
X Stop the vehicle without making any sudden steering or braking
maneuvers. Pay attention to the traffic conditions as you do so.
X Secure the vehicle against rolling away (Y page 128).
X Check the tires and, if necessary, follow the instructions for a flat
tire (Y page 241).
X Check the tire pressure (Y page 263).
X If necessary, correct the tire pressure. Warning Tire Mal‐ Warning Tire Mal‐
function function The tire pressure in one or more tires has dropped suddenly. The wheel
position appears in the multifunction display.
G WARNING
Driving with a flat tire poses a risk of the following hazards: R a flat tire affects the ability to steer or brake the vehicle
R you could lose control of the vehicle
R continued driving with a flat tire will cause excessive heat build-up
and possibly a fire
There is a risk of an accident.
X Stop the vehicle without making any sudden steering or braking
maneuvers. Pay attention to the traffic conditions as you do so.
X Secure the vehicle against rolling away (Y page 128).
X Check the tires and, if necessary, follow the instructions for a flat
tire (Y page 241). Display
messages
185On-board computer and displays Z
Page 202 of 290

Tires
Warning/
indicator
lamp
0051 0051
Signal type
Possible causes/consequences and 0050
0050Solutions 0077
0051
The yellow tire pressure monitor warning lamp (pressure loss/malfunction) is lit.
The tire pressure monitor has detected a loss of pressure in at least one of the tires.
G WARNING
Tire pressures that are too low pose the following hazards: R they may burst, especially as the load and vehicle speed increase
R they may wear excessively and/or unevenly, which may greatly impair tire trac-
tion.
R the driving characteristics, as well as steering and braking, may be greatly
impaired
There is a risk of an accident.
X Stop the vehicle without making any sudden steering or braking maneuvers. Pay
attention to the traffic conditions as you do so.
X Secure the vehicle against rolling away (Y page 128).
X Observe the additional display messages in the multifunction display.
X Check the tires and, if necessary, follow the instructions for a flat tire
(Y page 241).
X Check the tire pressure (Y page 263).
X If necessary, correct the tire pressure. 0077
0051
The yellow tire pressure monitor warning lamp (pressure loss/malfunction)
flashes for approximately one minute and then remains lit.
The tire pressure monitor is faulty.
G WARNING
The system is possibly unable to recognize or register low tire pressure.
There is a risk of an accident.
X Observe the additional display messages in the multifunction display.
X Visit a qualified specialist workshop immediately. 200
Warning and indicator lamps in the instrument clusterOn-board computer and displays
Page 243 of 290

Where will I find...?
Vehicle tool kit
General notes Vehicles with a TIREFIT kit: the TIREFIT kit is
located in the stowage well under the cargo
compartment floor.
Vehicles with a tire-change tool kit: the tire-
change tool kit is in the stowage well under the
cargo compartment floor.
Apart from certain country-specific variations,
the vehicles are not equipped with a tire-change tool kit. Some tools for changing a wheel are
specific to the vehicle. For more information on
which tire changing tools are required and
approved to perform a wheel change on your
vehicle, consult a qualified specialist workshop.
Tools required for changing a wheel may
include, for example:
R Jack
R Wheel chock
R Lug wrench
R Alignment bolt
Vehicles with a TIREFIT kit 0043
Tire inflation compressor
0044 Tire sealant filler bottle
0087 Towing eye
X Open the tailgate.
X Lift the cargo compartment floor upwards
(Y page 214).
X Use the TIREFIT kit (Y page 243) or remove it.
Towing eye 0087is located under tire inflation
compressor 0043. Vehicles with a tire-change tool kit X
Open the tailgate.
X Lift the cargo compartment floor upwards
(Y page 214).
X Remove the tire-change tool kit.
The tire-change tool kit contains:
R Jack
R Lug wrench
R One pair of gloves
R Folding wheel chock Flat tire
Preparing the vehicle
Your vehicle may be equipped with:
R MOExtended tires (tires with run-flat proper-
ties) (Y page 242)
Vehicle preparation is not necessary on vehi-
cles with MOExtended tires
R a TIREFIT kit (Y page 241)
Vehicles equipped with MOExtended tires are
not equipped with a TIREFIT kit at the factory. It
is therefore recommended that you additionally
equip your vehicle with a TIREFIT kit if you mount tires that do not feature run-flat properties, e.g.
winter tires. A TIREFIT kit may be obtained from a qualified specialist workshop.
Information on changing and mounting wheels
(Y page 275).
X Stop the vehicle on solid, non-slippery and
level ground, as far away as possible from
traffic.
X Switch on the hazard warning lamps.
X Secure the vehicle against rolling away
(Y page 128).
X If possible, bring the front wheels into the
straight-ahead position.
X Switch off the drive system.
X Vehicles without KEYLESS-GO: remove the
SmartKey from the ignition lock.
X Vehicles with KEYLESS-GO: open the driv-
er's door.
The vehicle electronics now have status 0.
This is the same as the SmartKey having been removed.
X Make sure that the passengers are not endan-
gered as they do so. Make sure that no one is
near the danger area while a wheel is being Flat tire
241Breakdown assistance
Page 244 of 290

changed. Anyone who is not directly assisting
in the wheel change should, for example,
stand behind the barrier.
X Get out of the vehicle. Pay attention to traffic
conditions when doing so.
X Close the driver's door. MOExtended tires (tires with run-flat
properties)
General notes With MOExtended tires (tires with run flat char-
acteristics), you can continue to drive your vehi- cle even if there is a total loss of pressure in one
or more tires. The affected tire must not show
any clearly visible damage.
You can recognize MOExtended tires by the
MOExtended marking which appears on the
sidewall of the tire. You will find this marking
next to the tire size designation, the load-bear-
ing capacity and the speed index (Y page 270).
MOExtended tires may only be used in conjunc-
tion with an active tire pressure monitor.
If a pressure loss warning message appears in the multifunction display:
R observe the instructions in the display mes-
sages (Y page 185).
R check the tire for damage.
R if driving on, observe the following notes.
The driving distance possible in run-flat mode is approximately 50 miles (80 km) when the vehi-
cle is partially laden. When the vehicle is fully
laden it is approximately 19 miles (30 km).
In addition to the vehicle load, the driving dis-
tance possible depends upon:
R Vehicle speed
R Road condition
R Outside temperature
The driving distance possible in run-flat mode
may be reduced by extreme driving conditions
or maneuvers, or it can be increased through a
moderate style of driving.
The driving distance possible in run-flat mode is counted from the moment the tire pressure loss
warning appears in the multifunction display.
You must not exceed a maximum speed of
50 mph (80 km/h). When replacing one or all tires, please observe
the following specifications for your vehicle's
tires:
R size
R type and
R the "MOExtended" marking
If a tire has gone flat and cannot be replaced
with a MOExtended tire, a standard tire may be
used as a temporary measure. Make sure that
you use the proper size and type (summer or
winter tire).
Vehicles equipped with MOExtended tires are
not equipped with a TIREFIT kit at the factory. It
is therefore recommended that you additionally
equip your vehicle with a TIREFIT kit if you mount tires that do not feature run-flat properties, e.g.
winter tires. A TIREFIT kit may be obtained from
a qualified specialist workshop.
Important safety notes G
WARNING
When driving in emergency mode, the driving characteristics deteriorate, e.g. when corner-
ing, accelerating quickly and when braking.
There is a risk of an accident.
Do not exceed the stated maximum speed.
Avoid abrupt steering and driving maneuvers,
and driving over obstacles (curbs, potholes,
off-road). This applies in particular to a laden
vehicle.
Stop driving in emergency mode if:
R you hear banging noises.
R the vehicle starts to shake.
R you see smoke and smell rubber.
R ESP ®
is intervening constantly.
R there are tears in the sidewalls of the tire.
After driving in emergency mode, have the
wheel rims checked at a qualified specialist
workshop with regard to their further use. The defective tire must be replaced in every case. 242
Flat tireBreakdown assistance
Page 245 of 290
TIREFIT kit
Important safety notes TIREFIT is a tire sealant.
You can use TIREFIT to seal punctures of up to
0.16 in (4 mm), particularly those in the tire
tread. You can use TIREFIT at outside tempera-
tures down to 00F84 ‡ (00F820 †). G
WARNING
In the following situations, the tire sealant is
unable to provide sufficient breakdown assis- tance, as it is unable to seal the tire properly:
R there are cuts or punctures in the tire larger
than those mentioned above.
R the wheel rim is damaged.
R you have driven at very low tire pressures or
on a flat tire.
There is a risk of an accident.
Do not drive the vehicle. Contact a qualified
specialist workshop. G
WARNING
The tire sealant is harmful and causes irrita-
tion. It must not come into contact with your
skin, eyes or clothing or be swallowed. Do not inhale TIREFIT fumes. Keep tire sealant away
from children. There is a risk of injury.
If you come into contact with the tire sealant,
observe the following:
R Rinse off the tire sealant from your skin
immediately with water.
R If the tire sealant comes into contact with
your eyes, immediately rinse them thor-
oughly with clean water.
R If tire sealant is swallowed, immediately
rinse your mouth out thoroughly and drink
plenty of water. Do not induce vomiting,
and seek medical attention immediately.
R Immediately change out of clothing which
has come into contact with tire sealant.
R If an allergic reaction occurs, seek medical
attention immediately. !
Residue from the tire sealant may come out
of the filler hose after use. This could cause
stains.
Therefore, place the filler hose in the plastic
bag which contained the TIREFIT kit. H
Environmental note
Have the used tire sealant bottle disposed of
professionally, e.g. at a qualified specialist
workshop.
! Do not operate the tire inflation compressor
for longer than ten minutes at a time without
a break. It may otherwise overheat.
The tire inflation compressor can be operated again once it has cooled down.
Comply with the manufacturer’s safety instruc-
tions on the sticker on the tire inflation com-
pressor.
Using the TIREFIT kit X
Do not remove any foreign objects which have
penetrated the tire, e.g. screws or nails.
X Remove the tire sealant bottle, the accompa-
nying TIREFIT sticker and the tire inflation
compressor from the stowage well under-
neath the cargo compartment floor
(Y page 241).
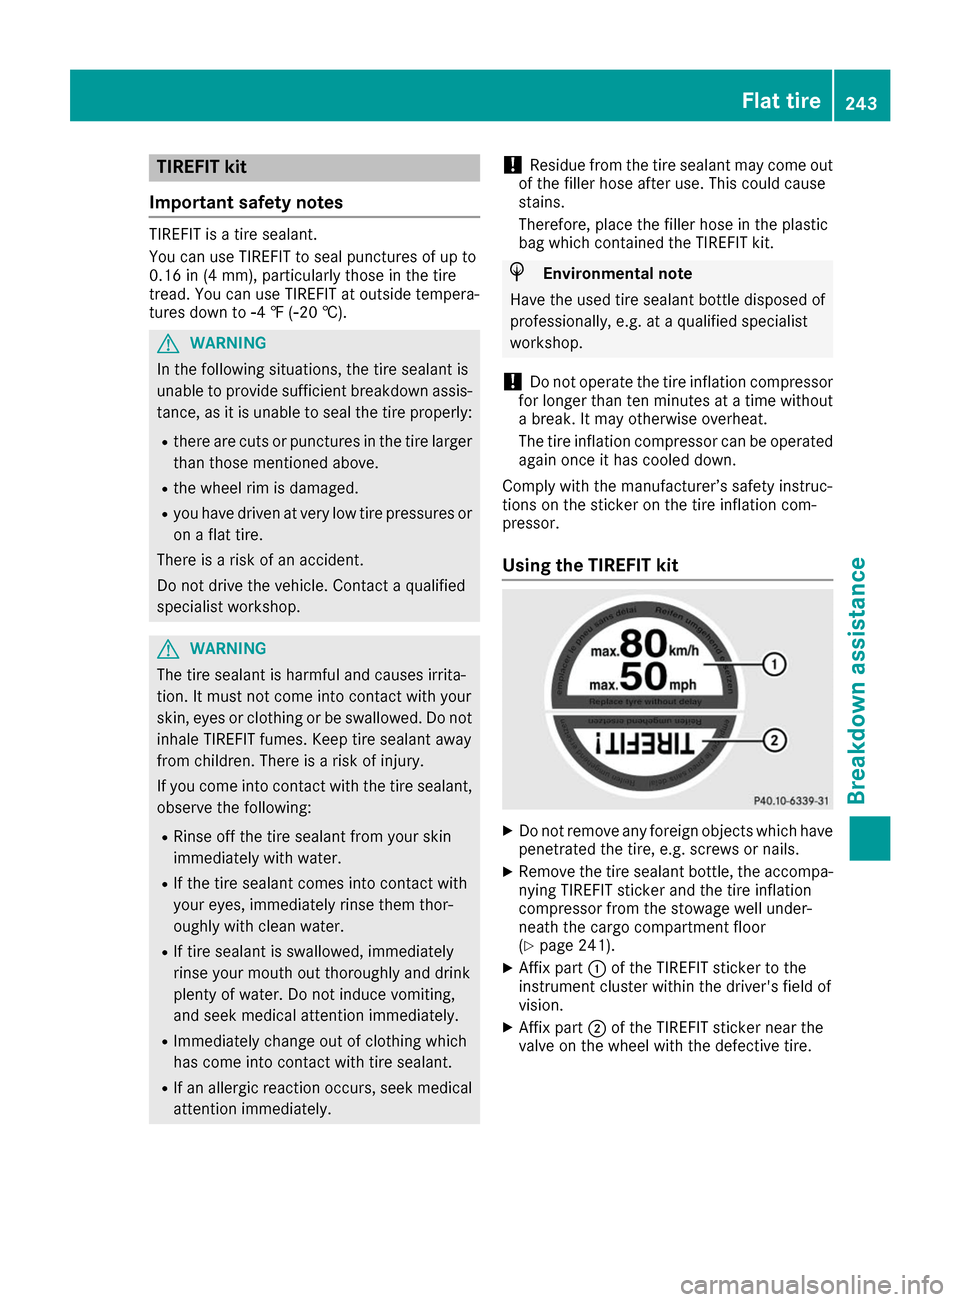
X Affix part 0043of the TIREFIT sticker to the
instrument cluster within the driver's field of
vision.
X Affix part 0044of the TIREFIT sticker near the
valve on the wheel with the defective tire. Flat tire
243Breakdown assistance Z
Page 246 of 290

X
Remove filler hose 0084and connector 0087from
the bottom section of the tire inflation com-
pressor housing 0044.
X Slide the yellow filler hose connector into the
mounting on yellow cap 0083of tire sealant filler
bottle 0043until the connector engages.
X With the sealing rings in front, slide yellow cap
0083 of tire sealant bottle 0043into the mounting
of tire inflation compressor 0044.
Yellow cap 0083and both hooks must engage. X
Remove the cap from valve 006Bon the faulty
tire.
X Screw filler hose 006Conto valve 006B.
X Insert plug 0087into a 12 V socket in your vehi-
cle.
Observe the notes on sockets (Y page 218).
X Turn the SmartKey to position 1in the ignition
lock (Y page 109).
X Press on and off switch 0085on the tire inflation
compressor to ON.
The tire inflation compressor is switched on.
The tire is inflated.
First, tire sealant is pumped into the tire. The
pressure can briefly rise to approximately
500 kPa (5 bar/73 psi). Do not switch off the tire inflation com-
pressor during this phase.
X Let the tire inflation compressor run for a
maximum of ten minutes. The tire should then
have attained a pressure of at least 200 kPa
(2.0 bar/29 psi).
If a pressure of 200 kPa (2.0 bar/29 psi) has
been at tained after five minutes, see "Tire pres-
sure reached" (Y page 245).
If a tire pressure of 200 kPa (2.0 bar/29 psi) has not been attained after five minutes, see "Tire
pressure not reached" (Y page 244).
If tire sealant has escaped, clean it off affected
areas as quickly as possible. Use plain water if
possible.
If your clothes are soiled with tire sealant, have them cleaned with perchloroethylene at a dry
cleaner as soon as possible.
Tire pressure not reached If a tire pressure of 200 kPa (2.0 bar/29 psi) has
not been attained after ten minutes:
X Switch off the tire inflation compressor.
X Unscrew the filler hose from the valve of the
faulty tire.
Note that tire sealant may escape when you
unscrew the filler hose.
X Very slowly drive forwards or reverse approx-
imately 30 ft (10 m).
X Pump up the tire again.
After a maximum of ten minutes, the tire pres-
sure must be at least 200 kPa (2.0 bar/
29 psi). G
WARNING
If the required tire pressure is not reached
after the specified time, the tire is too badly
damaged. The tire sealant cannot repair the
tire in this instance. Damaged tires and a tire pressure that is too low can significantly
impair the vehicle's braking and driving char-
acteristics. There is a risk of accident.
Do not continue driving. Contact a qualified
specialist workshop. 244
Flat tireBreakdown assistance
Page 247 of 290

Tire pressure reached
G
WARNING
A tire temporarily sealed with tire sealant
impairs the driving characteristics and is not
suitable for higher speeds. There is a risk of
accident.
You should therefore adapt your driving style
accordingly and drive carefully. Do not exceed the specified maximum speed with a tire that
has been repaired using tire sealant.
The maximum permissible speed for a tire
sealed with tire sealant is 50 mph (80 km/h).
The upper part of the TIREFIT sticker must be
affixed to the instrument cluster in the driver's
field of vision.
If a tire pressure of 200 kPa (2.0 bar/29 psi) has been attained after ten minutes:
X Switch off the tire inflation compressor.
X Unscrew the filler hose from the valve of the
faulty tire.
Note that tire sealant may escape when you
unscrew the filler hose.
X Stow the tire sealant bottle and the tire infla-
tion compressor.
X Pull away immediately.
X Stop after driving for approximately ten
minutes and check the tire pressure with the
tire inflation compressor.
The tire pressure must now be at least
130 kPa (1.3 bar/19 psi). G
WARNING
If the required tire pressure is not reached
after driving for a short period, the tire is too
badly damaged. The tire sealant cannot repair the tire in this instance. Damaged tires and a
tire pressure that is too low can significantly
impair the vehicle's braking and driving char-
acteristics. There is a risk of accident.
Do not continue driving. Contact a qualified
specialist workshop.
i In cases such as the one mentioned above,
contact an authorized Mercedes-Benz Cen-
ter. Or call 1-800-FOR-MERCedes (in the
USA) or 1-800-387-0100 (in Canada). X
Correct the tire pressure if it is still at least
130 kPa (1.3 bar/19 psi). See the Tire and
Loading Information placard on the driver's
side B-pillar or the tire pressure table in the
charge socket flap for values.
X To increase the tire pressure: switch on the
tire inflation compressor. X
To reduce the tire pressure: depress pres-
sure release button 0043next to pressure
gauge 0044.
X When the tire pressure is correct, unscrew the
filler hose from the valve of the sealed tire.
Note that tire sealant may escape when you
unscrew the filler hose.
X Screw the valve cap onto the tire valve of the
sealed tire. X
To remove the tire sealant bottle from the tire
inflation compressor, press together the lock- ing tabs on the yellow cap.
X Pull the tire sealant bottle out of the tire infla-
tion compressor.
The filler hose remains attached to the tire
sealant bottle. Flat tire
245Breakdown assistance Z
Page 255 of 290

Installing/removing the towing eye
Installing the towing eye The brackets for the screw-in towing eye are
located in the bumpers. They are at the rear and
at the front, under covers 0043.
X Remove the towing eye from the stowage
space.
The towing eye is located in the stowage well
under the cargo compartment floor.
Vehicles with the TIREFIT kit: the towing eye is
beneath the tire inflation compressor.
X Press the mark on cover 0043inwards in the
direction of the arrow.
X Take cover 0043off the opening.
X Screw in the towing eye clockwise to the stop.
Removing the towing eye X
Unscrew and remove the towing eye.
X Place the towing eye in the stowage well
beneath the cargo compartment floor in the
cargo compartment (Y page 241).
X Vehicles with the TIREFIT kit: put back the tire
inflation compressor. Towing a vehicle with both axles on
the ground
It is important that you observe the safety
instructions when towing away your vehicle
(Y page 251). X
Vehicles with KEYLESS-GO: use the Smart-
Key instead of the Start/Stop button
(Y page 110).
The transmission automatically shifts to posi-
tion Pwhen you open the driver's or front-
passenger door or when you remove the Smart-
Key from the ignition lock. In order to ensure
that the transmission stays in position Nwhen
towing the vehicle, you must observe the fol-
lowing points:
X Make sure that the vehicle is stationary.
X Turn the SmartKey to position 2in the ignition
lock.
X Depress and hold the brake pedal.
X Shift the transmission to position N.
X Release the brake pedal.
X Release the electric parking brake.
X Switch on the hazard warning lamps
(Y page 89).
X Leave the SmartKey in position 2in the igni-
tion lock.
If the 12 V battery indicator lamp lights up, you must observe the following points:
X Pull over and stop the vehicle safely as soon
as possible, paying attention to road and traf-
fic conditions.
X Shift the transmission to position P.
X Apply the electric parking brake.
i In order to signal a change of direction when
towing the vehicle with the hazard warning
lamps switched on, use the combination
switch as usual. In this case, only the indicator lamps for the direction of travel flash. After
resetting the combination switch, the hazard
warning lamp starts flashing again. Towing the vehicle with the front axle
raised
Observe the important safety notes when tow-
ing your vehicle with the front axle raised
(Y page 251).
! The ignition must be switched off if the vehi-
cle is being towed with the front axle raised.
Otherwise, ESP ®
may intervene and damage
the brake system. Towing
253Breakdown assistance Z