2017 LINCOLN MKX Back door
[x] Cancel search: Back doorPage 54 of 587

SIDE AIRBAGS
WARNINGS
Do not place objects or mount
equipment on or near the airbag cover,
on the side of the seatbacks (of the front
seats), or in front seat areas that may come
into contact with a deploying airbag. Failure
to follow these instructions may increase the
risk of personal injury in the event of a crash. Do not use accessory seat covers. The
use of accessory seat covers may
prevent the deployment of the side airbags
and increase the risk of injury in an accident. Do not lean your head on the door. The
side airbag could injure you as it
deploys from the side of the seatback. Do not attempt to service, repair, or
modify the seat airbag supplemental
restraint systems, its fuses or the seat cover
on a vehicle containing seat airbags as you
could be seriously injured or killed. Contact
your authorized dealer as soon as possible. WARNINGS
If the side airbag has deployed, the
airbag will not function again. The side
airbag system (including the seat) must be
inspected as soon as possible. If the airbag
is not replaced, the unrepaired area will
increase the risk of injury in a crash. The side airbags are on the outboard side
of the seatbacks of the front seats. The
airbag was designed to inflate between the
door panel and occupant to further enhance
the protection provided to occupants in
certain side impact crashes. The system consists of the following:
•
A label or embossed side panel
indicating that side airbags are fitted to
your vehicle.
• Side airbags inside the driver and front
passenger seatbacks.
• Front passenger sensing system. Crash sensors and monitoring
system with readiness indicator.
See Crash Sensors and Airbag
Indicator (page 53).
The design and development of the side
airbag system included recommended
testing procedures that were developed by
a group of automotive safety experts known
as the Side Airbag Technical Working Group.
These recommended testing procedures
help reduce the risk of injuries related to the
deployment of side airbags.
51
MKX (CD9) Canada/United States of America, enUSA, First Printing Supplementary Restraints SystemE152533 E67017
Page 60 of 587

REMOTE CONTROL
Intelligent Access Key
The intelligent access keys operate the
power locks and the remote start system.
The key must be in your vehicle to activate
the push-button start system.
Removable Key Blade
The intelligent access key also contains a
removable mechanical key blade that you
can use to unlock the driver door. Slide the release on the back of the remote
control and pivot the cover off to access the
key blade.
Note:
Your vehicle ’s backup keys came with
a security tag that provides important vehicle
key cut information. Keep the tag in a safe
place for future reference. Replacing the Battery
Note:
Refer to local regulations when
disposing of transmitter batteries.
Note: Do not wipe off any grease on the
battery terminals or on the back surface of
the circuit board.
Note: Replacing the battery will not delete
the transmitter programming to your vehicle.
The transmitter should operate normally
after you replace the battery.
A message will appear in the information
display when the remote control battery is
low. See General Information (page 114).
Intelligent Access Transmitter
The remote control uses two coin-type
three-volt lithium batteries CR2025 or
equivalent.
57
MKX (CD9) Canada/United States of America, enUSA, First Printing Keys and Remote ControlsE144506 E208898 E151795
Page 61 of 587

1. Slide the release on the back of the
remote control and pivot the cover off. 2. Insert a coin into the slot and twist to
separate the housing. 3. Remove the batteries.
4. Install new batteries with the + facing
each other.
Note: Make sure to replace the label
between the two batteries.
5. Reinstall the housing and cover.
Car Finder Press the button twice within three
seconds. The horn will sound and
the turn signals will flash. We
recommend you use this method to locate
your vehicle, rather than using the panic
alarm. Sounding a Panic Alarm
Note:
The panic alarm will only operate
when the ignition is off. Press the button to activate the
alarm. Press the button again or
switch the ignition on to deactivate.
Remote Start WARNING
To avoid exhaust fumes, do not use
remote start if your vehicle is parked
indoors or in areas that are not well
ventilated. Note:
Do not use remote start if your vehicle
is low on fuel. The remote start button is on the
transmitter.
This feature allows you to start your vehicle
from outside the vehicle. The transmitter has
an extended operating range.
58
MKX (CD9) Canada/United States of America, enUSA, First Printing Keys and Remote ControlsE176225 E153890 E176226 E138623 E138624 E138625
Page 83 of 587

2. With the buttons facing the rear of your
vehicle and the key ring up, place the
first intelligent access key into the
backup slot inside the center console.
3. Press the push button ignition switch once and wait a few seconds.
4. Press the push button ignition switch again and remove the key.
5. Insert the second programmed key into the backup slot, then press the push
button ignition switch. The factory-set code appears in the
information display for a few seconds.
Note:
The code may not display until after
any other warning messages first display.
80
MKX (CD9) Canada/United States of America, enUSA, First Printing Doors and LocksE203694
2
Page 85 of 587

Make sure that the ignition is switched off
before beginning this procedure. Make sure
that you close all the doors before beginning
and that they remain closed throughout the
procedure. Carry out all steps within 30
seconds of starting the sequence. Stop and
wait for at least one minute before starting
again if you carry out any steps out of
sequence.
Read and understand the entire procedure
before you begin. 1. Open the floor console storage
compartment lid. 2. With the buttons facing the rear of your
vehicle and the key ring up, place the
intelligent access key into the backup
slot.
3. Press the push button ignition switch.
4. Wait five seconds and then press the push button ignition switch again.
5. Remove the intelligent access key. 6. Within 10 seconds, place a second
programmed intelligent access key in the
backup slot and press the push button
ignition switch.
7. Wait five seconds and then press the push button ignition switch again.
8. Remove the intelligent access key.
9. Wait five seconds, then place the unprogrammed intelligent access key in
the backup slot and press the push
button ignition switch.
Programming is now complete. Check that
the remote control functions operate and
your vehicle starts with the new intelligent
access key.
If programming was unsuccessful, wait 10
seconds and repeat Steps 1 through 7. If
programming remains unsuccessful, contact
an authorized dealer.
82
MKX (CD9) Canada/United States of America, enUSA, First Printing SecurityE203693
1 E203694
2
Page 100 of 587

Note:
There may be a delay of up to five
seconds before the system will operate when
the vehicle is first driven.
Note: The system is only active at speeds
above 3 mph (5 km/h).
When the vehicle is started, the lamps track
to a predetermined position, then back to
center to alert the driver that the system is
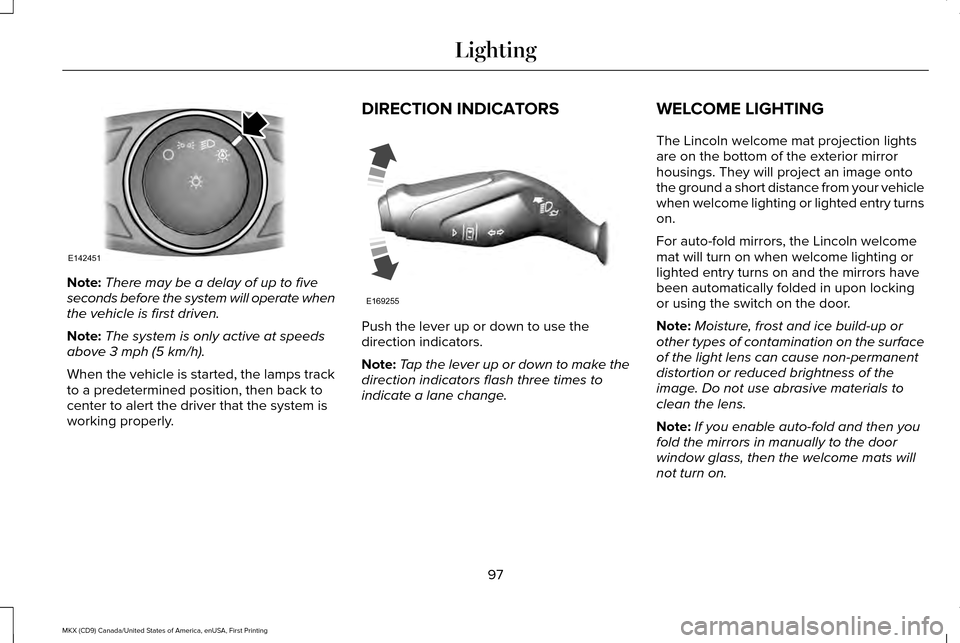
working properly. DIRECTION INDICATORS
Push the lever up or down to use the
direction indicators.
Note:
Tap the lever up or down to make the
direction indicators flash three times to
indicate a lane change. WELCOME LIGHTING
The Lincoln welcome mat projection lights
are on the bottom of the exterior mirror
housings. They will project an image onto
the ground a short distance from your vehicle
when welcome lighting or lighted entry turns
on.
For auto-fold mirrors, the Lincoln welcome
mat will turn on when welcome lighting or
lighted entry turns on and the mirrors have
been automatically folded in upon locking
or using the switch on the door.
Note:
Moisture, frost and ice build-up or
other types of contamination on the surface
of the light lens can cause non-permanent
distortion or reduced brightness of the
image. Do not use abrasive materials to
clean the lens.
Note: If you enable auto-fold and then you
fold the mirrors in manually to the door
window glass, then the welcome mats will
not turn on.
97
MKX (CD9) Canada/United States of America, enUSA, First Printing LightingE142451 E169255
Page 101 of 587

INTERIOR LAMPS
The lamps will turn on when you have met
one of the following conditions:
•
You open any door.
• You press a remote control button.
• You press the all lamps on button on the
front interior lamp.
Front Interior Lamp
Note: The front interior lamp buttons are on
the overhead console. The exact location of
each button on the overhead console
depends upon which roof, moonroof, and
window shade features are equipped on the
vehicle. Note:
Press the button to switch the door
function off when you open any door. The
indicator lamp will light amber when the door
function is off. When the door function is off
and you open a door, the courtesy and door
lamps will stay off. Press the button again to
switch the door function back on. The
indicator lamp will light amber when the door
function is on. When the door function is on
and you open a door, the courtesy and door
lamps will light. Type 1
All lamps on button
A
Door function button
B
All lamps off button
C
Individual dome lamps
D
98
MKX (CD9) Canada/United States of America, enUSA, First Printing LightingE201074
DDCAB
Page 116 of 587

WARNING
Under engine misfire conditions,
excessive exhaust temperatures could
damage the catalytic converter, the fuel
system, interior floor coverings or other
vehicle components, possibly causing a fire.
Have your vehicle serviced immediately. The service engine soon indicator light
illuminates when you first switch the ignition
on before engine start to check the bulb and
to indicate whether the vehicle is ready for
Inspection/Maintenance (I/M) testing.
Normally, the service engine soon light stays
on until you crank the engine, then turns
itself off if no malfunctions are present.
However, if after 15 seconds the service
engine soon light blinks eight times, it means
that the vehicle is not ready for I/M testing.
See Emission Control System (page 180).
Stability Control It flashes when the system is
active. If it remains illuminated or
does not illuminate when you
switch the ignition on, this indicates a
malfunction. During a malfunction the system
switches off. Have the system checked by
an authorized dealer immediately.
See
Using Stability Control (page 205).
Stability Control Off It illuminates when you switch the
system off. It goes out when you
switch the system back on or when
you switch the ignition off.
AUDIBLE WARNINGS AND
INDICATORS
Keyless Warning Alert
The horn will sound twice when you exit your
vehicle with the intelligent access key and
your vehicle is in RUN, indicating your vehicle
is still on. Headlamps On Warning Chime
Sounds when you remove the key from the
ignition and open the driver's door and you
have left the headlamps or parking lamps
on.
Parking Brake On Warning Chime
Sounds when you have left the parking brake
on and drive your vehicle. If the warning
chime remains on after you have released
the parking brake, have the system checked
by your authorized dealer immediately.
113
MKX (CD9) Canada/United States of America, enUSA, First Printing Instrument ClusterE138639 E130458