Page 152 of 584

WARNINGS
The head restraint is a safety device.
Whenever possible it should be
installed and properly adjusted when the
seat is occupied. Failure to adjust the head
restraint properly could reduce its
effectiveness during certain impacts. Install the head restraint properly to
help minimize the risk of neck injury in
the event of a crash. Note:
Adjust the seatback to an upright
driving position before adjusting the head
restraint. Adjust the head restraint so that
the top of it is level with the top of your head
and as far forward as possible. Make sure
that you remain comfortable. If you are
extremely tall, adjust the head restraint to
its highest position. Front seat manual head restraints (If
Equipped) The front head restraints consist of:
An energy absorbing head
restraint.
A
Two steel stems.
B
Guide sleeve adjust and unlock
button.
C
Guide sleeve unlock and remove
button.
D Raising the Head Restraint
Pull the head restraint up.
Lowering the Head Restraint
1. Press and hold button C.
2. Push the head restraint down.
Removing the Head Restraint
1.
Pull the head restraint up until it reaches
its highest position.
2. Press and hold buttons C and D.
3. Pull the head restraint up.
Installing the Head Restraint
Align the steel stems into the guide sleeves
and push the head restraint down until it
locks.
149
Continental (CPL) Canada/United States of America, enUSA, First Printing SeatsE138642
Page 153 of 584

Rear seat outboard head restraints
The rear outboard head restraints consist of:
An energy absorbing head
restraint.
A
Two steel stems.
B
Guide sleeve unlock and remove
button.
C
Fold button (If equipped).
D
Removing the Head Restraint
1. Press and hold both C buttons.
2. Pull the head restraint up. Installing the Head Restraint
Align the steel stems into the guide sleeves
and push the head restraint down until it
locks.
Folding the Head Restraint
1. Press and hold button D.
2. Pull it back up to reset.
Rear seat center head restraint The rear center head restraint consists of:
An energy absorbing head
restraint.
A
Two steel stems.
B
Guide sleeve adjust and unlock
button.
C
Guide sleeve unlock and remove
button.
D
Raising the Head Restraint
Pull the head restraint up.
Lowering the Head Restraint
1. Press and hold button C.
2. Push the head restraint down.
Removing the Head Restraint
1. Pull the head restraint up until it reaches
its highest position.
2. Press and hold buttons C and D.
3. Pull the head restraint up.
150
Continental (CPL) Canada/United States of America, enUSA, First Printing SeatsE162605 E138645
Page 154 of 584
Installing the Head Restraint
Align the steel stems into the guide sleeves
and push the head restraint down until it
locks.
Tilting Manual Head Restraints
The front seat head restraints tilt for extra
comfort. To tilt the head restraint, do the
following:
1.
Adjust the seatback to an upright driving
or riding position. 2. Pivot the head restraint forward toward
your head to the desired position.
After the head restraint reaches the
forward-most tilt position, pivot it forward
again to release it to the rearward, un-tilted
position.
Power Front Head Restraints (If equipped) Power Rear Head Restraints (If Equipped)
Press the button on the overhead console
to fold the rear outboard head restraints.
151
Continental (CPL) Canada/United States of America, enUSA, First Printing SeatsE144727 E222280 E229803
Page 155 of 584
POWER SEATS
WARNINGS
Do not adjust the driver seat or seat
backrest when your vehicle is moving.
This may result in sudden seat movement, WARNINGS
causing the loss of control of your vehicle. Do not place cargo or any objects
behind the seatback before returning
it to the original position. The power seat controls are on the door.
152
Continental (CPL) Canada/United States of America, enUSA, First Printing Seats
Page 156 of 584
153
Continental (CPL) Canada/United States of America, enUSA, First Printing SeatsE222307
Page 157 of 584
Power Lumbar Adjusting the Length of the Seat Cushion
(If equipped) Adjusting the Upper Seatback (If equipped)
Multi-Contour Front Seats With Active
Motion (If Equipped)
Note: The massage system turns off after
20 minutes.
Note: The engine must be running or the
vehicle must be in accessory mode to
activate the seats.
Note: Allow a few seconds for any selection
to activate. The seatback and cushion
massage cannot function at the same time.
154
Continental (CPL) Canada/United States of America, enUSA, First Printing SeatsE222308 E221053 E222281
Page 158 of 584
Massage mode
Massage intensity increase
A
Massage feature selection
B
Massage intensity decrease
C
On and off
D
155
Continental (CPL) Canada/United States of America, enUSA, First Printing SeatsE222219
Page 159 of 584

You can also adjust this feature through the
touchscreen.
Press the Menu Settings icon, then
Vehicle. Choose Multi-Contour
Seats.
When switched on, the system displays
directions for you to adjust the lumbar
settings in your seat or to set the massage
function.
To access and make adjustments to the
lumbar setting:
1. Choose the desired seat to adjust.
2. Press the + or - to adjust the lumbar intensity.
To access and make adjustments to the
massage setting:
1. Press the Menu Settings icon, then Vehicle. Choose Multi-Contour Seats.
2. Choose the desired seat to adjust.
3. Press OFF, Low or High. MEMORY FUNCTION (If Equipped) WARNINGS
Before activating the memory seat,
make sure that the area immediately
surrounding the seat is clear of obstructions
and that all occupants are clear of moving
parts. Do not use the memory function when
your vehicle is moving.
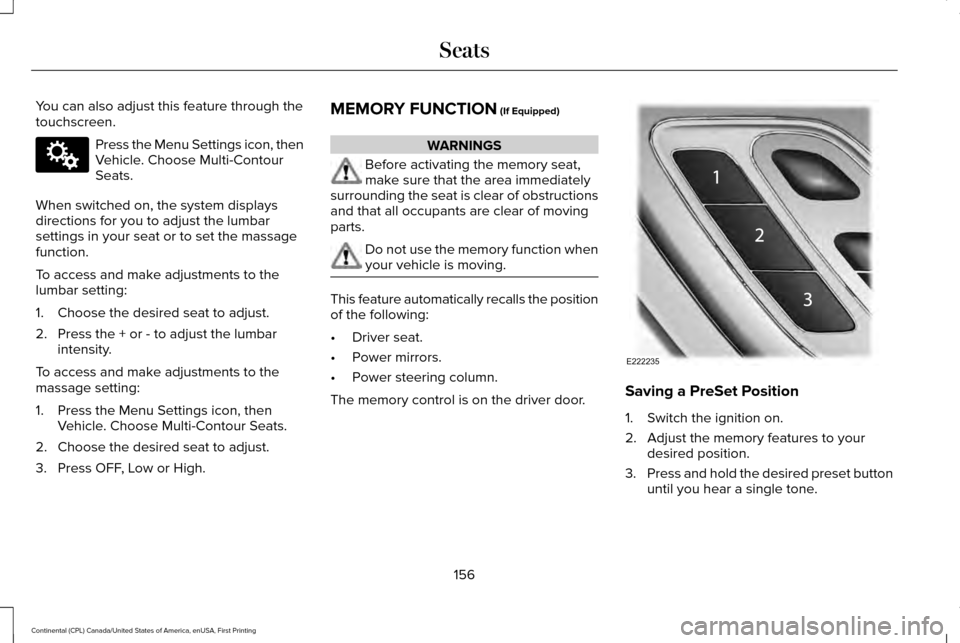
This feature automatically recalls the position
of the following:
•
Driver seat.
• Power mirrors.
• Power steering column.
The memory control is on the driver door. Saving a PreSet Position
1. Switch the ignition on.
2. Adjust the memory features to your
desired position.
3. Press and hold the desired preset button
until you hear a single tone.
156
Continental (CPL) Canada/United States of America, enUSA, First Printing SeatsE142607 E222235