2017 LINCOLN CONTINENTAL air filter
[x] Cancel search: air filterPage 322 of 584

You may notice a reduction in vehicle speed
caused by reduced engine power. In order
to manage the engine coolant temperature.
Your vehicle may enter this mode if certain
high-temperature and high-load conditions
take place. The amount of speed reduction
depends on vehicle loading, grade and
ambient temperature. If this occurs, there is
no need to pull off the road. You can
continue to drive your vehicle.
The air conditioning may automatically turn
on and off during severe operating
conditions to protect the engine from
overheating. When the coolant temperature
decreases to the normal operating
temperature, the air conditioning turns on.
If the coolant temperature gauge moves fully
into the red zone, or if the coolant
temperature warning or service engine soon
messages appear in your information display,
do the following:
1. Pull off the road as soon as safely
possible and shift the transmission into
park (P). 2. Leave the engine running until the
coolant temperature gauge needle
returns to the normal position. After
several minutes, if the temperature does
not drop, follow the remaining steps.
3. Switch the engine off and wait for it to cool. Check the coolant level.
4. If the coolant level is at or below the minimum mark, add prediluted coolant
immediately.
5. If the coolant level is normal, restart the engine and continue.
AUTOMATIC TRANSMISSION
FLUID CHECK
6F50/6F55 Transmission
(If Equipped) WARNINGS
The dipstick cap and surrounding
components may be hot, use gloves.
Use gloves when moving the air filter
assembly. Components will be hot. Note:
Automatic transmission fluid expands
when warmed. To obtain an accurate fluid
check, drive your vehicle until you warm it
up, approximately
20 mi (30 km). If you
operate your vehicle for an extended period
at high speeds, in city traffic during hot
weather or pulling a trailer, switch your
vehicle off until it reaches normal operating
temperatures to allow the fluid to cool before
checking. Depending on vehicle use, cooling
times could take up to 30 minutes or longer.
Refer to your scheduled maintenance
information for scheduled intervals for fluid
checks and changes. Your transmission does
not consume fluid. However, you should
check the fluid level if the transmission is not
working properly. For example, if the
transmission slips or shifts slowly or if you
notice some sign of a fluid leak.
1. Drive your vehicle 20 mi (30 km) or until it reaches normal operating temperature.
2. Park your vehicle on a level surface and engage the parking brake.
319
Continental (CPL) Canada/United States of America, enUSA, First Printing Maintenance
Page 323 of 584

3.
With the parking brake engaged and your
foot on the brake pedal, start the engine
and move the gearshift lever through all
of the gear ranges. Allow a minimum of
10 seconds for each gear to engage.
4. Put the gearshift lever in park (P) and leave the engine running.
Note: For vehicles with the EcoBoost engine,
move the air filter assembly aside to access
the transmission dipstick. See Moving the
Air Filter Assembly for more information.
5. Remove the dipstick and wipe it clean with a dry, lint free clean rag. If
necessary, refer to the Under hood
overview in this chapter for the location
of the dipstick.
6. Install the dipstick making sure you fully seat it in the filler tube by turning it to the
locked position.
7. Remove the dipstick and inspect the fluid
level. The fluid should be in the
designated areas for normal operating
temperature. Moving the Air Filter Assembly (Accessing
the Dipstick) WARNING
Do not run engine with the air filter
disconnected.
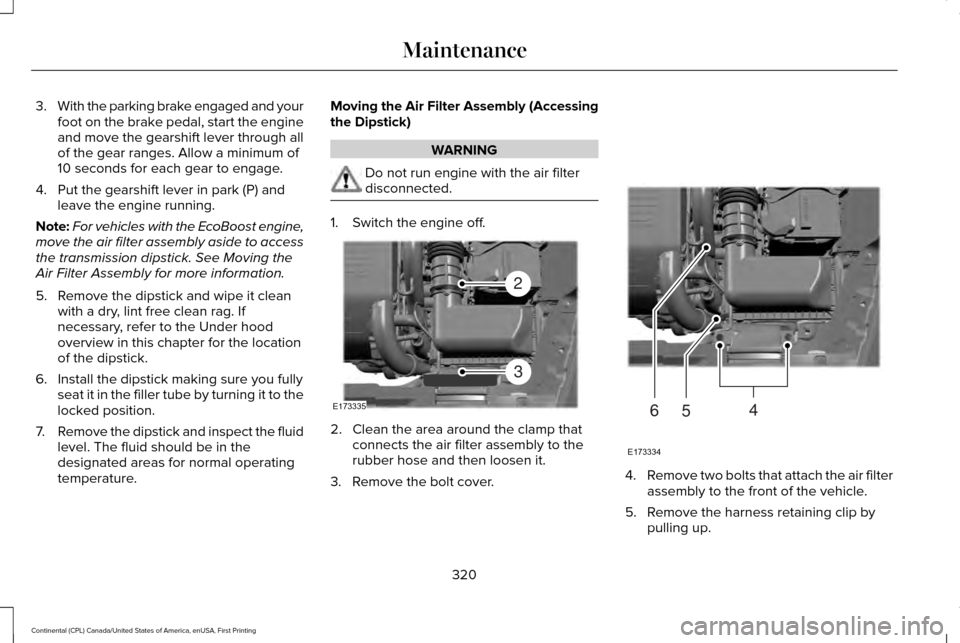
1. Switch the engine off.
2. Clean the area around the clamp that
connects the air filter assembly to the
rubber hose and then loosen it.
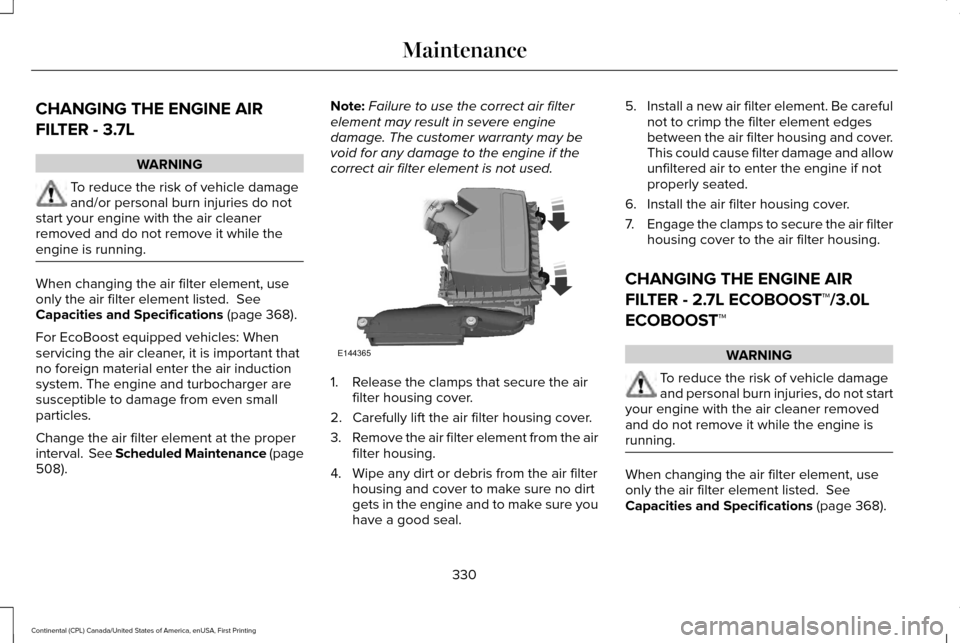
3. Remove the bolt cover. 4.
Remove two bolts that attach the air filter
assembly to the front of the vehicle.
5. Remove the harness retaining clip by pulling up.
320
Continental (CPL) Canada/United States of America, enUSA, First Printing MaintenanceE173335
2
3 E173334
654
Page 324 of 584

6. Do not disconnect the sensor.
7. Pull the air filter assembly up to
disconnect it from the seated grommets
located under the air filter assembly.
8. Rotate the air filter assembly 90 degrees
counterclockwise. Make sure the rubber
hose is still connected to the air filter
assembly.
9. Tighten the clamp.
You can now access the transmission fluid
level indicator. Checking the fluid level
Low fluid level
If the fluid level is below the MIN range of
the dipstick, add fluid to reach the hash mark
level.
Note:
If the fluid level is below the MIN level,
do not drive the vehicle. An underfill
condition may cause shift or engagement
concerns or possible damage. Correct fluid level Check the transmission fluid at the normal
operating temperatures between 180°F
(82°C) and 200°F (93°C) on a level surface.
Drive your vehicle until you warm it up to the
normal operating temperature after
approximately 20 mi (30 km).
Target the transmission fluid level within the
cross-hatch area if at the normal operating
temperature between 180°F (82°C) and 200°F
(93°C).
321
Continental (CPL) Canada/United States of America, enUSA, First Printing MaintenanceE173400 E158842 E158843
Page 325 of 584

High fluid level
If the fluid level is above the MAX range of
the dipstick, remove fluid to reach the
hashmark level.
Note:
Fluid level above the MAX level may
cause shift or engagement concerns or
possible damage. An overheating condition
can cause high fluid levels. If you operate
your vehicle for an extended period at high
speeds, in city traffic during hot weather or
pulling a trailer, you should switch your
vehicle off until your vehicle reaches normal
operating temperatures. Depending on
vehicle use, cooling times could take up to
30 minutes or longer. Adjusting Automatic Transmission Fluid
Levels
Before adding any fluid, make sure the
correct type is used. The type of fluid used
is normally indicated on the dipstick and in
the Technical Specifications section in this
chapter.Note:
An overfill condition of transmission
fluid may cause shift or engagement
concerns or possible damage.
Do not use supplemental transmission fluid
additives, treatments or cleaning agents. The
use of these materials may affect
transmission operation and result in damage
to internal transmission components.
Reinstall the air filter assembly. After you
check the fluid level and adjust as necessary,
do the following:
1. Switch the engine off.
2. Loosen the clamp holding the air filter assembly to the rubber hose.
3. Seat the air filter assembly back into the
grommets by pushing down on the air
filter assembly.
4. Tighten the clamp.
5. Install and tighten the two bolts that attach the air filter assembly to the front
of the vehicle.
6. Install the bolt cover.
7. Reinstall the harness retaining clip into the front of the air filter assembly.
322
Continental (CPL) Canada/United States of America, enUSA, First Printing MaintenanceE158844 E158845 E158846
Page 333 of 584

CHANGING THE ENGINE AIR
FILTER - 3.7L
WARNING
To reduce the risk of vehicle damage
and/or personal burn injuries do not
start your engine with the air cleaner
removed and do not remove it while the
engine is running. When changing the air filter element, use
only the air filter element listed. See
Capacities and Specifications (page 368).
For EcoBoost equipped vehicles: When
servicing the air cleaner, it is important that
no foreign material enter the air induction
system. The engine and turbocharger are
susceptible to damage from even small
particles.
Change the air filter element at the proper
interval. See Scheduled Maintenance (page
508
). Note:
Failure to use the correct air filter
element may result in severe engine
damage. The customer warranty may be
void for any damage to the engine if the
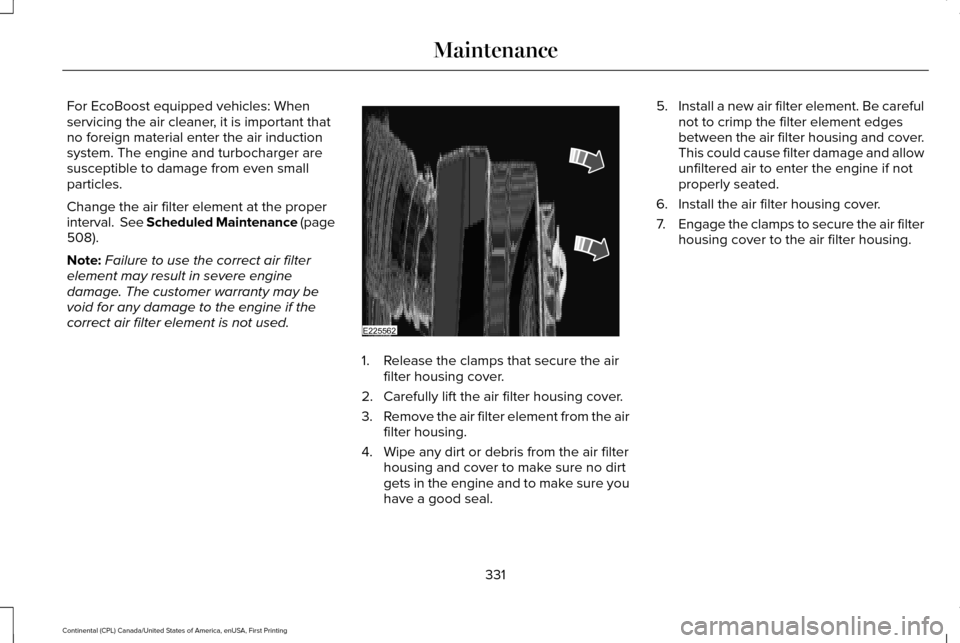
correct air filter element is not used. 1. Release the clamps that secure the air
filter housing cover.
2. Carefully lift the air filter housing cover.
3. Remove the air filter element from the air
filter housing.
4. Wipe any dirt or debris from the air filter housing and cover to make sure no dirt
gets in the engine and to make sure you
have a good seal. 5.
Install a new air filter element. Be careful
not to crimp the filter element edges
between the air filter housing and cover.
This could cause filter damage and allow
unfiltered air to enter the engine if not
properly seated.
6. Install the air filter housing cover.
7. Engage the clamps to secure the air filter
housing cover to the air filter housing.
CHANGING THE ENGINE AIR
FILTER - 2.7L ECOBOOST™/3.0L
ECOBOOST™ WARNING
To reduce the risk of vehicle damage
and personal burn injuries, do not start
your engine with the air cleaner removed
and do not remove it while the engine is
running. When changing the air filter element, use
only the air filter element listed.
See
Capacities and Specifications (page 368).
330
Continental (CPL) Canada/United States of America, enUSA, First Printing MaintenanceE144365
Page 334 of 584

For EcoBoost equipped vehicles: When
servicing the air cleaner, it is important that
no foreign material enter the air induction
system. The engine and turbocharger are
susceptible to damage from even small
particles.
Change the air filter element at the proper
interval. See Scheduled Maintenance (page
508).
Note: Failure to use the correct air filter
element may result in severe engine
damage. The customer warranty may be
void for any damage to the engine if the
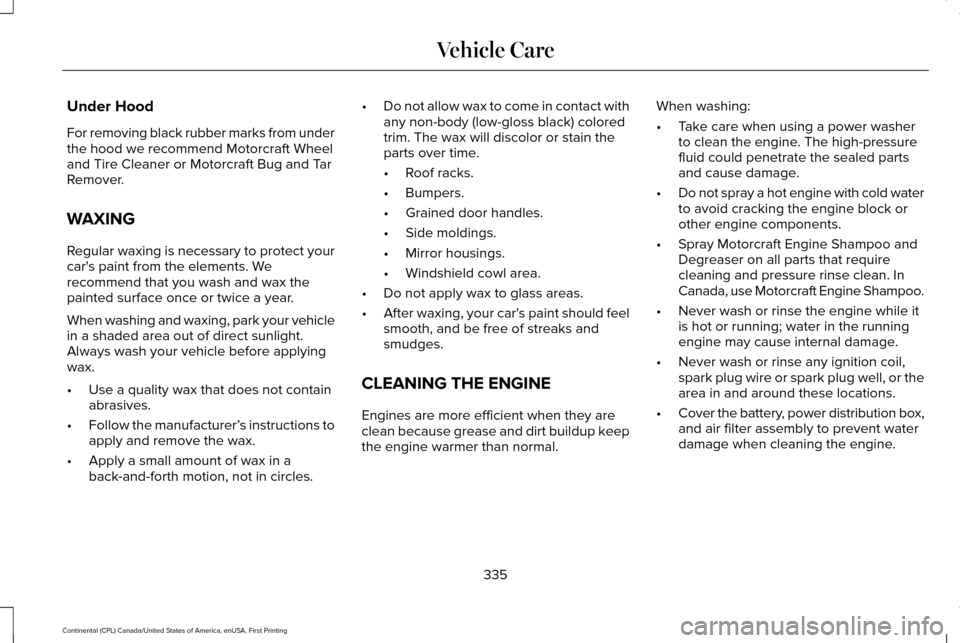
correct air filter element is not used. 1. Release the clamps that secure the air
filter housing cover.
2. Carefully lift the air filter housing cover.
3. Remove the air filter element from the air
filter housing.
4. Wipe any dirt or debris from the air filter housing and cover to make sure no dirt
gets in the engine and to make sure you
have a good seal. 5.
Install a new air filter element. Be careful
not to crimp the filter element edges
between the air filter housing and cover.
This could cause filter damage and allow
unfiltered air to enter the engine if not
properly seated.
6. Install the air filter housing cover.
7. Engage the clamps to secure the air filter
housing cover to the air filter housing.
331
Continental (CPL) Canada/United States of America, enUSA, First Printing MaintenanceE225562
Page 338 of 584

Under Hood
For removing black rubber marks from under
the hood we recommend Motorcraft Wheel
and Tire Cleaner or Motorcraft Bug and Tar
Remover.
WAXING
Regular waxing is necessary to protect your
car's paint from the elements. We
recommend that you wash and wax the
painted surface once or twice a year.
When washing and waxing, park your vehicle
in a shaded area out of direct sunlight.
Always wash your vehicle before applying
wax.
•
Use a quality wax that does not contain
abrasives.
• Follow the manufacturer’ s instructions to
apply and remove the wax.
• Apply a small amount of wax in a
back-and-forth motion, not in circles. •
Do not allow wax to come in contact with
any non-body (low-gloss black) colored
trim. The wax will discolor or stain the
parts over time.
•Roof racks.
• Bumpers.
• Grained door handles.
• Side moldings.
• Mirror housings.
• Windshield cowl area.
• Do not apply wax to glass areas.
• After waxing, your car's paint should feel
smooth, and be free of streaks and
smudges.
CLEANING THE ENGINE
Engines are more efficient when they are
clean because grease and dirt buildup keep
the engine warmer than normal. When washing:
•
Take care when using a power washer
to clean the engine. The high-pressure
fluid could penetrate the sealed parts
and cause damage.
• Do not spray a hot engine with cold water
to avoid cracking the engine block or
other engine components.
• Spray Motorcraft Engine Shampoo and
Degreaser on all parts that require
cleaning and pressure rinse clean. In
Canada, use Motorcraft Engine Shampoo.
• Never wash or rinse the engine while it
is hot or running; water in the running
engine may cause internal damage.
• Never wash or rinse any ignition coil,
spark plug wire or spark plug well, or the
area in and around these locations.
• Cover the battery, power distribution box,
and air filter assembly to prevent water
damage when cleaning the engine.
335
Continental (CPL) Canada/United States of America, enUSA, First Printing Vehicle Care
Page 375 of 584

MOTORCRAFT PARTS - 2.7L ECOBOOST™
Motorcraft Part number
Component
FA-1912
Air filter element.
FL-2062
Oil filter.
BXT-94RH7-730
Battery.
SP-542
Spark plugs.
FP-71
Cabin air filter (particulate).
FP-80
Cabin air filter (combi).
WW-2431 (driver side)
Windshield wiper blade.
WW-2050 (passenger side)
We recommend Motorcraft® replacement
parts available at your Ford dealer or at
fordparts.com for scheduled maintenance.
These parts meet or exceed Ford Motor
Company’ s specifications and are
engineered for your vehicle. Use of other
parts may impact vehicle performance,
emissions and durability. Your warranty may
be void for any damage related to use of
other parts. If a Motorcraft® oil filter is not available, use
an oil filter that meets industry performance
specification SAE/USCAR-36.
For spark plug replacement, contact an
authorized dealer. Replace the spark plugs
at the appropriate intervals. See Scheduled
Maintenance Record (page 521).
372
Continental (CPL) Canada/United States of America, enUSA, First Printing Capacities and Specifications