2017 Lexus GS F ignition
[x] Cancel search: ignitionPage 2 of 96

GS F_QG_OM30G10U_(U)
1
The Quick Guide is not intended as a substitute for your Owner’s
Manual. We strongly encourage you to review the Owner’s
Manual and supplementary manuals so you will have a better
understanding of your vehicle’ s capabilities and limitations.
12.3-inch Display............................................................................................................................... .49
ASC (Active Sound Control) ........................................................................................................ 44
Audio System Audio control screen ........................................................................................................... ....... 58
Side Display (vehicles with navigation system) ................................................................ 58
Remote control (steering wheel switches) .........................................................................59
Basic operation ................................................................................................................ ...............59
Radio ...................................................................................................................................................60
DVD player/CD player ........................................................................................................... ...60
Operating an iPod.............................................................................................................. ........... 62
Automatic High Beam ...................................................................................................................... 26
BSM (Blind Spot Monitor) .............................................................................................................. 42
Cruise Control ..................................................................................................................................... 37
Driving Mode Select Switch ..........................................................................................................40
Driving Position Memory ................................................................................................................. 14
Dynamic Radar Cruise Control ..................................................................................................33
Eco Driving Indicator ........................................................................................................................ 24
Engine (Ignition) Switch .................................................................................................................... 16
Floor mat installation ............................................................................................................................11
Front Automatic Air Conditioning System
Control panel .................................................................................................................. ................63
Control screen................................................................................................................. ............... 64
Option control screen .......................................................................................................... .......65
Side display (vehicles with 12.3-inch display) ....................................................................65
Using the automatic mode....................................................................................................... .. 66
Adjusting the temperature for the driver’s and front passenger’s seats separately (DUAL mode)
(vehicles without rear air conditioning system) .......................................................... 66
Adjusting the temperature for the driver’s, front passenger’s and rear se ats separately (3-ZONE mode)
(vehicles with rear air conditioning system) ................................................................. 66
Using the S-FLOW mode.......................................................................................................... 66
Front Seats .............................................................................................................................................. 13
Fuel Tank Cap ............................................................................................................................... ........84
Page 15 of 96

14
GS F_QG_OM30G10U_(U)
Driving Position Memory
■Driving position memory
■
Recording procedure
Check that the shift lever is in P.
Turn the engine switch to IGNITION ON mode.
Adjust the driver’s seat, steering wheel, outside rear view mirrors and HUD (head-up
display) (if equipped) to the desired positions. While pressing the “SET” button, or within
3 seconds after the “SET” button is pressed,
press button “1”, “2” or “3” until the buzzer
sounds.If the selected button has already been
preset, the previously recorded position
will be overwritten.
■Recall procedure
Check that the shift lever is in P.
Turn the engine switch to IGNITION ON mode.
Press one of the buttons for the driving
position you want to recall until the buzzer
sounds.
This feature automatically adjusts the front seats, steering wheel and outside rear view
mirrors to make entering and exiting the vehicle easier or to suit your preferences.
1
2
3
4
1
2
3
Page 16 of 96

15
GS F_QG_OM30G10U_(U)
■Memory recall function (driver’s side only)
Each electronic key (including a card key) can be registered to recall your preferred driving
position.
■Registering procedure
Check that the shift lever is in P.
Turn the engine switch to IGNITION ON mode.
Recall the driving position that you want to record.
While pressing the recalled button, press
and hold the door lock switch (either lock
or unlock) until the buzzer sounds. If the button could not be registered, the
buzzer sounds continuously for approxi-
mately 3 seconds.1
2
3
4
Page 17 of 96

16
GS F_QG_OM30G10U_(U)
Engine (Ignition) Switch
■Starting the engine
Press the parking brake switch to
check that the parking brake is set.
( P. 2 0 )
Parking brake indicator will come on.
Check that the shift lever is set in P.
Firmly depress the brake pedal.
and a message will be dis-
played on the multi-information dis-
play. If it is not displayed, the engine
cannot be started.
Press the engine switch shortly and
firmly. When operating the engine switch,
one short, firm press is enough.
It is not necessary to press and hold
the switch.
The engine will crank until it starts or
for up to 30 seconds, whichever is
less.
Continue depressing the brake pedal
until the engine is completely started.
The engine can be started from any
engine switch mode.
Performing the following operations when carrying the electronic key on your person
starts the engine or changes engine switch modes.
1
2
3
4
Page 18 of 96

17
GS F_QG_OM30G10U_(U)
■Stopping the engine
Stop the vehicle.
Set the parking brake ( P.20), and shift the shift lever to P.
Press the engine switch.
Release the brake pedal and check that “POWER ON” on the multi-information dis-
play is off.
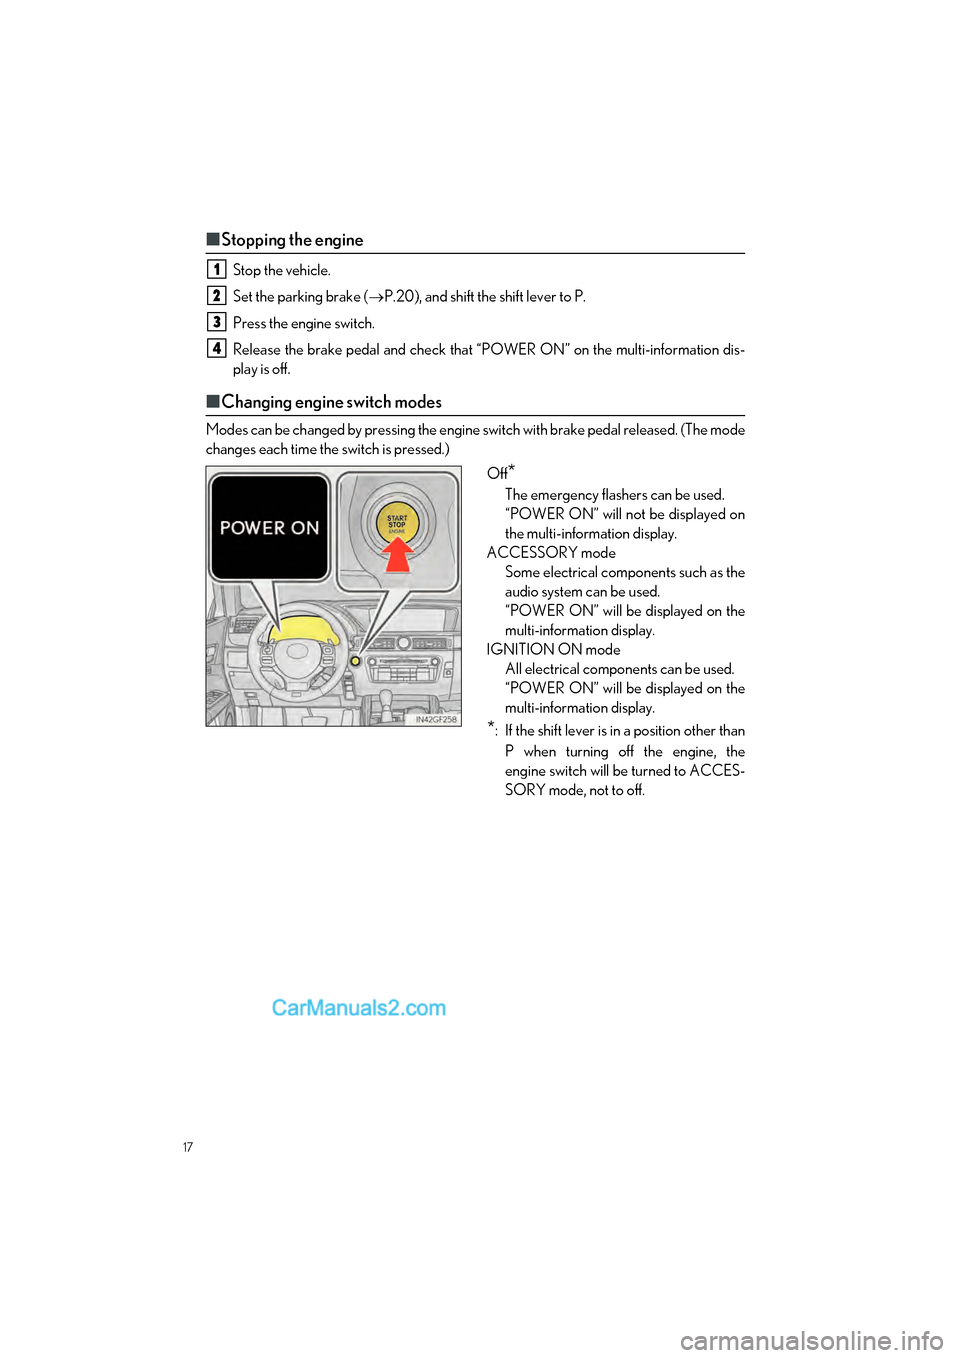
■ Changing engine switch modes
Modes can be changed by pressing the engine switch with brake pedal released. (The mode
changes each time the switch is pressed.)
Off
*
The emergency flashers can be used.
“POWER ON” will not be displayed on
the multi-information display.
ACCESSORY mode Some electrical components such as the
audio system can be used.
“POWER ON” will be displayed on the
multi-information display.
IGNITION ON mode All electrical components can be used.
“POWER ON” will be displayed on the
multi-information display.
*: If the shift lever is in a position other than
P when turning off the engine, the
engine switch will be turned to ACCES-
SORY mode, not to off.
1
2
3
4
Page 26 of 96

25
GS F_QG_OM30G10U_(U)
Headlights
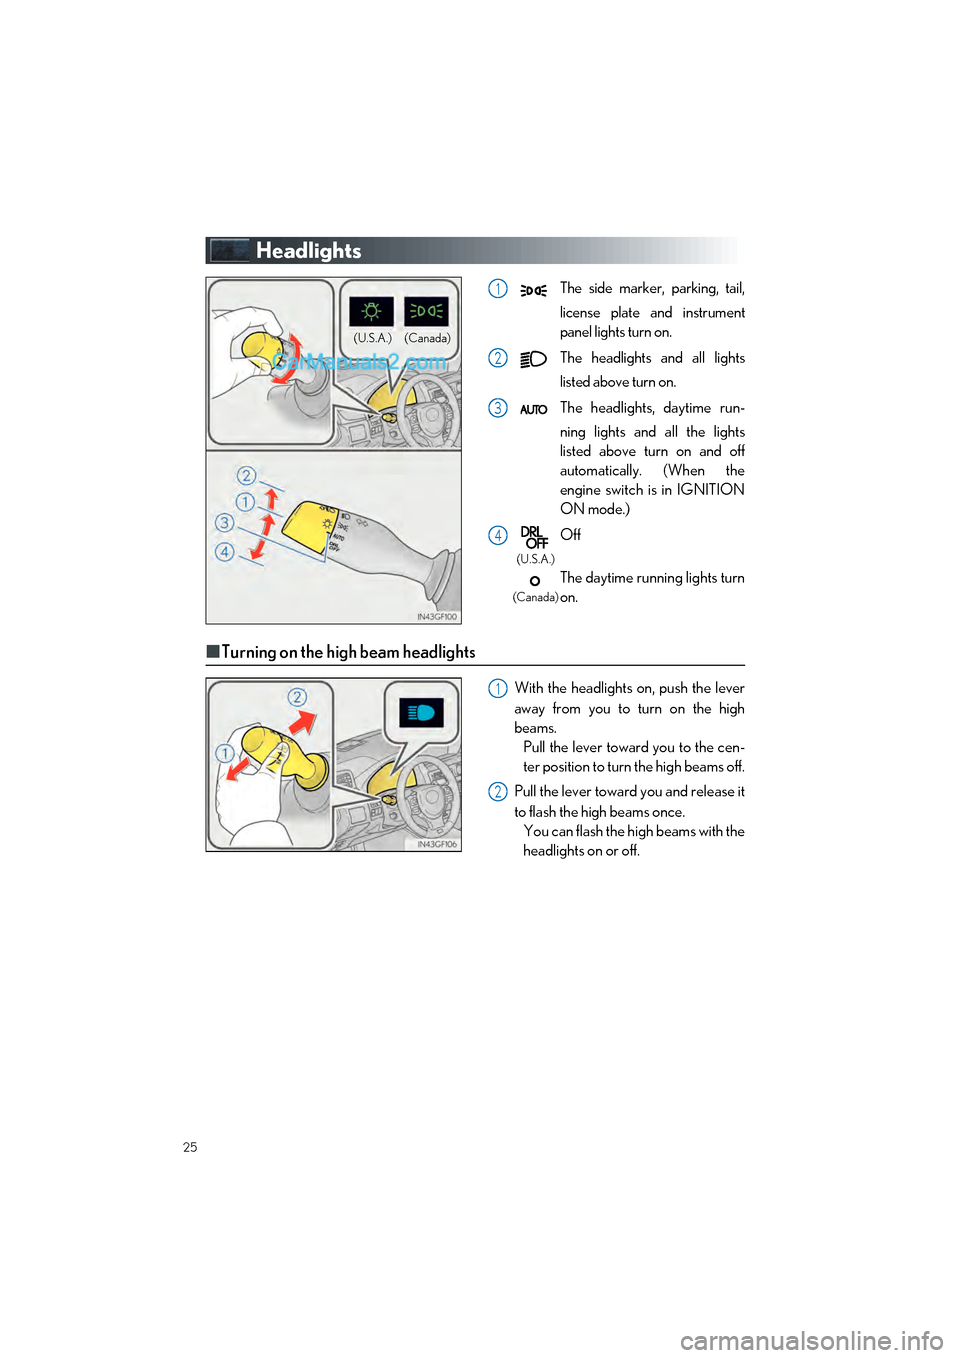
The side marker, parking, tail,
license plate and instrument
panel lights turn on.
The headlights and all lights
listed above turn on.
The headlights, daytime run-
ning lights and all the lights
listed above turn on and off
automatically. (When the
engine switch is in IGNITION
ON mode.)
Off
The daytime running lights turn
on.
■Turning on the high beam headlights
With the headlights on, push the lever
away from you to turn on the high
beams.
Pull the lever toward you to the cen-
ter position to turn the high beams off.
Pull the lever toward you and release it
to flash the high beams once. You can flash the high beams with the
headlights on or off.
(Canada)
(U.S.A.)
1
2
3
4
(U.S.A.)
(Canada)
1
2
Page 36 of 96

35
GS F_QG_OM30G10U_(U)
■Adjusting the set speed
Increases the speed
Decreases the speed
Fine adjustment: Momentarily move the
lever in the desired direction.
Large adjustment: Ho ld the lever up or
down to change the speed, and release
when the desired speed is reached.
■ Changing the vehicle-to-vehicle distan ce (vehicle-to-vehicle distance con-
trol mode)
Pressing the button changes the vehicle-to-
vehicle distance as follows:
Long
Medium
Short
The vehicle-to-vehicle distance is set
automatically to long mode when the
engine switch is turned to IGNITION
ON mode.
If a vehicle is running ahead of you, the
preceding vehicle mark will also be dis-
played.
1
2
Preceding
vehicle mark
1
2
3
Page 44 of 96

43
GS F_QG_OM30G10U_(U)
Tire Pressure Warning System
■The tire inflation pressure display function
The tire pressure detected by the tire pres-
sure warning system can be displayed on
the multi-information display.
The illustration used is intended as an
example, and may differ from the image
that is actually displayed on the multi-
information display.
■Initializing the tire pressure warning system
Turn the engine switch to IGNITION ON mode.
Press or on the meter control switch and select .
Press or on the meter control switch an d select “Vehicle Settings”. Then press
.
Press or on the meter control
switch and select “TPMS”. Then press
and hold until a message is dis-
played.The message will be displayed on the
meter and the tire pressure warning
light will blink slowly 3 times.
When the message disappears, ini-
tialization is complete.
Your vehicle is equipped with a tire pressure warning system that uses tire pressure warn-
ing valves and transmitters to detect low ti re inflation pressure before serious problems
arise.
1
2
3
4