Page 123 of 595
Features of your vehicle
38
4
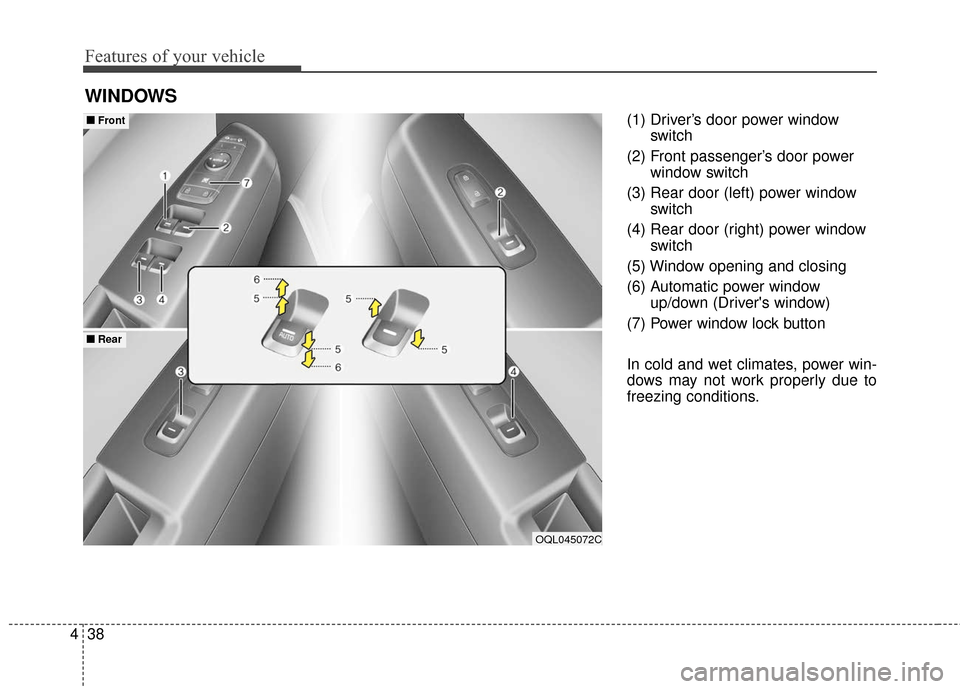
(1) Driver’s door power window
switch
(2) Front passenger’s door power window switch
(3) Rear door (left) power window switch
(4) Rear door (right) power window switch
(5) Window opening and closing
(6) Automatic power window up/down (Driver's window)
(7) Power window lock button
In cold and wet climates, power win-
dows may not work properly due to
freezing conditions.
WINDOWS
OQL045072C
■ ■ Front
■ ■Rear
Page 124 of 595
439
Features of your vehicle
Power windows
The ignition switch must be in the ON
position for power windows to operate.
Each door has a power window
switch that controls the door's win-
dow. The driver has a power window
lock button which can block the oper-
ation of rear seat windows. The
power windows can be operated for
approximately 30 seconds after the
ignition key is removed or turned to
the ACC or LOCK (or OFF) position.
If the front doors are opened; howev-
er, the power windows cannot be
operated even within the 30 second
period.
✽ ✽NOTICE
While driving with the rear windows
down or with the sunroof (if
equipped) in an open (or partially
open) position, your vehicle may
demonstrate a wind buffeting or
pulsation noise. This noise is a nor-
mal occurrence and can be reduced
or eliminated by taking the follow-
ing actions. If the noise occurs with
one or both of the rear windows
down, partially lower both front
windows approximately 2.5 cm. If
you experience the noise with the
sunroof open, slightly reduce the
size of the sunroof opening.
Window opening and closing
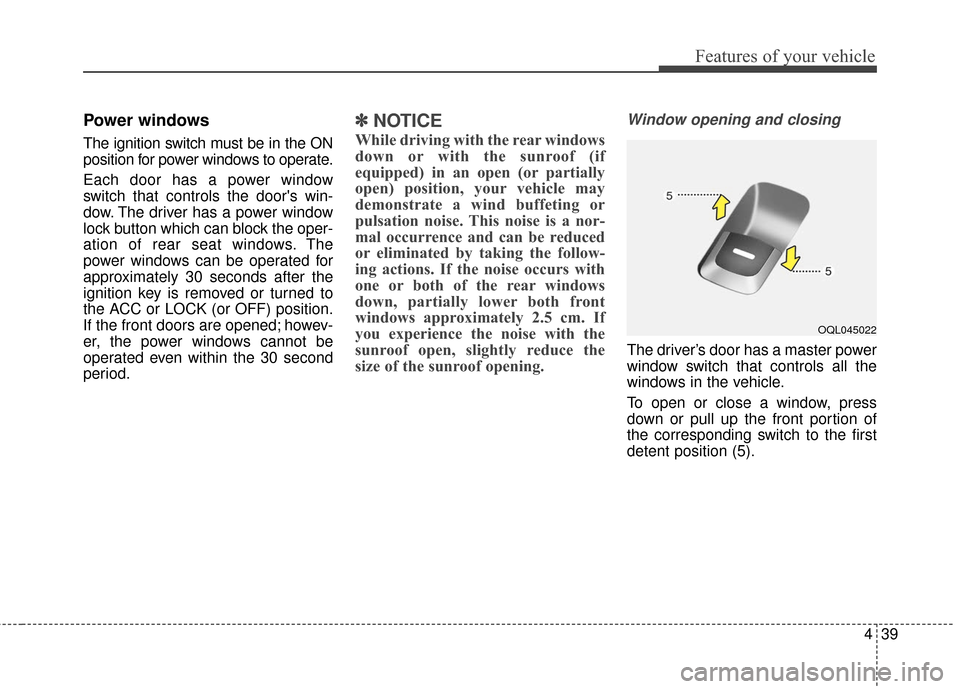
The driver’s door has a master power
window switch that controls all the
windows in the vehicle.
To open or close a window, press
down or pull up the front portion of
the corresponding switch to the first
detent position (5).
OQL045022
Page 126 of 595
441
Features of your vehicle
If the power window switch is pulled
up continuously again within 5 sec-
onds after the window is lowered by
the automatic window reversal fea-
ture, the automatic window reversal
will not operate.
The automatic reverse feature for the
driver’s window is only active when
the “auto up” feature is used by fully
pulling up the switch. The automatic
reverse feature will not operate if the
window is raised using the halfway
position on the power window switch.Power window lock button
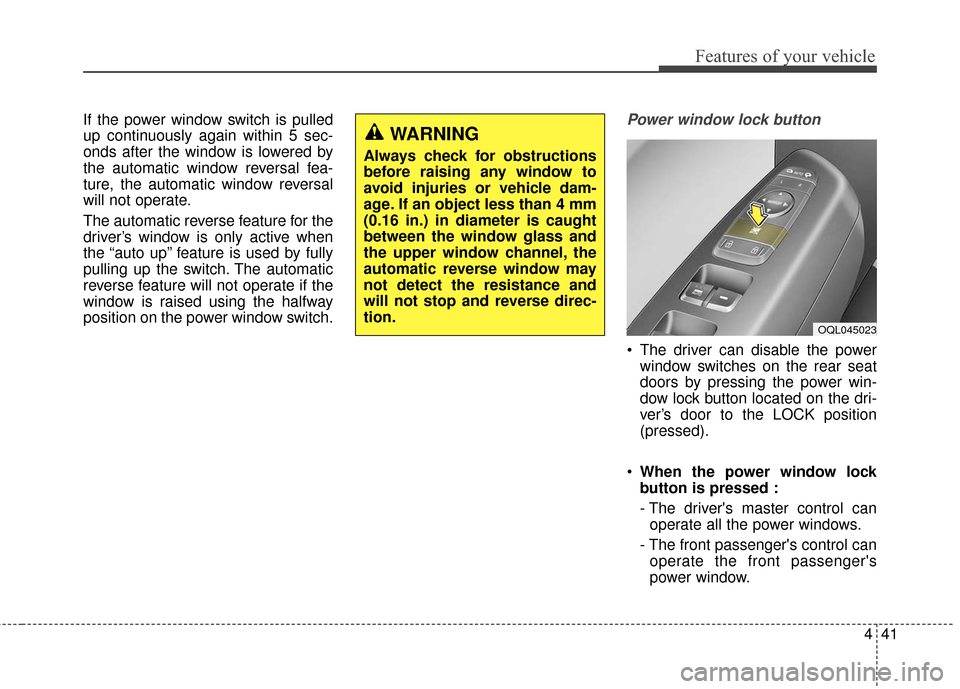
The driver can disable the powerwindow switches on the rear seat
doors by pressing the power win-
dow lock button located on the dri-
ver’s door to the LOCK position
(pressed).
When the power window lock
button is pressed :
- The driver's master control can
operate all the power windows.
- The front passenger's control can operate the front passenger's
power window.
WARNING
Always check for obstructions
before raising any window to
avoid injuries or vehicle dam-
age. If an object less than 4 mm
(0.16 in.) in diameter is caught
between the window glass and
the upper window channel, the
automatic reverse window may
not detect the resistance and
will not stop and reverse direc-
tion.
OQL045023
Page 127 of 595
Features of your vehicle
42
4
- The rear passenger's control can
not operate the rear passenger's
power window. Always double check to make sure
all arms, hands, head and other
obstructions are safely out of the way
before closing a window.
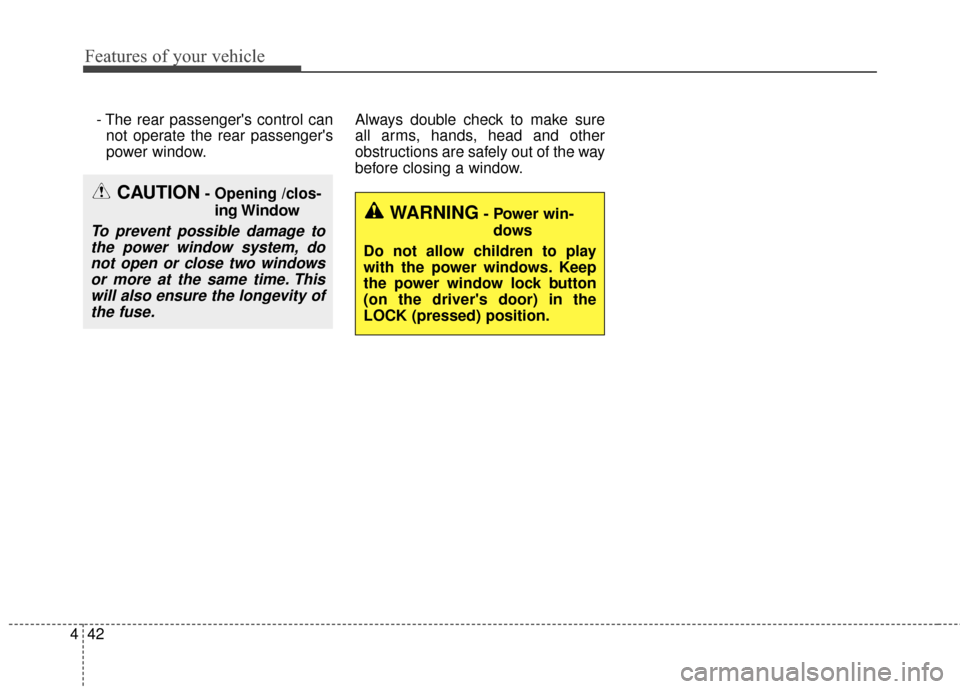
CAUTION- Opening /clos-
ing Window
To prevent possible damage tothe power window system, donot open or close two windowsor more at the same time. Thiswill also ensure the longevity ofthe fuse.
WARNING- Power win-
dows
Do not allow children to play
with the power windows. Keep
the power window lock button
(on the driver's door) in the
LOCK (pressed) position.
Page 130 of 595
445
Features of your vehicle
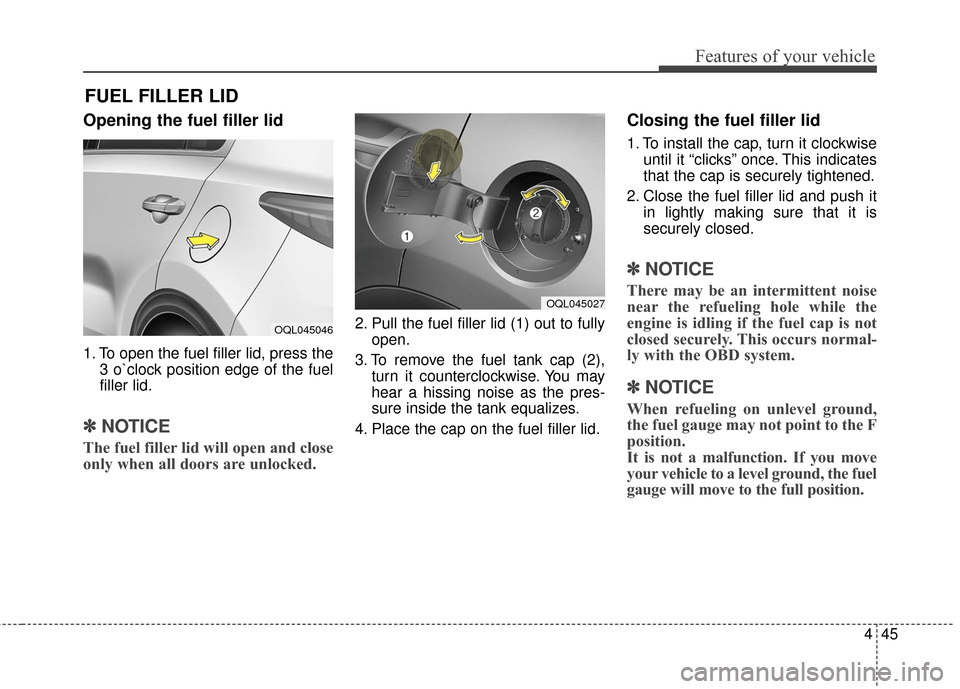
Opening the fuel filler lid
1. To open the fuel filler lid, press the3 o`clock position edge of the fuel
filler lid.
✽ ✽NOTICE
The fuel filler lid will open and close
only when all doors are unlocked.
2. Pull the fuel filler lid (1) out to fully
open.
3. To remove the fuel tank cap (2), turn it counterclockwise. You may
hear a hissing noise as the pres-
sure inside the tank equalizes.
4. Place the cap on the fuel filler lid.
Closing the fuel filler lid
1. To install the cap, turn it clockwise until it “clicks” once. This indicates
that the cap is securely tightened.
2. Close the fuel filler lid and push it in lightly making sure that it is
securely closed.
✽ ✽NOTICE
There may be an intermittent noise
near the refueling hole while the
engine is idling if the fuel cap is not
closed securely. This occurs normal-
ly with the OBD system.
✽ ✽NOTICE
When refueling on unlevel ground,
the fuel gauge may not point to the F
position.
It is not a malfunction. If you move
your vehicle to a level ground, the fuel
gauge will move to the full position.
FUEL FILLER LID
OQL045027
OQL045046
Page 132 of 595
447
Features of your vehicle
Make sure to refuel your vehicle
according to the “Fuel requirements”
suggested in chapter 1.
If the fuel filler cap requires replace-
ment, use only a genuine Kia cap or
the equivalent specified for your vehi-
cle. An incorrect fuel filler cap can
result in a serious malfunction of the
fuel system or emission control sys-
tem.
WARNING- Cell phonefires
Do not use cellular phones
while refueling. Electric current
and/or electronic interference
from cellular phones can poten-
tially ignite fuel vapors causing
a fire.
WARNING- Smoking
DO NOT use matches or a lighter
and DO NOT SMOKE or leave a lit
cigarette in your vehicle while at
a gas station especially during
refueling. Automotive fuel is
highly flammable and can, when
ignited, result in fire.
WARNING- Refueling & Vehicle fires
When refueling, always shut the
engine off. Sparks produced by
electrical components related
to the engine can ignite fuel
vapors causing a fire. Once
refueling is complete, check to
make sure the filler cap and
filler door are securely closed,
before starting the engine.CAUTION- Exterior paint
Do not spill fuel on the exterior surfaces of the vehicle. Anytype of fuel spilled on paintedsurfaces may damage the paint.
WARNING- Portable fuel
container
When using an approved portable
fuel container, be sure to place
the container on the ground prior
to refueling. Static electricity dis-
charge from the container can
ignite fuel vapors causing a fire.
Once refueling has begun, con-
tact with the vehicle should be
maintained until the filling is com-
plete. Use only approved portable
plastic fuel containers designed
to carry and store gasoline.
Page 133 of 595
Features of your vehicle
48
4
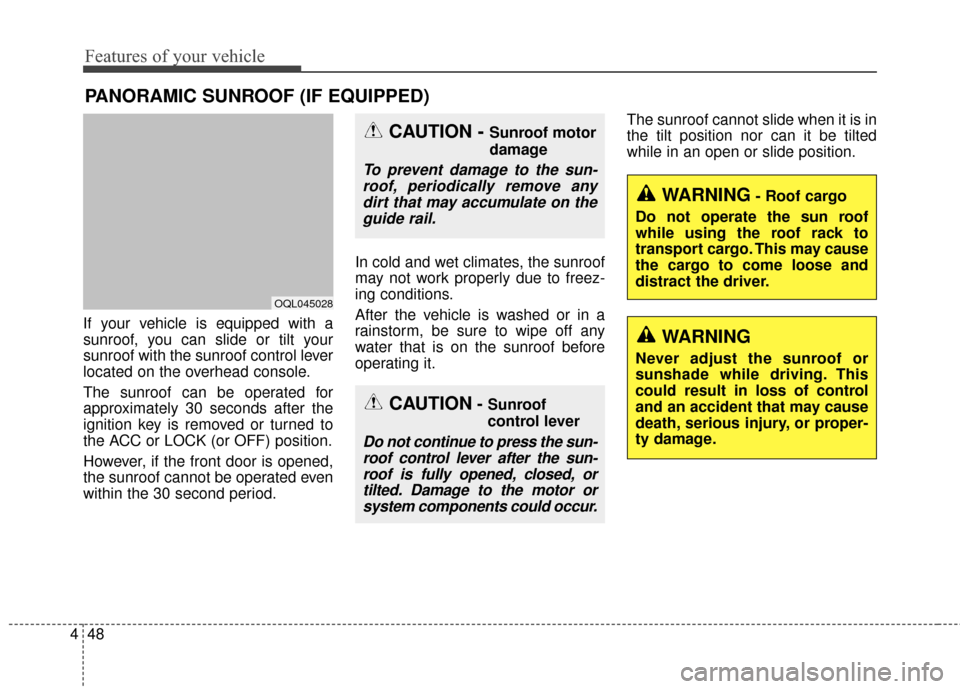
If your vehicle is equipped with a
sunroof, you can slide or tilt your
sunroof with the sunroof control lever
located on the overhead console.
The sunroof can be operated for
approximately 30 seconds after the
ignition key is removed or turned to
the ACC or LOCK (or OFF) position.
However, if the front door is opened,
the sunroof cannot be operated even
within the 30 second period. In cold and wet climates, the sunroof
may not work properly due to freez-
ing conditions.
After the vehicle is washed or in a
rainstorm, be sure to wipe off any
water that is on the sunroof before
operating it.The sunroof cannot slide when it is in
the tilt position nor can it be tilted
while in an open or slide position.
PANORAMIC SUNROOF (IF EQUIPPED)
CAUTION- Sunroof
control lever
Do not continue to press the sun-
roof control lever after the sun-roof is fully opened, closed, ortilted. Damage to the motor orsystem components could occur.
CAUTION - Sunroof motor
damage
To prevent damage to the sun-roof, periodically remove anydirt that may accumulate on theguide rail.
WARNING- Roof cargo
Do not operate the sun roof
while using the roof rack to
transport cargo. This may cause
the cargo to come loose and
distract the driver.
OQL045028
WARNING
Never adjust the sunroof or
sunshade while driving. This
could result in loss of control
and an accident that may cause
death, serious injury, or proper-
ty damage.
Page 145 of 595
Features of your vehicle
60
4
Electrochromic mirror with
HomeLink system (if equipped)
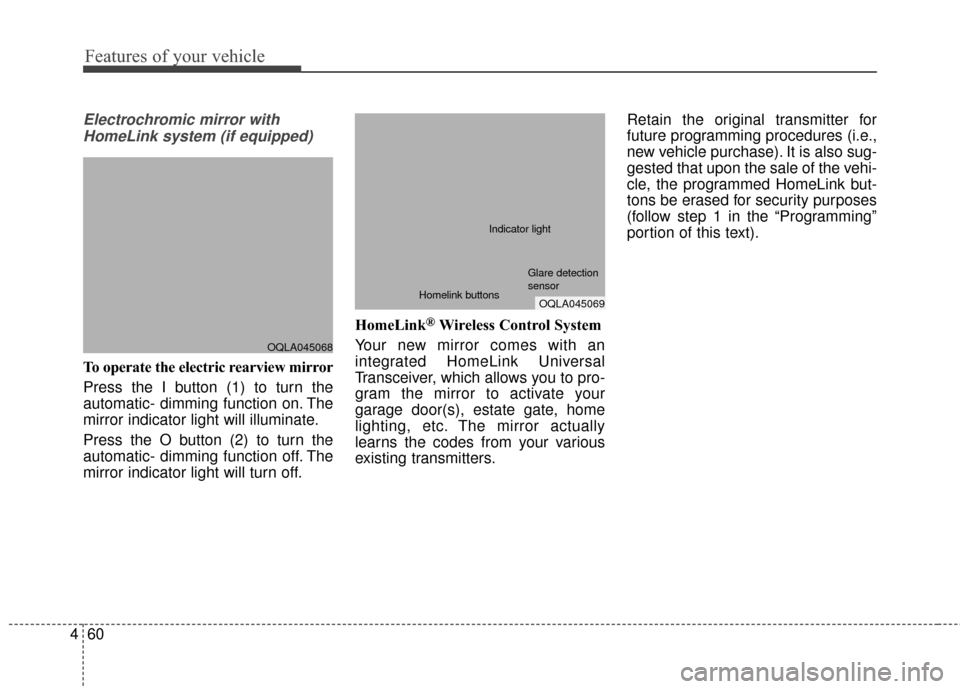
To operate the electric rearview mirror
Press the I button (1) to turn the
automatic- dimming function on. The
mirror indicator light will illuminate.
Press the O button (2) to turn the
automatic- dimming function off. The
mirror indicator light will turn off. HomeLink
®Wireless Control System
Your new mirror comes with an
integrated HomeLink Universal
Transceiver, which allows you to pro-
gram the mirror to activate your
garage door(s), estate gate, home
lighting, etc. The mirror actually
learns the codes from your various
existing transmitters. Retain the original transmitter for
future programming procedures (i.e.,
new vehicle purchase). It is also sug-
gested that upon the sale of the vehi-
cle, the programmed HomeLink but-
tons be erased for security purposes
(follow step 1 in the “Programming”
portion of this text).
OQLA045068
OQLA045069
Glare detection
sensor
Indicator light
Homelink buttons