Page 470 of 595
Fuses . . . . . . . . . . . . . . . . . . . . . . . . . . . . . . . . . . . . \
8-62
• Inner panel fuse replacement . . . . . . . . . . . . . . . . . . . 8-63
• Engine compartment fuse replacement. . . . . . . . . . . 8-65
• Fuse/relay panel description. . . . . . . . . . . . . . . . . . . . 8-68
Light bulbs . . . . . . . . . . . . . . . . . . . . . . . . . . . . . . . 8-80
• Bulb replacement precaution . . . . . . . . . . . . . . . . . . . 8-80
• Light bulb position (Front). . . . . . . . . . . . . . . . . . . . . 8-81
• Light bulb position (Rear) . . . . . . . . . . . . . . . . . . . . . 8-82
• Light bulb position (Side) . . . . . . . . . . . . . . . . . . . . . . 8-83
• Headlamp (HID type) bulb replacement . . . . . . . . . 8-83
• Headlamp (High/Low beam) bulb replacement . . . . 8-84
• Front turn signal lamp bulb replacement . . . . . . . . . 8-85
• Position lamp + DRL bulb replacement . . . . . . . . . . 8-86
• Front fog lamp (Bulb and LED type) bulbreplacement . . . . . . . . . . . . . . . . . . . . . . . . . . . . . . . . 8-86
• Stop and tail lamp bulb replacement . . . . . . . . . . . . 8-87
• Tail lamp (inside) bulb replacement . . . . . . . . . . . . . 8-88
• Stop and tail lamp (LED type) bulb replacement . . 8-89
• Back-up lamp and Rear turn signal lamp bulb replacement . . . . . . . . . . . . . . . . . . . . . . . . . . . . . . . . 8-89
• High mounted stop lamp bulb replacement . . . . . . . 8-90
• License plate lamp bulb Replacement. . . . . . . . . . . . 8-90
• Side repeater lamp (LED type) bulb replacement . . 8-91
• Map lamp bulb replacement . . . . . . . . . . . . . . . . . . . 8-91 • Vanity mirror lamp bulb replacement . . . . . . . . . . . 8-91
• Room lamp bulb replacement . . . . . . . . . . . . . . . . . . 8-92
• Personal lamp bulb replacement . . . . . . . . . . . . . . . . 8-93
• Glove box lamp bulb replacement . . . . . . . . . . . . . . . 8-93
• Tailgate room lamp bulb replacement . . . . . . . . . . . 8-94Appearance care . . . . . . . . . . . . . . . . . . . . . . . . . . . 8-95
• Exterior care . . . . . . . . . . . . . . . . . . . . . . . . . . . . . . . . 8-95
• Interior care . . . . . . . . . . . . . . . . . . . . . . . . . . . . . . . . 8-100
Emission control system . . . . . . . . . . . . . . . . . . . 8-103
• Crankcase emission control system . . . . . . . . . . . . . 8-103
• Evaporative emission control (including ORVR:
Onboard Refueling Vapor Recovery) system . . . . 8-103
• Exhaust emission control system . . . . . . . . . . . . . . . 8-104
8
Page 513 of 595
845
Maintenance
✽ ✽NOTICE
If you connect unauthorized elec-
tronic devices to the battery, the bat-
tery may be discharged. Never use
unauthorized devices.
Recharging the battery
Your vehicle has a maintenance-free,
calcium-based battery.
If the battery becomes discharged
in a short time (because, for exam-
ple, the headlamps or interior
lamps were left on while the vehi-
cle was not in use), recharge it by
slow charging (trickle) for 10 hours.
If the battery gradually discharges because of high electric load while
the vehicle is being used, recharge
it at 20-30A for two hours.WARNING- Risk of elec-
trocution
Never touch the electrical igni-
tion system while the vehicle is
running. This system works
with high voltage which can
shock you.
WARNING- Recharging Battery
Never attempt to recharge the
battery when the battery cables
are connected.
Page 532 of 595
Maintenance
64
8
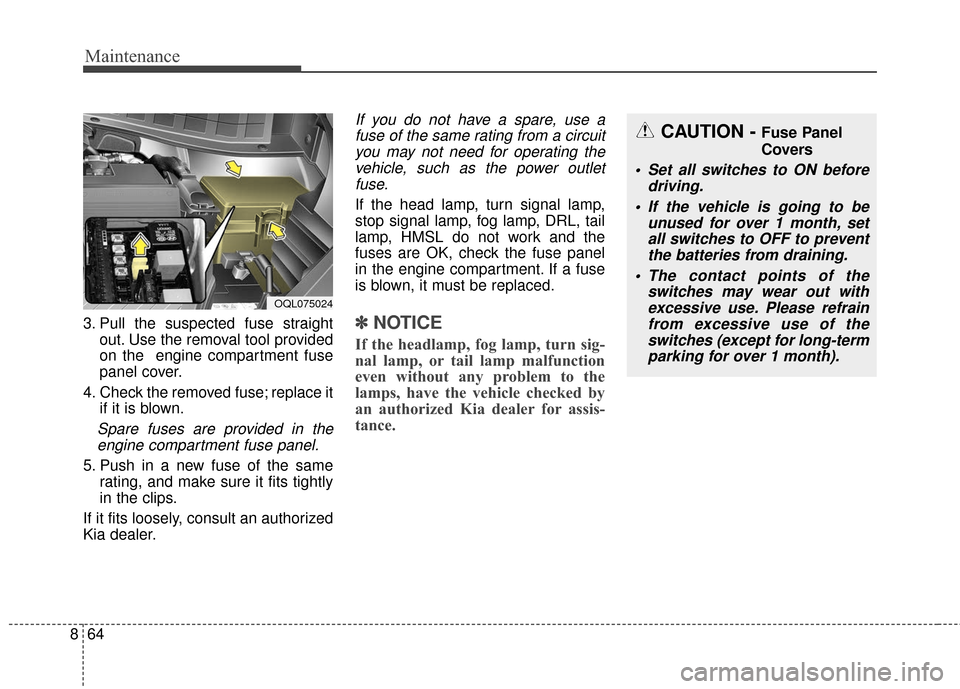
3. Pull the suspected fuse straight
out. Use the removal tool provided
on the engine compartment fuse
panel cover.
4. Check the removed fuse; replace it if it is blown.
Spare fuses are provided in theengine compartment fuse panel.
5. Push in a new fuse of the same rating, and make sure it fits tightly
in the clips.
If it fits loosely, consult an authorized
Kia dealer.
If you do not have a spare, use a fuse of the same rating from a circuityou may not need for operating thevehicle, such as the power outletfuse.
If the head lamp, turn signal lamp,
stop signal lamp, fog lamp, DRL, tail
lamp, HMSL do not work and the
fuses are OK, check the fuse panel
in the engine compartment. If a fuse
is blown, it must be replaced.
✽ ✽ NOTICE
If the headlamp, fog lamp, turn sig-
nal lamp, or tail lamp malfunction
even without any problem to the
lamps, have the vehicle checked by
an authorized Kia dealer for assis-
tance.
OQL075024
CAUTION - Fuse Panel
Covers
Set all switches to ON before
driving.
If the vehicle is going to be unused for over 1 month, setall switches to OFF to preventthe batteries from draining.
The contact points of the switches may wear out withexcessive use. Please refrainfrom excessive use of theswitches (except for long-termparking for over 1 month).
Page 537 of 595

869
Maintenance
Fuse NameFuse ratingCircuit Protected
MDPS7.5AMDPS Unit
MODULE 210AHeadlamp LH/RH
SMART KEY 110ASmart Key Control Module/Immobilizer Module
A/BAG IND7.5A
Instrument Cluster
[Audio & Manual A/C] Hazard Switch
[Audio & Auto A/C] A/C Control Module
[Navigation] Center Facia Lamp
MODULE 410AConsole Switch, Blind Spot Detection Radar LH/RH, AWD ECM, Crash Pad Switch, BCM, Lane Departure
Warning Control Module
A/BAG15ASRS Control Module
START7.5A[W/O Smart Key & IMMO.] ICM Relay Box (Burglar Alarm Relay), Ignition Switch
[With Smart Key / IMMO.] Transaxle Range Switch, ECM, Smart Key Control Module
MODULE 310AFront/Rear Seat Warmer Control Module, ATM Shift Lever ILL., Front Air Ventilation Seat Control Module, A/V
& Navigation Head Unit, Electro Chromic Mirror, Audio, A/C Control Module, Multipurpose Check Connector,
Adaptive Front Lighting Module
CLUSTER10AInstrument Cluster
MODULE 920APCB Block (Fuse - ABS 3, VACUUM PUMP 2, ECU 6, AEB, TCU 2, MODULE)
Instrument panel (Driver’s side fuse panel)
Page 548 of 595
Maintenance
80
8
LIGHT BULBS
Bulb replacement precaution
Please keep extra bulbs on hand
with appropriate wattage ratings in
case of emergencies.
Refer to “Bulb Wattage” in chapter 9.
When changing lamps, first turn off
the engine at a safe place, firmly
apply the parking brake and detach
the battery’s negative (-) terminal.
Use only bulbs of the specified
wattage.✽ ✽ NOTICE
• If the light bulb or lamp connector
is removed while the lamp is still
on, the fuse box's electronic sys-
tem may log it as a malfunction.
Therefore, a lamp malfunction
incident may be recorded as a
Diagnostic Trouble Code (DTC) in
the fuse box.
• It is normal for an operating lamp to flicker momentarily. This is due
to a stabilization function of the
vehicle’s electronic control device.
If the lamp lights up normally
after momentarily blinking, then
it is functioning as normal.
However, if the lamp continues to
flicker several times or turns off
completely, there may be an error
in the vehicle’s electronic control
device. Please have the vehicle
checked by an authorized Kia
dealer immediately.
WARNING- Working on
the lights
Prior to working on the light,
firmly apply the parking brake,
ensure that the ignition switch
is turned to the LOCK position
and turn off the lights to avoid
sudden movement of the vehi-
cle and burning your fingers or
receiving an electric shock.
CAUTION -Light replace-
ment
Be sure to replace the burned- out bulb with one of the samewattage rating. Otherwise, itmay cause damage to the fuseor electric wiring system.
CAUTION -Headlamp
Lens
To prevent damage, do notclean the headlamp lens withchemical solvents or strongdetergents.
Page 549 of 595
881
Maintenance
If you don’t have the necessary tools,
the correct bulbs and the expertise,
consult an authorized Kia dealer. In
many cases, it is difficult to replace
vehicle light bulbs because other
parts of the vehicle must be removed
before you can get to the bulb. This is
especially true if you have to remove
the headlamp assembly to get to the
bulb(s).
Removing/installing the headlamp
assembly can result in damage to
the vehicle.
If non-genuine parts or substandard
bulbs are used, it may lead to blow-
ing a fuse or other wiring damages.
Do not install extra lamps or LEDs to
the vehicle. If additional lights are
installed, it may lead to lamp mal-
functions and flickering. Additionally,
the fuse box and other writing may
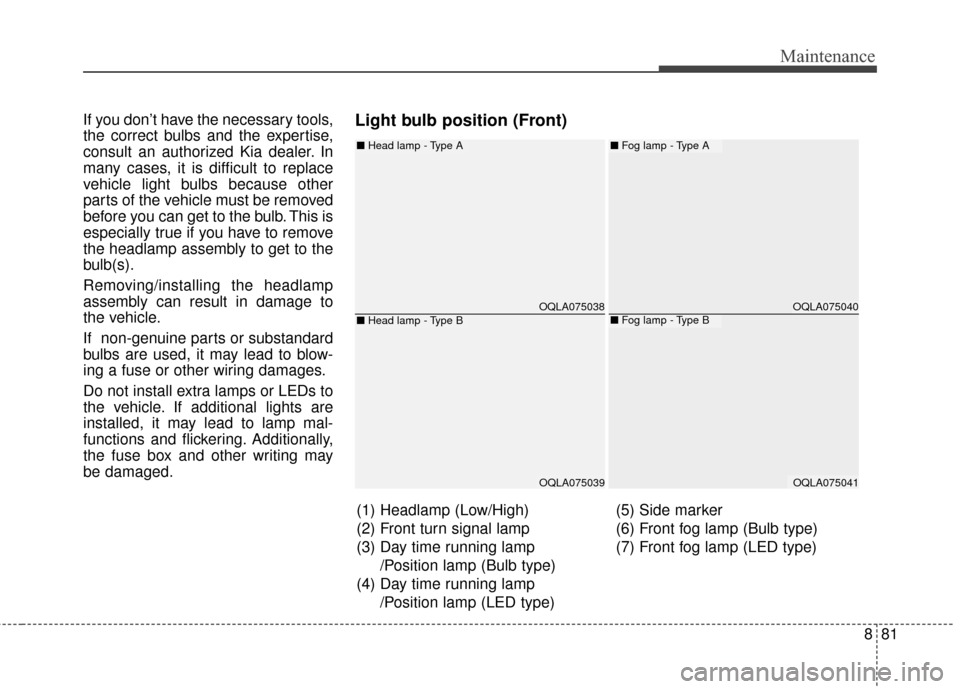
be damaged.Light bulb position (Front)
OQLA075038
OQLA075039
■Head lamp - Type A
■Head lamp - Type BOQLA075040
OQLA075041
■Fog lamp - Type A
■Fog lamp - Type B
(1) Headlamp (Low/High)
(2) Front turn signal lamp
(3) Day time running lamp
/Position lamp (Bulb type)
(4) Day time running lamp /Position lamp (LED type) (5) Side marker
(6) Front fog lamp (Bulb type)
(7) Front fog lamp (LED type)
Page 551 of 595
883
Maintenance
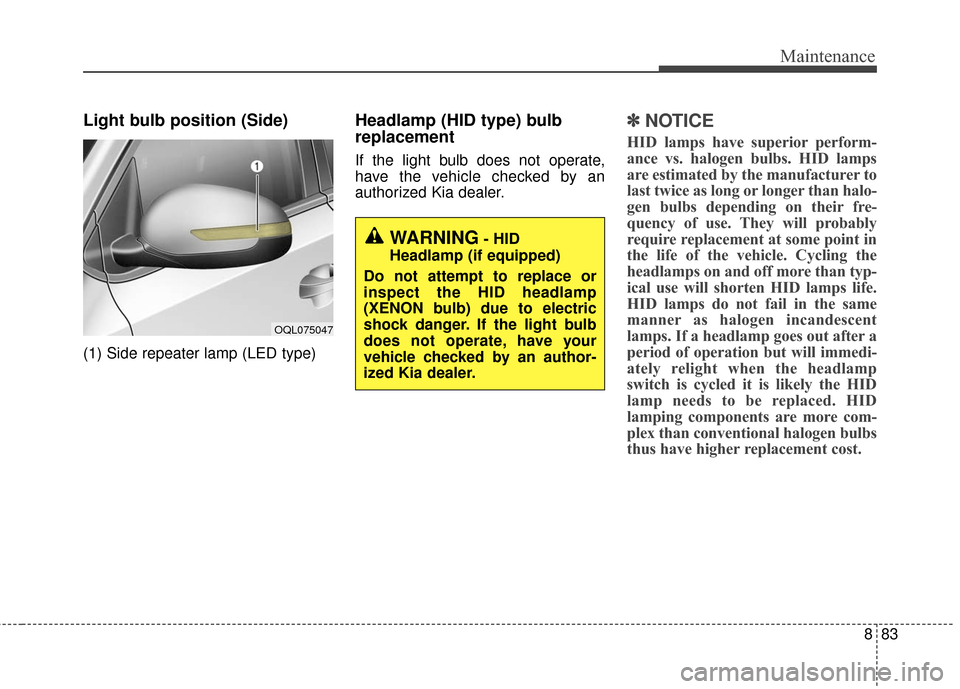
Light bulb position (Side)
(1) Side repeater lamp (LED type)
Headlamp (HID type) bulb
replacement
If the light bulb does not operate,
have the vehicle checked by an
authorized Kia dealer.
✽ ✽NOTICE
HID lamps have superior perform-
ance vs. halogen bulbs. HID lamps
are estimated by the manufacturer to
last twice as long or longer than halo-
gen bulbs depending on their fre-
quency of use. They will probably
require replacement at some point in
the life of the vehicle. Cycling the
headlamps on and off more than typ-
ical use will shorten HID lamps life.
HID lamps do not fail in the same
manner as halogen incandescent
lamps. If a headlamp goes out after a
period of operation but will immedi-
ately relight when the headlamp
switch is cycled it is likely the HID
lamp needs to be replaced. HID
lamping components are more com-
plex than conventional halogen bulbs
thus have higher replacement cost.
OQL075047
WARNING- HID
Headlamp (if equipped)
Do not attempt to replace or
inspect the HID headlamp
(XENON bulb) due to electric
shock danger. If the light bulb
does not operate, have your
vehicle checked by an author-
ized Kia dealer.
Page 552 of 595
Maintenance
84
8
Headlamp (High/Low beam)
bulb replacement
1. Open the hood.
2. Remove the headlamp bulb cover
by turning it counterclockwise.
3. Disconnect the headlamp bulb socket-connector.
4. Remove the bulb-socket from the headlamp assembly by turning the
bulb-socket counterclockwise until
the tabs on the bulb-socket align
with the slots on the headlamp
assembly. 5. Install a new bulb-socket assem-
bly in the headlamp assembly by
aligning the tabs on the bulb-sock-
et with the slots in the headlamp
assembly. Push the bulb-socket
into the headlamp assembly and
turn the bulb-socket clockwise.
6. Install the headlamp bulb cover by turning it clockwise.
Headlamp bulb
OQL075049
OQL075058
WARNING- Halogen
bulbs
Handle halogen bulbs with care.
Halogen bulbs contain pres- surized gas that will produce
flying pieces of glass if bro-
ken.