Page 174 of 589

Features of your vehicle
88
4
Headlamp escort (if equipped)
If you turn the ignition switch to the
ACC or OFF position with the head-
lights ON, the headlights remain on
for about 5 minutes. However, if the
driver’s door is opened and closed,
the headlights are turned off after 15
seconds.
The headlights can be turned off by
pressing the lock button on the trans-
mitter (or smart key) twice or turning
the light switch to the OFF or Auto
position. However, if you turn the light
switch to the Auto position when it is
dark outside, the headlights will not
be turned off immediately.
Battery saver function
The purpose of this feature is to
prevent the battery from being dis-
charged. The system automatically
turns off the parking lights when
the driver removes the ignition key
and opens the driver-side door (in
that order).
With this feature, the parking lights will turn off automatically if the driv-
er parks on the side of the road at
night.
If necessary, to keep the lights on
when the ignition key is removed,
perform the following:
1) Open the driver-side door.
2) Turn the parking lights OFF and ON again using the light switch
on the steering column.
Daytime running light
(if equipped)
Daytime Running Lights (DRL) may
help make it easier for others to see
the front of your vehicle during the
day. DRL can be helpful in many dif-
ferent driving conditions, and it is
especially helpful after dawn and
before sunset.
The DRL system turns OFF when:
1. The front fog light or headlight (lowbeam) switch is ON.
2. The engine is OFF.
3. The parking brake is applied.
LIGHTING
Page 182 of 589
Features of your vehicle
96
4
Do not use the interior lights for
extended periods when the engine is
not running.
It may cause battery discharge.Interior lamp AUTO cut
When all entrances are closed, if
you lock the vehicle by using the
transmitter or the smart key, all
interior lamp will be off after a few
seconds.
If you do not operate anything in the vehicle after turning off the
engine, the lights will turn off after
20 minutes.
Map lamp
Press the lens (1) or button (1) to
turn the map lamp on or off
INTERIOR LIGHT
WARNING - Interior light
Do not use the interior lights
when driving in the dark. The
glare from the interior lights
may obstruct your view and
cause an accident.
OPS043052
OPSE046053L
■ Type B
■Type A
Page 183 of 589

497
Features of your vehicle
ROOM (2) :- The map lamp and room lampstays on at all times.
- To turn off the ROOM mode, press the ROOM button (2) once
again (not pressed.)
DOOR (3) : - The map lamp and room lampcomes on when a door is opened.
The lamps go out after approxi-
mately 30 seconds.
- The map lamp and room lamp comes on for approximately 30
seconds when doors are unlocked
with a transmitter or smart key as
long as the doors are not opened.
- The map lamp and room lamp will stay on for approximately 20 min-
utes if a door is opened with the
ignition switch in the ACC or
LOCK/OFF position.
- The map lamp and room lamp will stay on continuously if the door is
opened with the ignition switch in
the ON position. - The map lamp and room lamp will
go out immediately if the ignition
switch is changed to the ON posi-
tion or all doors are locked.
- To turn off the DOOR mode, press the DOOR button (3) once
again (not pressed).
✽ ✽ NOTICE
• When the lamp is turned on by
pressing the lens (1), the lamp does
not turn off even if the DOOR
mode or ROOM mode is not
selected (not pressed).
• If the ROOM button and DOOR button are pressed at the same
time, the map lamp and room
lamp will stay on at all times
(ROOM mode will be selected).
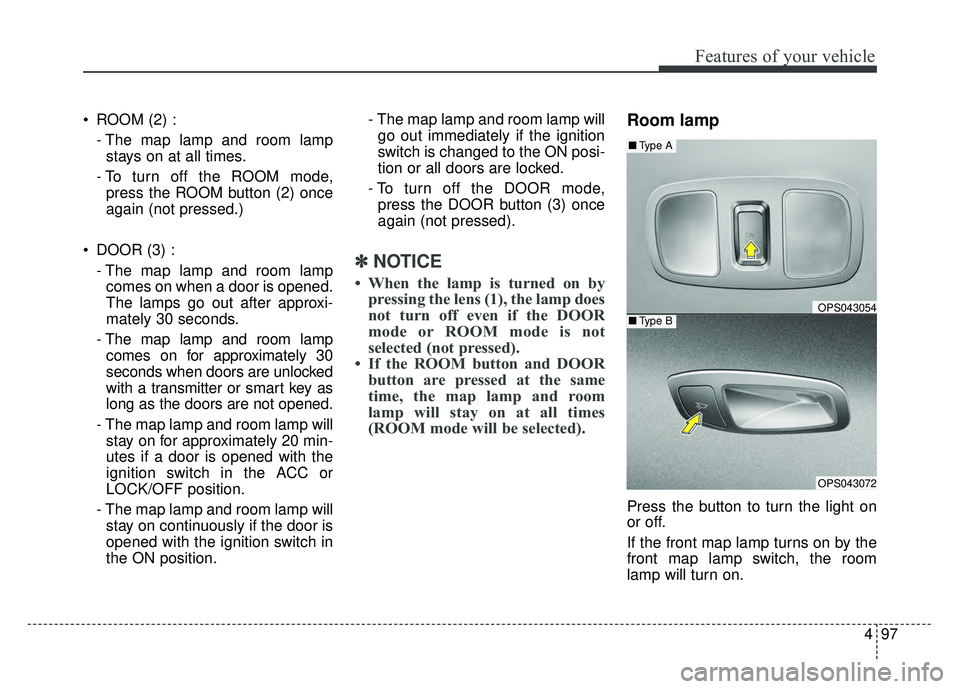
Room lamp
Press the button to turn the light on
or off.
If the front map lamp turns on by the
front map lamp switch, the room
lamp will turn on.
OPS043054
OPS043072
■ Type B
■Type A
Page 258 of 589
Audio system
523
(Continued)
• DRM (Digital Rights Management)files cannot be played.
• SD-type USB memory, CF-type USB memory, and other USB
memory devices that require
adapters for connection are not
supported.
• Proper operation of USB HDDs or USB drives with connectors that
loosen due to vehicle vibrations is
not guaranteed. (iStick, etc.)
• USB products that are used as key chains or
cell phone accessories
may damage the USB
jack and affect proper
file playback. Please refrain from
use. Use only products with plug
connectors, as shown in the follow-
ing illustration.
• When MP3 devices or cell phones are connected simultaneously
through AUX, BT Audio and USB
modes, a popping noise or mal-
function may occur.
Page 272 of 589

Audio system
537
Pairing a Bluetooth®Wireless
Technology device
Information on pairing Bluetooth®
Wireless Technology devices
Pairing refers to the process of
pairing
Bluetooth®Wireless
Technology cell phones or devices
with the system prior to connec-
tion. This is a necessary procedure
for
Bluetooth®Wireless Technology
connection and usage.
Up to five devices can be paired.
Pairing
Bluetooth®Wireless
Technology device is not allowed
while vehicle is moving. Pairing the first
Bluetooth
®Wireless
Technology device
Select the [PHONE] button on the
audio system or the [CALL] button
on the steering wheel remote control
➟ Search for the vehicle from the
Bluetooth®Wireless Technology
device, and pair ➟ Enter the passkey
on the
Bluetooth®Wireless Technology
device or approve passkey ➟
Bluetooth®Wireless Technology pair-
ing completed.
1. When the [PHONE] button on the
audio or the [CALL] button on the
steering wheel remote control is
pressed, the following screen is dis-
played. Devices can now be paired. (1) Vehicle Name: Searched name inBluetooth®Wireless Technology
device
.
✽ ✽ NOTICE
The vehicle name in the image above
is an example. Refer to your device
for the actual name of your device.
2. Search for available Bluetooth®
Wireless Technology devices in
the
Bluetooth®Wireless Technology
menu of your
Bluetooth®Wireless
Technology device (cell phone,
etc.).
3. Confirm that the vehicle name in your
Bluetooth®Wireless Technology
device matches the vehicle name
shown on the audio screen, then
select it.
Page 273 of 589

Audio system
38
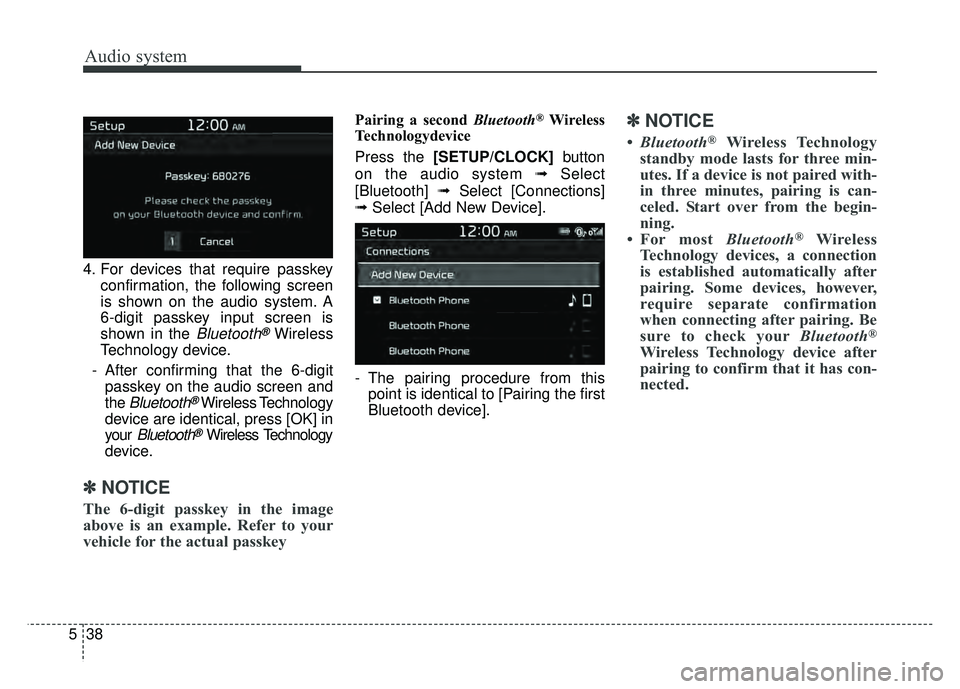
5 4. For devices that require passkey
confirmation, the following screen
is shown on the audio system. A
6-digit passkey input screen is
shown in the
Bluetooth®Wireless
Technology device.
- After confirming that the 6-digit passkey on the audio screen and
the
Bluetooth®Wireless Technology
device are identical, press [OK] in
your
Bluetooth®Wireless Technology
device.
✽ ✽ NOTICE
The 6-digit passkey in the image
above is an example. Refer to your
vehicle for the actual passkey
Pairing a second Bluetooth®Wireless
Technologydevice
Press the [SETUP/CLOCK] button
on the audio system ➟Select
[Bluetooth] ➟Select [Connections]
➟ Select [Add New Device].
- The pairing procedure from this point is identical to [Pairing the first
Bluetooth device].✽ ✽ NOTICE
•Bluetooth®Wireless Technology
standby mode lasts for three min-
utes. If a device is not paired with-
in three minutes, pairing is can-
celed. Start over from the begin-
ning.
• For most Bluetooth
®Wireless
Technology devices, a connection
is established automatically after
pairing. Some devices, however,
require separate confirmation
when connecting after pairing. Be
sure to check your Bluetooth
®
Wireless Technology device after
pairing to confirm that it has con-
nected.
Page 295 of 589
Audio system
60
5
(Continued)
• DRM (Digital Rights Management)
files cannot be played.
• SD-type USB memory, CF-type USB memory, and other USB
memory devices that require
adapters for connection are not
supported.
• Proper operation of USB HDDs or USB drives with connectors that
loosen due to vehicle vibrations is
not guaranteed. (iStick, etc.)
• USB products that are used as key chains or
cell phone accessories
may damage the USB
jack and affect proper
file playback. Please refrain from
use. Use only products with plug
connectors, as shown in the follow-
ing illustration.
• When MP3 devices or cell phones are connected simultaneously
through AUX, BT Audio and USB
modes, a popping noise or mal-
function may occur.
Page 310 of 589

Audio system
575
Pairing a Bluetooth®Wireless
Technology device
Information on pairing Bluetooth®
Wireless Technology devices
Pairing refers to the process of pair-
ing
Bluetooth®Wireless Technology
cell phones or devices with the
system prior to connection. This is
a necessary procedure for
Bluetooth®
Wireless Technology connection
and usage.
Up to five devices can be paired.
Pairing the first Bluetooth
®Wireless
Technology device
Select the [PHONE] button on the
audio system or the [CALL] button
on the steering wheel remote control
➟ Search for the vehicle from the
Bluetooth®Wireless Technology
device, and pair ➟ Enter the passkey
on the
Bluetooth®Wireless Technology
device or approve passkey ➟
Bluetooth®Wireless Technology pair-
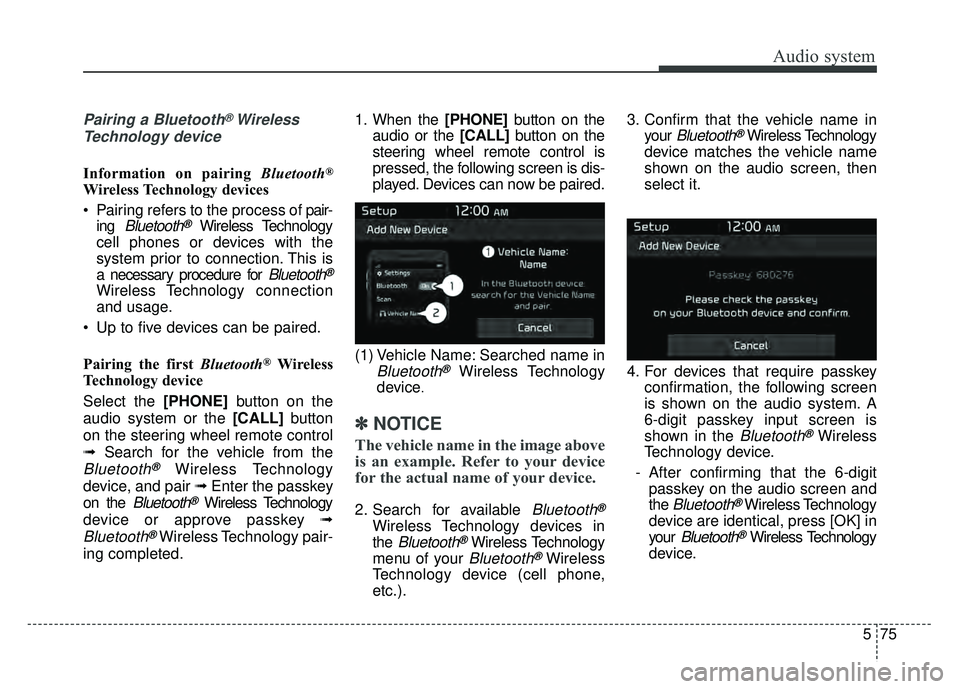
ing completed. 1. When the [PHONE]
button on the
audio or the [CALL] button on the
steering wheel remote control is
pressed, the following screen is dis-
played. Devices can now be paired.
(1) Vehicle Name: Searched name in
Bluetooth®Wireless Technology
device
.
✽ ✽ NOTICE
The vehicle name in the image above
is an example. Refer to your device
for the actual name of your device.
2. Search for available Bluetooth®
Wireless Technology devices in
the
Bluetooth®Wireless Technology
menu of your
Bluetooth®Wireless
Technology device (cell phone,
etc.). 3. Confirm that the vehicle name in
your
Bluetooth®Wireless Technology
device matches the vehicle name
shown on the audio screen, then
select it.
4. For devices that require passkey confirmation, the following screen
is shown on the audio system. A
6-digit passkey input screen is
shown in the
Bluetooth®Wireless
Technology device.
- After confirming that the 6-digit passkey on the audio screen and
the
Bluetooth®Wireless Technology
device are identical, press [OK] in
your
Bluetooth®Wireless Technology
device.