2017 KIA SOUL fuel
[x] Cancel search: fuelPage 348 of 589
629
Driving your vehicle
D (Drive)
This is the normal driving position.
The transmission will automatically
shift through a seven-gear
sequence, providing the best fuel
economy and power.
For extra power when passing anoth-
er vehicle or driving uphill depress
the accelerator pedal further until
you feel the transmission downshift
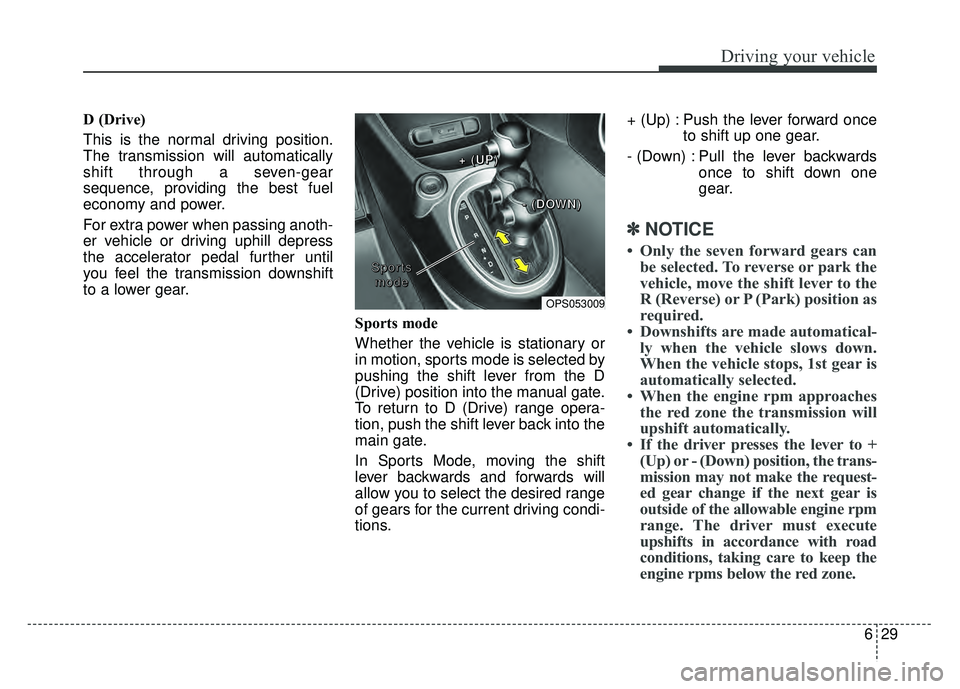
to a lower gear.Sports mode
Whether the vehicle is stationary or
in motion, sports mode is selected by
pushing the shift lever from the D
(Drive) position into the manual gate.
To return to D (Drive) range opera-
tion, push the shift lever back into the
main gate.
In Sports Mode, moving the shift
lever backwards and forwards will
allow you to select the desired range
of gears for the current driving condi-
tions.+ (Up) : Push the lever forward once
to shift up one gear.
- (Down) : Pull the lever backwards once to shift down one
gear.
✽ ✽NOTICE
• Only the seven forward gears can
be selected. To reverse or park the
vehicle, move the shift lever to the
R (Reverse) or P (Park) position as
required.
• Downshifts are made automatical- ly when the vehicle slows down.
When the vehicle stops, 1st gear is
automatically selected.
• When the engine rpm approaches the red zone the transmission will
upshift automatically.
• If the driver presses the lever to + (Up) or - (Down) position, the trans-
mission may not make the request-
ed gear change if the next gear is
outside of the allowable engine rpm
range. The driver must execute
upshifts in accordance with road
conditions, taking care to keep the
engine rpms below the red zone.
OPS053009
S
S
S
S
p
p
p
p
o
o
o
o
r
r
r
r
t
t
t
t
s
s
s
s
m
m
m
m
o
o
o
o
d
d
d
d
e
e
e
e +
+
+
+
(
(
(
(
U
U
U
U
P
P
P
P
)
)
)
)
-
-
-
-
(
(
(
(
D
D
D
D
O
O
O
O
W
W
W
W
N
N
N
N
)
)
)
)
Page 369 of 589
Driving your vehicle
50
6
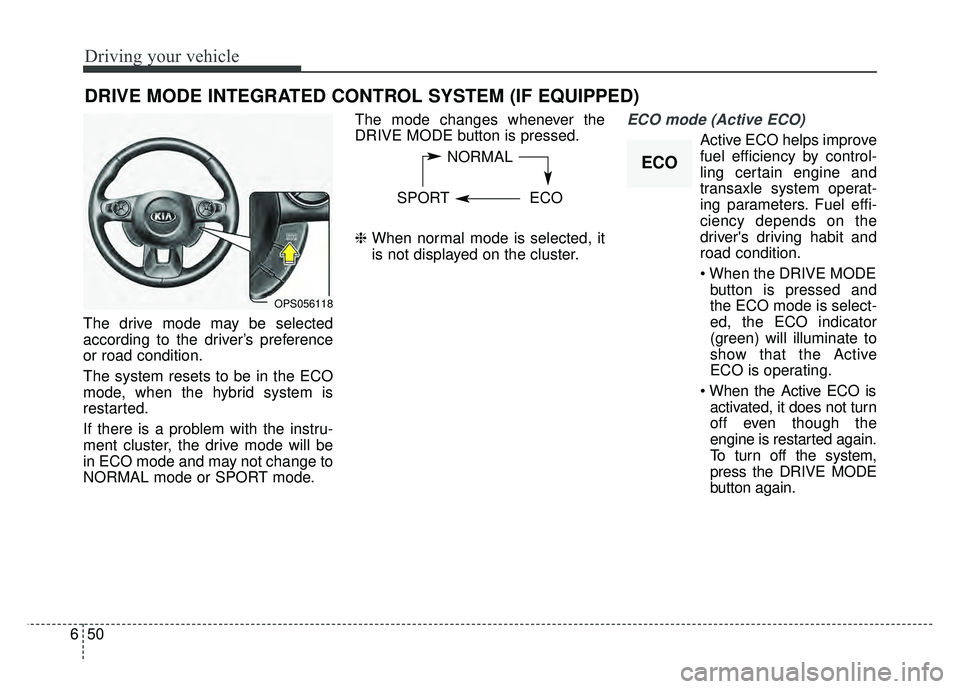
The drive mode may be selected
according to the driver’s preference
or road condition.
The system resets to be in the ECO
mode, when the hybrid system is
restarted.
If there is a problem with the instru-
ment cluster, the drive mode will be
in ECO mode and may not change to
NORMAL mode or SPORT mode. The mode changes whenever the
DRIVE MODE button is pressed.
❈
When normal mode is selected, it
is not displayed on the cluster.
ECO mode (Active ECO)
Active ECO helps improve
fuel efficiency by control-
ling certain engine and
transaxle system operat-
ing parameters. Fuel effi-
ciency depends on the
driver's driving habit and
road condition.
button is pressed and
the ECO mode is select-
ed, the ECO indicator
(green) will illuminate to
show that the Active
ECO is operating.
activated, it does not turn
off even though the
engine is restarted again.
To turn off the system,
press the DRIVE MODE
button again.
DRIVE MODE INTEGRATED CONTROL SYSTEM (IF EQUIPPED)
NORMAL
SPORT ECO
OPS056118
ECO
Page 370 of 589
651
Driving your vehicle
When Active ECO is activated:
The acceleration may slightly bereduced eventhough you depress
the accelerator fully.
The air conditioner performance may be limited
The shift pattern of the automatic transaxle may change.
The engine noise may get louder.
The above situations are normal
conditions when the active eco sys-
tem is activated to improve fuel effi-
ciency. Limitation of Active ECO operation:
If the following conditions occur while
Active ECO is operating, the system
operation is limited even though there
is no change in the ECO indicator.
When the coolant temperature is
low:
The system will be limited until
engine performance becomes nor-
mal.
When driving up a hill: The system will be limited to gain
power when driving uphill because
the engine torque is restricted.
When using manual mode: The system will be limited accord-
ing to the shift location.
When the accelerator pedal is deeply depressed for a few seconds:
The system will be limited, judging
that the driver wants to speed up.SPORT mode
SPORT mode focuses on dynamic
driving by automatically controlling
the steering wheel, engine and
transaxle system.
When the DRIVE MODE button ispressed and the SPORT mode is
selected, the SPROT indicator
(yellow) will illuminate.
Whenever the hybrid system is restarted, the Drive Mode will revert
back to ECO mode. If SPORT mode
is desired, re-select SPORT mode
from the DRIVE MODE button
If the system is activated: - After speeding, it maintains thegear and RPM for some time
even though the accelerator
pedal is not depressed.
- Up-shifting is delayed.
✽ ✽
NOTICE
In Sport drive mode, the fuel effi-
ciency may decrease.
Page 388 of 589
669
Driving your vehicle
Your vehicle's fuel economy depends
mainly on your style of driving, where
you drive and when you drive.
Each of these factors affects how
many miles (kilometers) you can get
from a gallon (liter) of fuel. To operate
your vehicle as economically as pos-
sible, use the following driving sug-
gestions to help save money in both
fuel and repairs:
Drive smoothly. Accelerate at amoderate rate. Don't make "jack-
rabbit" starts or full-throttle shifts
and maintain a steady cruising
speed. Don't race between stop-
lights. Try to adjust your speed to
the traffic so you don't have to
change speeds unnecessarily.
Avoid heavy traffic whenever pos-
sible. Always maintain a safe dis-
tance from other vehicles so you
can avoid unnecessary braking.
This also reduces brake wear.
Drive at a moderate speed. The faster you drive, the more fuel your
vehicle uses. Driving at a moderate
speed, especially on the highway,
is one of the most effective ways to
reduce fuel consumption. Don't "ride" the brake or clutch
pedal. This can increase fuel con-
sumption and also increase wear
on these components. In addition,
driving with your foot resting on the
brake pedal may cause the brakes
to overheat, which reduces their
effectiveness and may lead to
more serious consequences.
Take care of your tires. Keep them inflated to the recommended pres-
sure. Incorrect inflation, either too
much or too little, results in unnec-
essary tire wear. Check the tire
pressures at least once a month.
Be sure that the wheels are aligned correctly. Improper align-
ment can result from hitting curbs
or driving too fast over irregular
surfaces. Poor alignment causes
faster tire wear and may also result
in other problems as well as
greater fuel consumption. Keep your vehicle in good condi-
tion. For better fuel economy and
reduced maintenance costs, main-
tain your vehicle in accordance
with the maintenance schedule in
section 8. If you drive your vehicle
in severe conditions, more frequent
maintenance is required (see sec-
tion 8 for details).
Keep your vehicle clean. For maxi- mum service, your vehicle should
be kept clean and free of corrosive
materials. It is especially important
that mud, dirt, ice, etc. not be
allowed to accumulate on the
underside of the vehicle. This extra
weight can result in increased fuel
consumption and also contribute to
corrosion.
Travel lightly. Don't carry unneces- sary weight in your vehicle. Weight
reduces fuel economy.
Don't let the engine idle longer than necessary. If you are waiting
(and not in traffic), turn off your
engine and restart only when
you're ready to go.
ECONOMICAL OPERATION
Page 389 of 589
Driving your vehicle
70
6
Remember, your vehicle does not
require extended warm-up. After
the engine has started, allow the
engine to run for 10 to 20 seconds
prior to placing the vehicle in gear.
In very cold weather, however, give
your engine a slightly longer warm-
up period.
Don't "lug" or "over-rev" the engine. Lugging is driving too slowly in a
very high gear resulting in engine
bucking. If this happens, shift to a
lower gear. Over-revving is racing
the engine beyond its safe limit.
This can be avoided by shifting at
the recommended speed. Use your air conditioning sparingly.
The air conditioning system is
operated by engine power so your
fuel economy is reduced when you
use it.
Open windows at high speeds can reduce fuel economy.
Fuel economy is less in crosswinds and headwinds. To help offset
some of this loss, slow down when
driving in these conditions.
Keeping a vehicle in good operating
condition is important both for econ-
omy and safety. Therefore, have an
authorized Kia dealer perform
scheduled inspections and mainte-
nance.
WARNING
- Engine off during motion
Never turn the engine off to
coast down hills or anytime the
vehicle is in motion. The power
steering and power brakes will
not function properly without
the engine running. In addition,
turning off the ignition while
driving could engage the steer-
ing wheel lock resulting in loss
of vehicle steering. Keep the
engine on and downshift to an
appropriate gear for engine
braking effect.
Page 394 of 589
675
Driving your vehicle
Driving off-road
Drive carefully off-road because your
vehicle may be damaged by rocks or
roots of trees. Become familiar with
the off-road conditions where you
are going to drive before you begin
driving.
Highway driving
Tires
Adjust the tire inflation pressures to
specification. Low tire inflation pres-
sures will result in overheating and
possible failure of the tires.
Avoid using worn or damaged tires
which may result in reduced traction
or tire failure.
Never exceed the maximum tire
inflation pressure shown on the tires.
Fuel, engine coolant and engineoil
High speed travel consumes more
fuel than urban motoring. Do not for-
get to check both the engine coolant
and engine oil.
Drive belt
A loose or damaged drive belt may
result in overheating of the engine.
WARNING- Under/over inflated tires
Always check the tires for proper
inflation before driving.
Underinflated or overinflated
tires can cause poor handling,
loss of vehicle control, and sud-
den tire failure leading to acci-
dents, injuries, and even death.
For proper tire pressures, refer to
“Tires and wheels” in section 9.
WARNING- Tire tread
Always check the tire tread
before driving your vehicle.
Worn-out tires can result in loss
of vehicle control. Worn-out tires
should be replaced as soon as
possible. For further information
and tread limits, refer to "Tires
and wheels" in section 8.
Page 403 of 589
Driving your vehicle
84
6
Certification label
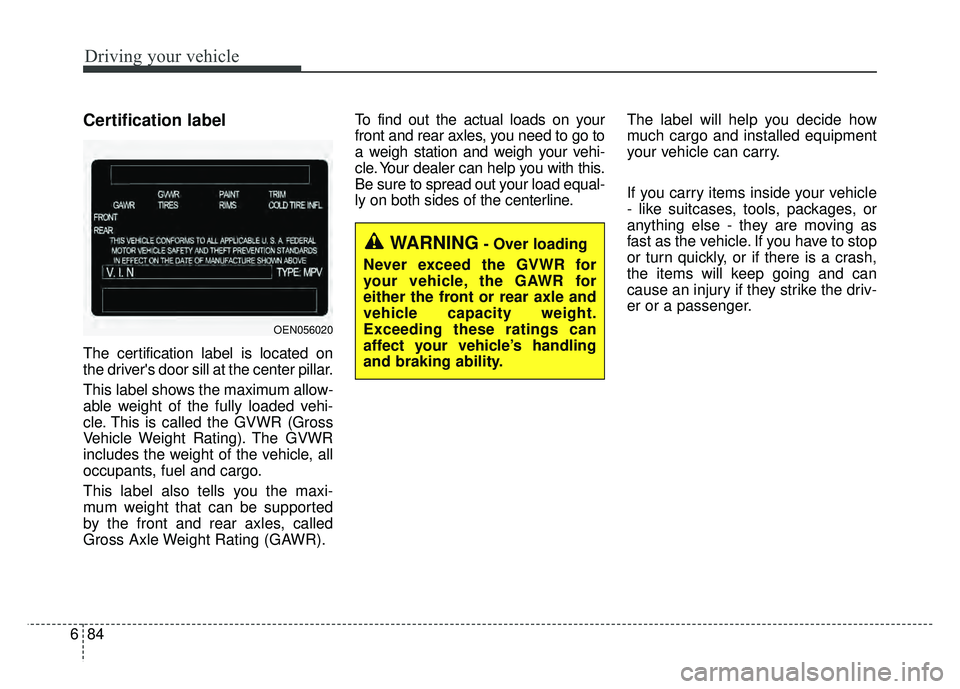
The certification label is located on
the driver's door sill at the center pillar.
This label shows the maximum allow-
able weight of the fully loaded vehi-
cle. This is called the GVWR (Gross
Vehicle Weight Rating). The GVWR
includes the weight of the vehicle, all
occupants, fuel and cargo.
This label also tells you the maxi-
mum weight that can be supported
by the front and rear axles, called
Gross Axle Weight Rating (GAWR). To find out the actual loads on your
front and rear axles, you need to go to
a weigh station and weigh your vehi-
cle. Your dealer can help you with this.
Be sure to spread out your load equal-
ly on both sides of the centerline.
The label will help you decide how
much cargo and installed equipment
your vehicle can carry.
If you carry items inside your vehicle
- like suitcases, tools, packages, or
anything else - they are moving as
fast as the vehicle. If you have to stop
or turn quickly, or if there is a crash,
the items will keep going and can
cause an injury if they strike the driv-
er or a passenger.
OEN056020
WARNING- Over loading
Never exceed the GVWR for
your vehicle, the GAWR for
either the front or rear axle and
vehicle capacity weight.
Exceeding these ratings can
affect your vehicle’s handling
and braking ability.
Page 405 of 589
Driving your vehicle
86
6
This section will guide you in the
proper loading of your vehicle and/or
trailer, to keep your loaded vehicle
weight within its design rating capa-
bility, with or without a trailer.
Properly loading your vehicle will
provide maximum return of the vehi-
cle design performance. Before load-
ing your vehicle, familiarize yourself
with the following terms for determin-
ing your vehicle's weight ratings, with
or without a trailer, from the vehicle's
specifications and the certification
label:
Base curb weight
This is the weight of the vehicle
including a full tank of fuel and all
standard equipment. It does not
include passengers, cargo, or option-
al equipment.
Vehicle curb weight
This is the weight of your new vehicle
when you picked it up from your deal-
er plus any aftermarket equipment.
Cargo weight
This figure includes all weight added
to the Base Curb Weight, including
cargo and optional equipment.
GAW (Gross axle weight)
This is the total weight placed on
each axle (front and rear) - including
vehicle curb weight and all payload.
GAWR
(Gross axle weight rating)
This is the maximum allowable
weight that can be carried by a single
axle (front or rear). These numbers
are shown on the certification label.
The total load on each axle must
never exceed its GAWR.
GVW (Gross vehicle weight)
This is the Base Curb Weight plus
actual Cargo Weight plus passen-
gers.
GVWR
(Gross vehicle weight rating)
This is the maximum allowable
weight of the fully loaded vehicle
(including all options, equipment,
passengers and cargo). The GVWR
is shown on the certification label
located on the driver’s door sill.
VEHICLE WEIGHT GLOSSARY