Page 176 of 589
Features of your vehicle
90
4
Auto light position (if equipped)
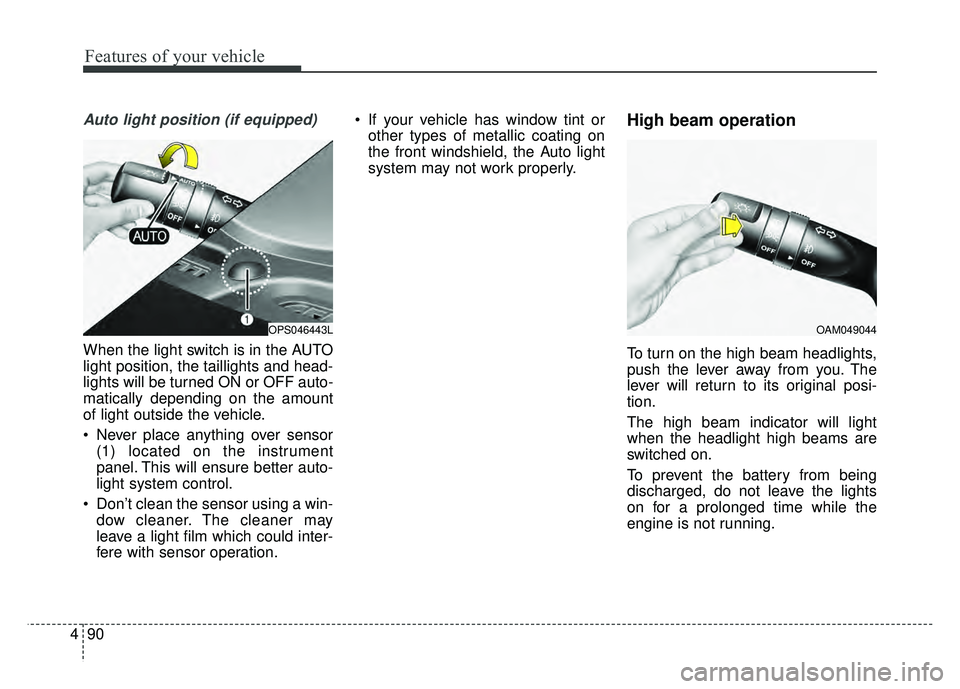
When the light switch is in the AUTO
light position, the taillights and head-
lights will be turned ON or OFF auto-
matically depending on the amount
of light outside the vehicle.
Never place anything over sensor
(1) located on the instrument
panel. This will ensure better auto-
light system control.
Don’t clean the sensor using a win- dow cleaner. The cleaner may
leave a light film which could inter-
fere with sensor operation. If your vehicle has window tint or
other types of metallic coating on
the front windshield, the Auto light
system may not work properly.
High beam operation
To turn on the high beam headlights,
push the lever away from you. The
lever will return to its original posi-
tion.
The high beam indicator will light
when the headlight high beams are
switched on.
To prevent the battery from being
discharged, do not leave the lights
on for a prolonged time while the
engine is not running.
OPS046443LOAM049044
Page 182 of 589
Features of your vehicle
96
4
Do not use the interior lights for
extended periods when the engine is
not running.
It may cause battery discharge.Interior lamp AUTO cut
When all entrances are closed, if
you lock the vehicle by using the
transmitter or the smart key, all
interior lamp will be off after a few
seconds.
If you do not operate anything in the vehicle after turning off the
engine, the lights will turn off after
20 minutes.
Map lamp
Press the lens (1) or button (1) to
turn the map lamp on or off
INTERIOR LIGHT
WARNING - Interior light
Do not use the interior lights
when driving in the dark. The
glare from the interior lights
may obstruct your view and
cause an accident.
OPS043052
OPSE046053L
■ Type B
■Type A
Page 185 of 589
499
Features of your vehicle
✽
✽NOTICE
1. Remove the batteries when not in
use for a long time.
2. Use the specified battery.
3. Do not place the lamp with water or moist places and liquid com-
pounds. These can cause internal
leakage of a battery.
4.When replacing the batteries, check the direction and insert.
It will not be charged if installed
reversely.
5. Do not mix the rechargeable bat- teries.
It may not be charged normally.
If the portable lamp does not turn on
anymore after charged, replace the
rechargeable batteries.Battery replacement
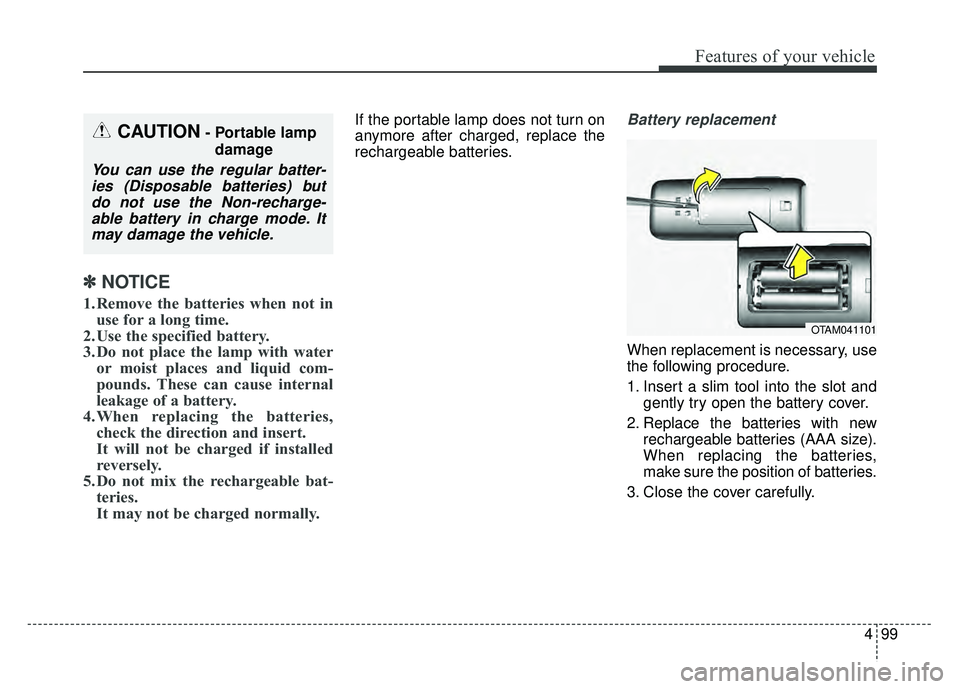
When replacement is necessary, use
the following procedure.
1. Insert a slim tool into the slot and
gently try open the battery cover.
2. Replace the batteries with new rechargeable batteries (AAA size).
When replacing the batteries,
make sure the position of batteries.
3. Close the cover carefully.
CAUTION- Portable lamp damage
You can use the regular batter-ies (Disposable batteries) butdo not use the Non-recharge-able battery in charge mode. Itmay damage the vehicle.
OTAM041101
Page 205 of 589
4119
Features of your vehicle
The temperature will decrease to the
minimum (Lo) by pushing the button
().
When pushing the button, the tem-
perature will increase or decrease by
0.5°C/1°F. When set to the lowest
temperature setting, the air condi-
tioning will operate continuously.
B
The temperature will increase to the
maximum (HI) by turning the knob to
the right extremely.
The temperature will decrease to the
minimum (Lo) by turning the knob to
the left extremely.
When turning the knob, the tempera-
ture will increase or decrease by
0.5°C/1°F. When set to the lowest
temperature setting, the air condi-
tioning will operate continuously.Temperature scale conversion
If the battery has been discharged or
disconnected, the temperature mode
display will reset to Centigrade.
This is normal condition. You can
switch the temperature scale as fol-
lows;
While pressing the AUTO button,
press the OFF button for 3 seconds
or more. The temperature scale will
change from Centigrade to
Fahrenheit, or from Fahrenheit to
Centigrade.
The temperature unit (from °C to °F
or from °F to °C) can be changed by
using the “User Settings” mode of the
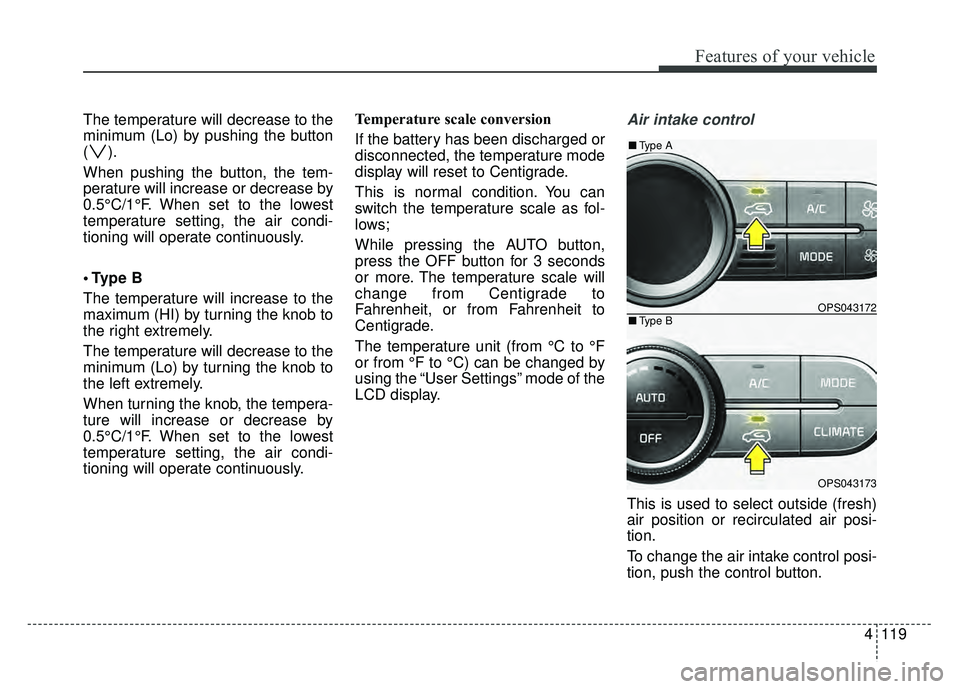
LCD display.Air intake control
This is used to select outside (fresh)
air position or recirculated air posi-
tion.
To change the air intake control posi-
tion, push the control button.
OPS043172
OPS043173
■
Type B
■Type A
Page 217 of 589
4131
Features of your vehicle
Manual climate control system
1. Turn the ignition switch to the ONposition.
2. Turn the mode selection knob to the defrost position ( ).
3. Within 10 seconds after select the defrost positon, press the air
intake control button ( ) at least
5 times within 3 seconds.
The indicator on the air intake button
blinks 3 times with 0.5 seconds of
interval. It indicates that the defog-
ging logic is canceled or returned to
the programmed status. If the battery has been discharged or
disconnected, it will be reset to the
defog logic status.
Automatic climate control system
1. Turn the ignition switch to the ON
position.
2. Press the defrost button ( ).
OPS043187
OPS043189
OPS043188
■ Type B
■
Type A
Page 218 of 589
Features of your vehicle
132
4
3. While pressing the air conditioning
button (A/C), press the air intake
control button ( ) at least 5
times within 3 seconds.
The indicator on the air intake button
blinks 3 times with 0.5 seconds of
interval. It indicates that the defog-
ging logic is canceled or returned to
the programmed status.
If the battery has been discharged or
disconnected, it will be reset to the
defog logic status. When the ignition switch is in the ON
position, the clean air function turns
on automatically.
Also, the clean air function turns off
automatically, when the ignition
switch turns to the OFF position.
OPS043206
CLEAN AIR (IF EQUIPPED)
Page 223 of 589
4137
Features of your vehicle
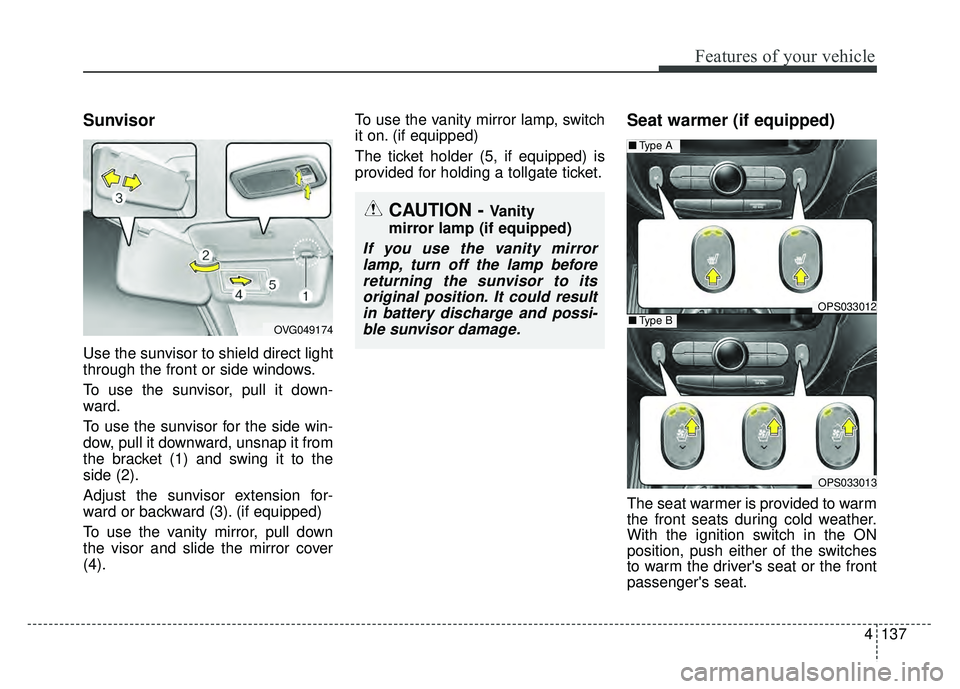
Sunvisor
Use the sunvisor to shield direct light
through the front or side windows.
To use the sunvisor, pull it down-
ward.
To use the sunvisor for the side win-
dow, pull it downward, unsnap it from
the bracket (1) and swing it to the
side (2).
Adjust the sunvisor extension for-
ward or backward (3). (if equipped)
To use the vanity mirror, pull down
the visor and slide the mirror cover
(4).To use the vanity mirror lamp, switch
it on. (if equipped)
The ticket holder (5, if equipped) is
provided for holding a tollgate ticket.
Seat warmer (if equipped)
The seat warmer is provided to warm
the front seats during cold weather.
With the ignition switch in the ON
position, push either of the switches
to warm the driver's seat or the front
passenger's seat.
CAUTION - Vanity
mirror lamp (if equipped)
If you use the vanity mirror lamp, turn off the lamp beforereturning the sunvisor to itsoriginal position. It could resultin battery discharge and possi-ble sunvisor damage.
OPS033012
■ Type A
OPS033013
■Type BOVG049174
Page 228 of 589
Features of your vehicle
142
4
Use the power outlet only when the
engine is running and remove the
accessory plug after use. Using the
accessory plug for prolonged peri-
ods of time with the engine off could
cause the battery to discharge.
Only use 12V electric accessories which are less than 10A(Driver’s
side) or 15A(Passenger’s side) in
electric capacity.
Adjust the air-conditioner or heater to the lowest operating level when
using the power outlet.
Close the cover when not in use.
Some electronic devices can cause electronic interference when
plugged into a vehicle’s power out-
let. These devices may cause
excessive audio static and malfunc-
tions in other electronic systems or
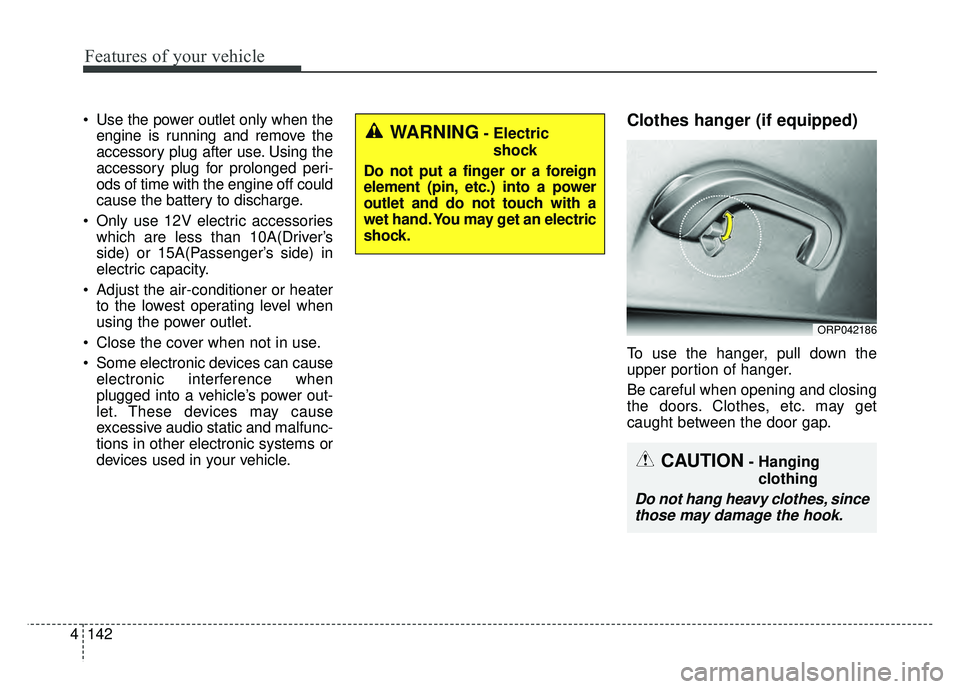
devices used in your vehicle.Clothes hanger (if equipped)
To use the hanger, pull down the
upper portion of hanger.
Be careful when opening and closing
the doors. Clothes, etc. may get
caught between the door gap.
ORP042186
WARNING- Electric
shock
Do not put a finger or a foreign
element (pin, etc.) into a power
outlet and do not touch with a
wet hand. You may get an electric
shock.
CAUTION- Hanging clothing
Do not hang heavy clothes, sincethose may damage the hook.