Page 374 of 589

655
Driving your vehicle
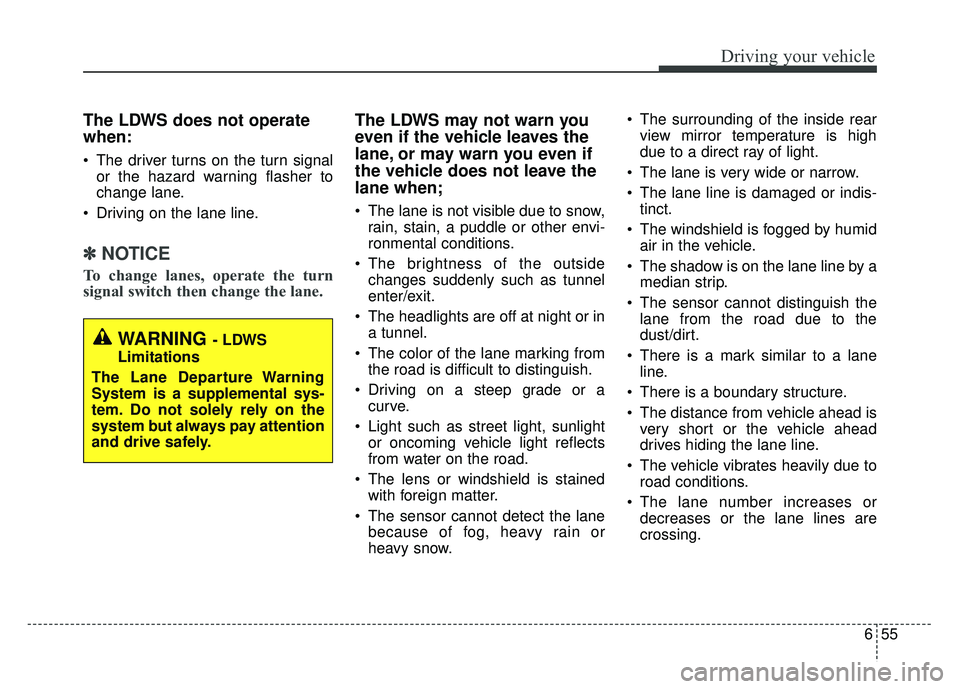
The LDWS does not operate
when:
The driver turns on the turn signalor the hazard warning flasher to
change lane.
Driving on the lane line.
✽ ✽ NOTICE
To change lanes, operate the turn
signal switch then change the lane.
The LDWS may not warn you
even if the vehicle leaves the
lane, or may warn you even if
the vehicle does not leave the
lane when;
The lane is not visible due to snow,
rain, stain, a puddle or other envi-
ronmental conditions.
The brightness of the outside changes suddenly such as tunnel
enter/exit.
The headlights are off at night or in a tunnel.
The color of the lane marking from the road is difficult to distinguish.
Driving on a steep grade or a curve.
Light such as street light, sunlight or oncoming vehicle light reflects
from water on the road.
The lens or windshield is stained with foreign matter.
The sensor cannot detect the lane because of fog, heavy rain or
heavy snow. The surrounding of the inside rear
view mirror temperature is high
due to a direct ray of light.
The lane is very wide or narrow.
The lane line is damaged or indis- tinct.
The windshield is fogged by humid air in the vehicle.
The shadow is on the lane line by a median strip.
The sensor cannot distinguish the lane from the road due to the
dust/dirt.
There is a mark similar to a lane line.
There is a boundary structure.
The distance from vehicle ahead is very short or the vehicle ahead
drives hiding the lane line.
The vehicle vibrates heavily due to road conditions.
The lane number increases or decreases or the lane lines are
crossing.
WARNING - LDWS
Limitations
The Lane Departure Warning
System is a supplemental sys-
tem. Do not solely rely on the
system but always pay attention
and drive safely.
Page 378 of 589
659
Driving your vehicle
The second stage alarm will activate
when:
1. The first stage alert is on
2. The turn signal is on to change alane
When the second stage alert is acti-
vated, a warning light will be blinking
on the outside rearview mirror and
an alarm will sound.
If you move the turn signal switch to
origin position, the second stage
alert will be deactivated. - The second stage alarm can be
deactivated.
To activate the alarm: Go to the User Settings Mode →
Sound and select "BSD" on the
LCD display.
To deactivate the alarm: Go to the User Settings Mode →
Sound and deselect "BSD" on the
LCD display.
The alarm function helps alert the
driver. Deactivate this function only
when it is necessary
Detecting sensor
The sensors are located inside the
rear bumper.
Always keep the rear bumper clean
for the system to work properly.
OPS056114L
OUM054029
2nd stage
Page 407 of 589
What to do in an emergency
27
ROAD WARNING
Hazard warning flasher
The hazard warning flasher serves
as a warning to other drivers to exer-
cise extreme caution when
approaching, overtaking, or passing
your vehicle.
It should be used whenever emer-
gency repairs are being made or
when the vehicle is stopped near the
edge of a roadway.Depress the flasher switch with the
ignition switch in any position. The
flasher switch is located in the center
console switch panel. All turn signal
lights will flash simultaneously.
• The hazard warning flasher oper-
ates whether your vehicle is run-
ning or not.
The turn signals do not work when the hazard flasher is on.
Care must be taken when using the hazard warning flasher while
the vehicle is being towed.
OPS066001L
Page 415 of 589

What to do in an emergency
10
7
Your vehicle has also been equipped
with a TPMS malfunction indicator to
indicate when the system is not oper-
ating properly. The TPMS malfunction
indicator is combined with the low tire
pressure telltale. When the system
detects a malfunction, the telltale will
flash for approximately one minute
and then remain continuously illumi-
nated. This sequence will continue
upon subsequent vehicle start-ups as
long as the malfunction exists. When
the malfunction indicator is illuminat-
ed, the system may not be able to
detect or signal low tire pressure as
intended. TPMS malfunctions may
occur for a variety of reasons, includ-
ing the installation of replacement or
alternate tires or wheels on the vehi-
cle that prevent the TPMS from func-
tioning properly. Always check the
TPMS malfunction telltale after
replacing one or more tires or wheels
on your vehicle to ensure that the
replacement or alternate tires and
wheels allow the TPMS to continue to
function properly.✽ ✽
NOTICE
If the TPMS, Low Tire Pressure
indicator do not illuminate for 3 sec-
onds when the ignition switch is
turned to the ON position or engine
is running, or if they remain illumi-
nated after coming on for approxi-
mately 3 seconds, take your vehicle
to your nearest authorized Kia deal-
er and have the system checked.
Low tire pressure tell-
tale
When the tire pressure monitoring
system warning indicators are illumi-
nated, one or more of your tires is
significantly under-inflated.
If the telltale illuminates, immediately
reduce your speed, avoid hard cor-
nering and anticipate increased stop-
ping distances. You should stop and
check your tires as soon as possible.
Inflate the tires to the proper pres-
sure as indicated on the vehicle’s
placard or tire inflation pressure label
located on the driver’s side center pil-
lar outer panel. If you cannot reach a
service station or if the tire cannot
hold the newly added air, replace the
low pressure tire with the spare tire.
Page 450 of 589

89
Maintenance
At least monthly:
Check the coolant level in theengine coolant reservoir.
Check the operation of all exterior lights, including the stoplights, turn
signals and hazard warning flash-
ers.
Check the inflation pressures of all tires including the spare.
At least twice a year
(i.e., every Spring and Fall):
Check the radiator, heater and air conditioning hoses for leaks or
damage.
Check the windshield washer spray and wiper operation. Clean
the wiper blades with clean cloth
dampened with washer fluid.
Check the headlight alignment.
Check the muffler, exhaust pipes, shields and clamps.
Check the lap/shoulder belts for wear and function.
Check for worn tires and loose wheel lug nuts.
At least once a year:
Clean the body and door drainholes.
Lubricate the door hinges and checks, and hood hinges.
Lubricate the door and hood locks and latches.
Lubricate the door rubber weather- strips.
Check the air conditioning system.
Inspect and lubricate the automat- ic transaxle linkage and controls.
Clean the battery and terminals.
Check the brake fluid level.
Page 530 of 589

889
Maintenance
If you don’t have the necessary tools,
the correct bulbs and the expertise,
consult an authorized Kia dealer. In
many cases, it is difficult to replace
vehicle light bulbs because other
parts of the vehicle must be removed
before you can get to the bulb. This is
especially true if you have to remove
the headlamp assembly to get to the
bulb(s).
Removing/installing the headlamp
assembly can result in damage to
the vehicle.
If non-genuine parts or substandard
bulbs are used, it may lead to blow-
ing a fuse or other wiring damages.
Do not install extra lamps or LEDs to
the vehicle. If additional lights are
installed, it may lead to lamp mal-
functions and flickering. Additionally,
the fuse box and other writing may
be damaged.Light bulb position (Front)(1) Front turn signal lamp
(2) Headlamp (Low/High)
(3) Side marker
(4) Headlamp (High)
(5) Headlamp (Low)
(6) Position lamp (LED Type)
(7) Position lamp/Daytime runninglamp (LED Type)
(8) Front fog lamp
■Type B
■Type A
OPS076021N
OPS076020N■Type C
OPS076134N
Page 531 of 589

Maintenance
90
8
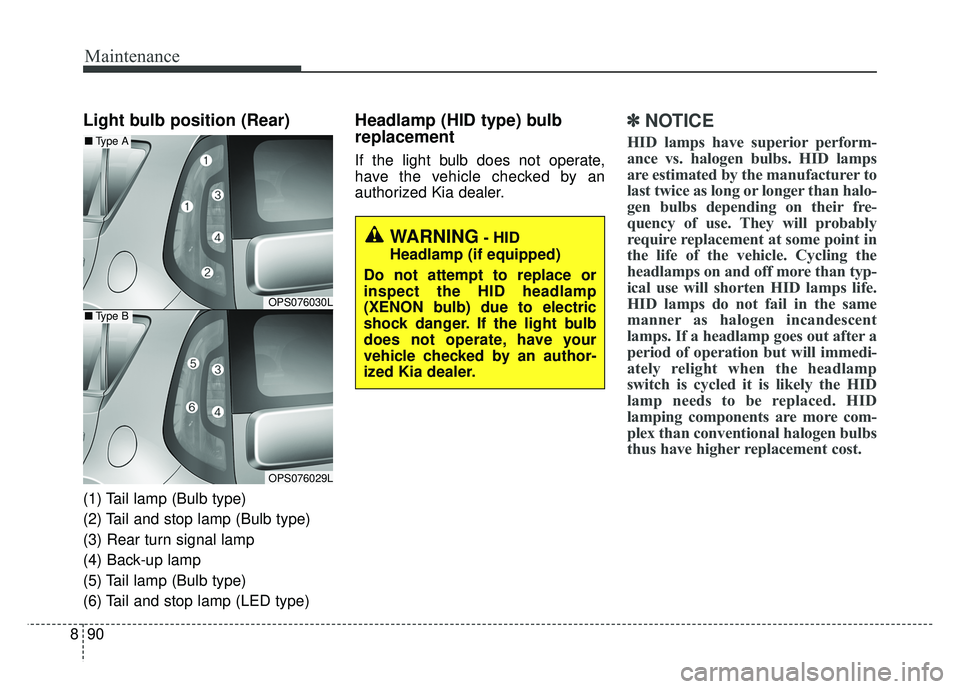
Light bulb position (Rear)
(1) Tail lamp (Bulb type)
(2) Tail and stop lamp (Bulb type)
(3) Rear turn signal lamp
(4) Back-up lamp
(5) Tail lamp (Bulb type)
(6) Tail and stop lamp (LED type)
Headlamp (HID type) bulb
replacement
If the light bulb does not operate,
have the vehicle checked by an
authorized Kia dealer.
✽ ✽
NOTICE
HID lamps have superior perform-
ance vs. halogen bulbs. HID lamps
are estimated by the manufacturer to
last twice as long or longer than halo-
gen bulbs depending on their fre-
quency of use. They will probably
require replacement at some point in
the life of the vehicle. Cycling the
headlamps on and off more than typ-
ical use will shorten HID lamps life.
HID lamps do not fail in the same
manner as halogen incandescent
lamps. If a headlamp goes out after a
period of operation but will immedi-
ately relight when the headlamp
switch is cycled it is likely the HID
lamp needs to be replaced. HID
lamping components are more com-
plex than conventional halogen bulbs
thus have higher replacement cost.
OPS076030L
OPS076029L
■ Type A
■Type B
WARNING- HID
Headlamp (if equipped)
Do not attempt to replace or
inspect the HID headlamp
(XENON bulb) due to electric
shock danger. If the light bulb
does not operate, have your
vehicle checked by an author-
ized Kia dealer.
Page 534 of 589
893
Maintenance
Always handle them carefully, andavoid scratches and abrasions. If
the bulbs are lit, avoid contact with
liquids. Never touch the glass with
bare hands. Residual oil may
cause the bulb to overheat and
burst when lit. A bulb should be
operated only when installed in a
headlamp.
If a bulb becomes damaged or cracked, replace it immediately
and carefully dispose of it.
Wear eye protection when chang- ing a bulb. Allow the bulb to cool
down before handling it.Front turn signal lamp bulb
replacement
1. Turn off the engine and open the hood. Disconnect the negative
battery cable. 2. Disconnect the power connector
front the back of the headlamp
assembly.
3. Loosen the retaining bolts.
OPS073051
OPS076028L