2017 KIA Sorento abs
[x] Cancel search: absPage 537 of 576

785
Maintenance
Headlamp (bulb type) -high/low
1. Open the hood.
2. Remove the headlamp assemblyfrom the body of the vehicle
3. Remove the headlamp bulb cover by turning it counterclockwise.
4. Remove the socket from the assembly by turning the socket
counterclockwise until the tabs on
the socket align with the slots on
the assembly.
5. Remove the bulb by pulling it out.
6. Inset a new bulb into the socket. 7. Install the socket in the assembly
by aligning the tabs on the socket
with the slots in the assembly.
Push the socket into the assembly
and turn the socket clockwise.
8. Install the headlamp bulb cover by turning it clockwise.
Turn signal lamp
Follow the steps 1 to 3 from the pre-
vious page.
4. Remove the socket from theassembly by turning the socket
counterclockwise until the tabs on
the socket align with the slots on
the assembly.
5. Remove the bulb from the socket by pressing it in and rotating it
counterclockwise until the tabs on
the bulb align with the slots in the
socket. Pull the bulb out of the
socket
OUM074108L
Turn signal
OUM074053L
High lamp Low lamp
Page 538 of 576

Maintenance
86
7
6. Insert a new bulb by inserting it
into the socket and rotating it until
it locks into place.
7. Install the socket in the assembly by aligning the tabs on the socket
with the slots in the assembly.
Push the socket into the assembly
and turn the socket clockwise.
✽ ✽NOTICE
If bulb will not rotate inside socket,
remove bulb, rotate 180°, and try
again.
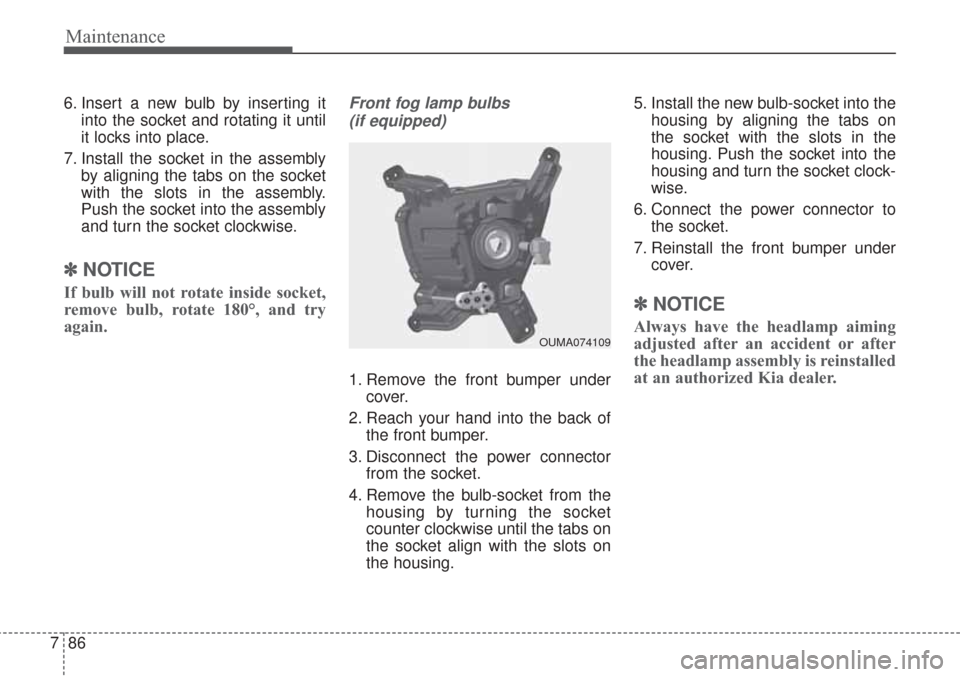
Front fog lamp bulbs
(if equipped)
1. Remove the front bumper under cover.
2. Reach your hand into the back of the front bumper.
3. Disconnect the power connector from the socket.
4. Remove the bulb-socket from the housing by turning the socket
counter clockwise until the tabs on
the socket align with the slots on
the housing. 5. Install the new bulb-socket into the
housing by aligning the tabs on
the socket with the slots in the
housing. Push the socket into the
housing and turn the socket clock-
wise.
6. Connect the power connector to the socket.
7. Reinstall the front bumper under cover.
✽ ✽NOTICE
Always have the headlamp aiming
adjusted after an accident or after
the headlamp assembly is reinstalled
at an authorized Kia dealer.OUMA074109
Page 541 of 576

789
Maintenance
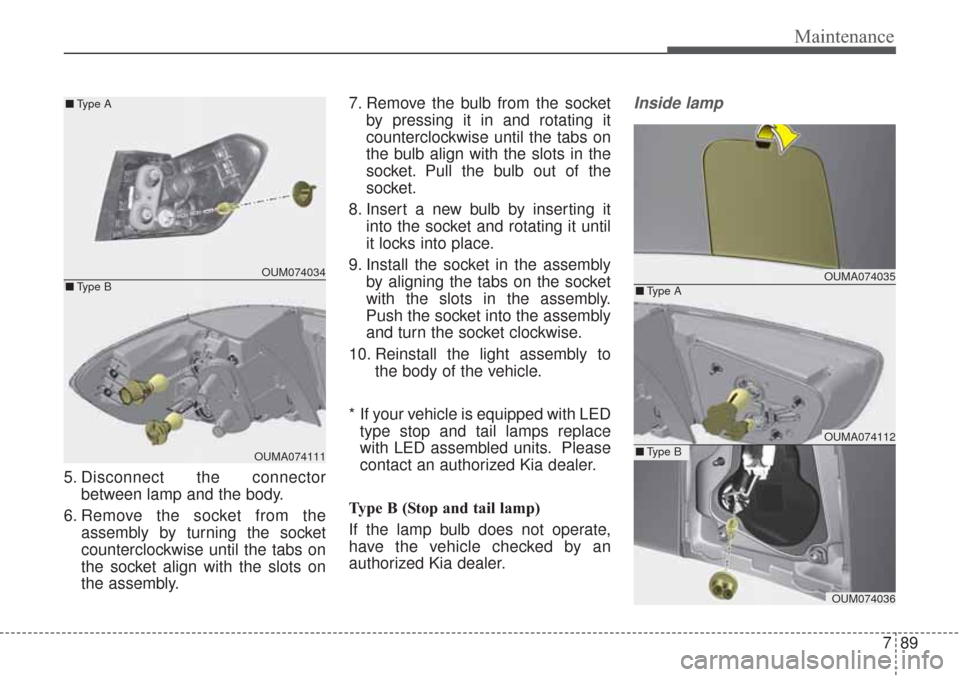
5. Disconnect the connectorbetween lamp and the body.
6. Remove the socket from the assembly by turning the socket
counterclockwise until the tabs on
the socket align with the slots on
the assembly. 7. Remove the bulb from the socket
by pressing it in and rotating it
counterclockwise until the tabs on
the bulb align with the slots in the
socket. Pull the bulb out of the
socket.
8. Insert a new bulb by inserting it into the socket and rotating it until
it locks into place.
9. Install the socket in the assembly by aligning the tabs on the socket
with the slots in the assembly.
Push the socket into the assembly
and turn the socket clockwise.
10. Reinstall the light assembly to the body of the vehicle.
* If your vehicle is equipped with LED type stop and tail lamps replace
with LED assembled units. Please
contact an authorized Kia dealer.
Type B (Stop and tail lamp)
If the lamp bulb does not operate,
have the vehicle checked by an
authorized Kia dealer.
Inside lamp
OUMA074035
OUMA074112
OUM074036
■ Type A
■Type B
OUM074034
OUMA074111
■
Type A
■ Type B
Page 542 of 576

Maintenance
90
7
1. Open the liftgate.
2. Remove the service cover.
3. Remove the socket from the
assembly by turning the socket
counterclockwise until the tabs on
the socket align with the slots on
the assembly.
4. Remove the bulb from the socket by pressing it in and rotating it
counterclockwise until the tabs on
the bulb align with the slots in the
socket. Pull the bulb out of the
socket.
5. Insert a new bulb by inserting it into the socket and rotating it until
it locks into place.
6. Install the socket in the assembly by aligning the tabs on the socket
with the slots in the assembly.
Push the socket into the assembly
and turn the socket clockwise.
7. Install the service cover by putting it into the service hole.
* If your vehicle is equipped with LED type stop and tail lamps replace
with LED assembled units. Please
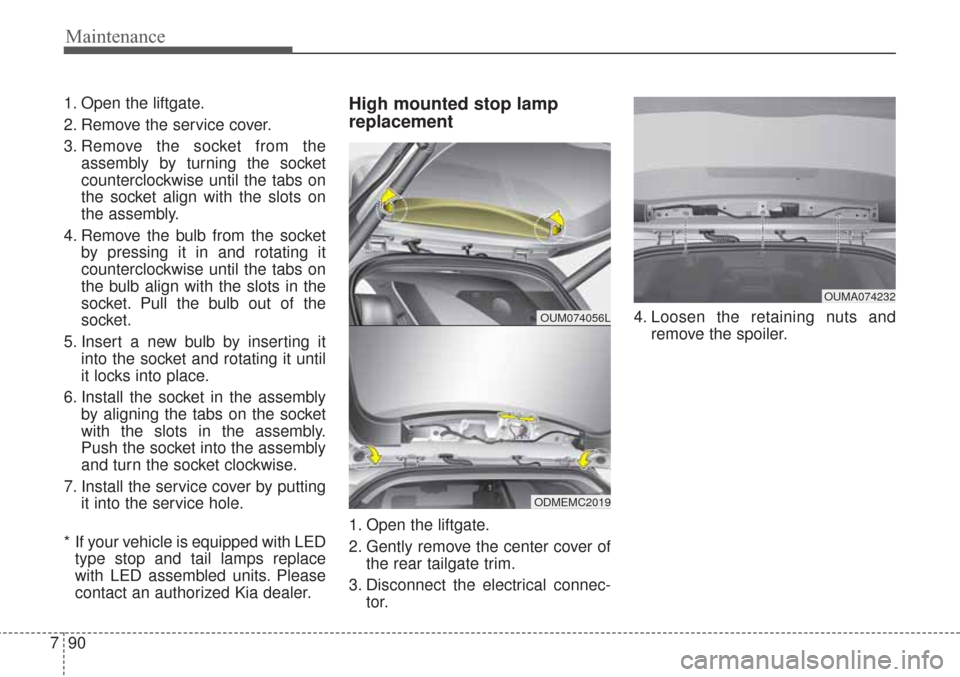
contact an authorized Kia dealer.High mounted stop lamp
replacement
1. Open the liftgate.
2. Gently remove the center cover of the rear tailgate trim.
3. Disconnect the electrical connec- tor. 4. Loosen the retaining nuts and
remove the spoiler.
OUM074056L
ODMEMC2019
OUMA074232
Page 544 of 576

Maintenance
92
7
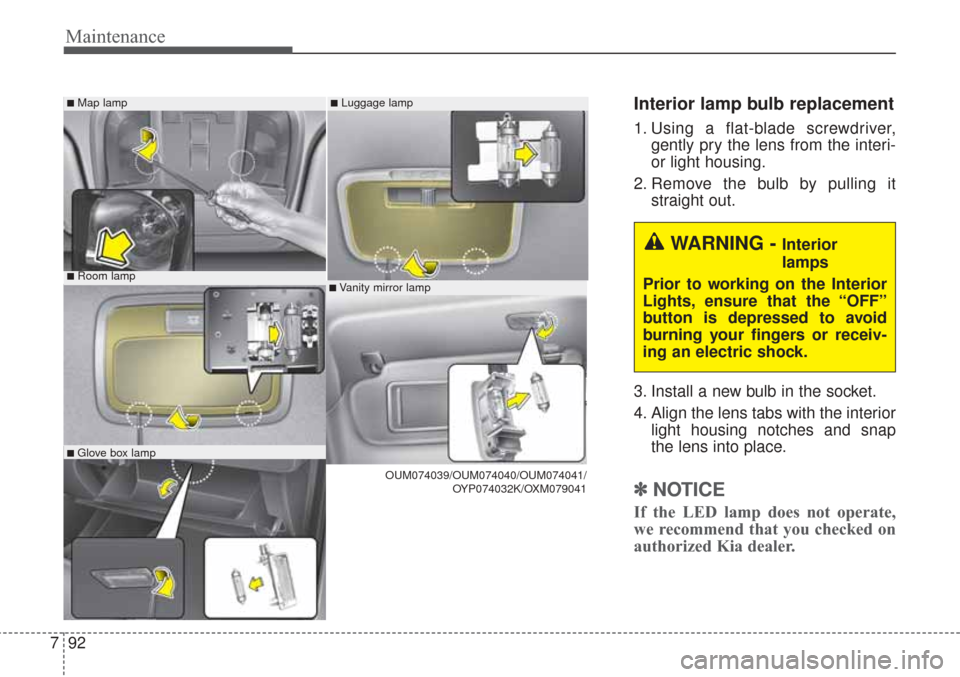
Interior lamp bulb replacement
1. Using a flat-blade screwdriver,
gently pry the lens from the interi-
or light housing.
2. Remove the bulb by pulling it straight out.
3. Install a new bulb in the socket.
4. Align the lens tabs with the interior light housing notches and snap
the lens into place.
✽ ✽NOTICE
If the LED lamp does not operate,
we recommend that you checked on
authorized Kia dealer.
WARNING - Interior
lamps
Prior to working on the Interior
Lights, ensure that the “OFF”
button is depressed to avoid
burning your fingers or receiv-
ing an electric shock.
■Room lamp
■Map lamp
■Glove box lamp
■Luggage lamp
■Vanity mirror lamp
OUM074039/OUM074040/OUM074041/ OYP074032K/OXM079041
Page 554 of 576

Maintenance
102
7
Canister
Fuel vapors generated inside the fuel
tank are absorbed and stored in the
onboard canister. When the engine is
running, the fuel vapors absorbed in
the canister are drawn into the surge
tank through the purge control sole-
noid valve.
Purge Control Solenoid Valve
(PCSV)
The purge control solenoid valve is
controlled by the Engine Control
Module (ECM); when the engine
coolant temperature is low during
idling, the PCSV closes so that evap-
orated fuel is not taken into the
engine. After the engine warms up
during ordinary driving, the PCSV
opens to introduce evaporated fuel to
the engine.
3. Exhaust emission control system
The Exhaust Emission Control
System is a highly effective system
which controls exhaust emissions
while maintaining good vehicle per-
formance.
Vehicle modifications
This vehicle should not be modified.
Modification of your vehicle could
affect its performance, safety or
durability and may even violate gov-
ernmental safety and emissions reg-
ulations.
In addition, damage or performance
problems resulting from any modifi-
cation may not be covered under
warranty.
If you use unauthorized electronic
devices, it may cause the vehicle to
operate abnormally, wire damage,
battery discharge and fire. For your
safety, do not use unauthorized
electronic devices.
Engine exhaust gas precautions
(carbon monoxide)
Carbon monoxide can be present with other exhaust fumes.
Therefore, if you smell exhaust
fumes of any kind inside your vehi-
cle, have it inspected and repaired
immediately. If you ever suspect
exhaust fumes are coming into
your vehicle, drive it only with all
the windows fully open. Have your
vehicle checked and repaired
immediately.
WARNING - Exhaust
Engine exhaust gases contain
carbon monoxide (CO). Though
colorless and odorless, it is
dangerous and could be lethal if
inhaled. Follow the instructions
on this page to avoid CO poi-
soning.
Page 569 of 576

I3
Index
Automatic transaxle . . . . . . . . . . . . . . . . . . . . . . . . . . . 5-13Automatic transaxle operation . . . . . . . . . . . . . . . . . 5-13
Good driving practices . . . . . . . . . . . . . . . . . . . . . . . 5-19
Battery. . . . . . . . . . . . . . . . . . . . . . . . . . . . . . . . . . . . \
. . 7-49 Battery recharging . . . . . . . . . . . . . . . . . . . . . . . . . . 7-50
For best battery service . . . . . . . . . . . . . . . . . . . . . . 7-49
Recharging battery . . . . . . . . . . . . . . . . . . . . . . . . . . 7-51
Reset items . . . . . . . . . . . . . . . . . . . . . . . . . . . . . . . . 7-51
Before driving . . . . . . . . . . . . . . . . . . . . . . . . . . . . . . . . . 5-4 Before entering vehicle . . . . . . . . . . . . . . . . . . . . . . . 5-4
Before starting . . . . . . . . . . . . . . . . . . . . . . . . . . . . . . 5-4
Necessary inspections . . . . . . . . . . . . . . . . . . . . . . . . 5-4
Blind spot detection system (BSD) . . . . . . . . . . . . . . . 5-84 BSD (Blind Spot Detection) /LCA (Lane Change Assist) . . . . . . . . . . . . . . . . . . 5-85
Non-operating condition . . . . . . . . . . . . . . . . . . . . . 5-90
RCTA (Rear Cross Traffic Alert) . . . . . . . . . . . . . . . 5-88
Brake fluid . . . . . . . . . . . . . . . . . . . . . . . . . . . . . . . . . . 7-39\
Checking the brake fluid level . . . . . . . . . . . . . . . . . 7-39
Brake system. . . . . . . . . . . . . . . . . . . . . . . . . . . . . . . . . 5-27 Anti-lock brake system (ABS) . . . . . . . . . . . . . . . . . 5-40
AUTO HOLD. . . . . . . . . . . . . . . . . . . . . . . . . . . . . . 5-37
Electronic parking brake (EPB) . . . . . . . . . . . . . . . . 5-30
Electronic stability control (ESC) . . . . . . . . . . . . . . 5-42
Good braking practices . . . . . . . . . . . . . . . . . . . . . . 5-48 Hill-start assist control (HAC) . . . . . . . . . . . . . . . . . 5-47
Parking brake – Foot type . . . . . . . . . . . . . . . . . . . . 5-29
Power brakes . . . . . . . . . . . . . . . . . . . . . . . . . . . . . . 5-27
Vehicle stability management (VSM) . . . . . . . . . . . 5-46
Bulb wattage . . . . . . . . . . . . . . . . . . . . . . . . . . . . . . . . . . 8-3
Child restraint system . . . . . . . . . . . . . . . . . . . . . . . . . . 3-36 Child restraint system. . . . . . . . . . . . . . . . . . . . . . . . 3-37
Lower anchor system . . . . . . . . . . . . . . . . . . . . . . . . 3-42
Tether anchor system . . . . . . . . . . . . . . . . . . . . . . . . 3-41
Clean air . . . . . . . . . . . . . . . . . . . . . . . . . . . . . . . . . . . 4-\
158
Climate control air filter . . . . . . . . . . . . . . . . . . . . . . . . 7-44 Filter inspection . . . . . . . . . . . . . . . . . . . . . . . . . . . . 7-44
Cruise control system . . . . . . . . . . . . . . . . . . . . . . . . . . 5-61 To cancel cruise control . . . . . . . . . . . . . . . . . . . . . . 5-63
To decrease the cruising speed. . . . . . . . . . . . . . . . . 5-63
To increase cruise control set speed. . . . . . . . . . . . . 5-62
To resume cruising speed . . . . . . . . . . . . . . . . . . . . . 5-64
To set cruise control speed . . . . . . . . . . . . . . . . . . . . 5-62
To temporarily accelerate with the cruise control on. . . . . . . . . . . . . . . . . . . . . . . . 5-63
To turn cruise control off . . . . . . . . . . . . . . . . . . . . . 5-64
C
B