2017 KIA Sorento turn signal
[x] Cancel search: turn signalPage 243 of 576

Features of your vehicle
158
4
This indicator illuminates
when the auto defogging
system senses the mois-
ture on the inside of the
windshield and operates.
If more moisture is in the vehicle,
higher steps operate as follow. For
example if auto defogging does not
defog inside the windshield at step 1
Outside air position, it tries to defog
again at step 2 Blowing air toward
the windshield.
Step 1 : Outside air position
Step 2 :Blowing air toward the wind-
shield
Step 3 : Increasing air flow toward the windshield
Step 4 : Operating the air conditioning
Step 5 : M aximizing the air condi-
tioning To cancel or reset the Auto Defogging
System
Press the front windshield defroster
button for 3 seconds when the igni-
tion switch is in the ON position.
When the Auto Defogging System is
canceled, ADS OFF symbol will blink
3 times and the ADS OFF will be dis-
played on the climate control infor-
mation screen.
When the Auto Defogging System is
reset, ADS OFF symbol will blink 6
times without a signal.
✽ ✽
NOTICE
If the A/C off or recirculated air
position is manually selected while
the auto defogging system is on, the
auto defogging indicator will blink 3
times to give notice that manual
operation is canceled.
Do not remove the sensor cover
located on the upper end of the pas-
senger side windshield glass.
Damage to the system parts could
occur and may not be covered by
your vehicle warranty. When the ignition switch is in the ON
position, the clean air function turns
on automatically.
Also, the clean air function turns off
automatically, when the ignition
switch turns to the OFF position.
CLEAN AIR (IF EQUIPPED)
OUM044174L
Page 257 of 576

Features of your vehicle
172 4
If you install aftermarket HID head
lamps, your vehicle’s audio and elec-
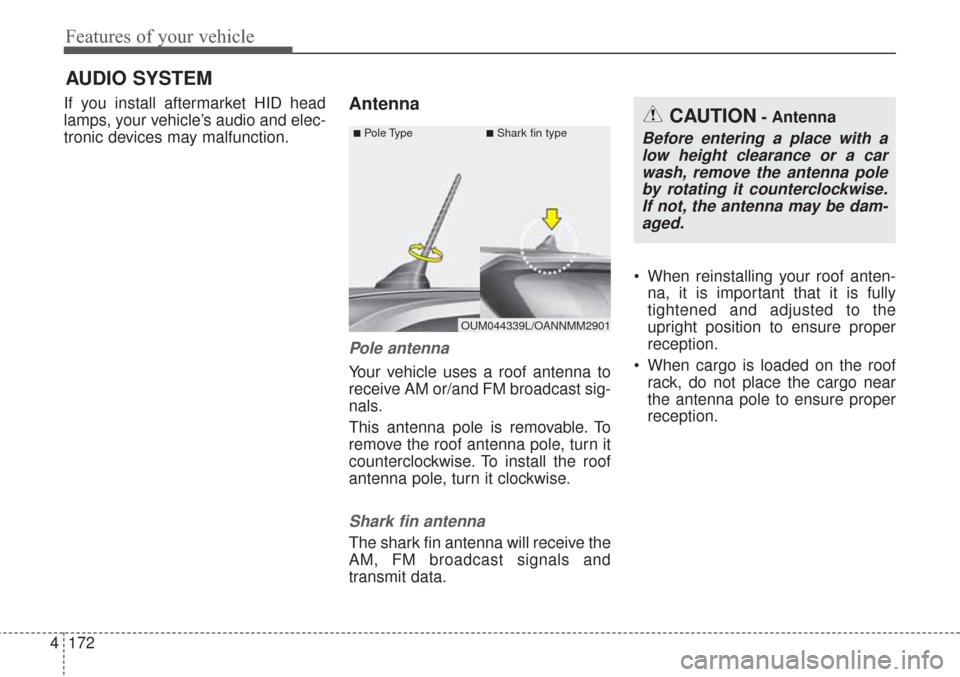
tronic devices may malfunction.Antenna
Pole antenna
Your vehicle uses a roof antenna to
receive AM or/and FM broadcast sig-
nals.
This antenna pole is removable. To
remove the roof antenna pole, turn it
counterclockwise. To install the roof
antenna pole, turn it clockwise.
Shark fin antenna
The shark fin antenna will receive the
AM, FM broadcast signals and
transmit data. When reinstalling your roof anten-
na, it is important that it is fully
tightened and adjusted to the
upright position to ensure proper
reception.
When cargo is loaded on the roof
rack, do not place the cargo near
the antenna pole to ensure proper
reception.
AUDIO SYSTEM
CAUTION- Antenna
Before entering a place with a
low height clearance or a car
wash, remove the antenna pole
by rotating it counterclockwise.
If not, the antenna may be dam-
aged.
OUM044339L/OANNMM2901
■Pole Type■Shark fin type
Page 279 of 576

Features of your vehicle
194 4
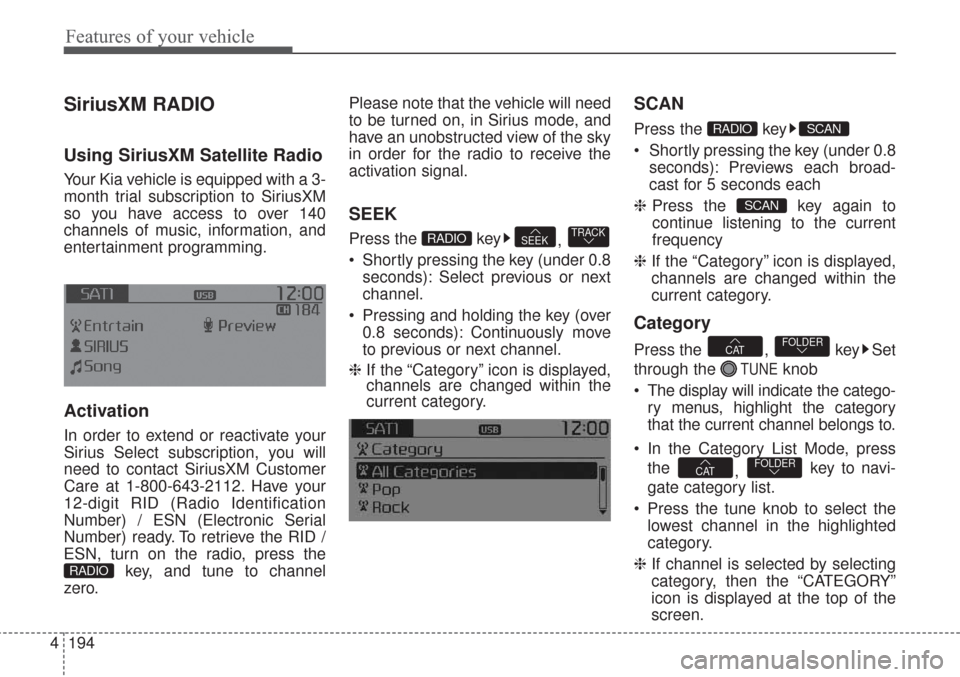
SiriusXM RADIO
Using SiriusXM Satellite Radio
Your Kia vehicle is equipped with a 3-
month trial subscription to SiriusXM
so you have access to over 140
channels of music, information, and
entertainment programming.
Activation
In order to extend or reactivate your
Sirius Select subscription, you will
need to contact SiriusXM Customer
Care at 1-800-643-2112. Have your
12-digit RID (Radio Identification
Number) / ESN (Electronic Serial
Number) ready. To retrieve the RID /
ESN, turn on the radio, press the
key, and tune to channel
zero.Please note that the vehicle will need
to be turned on, in Sirius mode, and
have an unobstructed view of the sky
in order for the radio to receive the
activation signal.
SEEK
Press the key
,
Shortly pressing the key (under 0.8
seconds): Select previous or next
channel.
Pressing and holding the key (over
0.8 seconds): Continuously move
to previous or next channel.
❈ If the “Category” icon is displayed,
channels are changed within the
current category.
SCAN
Press the key
Shortly pressing the key (under 0.8
seconds): Previews each broad-
cast for 5 seconds each
❈Press the key again to
continue listening to the current
frequency
❈If the “Category” icon is displayed,
channels are changed within the
current category.
Category
Press the , key Set
through the
TUNEknob
The display will indicate the catego-
ry menus, highlight the category
that the current channel belongs to.
In the Category List Mode, press
the
, key to navi-
gate category list.
Press the tune knob to select the
lowest channel in the highlighted
category.
❈If channel is selected by selecting
category, then the “CATEGORY”
icon is displayed at the top of the
screen.
FOLDERCAT
FOLDERCAT
SCAN
SCANRADIO
TRACKSEEKRADIO
RADIO
Page 399 of 576

Driving your vehicle
86
5
If a vehicle is detected within the
boundary of the system, a warning
light will illuminate on the outside
rearview mirror.
If the detected vehicle is not in
detecting range, the warning will turn
off according to driving conditions. The second stage alarm will activate
when:
1.The first stage alert is on
2.The turn signal is on to change a
lane
When the second stage alert is acti-
vated, a warning light will blink on the
outside rearview mirror and an alarm
will sound.
If you move the turn signal switch to
the original position, the second
stage alert will be deactivated. - The second stage alarm may be
deactivated.
To activate the alarm: Go to the User Settings Mode →
Sound and select "BSD" on the
LCD display.
To deactivate the alarm: Go to the User Settings Mode →
Sound and deselect "BSD" on the
LCD display.✽ ✽
NOTICE
The alarm function helps alert the
driver. Deactivate this function only
when it is necessary.
OUM054029
2nd stage
OUM054028
1st stage
Page 407 of 576

Driving your vehicle
94
5
The color of symbol will change
depend on the condition of LDWS
system.
- White color : It means the sensor
does not detect the
lane line.
- Green color : It means the sensor detects the lane line.
Warning indicator
When the LDWS is not working prop-
erly, the warning light will illuminate
and the warning message will come
on for a few second. After the mes-
sage disappears, the master warning
light will illuminate. Take your vehicle to an authorized
Kia dealer and have the system
checked.
The LDWS does not operate
when:
The driver turns on the turn signal
or the hazard warning flasher to
change lane.
Driving on the lane line.
✽ ✽ NOTICE
To change lanes, operate the turn
signal switch then change the lane.
WARNING - LDWS
Limitations
The Lane Departure Warning
System is a supplemental sys-
tem. Do not solely rely on the
system but always pay attention
and drive safely.
OUM054158L
OUM054132
OUM054133L
Page 421 of 576

Driving your vehicle
108
5
Driving with a trailer
Towing a trailer requires a certain
amount of experience. Before setting
out for the open road, you must get to
know your trailer. Acquaint yourself
with the feel of handling and braking
with the added weight of the trailer.
And always keep in mind that the
vehicle you are driving is now a good
deal longer and not nearly so respon-
sive as your vehicle is by itself.
Before you start, check the trailer
hitch and platform, safety chains,
electrical connector(s), lights, tires
and mirror adjustment. If the trailer
has electric brakes, start your vehicle
and trailer moving and then apply the
trailer brake controller by hand to be
sure the brakes are working. This lets
you check your electrical connection
at the same time.
During your trip, check occasionally
to be sure that the load is secure,
and that the lights and any trailer
brakes are still working.
Following distance
Stay at least twice as far behind the
vehicle ahead as you would when
driving your vehicle without a trailer.
This can help you avoid situations
that require heavy braking and sud-
den turns.
Passing
You’ll need more passing distance
up ahead when you’re towing a trail-
er. And, because of the increased
vehicle length, you’ll need to go
much farther beyond the passed
vehicle before you can return to your
lane. Due to the added load to the
engine when going uphill the vehicle
may also take longer to pass than it
would on flat ground.
Backing up
Hold the bottom of the steering
wheel with one hand. Then, to move
the trailer to the left, just move your
hand to the left. To move the trailer to
the right, move your hand to the
right. Always back up slowly and, if
possible, have someone guide you.
Making turns
When you’re turning with a trailer,
make wider turns than normal. Do
this so your trailer won’t strike soft
shoulders, curbs, road signs, trees,
or other objects near the edge of the
road. Avoid jerky or sudden maneu-
vers. Signal well in advance before
turning or lane changes.
Page 422 of 576

5109
Driving your vehicle
Turn signals when towing a trailer
When you tow a trailer, your vehicle
has to have a different turn signal
flasher and extra wiring. The green
arrows on your instrument panel will
flash whenever you signal a turn or
lane change. Properly connected,
the trailer lights will also flash to alert
other drivers you’re about to turn,
change lanes, or stop.
When towing a trailer, the green
arrows on your instrument panel will
flash for turns even if the bulbs on the
trailer are burned out. Thus, you may
think drivers behind you are seeing
your signals when, in fact, they are
not. It’s important to check occasion-
ally to be sure the trailer bulbs are still
working. You must also check the
lights every time you disconnect and
then reconnect the wires.
Do not connect a trailer lighting sys-
tem directly to your vehicle’s lighting
system. Use only an approved trailer
wiring harness.
An authorized Kia dealer can assist
you in installing the wiring harness.
Driving on grades
Reduce speed and shift to a lower
gear before you start down a long or
steep downgrade. If you don’t shift
down, you might have to use your
brakes so much that they would get
hot and no longer operate efficiently.
On a long uphill grade, shift down
and reduce your speed to around 70
km/h (45 mph) to reduce the possi-
bility of engine and transaxle over-
heating.
If your trailer weighs more than the
maximum trailer weight without trail-
er brakes and you have an automat-
ic transaxle, you should drive in D
(Drive) when towing a trailer.
Operating your vehicle in D (Drive)
when towing a trailer will minimize
heat build up and extend the life of
your transaxle.CAUTION
Always use an approved trailerwiring harness. Failure to usean approved trailer wiring har-ness could result in damage tothe vehicle electrical system.
Page 435 of 576

What to do in an emergency
26
ROAD WARNING
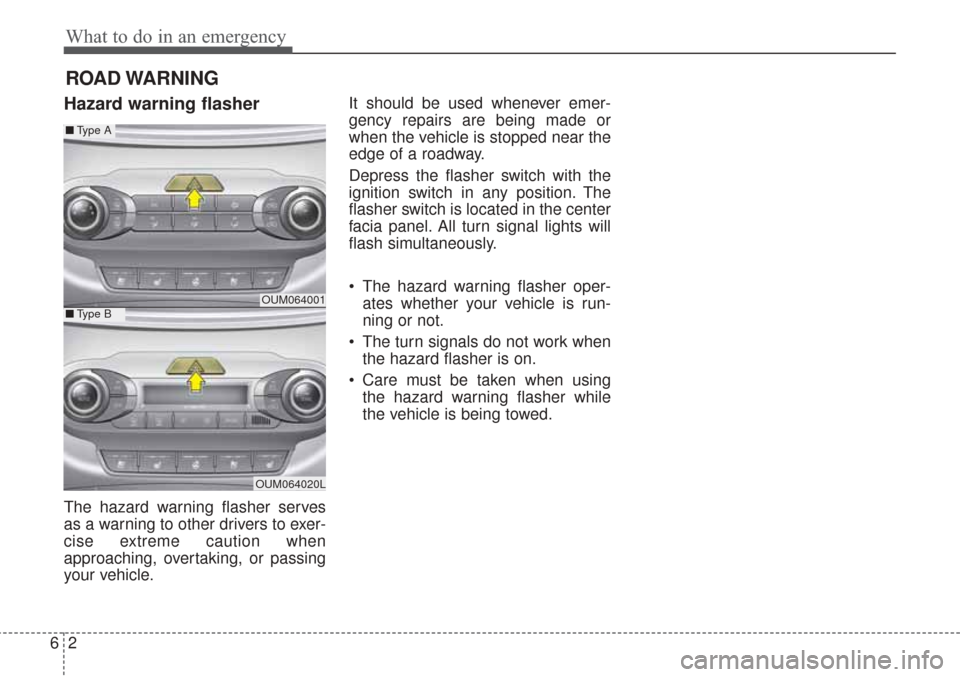
Hazard warning flasher
The hazard warning flasher serves
as a warning to other drivers to exer-
cise extreme caution when
approaching, overtaking, or passing
your vehicle.It should be used whenever emer-
gency repairs are being made or
when the vehicle is stopped near the
edge of a roadway.
Depress the flasher switch with the
ignition switch in any position. The
flasher switch is located in the center
facia panel. All turn signal lights will
flash simultaneously.
• The hazard warning flasher oper-
ates whether your vehicle is run-
ning or not.
The turn signals do not work when the hazard flasher is on.
Care must be taken when using the hazard warning flasher while
the vehicle is being towed.
OUM064001
OUM064020L
■ Type A
■Type B