Page 109 of 449

Features of your vehicle
38
4
Tilt and telescoping (if equipped)
steering
Tilt steering allows you to adjust the
steering wheel before you drive. You can
also raise it to give your legs more room
when you exit and enter the vehicle.
The steering wheel should be positioned
so that it is comfortable for you to drive,
while permitting you to see the instru-
ment panel warning lights and gauges.
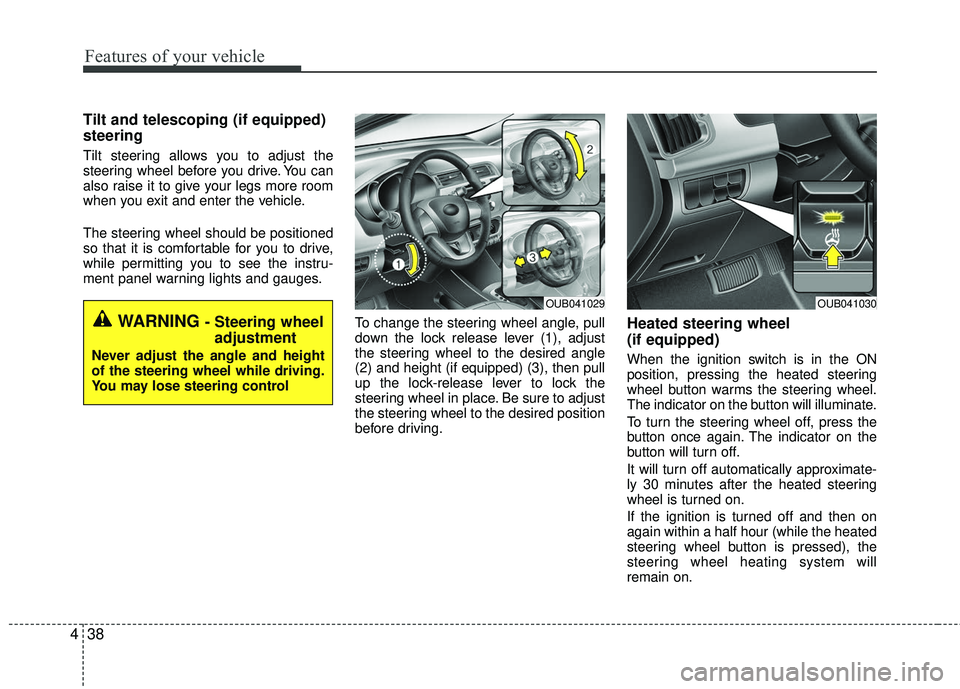
To change the steering wheel angle, pull
down the lock release lever (1), adjust
the steering wheel to the desired angle
(2) and height (if equipped) (3), then pull
up the lock-release lever to lock the
steering wheel in place. Be sure to adjust
the steering wheel to the desired position
before driving.
Heated steering wheel
(if equipped)
When the ignition switch is in the ON
position, pressing the heated steering
wheel button warms the steering wheel.
The indicator on the button will illuminate.
To turn the steering wheel off, press the
button once again. The indicator on the
button will turn off.
It will turn off automatically approximate-
ly 30 minutes after the heated steering
wheel is turned on.
If the ignition is turned off and then on
again within a half hour (while the heated
steering wheel button is pressed), the
steering wheel heating system will
remain on.
WARNING - Steering wheeladjustment
Never adjust the angle and height
of the steering wheel while driving.
You may lose steering control
OUB041029OUB041030
Page 111 of 449

Features of your vehicle
40
4
Inside rearview mirror
Adjust the rearview mirror so that the
center view through the rear window is
seen. Make this adjustment before you
start driving.
Do not place objects in the rear seat
which would interfere with your vision
through the rear window.
Day/night rearview mirror
(if equipped)
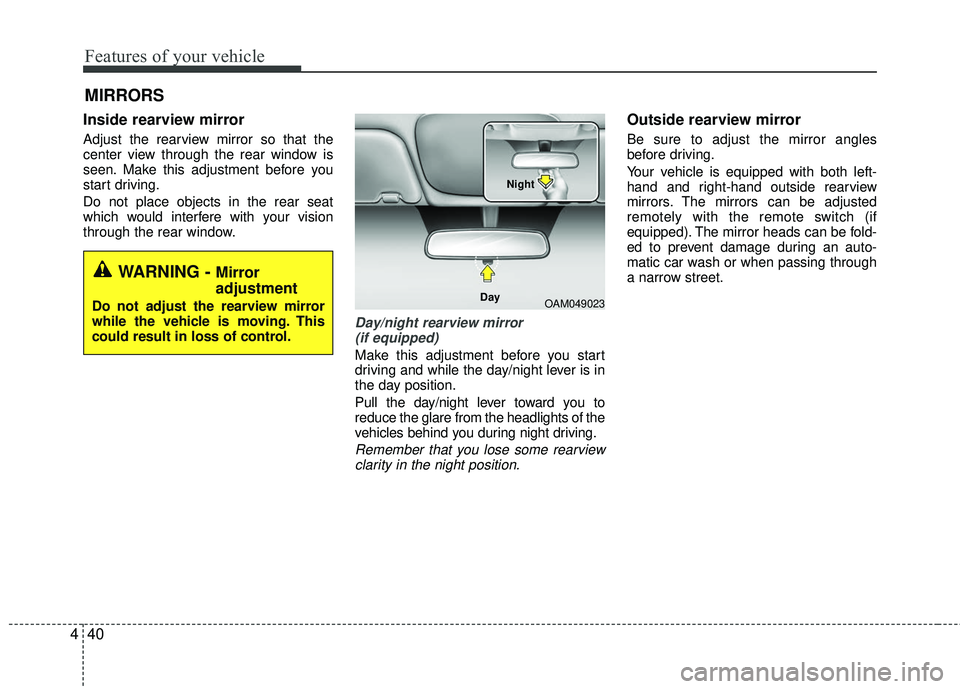
Make this adjustment before you start
driving and while the day/night lever is in
the day position.
Pull the day/night lever toward you to
reduce the glare from the headlights of the
vehicles behind you during night driving.
Remember that you lose some rearviewclarity in the night position.
Outside rearview mirror
Be sure to adjust the mirror angles
before driving.
Your vehicle is equipped with both left-
hand and right-hand outside rearview
mirrors. The mirrors can be adjusted
remotely with the remote switch (if
equipped). The mirror heads can be fold-
ed to prevent damage during an auto-
matic car wash or when passing through
a narrow street.
MIRRORS
WARNING - Mirror
adjustment
Do not adjust the rearview mirror
while the vehicle is moving. This
could result in loss of control.OAM049023
Day Night
Page 112 of 449

441
Features of your vehicle
The right outside rearview mirror is con-
vex. Objects seen in the mirror are closer
than they appear.
Use your interior rearview mirror or direct
observation to determine the actual dis-
tance of following vehicles when chang-
ing lanes.
Remote control
Electric type
The electric remote control mirror switch
allows you to adjust the position of the
left and right outside rearview mirrors. To
adjust the position of either mirror the
ignition switch should be in the ACC or
ON position.Move the lever (1) to R or L to select the
right side mirror or the left side mirror,
then press a corresponding point on the
mirror adjustment control to position the
selected mirror up, down, left or right.
After the adjustment, put the lever into
neutral (center) position to prevent inad-
vertent adjustment.
CAUTION - Rearview
mirror
Do not scrape ice off the mirror
face; this may damage the surfaceof the glass. If ice should restrictmovement of the mirror, do not forcethe mirror for adjustment. To removeice, use a deicer spray, or a spongeor soft cloth with very warm water.
WARNING - Mirror
adjustment
Do not adjust or fold the outside
rearview mirrors while the vehicle
is moving. This could result in loss
of control.
■Type BOUB041032
OUB041033
■Type A
CAUTION - Outside mirror
The mirrors stop moving when they reach the maximum adjust-ing angles, but the motor contin-ues to operate while the switch is pressed. Do not press the switchlonger than necessary, the motor may be damaged.
Do not attempt to adjust the out- side rearview mirror by hand.Doing so may damage the related parts.
Page 114 of 449
443
Features of your vehicle
INSTRUMENT CLUSTER
1. Tachometer
2. Turn signal indicators
3. Speedometer
4. Fuel gauge
5. Engine coolant temperature gauge
6. Warning and indicator lights
7. Shift position indicator (A/T) or Manual transaxle shift indicator (M/T)
8. Odometer/Trip computer
❈ The actual cluster in the vehicle may differ
from the illustration.
For more details refer to the "Gauges" in
the next pages.
OUB044036C/OUB042037C
■ ■Type A
■ ■Type B
Page 116 of 449

445
Features of your vehicle
Engine coolant temperature gauge(for supervisim cluster)
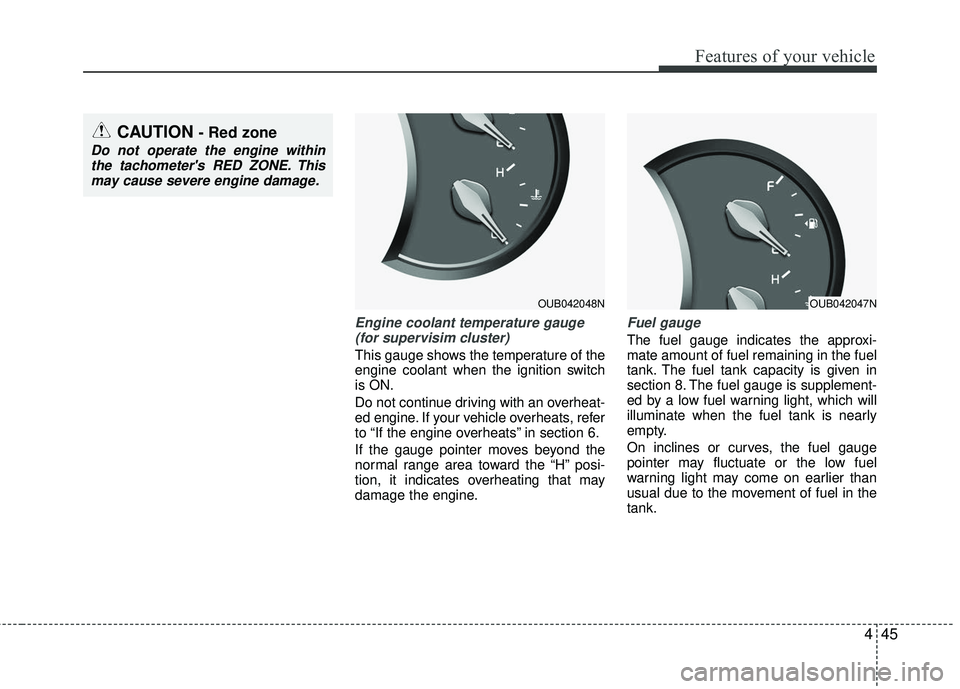
This gauge shows the temperature of the
engine coolant when the ignition switch
is ON.
Do not continue driving with an overheat-
ed engine. If your vehicle overheats, refer
to “If the engine overheats” in section 6.
If the gauge pointer moves beyond the
normal range area toward the “H” posi-
tion, it indicates overheating that may
damage the engine.
Fuel gauge
The fuel gauge indicates the approxi-
mate amount of fuel remaining in the fuel
tank. The fuel tank capacity is given in
section 8. The fuel gauge is supplement-
ed by a low fuel warning light, which will
illuminate when the fuel tank is nearly
empty.
On inclines or curves, the fuel gauge
pointer may fluctuate or the low fuel
warning light may come on earlier than
usual due to the movement of fuel in the
tank.
OUB042048N
CAUTION - Red zone
Do not operate the engine withinthe tachometer's RED ZONE. Thismay cause severe engine damage.
OUB042047N
Page 117 of 449
Features of your vehicle
46
4
Odometer
Odometer
The odometer indicates the total dis-
tance the vehicle has been driven.
You will also find the odometer useful to
determine when periodic maintenance
should be performed.
✽ ✽
NOTICE
It is forbidden to alter the odometer of
all vehicles with the intent to change the
mileage registered on the odometer. The
alteration may void your warranty cov-
erage.WARNING- Fuel gauge
Stop and obtain additional fuel as
soon as possible after the warning
light comes on or when the gauge
indicator comes close to the E level.
Running out of fuel can expose
vehicle occupants to danger.
CAUTION- Low fuel
Avoid driving with extremely low
fuel level. Running out of fuel couldcause the engine to misfire, damag-ing the catalytic converter.OUB041050C
■Type A■Type B
Page 123 of 449

Features of your vehicle
52
4
Car option (only for Type B clus-
ter, if equipped)
1. When the vehicle is at a standstill,
pressing the TRIP button for more than
2 seconds with the ENGINE
START/STOP button in the ON posi-
tion or engine running, the LCD display
on the cluster will change to the "User
Setting" mode.
You can move to items by pressing the
TRIP button and select the item by
pressing the RESET button.
2. In the "User Setting" mode, select "Vehicle Option".
3. Move (TRIP button) to the desired item and select (RESET button).
Align steering wheel (Steering position) (if equipped)
On - The warning illuminates on the LCD display when the steering wheel is
not aligned with the ENGINE
START/STOP button in the ON
position.
Off - The warning does not illuminate on the LCD display when the steering
wheel is not aligned with the
ENGINE START/STOP button in the
ON position.
Outside temperature unit(if equipped)
You can exchange the outside tempera-
ture unit °C ↔
°F.
OUB041064OUB041065OUB041066
Page 126 of 449

455
Features of your vehicle
Warnings and indicators
All warning lights are checked by turning
the ignition switch ON (do not start the
engine). Any light that does not illuminate
should be checked by an authorized Kia
dealer.
After starting the engine, check to make
sure that all warning lights are off. If any
warning lights are still on, this indicates a
situation that needs attention. When
releasing the parking brake, the brake
system warning light should go off. The
fuel warning light will stay on if the fuel
level is low.
Air bag warning light
This warning light will illuminate for
approximately 6 seconds each time you
turn the ignition switch to the ON position.
This light also comes on when the
Supplement Restraint System (SRS) is
not working properly. If the air bag warn-
ing light does not come on, or continu-
ously remains on after operating for
about 6 seconds when you turned the
ignition switch to the ON position or start-
ed the engine, or if it comes on while
driving, have the SRS inspected by an
authorized Kia dealer.
Anti-lock brake system(ABS) warning light (if equipped)
This warning light illuminates if the igni-
tion switch is turned ON and goes off in
approximately 3 seconds if the system is
operating normally.
If the ABS warning light remains on,
comes on while driving, or does not
come on when the ignition switch is
turned to the ON position, this indicates
that the ABS may have malfunctioned.
If this occurs, have your vehicle checked
by an authorized Kia dealer as soon as
possible. The normal braking system will
still be operational, but without the assis-
tance of the anti-lock brake system.