2017 KIA RIO trunk
[x] Cancel search: trunkPage 130 of 449

459
Features of your vehicle
Your vehicle is equipped with dual-diago-
nal braking systems. This means you still
have braking on two wheels even if one
of the dual systems should fail. With only
one of the dual systems working, more
than normal pedal travel and greater
pedal pressure are required to stop the
vehicle. Also, the vehicle will not stop in
as short a distance with only a portion of
the brake system working. If the brakes
fail while you are driving, shift to a lower
gear for additional engine braking and
stop the vehicle as soon as it is safe to do
so.
To check bulb operation, check whether
the parking brake and brake fluid warning
light illuminates when the ignition switch
is in the ON position.Charging system warninglight
This warning light indicates a malfunction
of either the generator or electrical
charging system.
If the warning light illuminates while the
vehicle is in motion:
1. Drive to the nearest safe location.
2. With the engine off, check the genera- tor drive belt for looseness or break-
age.
3. If the belt is adjusted properly, a prob- lem exists somewhere in the electrical
charging system. Have an authorized
Kia dealer correct the problem as soon
as possible.
Trunk lid (or tailgate) openwarning light
This warning light illuminates when the
trunk lid (or tailgate) is not closed secure-
ly with the ignition switch in any position.
Door ajar warning light
This warning light illuminates when a
door is not closed securely with the igni-
tion switch in any position.
Page 153 of 449

Features of your vehicle
82
4
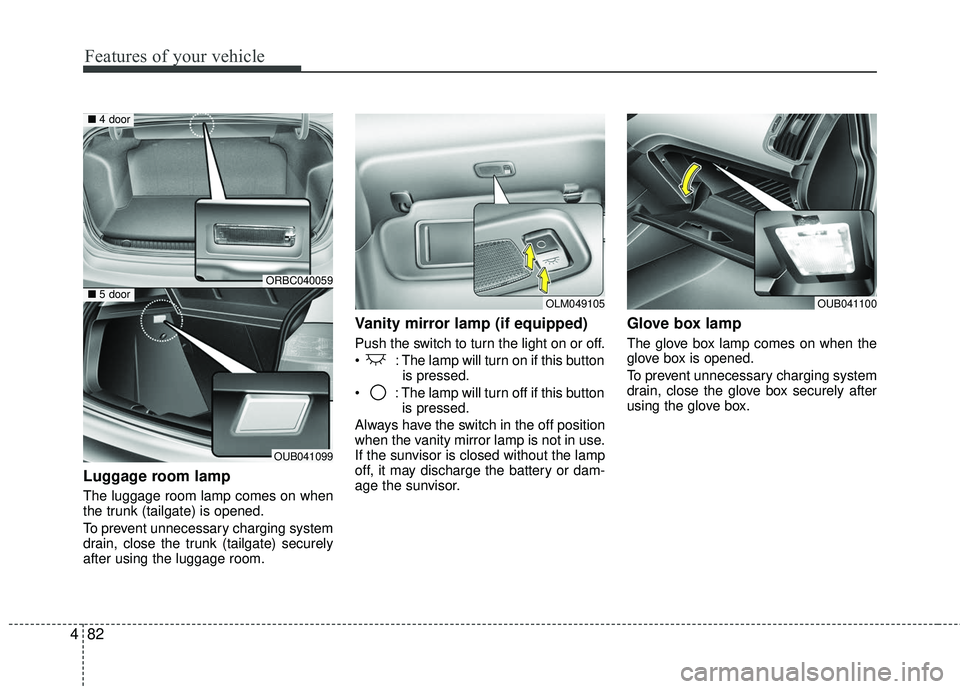
Luggage room lamp
The luggage room lamp comes on when
the trunk (tailgate) is opened.
To prevent unnecessary charging system
drain, close the trunk (tailgate) securely
after using the luggage room.
Vanity mirror lamp (if equipped)
Push the switch to turn the light on or off.
: The lamp will turn on if this button
is pressed.
: The lamp will turn off if this button is pressed.
Always have the switch in the off position
when the vanity mirror lamp is not in use.
If the sunvisor is closed without the lamp
off, it may discharge the battery or dam-
age the sunvisor.
Glove box lamp
The glove box lamp comes on when the
glove box is opened.
To prevent unnecessary charging system
drain, close the glove box securely after
using the glove box.
OLM049105OUB041100
ORBC040059
OUB041099
■ 4 door
■5 door
Page 415 of 449

779
Maintenance
Rear combination light bulb
replacement
(1) Stop and tail light
(2) Rear turn signal light
(3) Back-up light
(4) Tail light
Stop and tail light (LED type, if equipped)
If the light (LED) does not operate, have
the vehicle checked by an authorized Kia
dealer.
Outside light
Rear turn signal light and tail/stop light
1. Turn off the engine.
2. Open the trunk lid.
3. Remove the service cover by pulling out the service cover.
OUB071036
■ 4 door
■ 5 doorOUB075113
OUB071069K
Page 417 of 449

781
Maintenance
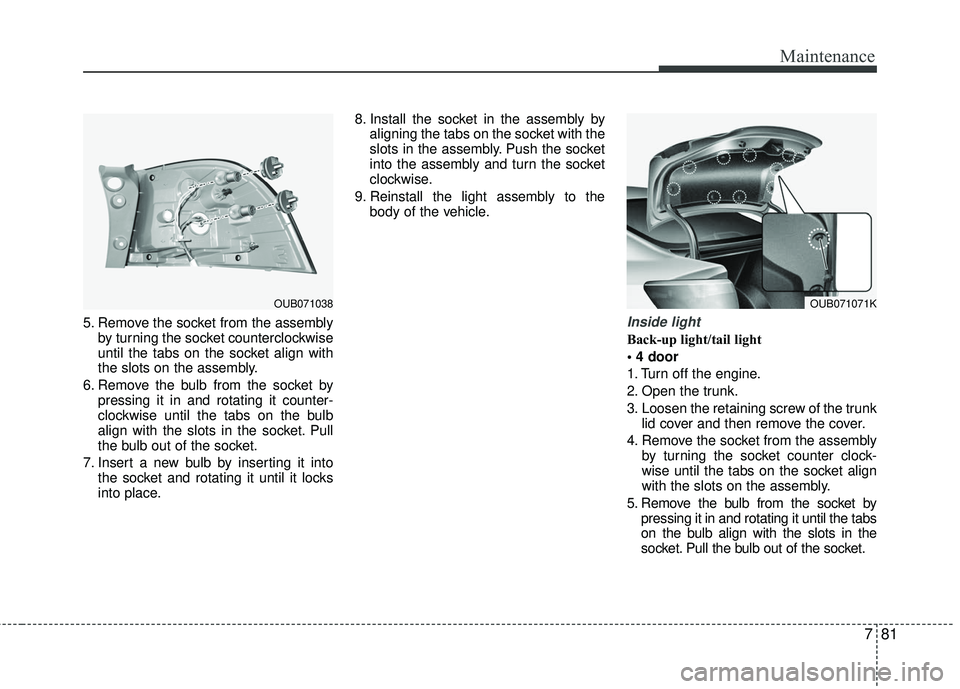
5. Remove the socket from the assemblyby turning the socket counterclockwise
until the tabs on the socket align with
the slots on the assembly.
6. Remove the bulb from the socket by pressing it in and rotating it counter-
clockwise until the tabs on the bulb
align with the slots in the socket. Pull
the bulb out of the socket.
7. Insert a new bulb by inserting it into the socket and rotating it until it locks
into place. 8. Install the socket in the assembly by
aligning the tabs on the socket with the
slots in the assembly. Push the socket
into the assembly and turn the socket
clockwise.
9. Reinstall the light assembly to the body of the vehicle.Inside light
Back-up light/tail light
1. Turn off the engine.
2. Open the trunk.
3. Loosen the retaining screw of the trunklid cover and then remove the cover.
4. Remove the socket from the assembly by turning the socket counter clock-
wise until the tabs on the socket align
with the slots on the assembly.
5. Remove the bulb from the socket by pressing it in and rotating it until the tabs
on the bulb align with the slots in the
socket. Pull the bulb out of the socket.
OUB071038OUB071071K
Page 418 of 449

Maintenance
82
7
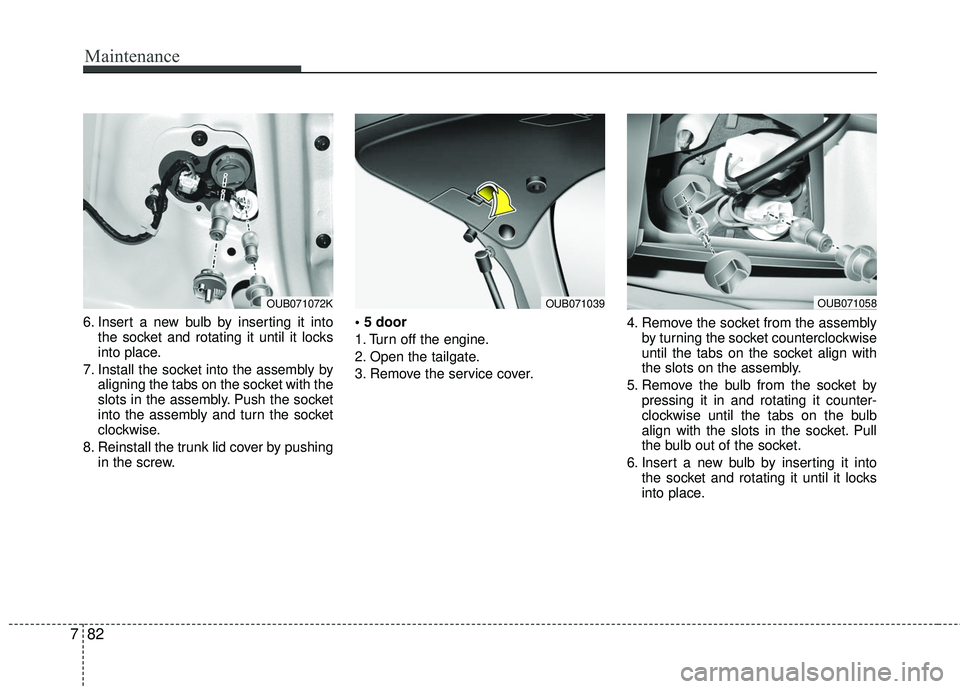
6. Insert a new bulb by inserting it into
the socket and rotating it until it locks
into place.
7. Install the socket into the assembly by aligning the tabs on the socket with the
slots in the assembly. Push the socket
into the assembly and turn the socket
clockwise.
8. Reinstall the trunk lid cover by pushing in the screw.
1. Turn off the engine.
2. Open the tailgate.
3. Remove the service cover.
4. Remove the socket from the assembly
by turning the socket counterclockwise
until the tabs on the socket align with
the slots on the assembly.
5. Remove the bulb from the socket by pressing it in and rotating it counter-
clockwise until the tabs on the bulb
align with the slots in the socket. Pull
the bulb out of the socket.
6. Insert a new bulb by inserting it into the socket and rotating it until it locks
into place.
OUB071072KOUB071058OUB071039
Page 419 of 449

783
Maintenance
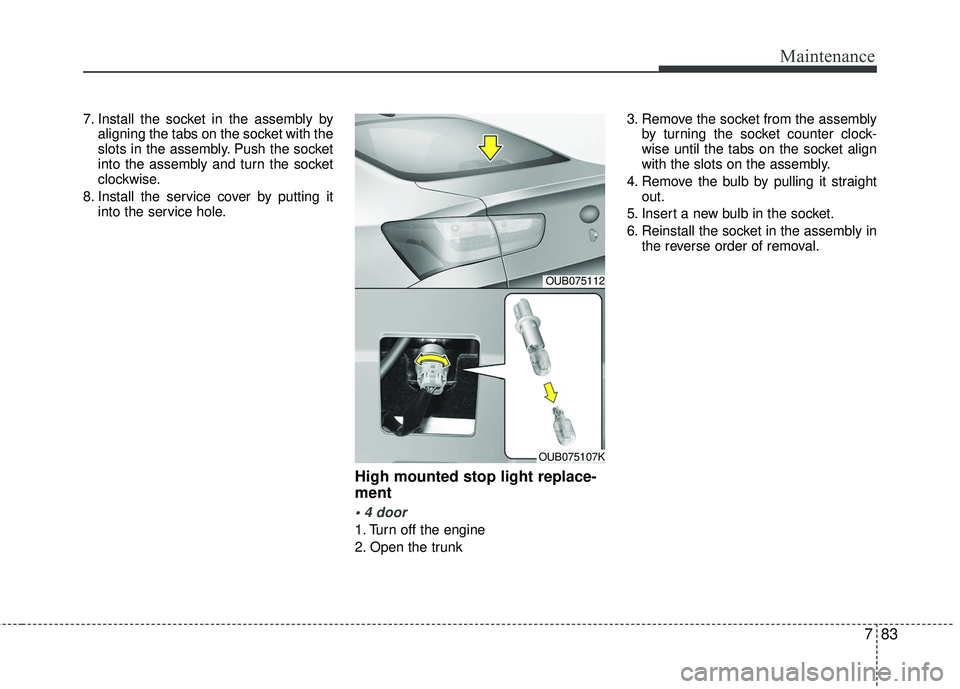
7. Install the socket in the assembly byaligning the tabs on the socket with the
slots in the assembly. Push the socket
into the assembly and turn the socket
clockwise.
8. Install the service cover by putting it into the service hole.
High mounted stop light replace-
ment
1. Turn off the engine
2. Open the trunk 3. Remove the socket from the assembly
by turning the socket counter clock-
wise until the tabs on the socket align
with the slots on the assembly.
4. Remove the bulb by pulling it straight out.
5. Insert a new bulb in the socket.
6. Reinstall the socket in the assembly in the reverse order of removal.
OUB075112
OUB075107K
Page 448 of 449

Index
8I
THEFT-ALARM SYSTEM··················\
··················\
·······4-13Armed stage ··················\
··················\
··················\
···········4-13
Disarmed stage ··················\
··················\
··················\
······4-14
Theft-alarm stage ··················\
··················\
··················\
···4-14
Tire Pressure Monitoring System (TPMS) ··················\
····6-9 Changing a tire with TPMS··················\
··················\
·····6-12
Low tire pressure telltale ··················\
··················\
·········6-10
TPMS (Tire Pressure Monitoring System)malfunction indicator ··················\
··················\
············6-11
Tire specification and pressure label ··················\
···········8-10
Tires and Wheels ··················\
··················\
··················\
·····7-48 All season tires ··················\
··················\
··················\
·····7-58
Checking tire inflation pressure ··················\
················7-49
Low aspect ratio tire ··················\
··················\
················7-59
Radial-ply tires ··················\
··················\
··················\
······7-59
Recommended cold tire inflation pressures ················7-48
Snow tires ··················\
··················\
··················\
··············7-59
Summer tires··················\
··················\
··················\
··········7-58
Tire care ··················\
··················\
··················\
·················7-48\
Tire maintenance ··················\
··················\
··················\
···7-52
Tire replacement ··················\
··················\
··················\
····7-51
Tire rotation ··················\
··················\
··················\
···········7-50
Tire sidewall labeling ··················\
··················\
··············7-53
Tire traction ··················\
··················\
··················\
···········7-52
Wheel alignment and tire balance ··················\
·············7-51
Wheel replacement ··················\
··················\
··················\
7-52
Tires and wheels ··················\
··················\
··················\
········8-5 Towing ··················\
··················\
··················\
··················\
···6-28
Emergency towing ··················\
··················\
··················\
·6-30
Removable towing hook (Front) ··················\
···············6-29
Towing service··················\
··················\
··················\
·······6-28
Trunk (4 Door)··················\
··················\
··················\
·········4-20 Closing the trunk ··················\
··················\
··················\
···4-21
Emergency trunk safety release··················\
·················4-21\
Opening the trunk ··················\
··················\
··················\
··4-20
Vehicle break-in process ··················\
··················\
··············1-5
Vehicle certification label ··················\
··················\
············8-9
Vehicle data collection and event data recorders·············1-6
Vehicle identification number (VIN) ··················\
·············8-9
Vehicle load limit ··················\
··················\
··················\
·····5-53 Certification label ··················\
··················\
··················\
··5-56
Tire and loading information label ··················\
············5-53
Vehicle weight ··················\
··················\
··················\
·········5-58
Washer fluid ··················\
··················\
··················\
·············7-40 Checking the washer fluid level ··················\
················7-40
Weight/Volume ··················\
··················\
··················\
··········8-6
Windows ··················\
··················\
··················\
··················\
4-24 Manual windows ··················\
··················\
··················\
···4-27
Power windows··················\
··················\
··················\
······4-25
V
W