2017 KIA CARENS RHD headlights
[x] Cancel search: headlightsPage 149 of 723

453
Features of your vehicle
Electric chromic mirror (ECM)(if equipped)
The electric rearview mirror automat- ically controls the glare from the
headlights of the vehicle behind you
in nighttime or low light driving condi-
tions. The sensor mounted in the mir-
ror senses the light level around the
vehicle, and automatically controls
the headlight glare from vehicles
behind you.
When the engine is running, the glare
is automatically controlled by the sen-
sor mounted in the rearview mirror.
Whenever the shift lever is shifted
into R (Reverse), the mirror will auto-
matically go to the brightest setting in
order to improve the drivers view
behind the vehicle. To operate the electric rearview mirror:
The mirror defaults to the ON posi-
tion whenever the ignition switch is
turned on.
Press the ON/OFF button (1) to turn the automatic dimming func-
tion off. The mirror indicator light
(2) will turn off.
Press the ON/OFF button (1) to
turn the automatic dimming func-
tion on. The mirror indicator light
(2) will illuminate.
❈ (2) : Indicator, (3) : Sensor Outside rearview mirror Be sure to adjust mirror angles
before driving.
Your vehicle is equipped with both
left-hand and right-hand outside
rearview mirrors. The mirrors can beadjusted remotely with the remote
switch. The mirror heads can be fold-
ed back to prevent damage during an
automatic car wash or when passing
in a narrow street.
CAUTION
When cleaning the mirror, use a
paper towel or similar materialdampened with glass cleaner. Do not spray glass cleanerdirectly on the mirror as thatmay cause the liquid cleaner to enter the mirror housing.
WARNING - Rearview
mirrors
The outside rearview mirror is convex. Objects seen in the
mirror are closer than they
appear.
Use your interior rearview mirror or direct observation todetermine the actual distance
of following vehicles when
changing lanes.
ORP046321L
Page 189 of 723

493
Features of your vehicle
This indicator light illuminates for 2
seconds and goes off:
When the vehicle can not detectthe smart key which is in the vehi-
cle whilst the Engine Start/StopButton is ON.
In this case, we recommend that
you have the vehicle inspected by
an authorised Kia dealer.
This indicator light blinks:
When the battery of the smart key is weak.
- At this time, you can not start theengine. However, you can start the
engine if you press the Engine
Start/Stop Button with the smart
key. (For more details, refer to
“Starting the Engine” in chapter 6).
When there is a malfunction with the immobiliser system.
In this case, we recommend that
you have the vehicle inspected by
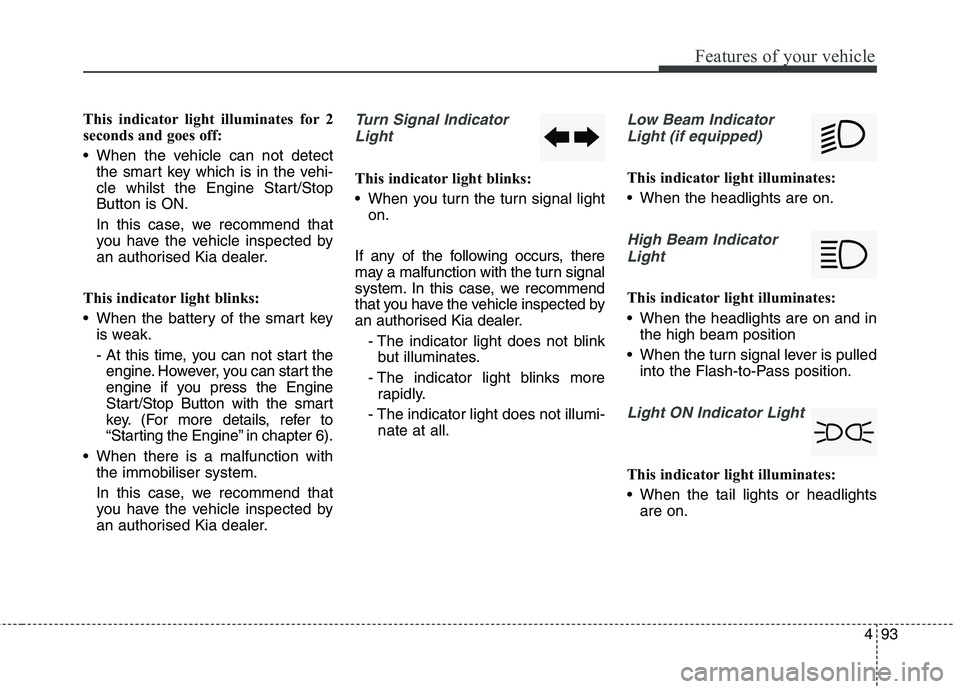
an authorised Kia dealer.Turn Signal Indicator
Light
This indicator light blinks:
When you turn the turn signal light on.
If any of the following occurs, there
may a malfunction with the turn signal
system. In this case, we recommend
that you have the vehicle inspected by
an authorised Kia dealer. - The indicator light does not blinkbut illuminates.
- The indicator light blinks more rapidly.
- The indicator light does not illumi- nate at all.
Low Beam Indicator
Light (if equipped)
This indicator light illuminates:
When the headlights are on.
High Beam IndicatorLight
This indicator light illuminates:
When the headlights are on and in the high beam position
When the turn signal lever is pulled into the Flash-to-Pass position.
Light ON Indicator Light
This indicator light illuminates:
When the tail lights or headlightsare on.
Page 213 of 723

4117
Features of your vehicle
Battery saver function
The purpose of this feature is toprevent the battery from being dis-
charged. The system automatically
turns off the parking lights when
the driver removes the ignition key
(Smart key : turns off the engine)
and opens the driver- side door.
With this feature, the parking lights will be turned off automatically if
the driver parks on the side of roadat night.
If necessary, to keep the lights on
when the ignition key is removed,
perform the following :
1) Open the driver-side door.
2) Turn the parking lights OFF and ON again using the light switch
on the steering column. Headlamp delay function (if equipped) The headlamps (and/or taillights)
remain on for same minutes (5 min-
utes) after the ignition key is removed
or turned to the ACC or LOCK posi-
tion. However, if the driver’s door isopened and closed, the headlights
are turned off after 15 seconds.
The headlights can be turned off by
pressing the lock button on the trans-
mitter or smart key twice or turning
off the light switch from the headlight
or Auto light position.
You can activate or deactivate the
headlamp delay function. Refer to
“User setting” in this chapter.
LIGHTING CAUTION
If the driver gets out of the vehi-
cle through other doors (exceptdriver’s door), the battery saverfunction does not operate and the headlamp delay functiondoes not turn off automatically.Therefore, it causes the battery to be discharged. In this case,make sure to turn off the lampbefore getting out of the vehicle.
Page 214 of 723

Features of your vehicle
118
4
Headlight (Headlamp) welcome function (if equipped)
When the headlight switch is in the
ON or AUTO position and all doors
(and tailgate) are closed and locked,
if you press the door unlock button
on the transmitter or smart key, the
headlights will come on for about 15
seconds.
If the headlight switch is in the AUTO position, the function can only oper-ate at night.
At this time, if you press the door
unlock button again or door lock but-
ton on the transmitter or smart key,
the headlights will turn off immedi-
ately.
You can activate or deactivate the
headlamp welcome fuction. Refer to
“User setting” in this chapter. Static bending light (if equipped)
Whilst driving the corner, for your
sight and safety, the static bending
light turns on automatically. The sys-
tem will operate automatically as fol-
lows:
When vehicle speed is under
10km/h and steering wheel angle
approximately 80 degrees.
When vehicle speed is over 10km/h and steering wheel angle
approximately 35 degrees.
When the vehicle is at a standstill.
When moving rearwards with one of the above conditions satisfied the lights will light up the oppositedirection. Daytime running light (if equipped)
Daytime Running Lights (DRL) can
make it easier for others to see the
front of your vehicle during the day.
DRL can be helpful in many different
driving conditions, and it is especially
helpful after dawn and before sunset.
The DRL system will turn off when:
1. The front fog light or headlight (low
beam) switch is ON.
2. The engine is OFF.
Page 216 of 723

Features of your vehicle
120
4
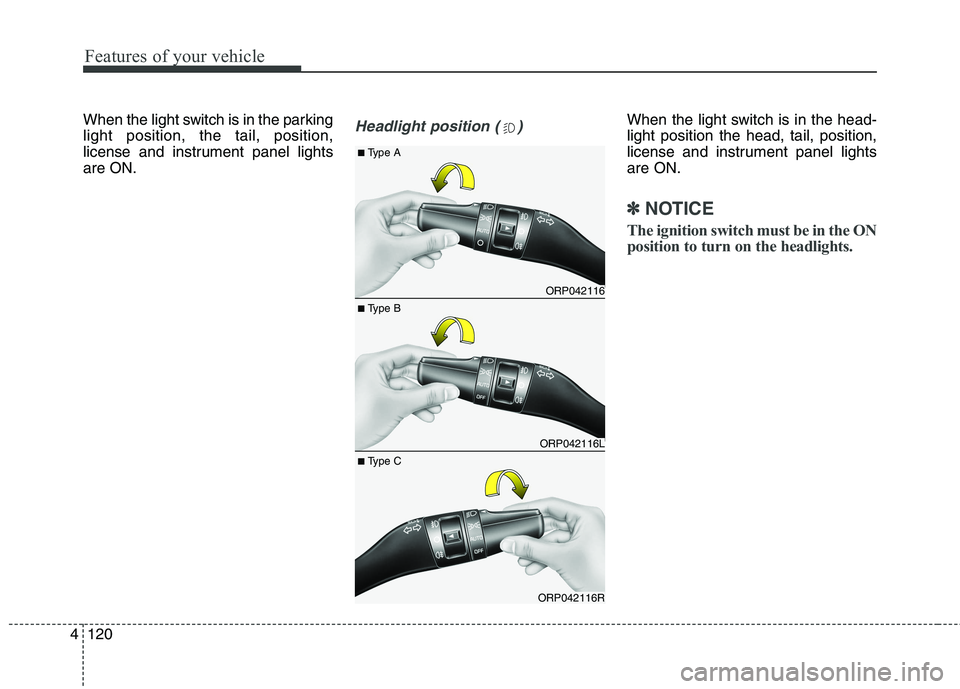
When the light switch is in the parking light position, the tail, position,
license and instrument panel lightsare ON.Headlight position ( )When the light switch is in the head- light position the head, tail, position,
license and instrument panel lightsare ON.
✽✽
NOTICE
The ignition switch must be in the ON
position to turn on the headlights.
ORP042116
ORP042116L
ORP042116R
■ Type B
■
Type A
■ Type C
Page 218 of 723

Features of your vehicle
122
4
The high-beam indicator will light
when the headlight high beams are
switched on.
To prevent the battery from being discharged, do not leave the lights
on for a prolonged time whilst the
engine is not running.Flashing headlights
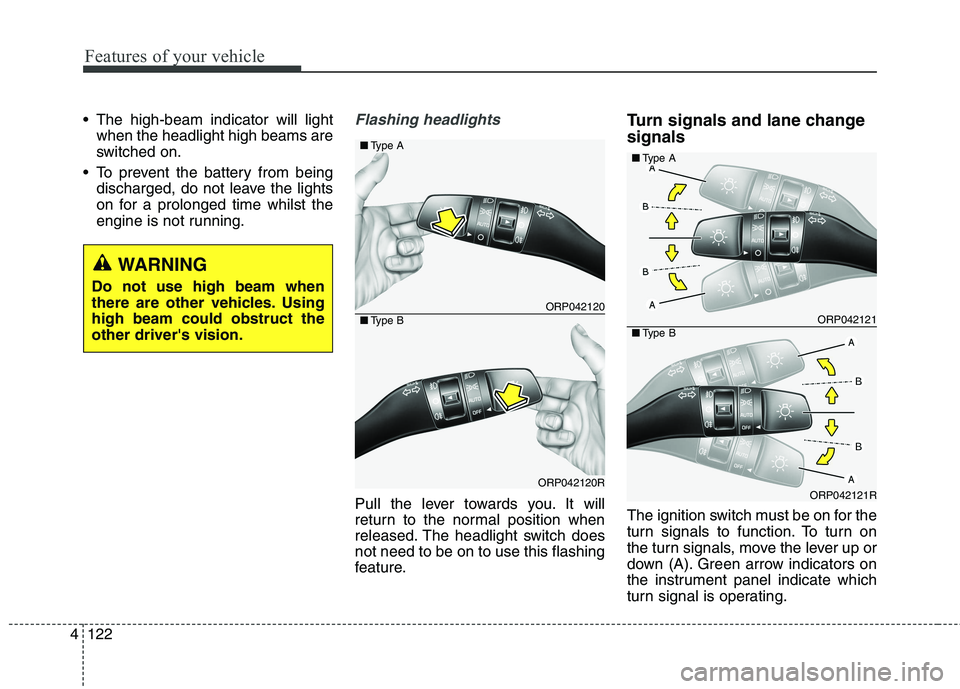
Pull the lever towards you. It will
return to the normal position when
released. The headlight switch doesnot need to be on to use this flashing
feature. Turn signals and lane change signals
The ignition switch must be on for the
turn signals to function. To turn on
the turn signals, move the lever up or
down (A). Green arrow indicators on
the instrument panel indicate which
turn signal is operating.
ORP042120
ORP042120R
■
Type A
■Type BORP042121
ORP042121R
■Type A
■Type B
WARNING
Do not use high beam when
there are other vehicles. Usinghigh beam could obstruct theother driver's vision.
Page 221 of 723

4125
Features of your vehicle
Headlight levelling device (if equipped)
Manual type
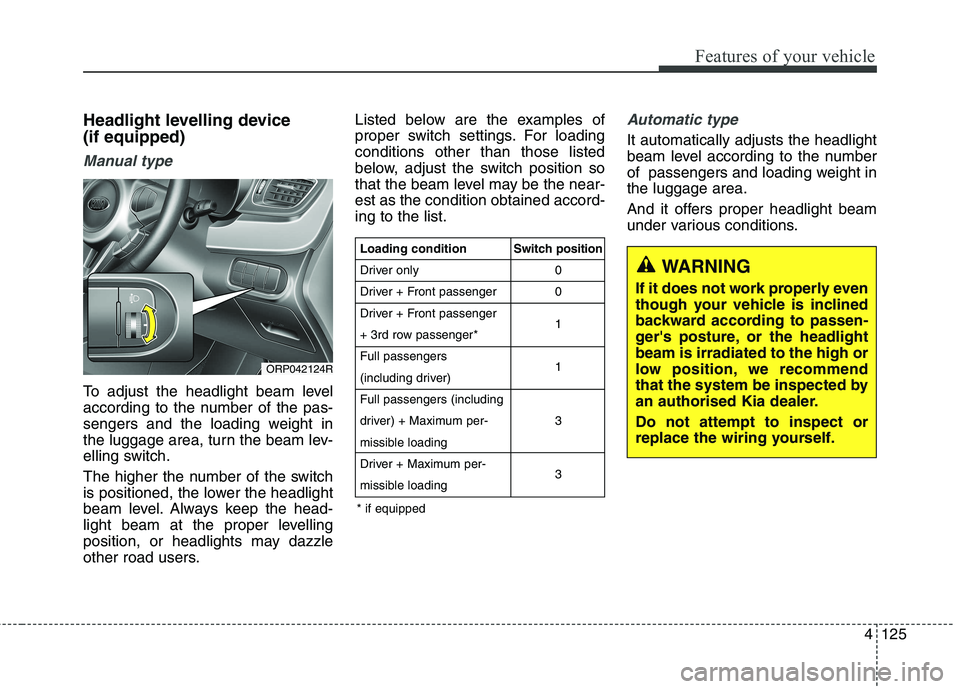
To adjust the headlight beam level
according to the number of the pas-
sengers and the loading weight in
the luggage area, turn the beam lev-
elling switch.
The higher the number of the switch
is positioned, the lower the headlight
beam level. Always keep the head-
light beam at the proper levelling
position, or headlights may dazzle
other road users.Listed below are the examples of
proper switch settings. For loadingconditions other than those listed
below, adjust the switch position so
that the beam level may be the near-est as the condition obtained accord-ing to the list.
Automatic type
It automatically adjusts the headlight
beam level according to the number
of passengers and loading weight inthe luggage area.
And it offers proper headlight beam
under various conditions.
ORP042124R
WARNING
If it does not work properly even
though your vehicle is inclined
backward according to passen-
ger's posture, or the headlightbeam is irradiated to the high or
low position, we recommend
that the system be inspected by
an authorised Kia dealer. Do not attempt to inspect or
replace the wiring yourself.
Loading condition
Driver only
Driver + Front passenger
Driver + Front passenger
+ 3rd row passenger*Full passengers
(including driver)Full passengers (including
driver) + Maximum per-
missible loading
Driver + Maximum per-
missible loading Switch position
00 1 1 3 3
* if equipped
Page 228 of 723

Features of your vehicle
132
4
Headlight washer (if equipped)
If your vehicle is equipped with the
headlight washer it will operate at the
same time when you operate the
windscreen washer. It will operate
when the headlight switch is in thefirst or second position and the igni-
tion switch or engine start/stop but-ton is in the ON position.
The washer fluid will be sprayed on
to the headlights.
✽✽
NOTICE
Check the headlight washers peri- odically to confirm that the wash-
er fluid is being sprayed properly
onto the headlight lenses.
The headlight washer can be oper- ated 15 minutes after being oper-
ated last time.
ORP046193L
WARNING
Do not use the washer in freez-
ing temperatures without firstwarming the windscreen with
the defrosters; the washer solu-
tion could freeze on the wind-
screen and obscure your vision.
CAUTION
To prevent possible damage to the wipers or windscreen,do not operate the wiperswhen the windscreen is dry.
To prevent damage to the wiper blades, do not use petrol,kerosene, paint thinner, or other solvents on or near them.
To prevent damage to the wiper arms and other compo-nents, do not attempt to movethe wipers manually.
To prevent possible damage to the wipers and washer sys-tem, use anti-freezing washerfluids in the winter season orcold weather.