2017 JEEP GRAND CHEROKEE manual radio set
[x] Cancel search: manual radio setPage 29 of 372

Memory Seat
This feature allows the driver to store up to
two different memory profiles for easy recall
through a memory switch. Each memory pro-
file contains desired position settings for the
driver seat, side mirrors, and power tilt and
telescopic steering column (if equipped) and
a set of desired radio station presets. Your
remote keyless entry key fob can also be
programmed to recall the same positions
when the UNLOCK button is pushed.NOTE:
Your vehicle is equipped with two key fobs,
one key fob can be linked to memory position
1 and the other key fob can be linked to
memory position 2.
The memory seat switch is located on the
driver’s door trim panel. The switch consists
of three buttons:
• The (S) button, which is used to activate
the memory save function.
• The (1) and (2) buttons which are used to recall either of two pre-programmed
memory profiles.
Backrest Memory
NOTE:
To create a new memory profile, perform the
following:
1. Cycle the vehicles ignition to the ON/RUN
position (Do not start the engine).
2. Adjust all memory profile settings to de- sired preferences (i.e., seat, side mirror,
power tilt and telescopic steering column
[if equipped], and radio station presets). 3. Push and release the S (Set) button on the
memory switch.
4. Within five seconds, push and release either of the memory buttons (1) or (2).
The instrument cluster display will show
which memory position has been set.
NOTE:
• Memory profiles can be set without the vehicle in PARK, but the vehicle must be
in PARK to recall a memory profile.
• To set a memory profile to your key fob , refer to “Linking And Unlinking The Re-
mote Keyless Entry Key Fob To Memory”
on your Owner's Manual at
www.jeep.com/en/owners/manuals/ for
further details.
Heated/Ventilated Seats
Front Heated Seats
The front heated seats control buttons are
located within the climate or controls screen
of the touchscreen.
Memory Seat Buttons
27
Page 106 of 372

When the vehicle is started, the BSM warning
light will momentarily illuminate in both out-
side rear view mirrors to let the driver know
that the system is operational. The BSM
system sensors operate when the vehicle is in
any forward gear or REVERSE and enters
stand by mode when the vehicle is in PARK.
The BSM warning light, located in the out-
side mirrors, will illuminate if a vehicle
moves into a blind spot zone.The BSM system can also be configured to
sound an audible (chime) alert and mute the
radio to notify you of objects that have en-
tered the detection zones.
Rear Cross Path (RCP)
The Rear Cross Path (RCP) feature is in-
tended to aid the driver when backing out of
parking spaces where the vision of oncoming
vehicles may be blocked. Proceed slowly and
cautiously out of the parking space until the rear end of the vehicle is exposed. The RCP
system will then have a clear view of the cross
traffic and if an oncoming vehicle is de-
tected, will alert the driver. When RCP is on
and the vehicle is in REVERSE, the driver is
alerted using both the visual and audible
alarms, including reducing the radio volume.
Refer to “Blind Spot Monitoring” in “Safety”
in the Owner's Manual at
www.jeep.com/en/owners/manuals/ for more
information.
Modes Of Operation
Three selectable modes of operation are
available in the Uconnect System. Refer to
“Uconnect Settings/Customer Programmable
Features” in “Multimedia” for further infor-
mation.
Blind Spot Alert Lights Only
When operating in Blind Spot Alert mode, the
BSM system will provide a visual alert in the
appropriate side view mirror based on a de-
tected object. However, when the system is
operating in Rear Cross Path (RCP) mode, the
Rear Detection Zones
Blind Spot Warning Light
SAFETY
104
Page 309 of 372
Radio Mode
Seek Previous/Next Buttons
Seek Up
Press and release the “Seek Up”button
on the touchscreen to tune the radio to the
next listenable station or channel.
During a Seek Up function, if the radio
reaches the starting station after passing
through the entire band two times, the radio
will stop at the station where it began.
Fast Seek Up
Press and hold the “Seek Up”button on
the touchscreen to advance the radio through
the available stations or channels at a faster
rate, the radio stops at the next available
station or channel when the button on the
touchscreen is released.
Seek Down
Press and release the “Seek Down”but-
ton on the touchscreen to tune the radio to
the next listenable station or channel. During a Seek Down function, if the radio
reaches the starting station after passing
through the entire band two times, the radio
will stop at the station where it began.
Fast Seek Down
Press and hold the “Seek Down”button
on the touchscreen to advance the radio
through the available stations or channel at a
faster rate, the radio stops at the next avail-
able station or channel when the button on
the touchscreen is released.
Store Radio Presets
The Radio stores up to 12 presets in each of
the Radio modes. There are four visible pre-
sets at the top of the radio screen. Pressing
the “All” button on the touchscreen on the
radio home screen will display all of the
preset stations for that mode. To store a radio preset manually, follow the
steps below:
1. Tune to the desired station.
2.
Press and hold the desired numbered button
on the touchscreen for more that two sec-
onds or until you hear a confirmation beep.
Media Mode
Audio Source Selection
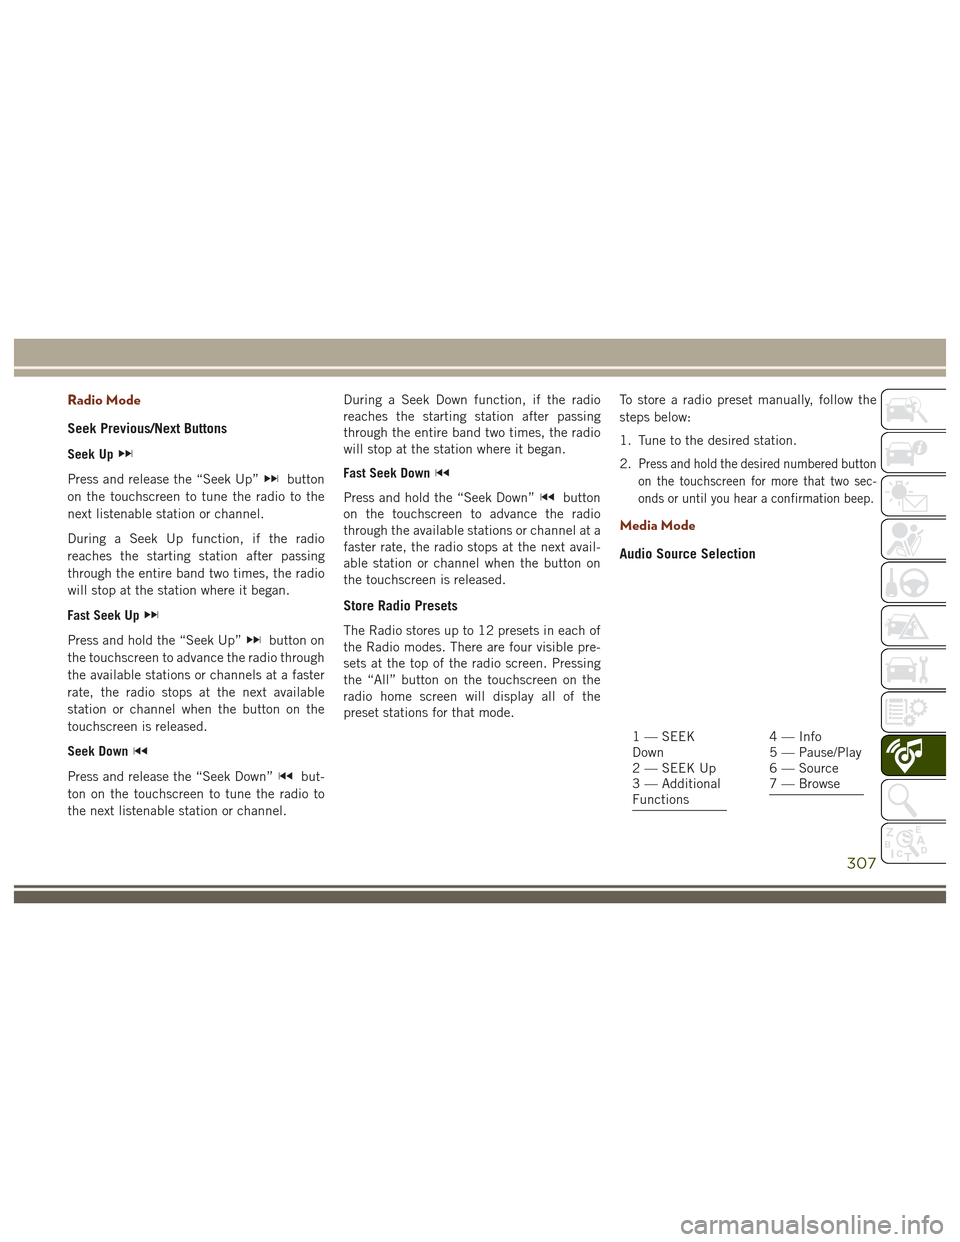
1 — SEEK
Down
2 — SEEK Up
3 — Additional
Functions4 — Info
5 — Pause/Play
6 — Source
7 — Browse
307
Page 319 of 372
WARNING!
ALWAYS drive safely with your hands on
the wheel. You have full responsibility and
assume all risks related to the use of the
Uconnect features and applications in this
vehicle. Only use Uconnect when it is safe
to do so. Failure to do so may result in an
accident involving serious injury or death.
CAUTION!
Do NOT attach any object to the touch-
screen, doing so can result in damage to
the screen.
Setting The Time
• Model 8.4 NAV synchronizes time auto-matically via GPS, so it should not require
any time adjustment. If you do need to set
the time manually, follow the instructions
below for Model 8.4.
• For Model 8.4, turn the unit on, then press the time display at the top of the screen.
Press “Yes.”
• If the time is not displayed at the top of the screen, press the “Settings” button on the touchscreen. In the Settings screen, press
the “Clock” button on the touchscreen,
then check or uncheck this option.
• Press “+” or “–” next to Set Time Hours and Set Time Minutes to adjust the time.
• If these features are not available, un- check the Sync Time box.
• Press “X” to save your settings and exit out of the Clock Setting screen.
Background Themes
• Screen background themes are selectablefrom a pre-loaded list of themes. If you’d
like to set a theme, follow the instructions
below.
• Press the “Settings” button on the touch- screen.
• Press the “Display” button on the touch- screen.
• Then press “Set Theme” button on the touchscreen and select a theme.
Audio Settings
• Press of the “Audio” button on the touch-screen to activate the Audio settings
screen to adjust Balance\Fade, Equalizer,
and Speed Adjusted Volume.
• You can return to the Radio screen by pressing the “X” located at the top right.
Balance/Fade
• Press the “Balance/Fade” button on thetouchscreen to Balance audio between the
front speakers or fade the audio between
the rear and front speakers.
• Pressing the “Front,” “Rear,” “Left,” or “Right” buttons on the touchscreen or
press and drag the Speaker Icon to adjust
the Balance/Fade.
Equalizer
• Press the “Equalizer” button on the touch-screen to activate the Equalizer screen.
• Press the “+” or “–” buttons on the touch- screen, or press and drag over the level bar
for each of the equalizer bands. The level
value, which spans between plus or minus
9, is displayed at the bottom of each of the
Bands.
317
Page 321 of 372

WARNING!
ALWAYS drive safely with your hands on
the wheel. You have full responsibility and
assume all risks related to the use of the
Uconnect features and applications in this
vehicle. Only use Uconnect when it is safe
to do so. Failure to do so may result in an
accident involving serious injury or death.
To access the Radio mode, press the “Radio”
button on the touchscreen.
Selecting Radio Stations
Press the desired radio band (AM, FM or
SXM) button on the touchscreen.
Seek Up/Seek Down
• Press the Seek up or down arrow buttons on the touchscreen for less than two sec-
onds to seek through radio stations.
• Press and hold either arrow button on the touchscreen for more than two seconds to
bypass stations without stopping. The ra-
dio will stop at the next listenable station
once the arrow button on the touchscreen
is released.
Direct Tune
• Tune directly to a radio station by pressingthe “Tune” button on the screen, and
entering the desired station number.
Store Radio Presets Manually
Your radio can store 36 total preset stations,
12 presets per band (AM, FM and SXM). They
are shown at the top of your radio screen. To
see the 12 preset stations per band, press the
arrow button on the touchscreen at the top
right of the screen to toggle between the two
sets of six presets.
To store a radio preset manually, follow the
steps below:
1. Tune to the desired station.
2. Press and hold the desired numbered but- ton on the touchscreen for more than two
seconds or until you hear a confirmation
beep.
HD Radio
• HD Radio (available on Uconnect8.4 NAV) operates similar to conventional
radio except it allows broadcasters to
transmit a high-quality digital signal. • With an HD radio receiver, the listener is
provided with a clear sound that enhances
the listening experience. HD radio can
also transmit data such as song title or
artist.
SiriusXM Premier Over 160 Channels
Get every channel available on your satellite
radio, and enjoy all you want, all in one place.
Hear commercial-free music plus sports,
news, talk and entertainment. Get all the
premium programming, including Howard
Stern, every NFL game, Oprah Radio, every
MLB and NHL game, every NASCAR race,
Martha Stewart and more. And get 20+ extra
channels, including SiriusXM Latino, offering
20 channels of commercial free music, news,
talk, comedy, sports and more dedicated to
Spanish language programming.
• To access SiriusXM Satellite Radio, pressthe “SXM” button on the touchscreen on
the main Radio screen.
319
Page 324 of 372
our satellite service area and in AK and HI.
©2016 Sirius XM Radio Inc. Sirius, XM
and all related marks and logos are trade-
marks of Sirius XM Radio Inc.
UCONNECT TOUCH
SETTINGS
The Uconnect system allows you to access
Customer Programmable feature settings
such as Display, Voice, Clock, Safety & Driv-
ing Assistance, Lights, Doors & Locks,
Auto-On Comfort & Remote Start, Engine Off
Options, Compass Settings, Audio, Phone/
Bluetooth, Suspension, SiriusXM Setup, Re-
store Settings, Clear Personal Data, and Sys-
tem Information through buttons on the
touchscreen.
Push the SETTINGS button (Uconnect 5.0),
or press the “Apps” button (Uconnect 8.4)
located near the bottom of the touchscreen,
then press the “Settings” button on the
touchscreen to access the Settings screen.
When making a selection, scroll up or down
until the preferred setting is highlighted,
then press the preferred setting until a check-mark appears next to the setting, showing
that setting has been selected. The following
feature settings are available:
• Display
• Engine Off Op-
tions
• Voice • Suspension
• Clock • Audio
• Safety & Driving Assistance • Phone/Bluetooth
• Lights • SiriusXM Setup
• Doors & Locks • Restore Settings
• Auto-On Comfort & Remote Start • Clear Personal
Data
• Compass (Uconnect 5.0) • System Informa-
tion
NOTE:
Depending on the vehicles options, feature
settings may vary.
Refer to “Uconnect Settings/Customer Pro-
grammable Features” in the “Multimedia”
Chapter on
www.jeep.com/en/owners/manuals/ for fur-
ther information.
IPOD/USB/SD CARD/MEDIA
PLAYER CONTROL
There are many ways to play music from
MP3 players, USB devices, or SD Cards
through your vehicle's sound system. Press
your Media button on the touchscreen to
begin.
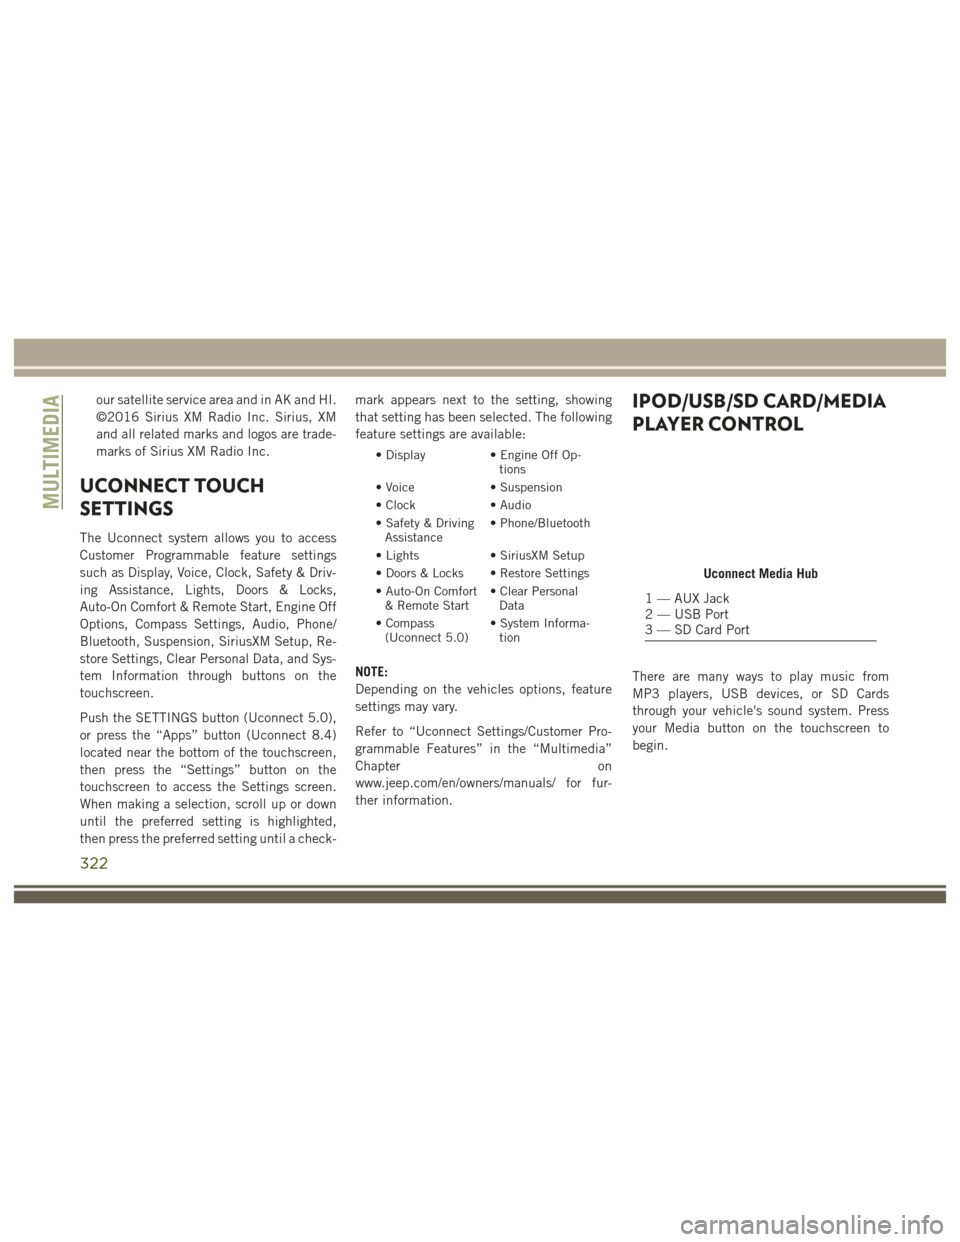
Uconnect Media Hub
1 — AUX Jack
2 — USB Port
3 — SD Card Port
MULTIMEDIA
322
Page 338 of 372
Common Phone Commands (Examples)
• “Call John Smith”
• “Call John Smith mobile”
• “Dial 1 248 555 1212”
• “Redial”
Mute (Or Unmute) Microphone During
Call
• During a call, press the “Mute” button onthe Phone main screen to mute and un-
mute the call.
Transfer Ongoing Call Between Handset
And Vehicle
• During an on-going call, press the “Trans-fer” button on the Phone main screen to
transfer an on-going call between handset
and vehicle.
Phonebook
The Uconnect system will automatically sync
your phonebook from your paired phone, if
this feature is supported by your phone.
Phonebook contacts are updated each time
that the phone is connected. If your phone book entries do not appear, check the set-
tings on your phone. Some phones require
you to enable this feature manually.
• Your phonebook can be browsed on the
Uconnect system touchscreen, but editing
can only be done on your phone. To
browse, press the “Phone” button on the
touchscreen, then the “Phonebook” but-
ton on the touchscreen.
Favorite phonebook entries can be saved as
Favorites for quicker access. Favorites are
shown at the top of the main phone screen.
Voice Command Tips
• Speaking complete names (i.e; Call John Doe vs. Call John) will result in greater
system accuracy.
• You can “link” commands together for faster results. Say “Call John Doe, mo-
bile,” for example.
• If you are listening to available voice com- mand options, you do not have to listen to
the entire list. When you hear the com-
mand that you need, push the
button on the steering wheel, wait for the
beep and say your command.
Changing The Volume
• Start a dialogue by pushing the Phone
button
, then say a command for
example - "Help".
• Use the radio VOLUME/MUTE rotary knob to adjust the volume to a comfortable level
while the Uconnect system is speaking.
NOTE:
The volume setting for Uconnect is different
than the audio system.
NOTE:
To access help, push the Uconnect Phone
button
on the steering wheel and say
"help." Push the Uconnect Phone Pickup
button
or the VR buttonand say
"cancel" to cancel the help session.
Using Do Not Disturb
With Do Not Disturb, you can disable notifi-
cations from incoming calls and texts, allow-
ing you to keep your eyes on the road and
hands on the wheel. For your convenience
there is a counter display to keep track of
your missed calls and text messages while
you were using Do Not Disturb.
MULTIMEDIA
336
Page 365 of 372
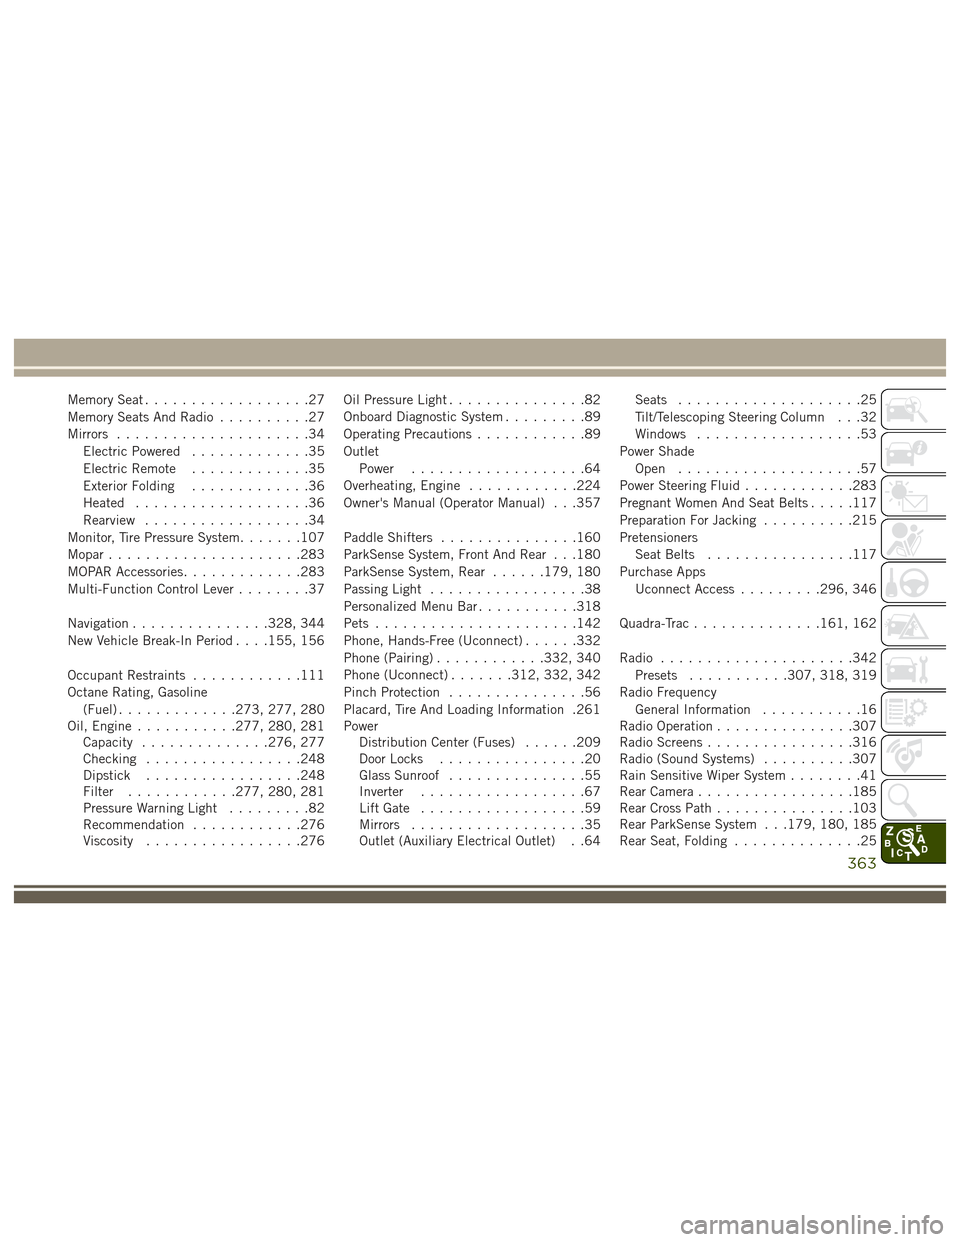
Memory Seat..................27
Memory Seats And Radio ..........27
Mirrors .....................34
Electric Powered .............35
Electric Remote .............35
Exterior Folding .............36
Heated ...................36
Rearview ..................34
Monitor, Tire Pressure System .......107
Mopar .....................283
MOPAR Accessories .............283
Multi-Function Control Lever ........37
Navigation ...............328, 344
New Vehicle Break-In Period . . . .155, 156
Occupant Restraints ............111
Octane Rating, Gasoline (Fuel) .............273, 277, 280
Oil, Engine ...........277, 280, 281
Capacity ..............276, 277
Checking .................248
Dipstick .................248
Filter ............277, 280, 281
Pressure Warning Light .........82
Recommendation ............276
Viscosity .................276 Oil Pressure Light
...............82
Onboard Diagnostic System .........89
Operating Precautions ............89
Outlet Power ...................64
Overheating, Engine ............224
Owner's Manual (Operator Manual) . . .357
Paddle Shifters ...............160
ParkSense System, Front And Rear . . .180
ParkSense System, Rear ......179, 180
Passing Light .................38
Personalized Menu Bar ...........318
Pets ......................142
Phone, Hands-Free (Uconnect) ......332
Phone (Pairing) ............332, 340
Phone (Uconnect) .......312, 332, 342
Pinch Protection ...............56
Placard, Tire And Loading Information .261
Power Distribution
Center (Fuses) ......209
Door Locks ................20
Glass Sunroof ...............55
Inverter ..................67
Lift Gate ..................59
Mirrors ...................35
Outlet (Auxiliary Electrical Outlet) . .64 Seats
....................25
Tilt/Telescoping Steering Column . . .32
Windows ..................53
Power Shade Open ....................57
Power Steering Fluid ............283
Pregnant Women And Seat Belts .....117
Preparation For Jacking ..........215
Pretensioners Seat Belts ................117
Purchase Apps Uconnect Access .........296, 346
Quadra-Trac ..............161, 162
Radio .....................342
Presets ...........307, 318, 319
Radio Frequency General Information ...........16
Radio Operation ...............307
Radio Screens ................316
Radio (Sound Systems) ..........307
Rain Sensitive Wiper System ........41
Rear Camera .................185
Rear Cross Path ...............103
Rear ParkSense System . . .179, 180, 185
Rear Seat, Folding ..............25
363