2017 JEEP GRAND CHEROKEE audio
[x] Cancel search: audioPage 76 of 372

INSTRUMENT CLUSTER
DISPLAY
Your vehicle may be equipped with an instru-
ment cluster display, which offers useful in-
formation to the driver. With the ignition in
the STOP/OFF position (and the key removed,
for vehicles with mechanical key), opening/
closing of a door will activate the display for
viewing, and display the total miles or kilo-
meters in the odometer. Your instrument
cluster display is designed to display impor-
tant information about your vehicle’s systems
and features. Using a driver interactive dis-
play located on the instrument panel, your
instrument cluster display can show you how
systems are working and give you warnings
when they aren’t. The steering wheel
mounted controls allow you to scroll through
and enter the main menus and submenus.
You can access the specific information you
want and make selections and adjustments.
Instrument Cluster Display Location and
Controls
The instrument cluster display is located in
the center of the instrument cluster.1. The top line where reconfigurable tell-
tales, compass direction, outside tem-
perature, Time, Range MPG or Trip are
displayed
2. The main display area where the menus and pop up messages are displayed
3. The lower line where reconfigurable tell- tales, menu name and menu page are
displayed • Push the
up
arrow button to scroll
upward through the main menus (Speed-
ometer, MPH/km/h, Vehicle Info, Terrain,
Driver Assist, Fuel Economy, Trip A, Trip B,
Stop/Start, Audio, Navigation, Stored
Messages, Screen Setup and Speed Warn-
ing).
• Push the down
arrow button to scroll
downward through the main menu and
submenus (Speedometer, MPH/km/h, Ve-
hicle Info, Terrain, Driver Assist, Fuel
Economy, Trip A, Trip B, Stop/Start, Audio,
Navigation, Stored Messages, Screen
Setup and Speed Warning).
Instrument Cluster Display
Instrument Cluster Display Controls
GETTING TO KNOW YOUR INSTRUMENT PANEL
74
Page 77 of 372

• Push therightarrow button to access
the information screens or submenu
screens of a main menu item.
• Push the left
arrow button to access
the information screens or submenu
screens of a main menu item.
• Push the OKbutton to access/select the
information screens or submenu screens
of a main menu item. Push and hold the
OK button for two seconds to reset
displayed/selected features that can be
reset.
Oil Change Reset
Oil Change Required
Your vehicle is equipped with an engine oil
change indicator system. The “Oil Change
Required” message will display in the instru-
ment cluster display for five seconds after a
single chime has sounded, to indicate the
next scheduled oil change interval. The en-
gine oil change indicator system is duty cycle
based, which means the engine oil change
interval may fluctuate, dependent upon your
personal driving style. Unless reset, this message will continue to
display each time you cycle the ignition to the
ON/RUN position. To turn off the message
temporarily, push and release the
OKbutton.
To reset the oil change indicator system (after
performing the scheduled maintenance), re-
fer to the following procedure.
Oil Change Reset Procedure
1. Without pushing the brake pedal, push and release the ENGINE START/STOP
button and place the ignition to the ON/
RUN position (do not start the engine).
2. Fully push the accelerator pedal, slowly, three times within 10 seconds.
3. Without pushing the brake pedal, push and release the ENGINE START/STOP
button once to return the ignition to the
OFF/LOCK position.
NOTE:
If the indicator message illuminates when
you start the vehicle, the oil change indicator
system did not reset. If necessary, repeat this
procedure. Secondary Method For Oil Change Reset
1. Without pushing the brake pedal, push
and release the ENGINE START/STOP
button and place the ignition to the ON/
RUN position (do not start the engine).
2. Navigate to "Oil Life" submenu in "Vehicle Info" in the instrument cluster display.
3. Push and Hold the OKbutton until the
gauge resets to 100%.
Instrument Cluster Display Selectable
Items
The Instrument Cluster Display can be used
to view the following main menu items:
NOTE:
Depending on the vehicles options, feature
settings may vary.
• Speedometer • Trip
• MPH to km/h • Audio
• Vehicle Info • Stored Messages
• Driver Assist • Screen Setup
• Fuel Economy
75
Page 161 of 372

• In SRT models, the transmission willlaunch (from a stop) in second gear, and
the torque converter clutch may engage at
lower engine speeds and remain on longer.
• Some ECO mode functions may be tempo- rarily inhibited based on temperature and
other factors.
Active Noise Cancellation — Summit And
SRT Models Only
Your vehicle is equipped with an Active Noise
Cancellation System. This system uses four
microphones embedded in the headliner to
detect undesirable exhaust noise, which
sometimes occurs when operating in ECO
mode. An onboard frequency generator cre-
ates counteracting sound waves through the
audio system to help keep the vehicle quiet.
Eight–Speed Automatic Transmission
Your vehicle is equipped with a fuel efficient
8 speed transmission. The gear selector is
located in the center console. The transmission gear selector provides
PARK, REVERSE, NEUTRAL, DRIVE and
MANUAL (AutoStick) shift positions. Manual
shifts can be made using the AutoStick shiftcontrol (refer to “AutoStick” in this section
for further information). Toggling the gear
selector forward (-) or rearward (+) while in
the MANUAL (AutoStick) position (beside
the DRIVE position), or tapping the shift
paddles (+/-), will manually select the trans-
mission gear, and will display the current gear
in the instrument cluster.
NOTE:
If the gear selector cannot be moved to the
PARK, REVERSE, or NEUTRAL position
(when pushed forward), it is probably in the
AutoStick (+/-) position (beside the DRIVE
position). In AutoStick mode, the transmis-
sion gear (1, 2, 3, etc.) is displayed in the
instrument cluster. Move the gear selector to
the right (into the DRIVE [D] position) for
access to PARK, REVERSE, and NEUTRAL.
Transmission Gear Selector
1 — Lock Button
2 — Transmission Gear Selector
159
Page 215 of 372

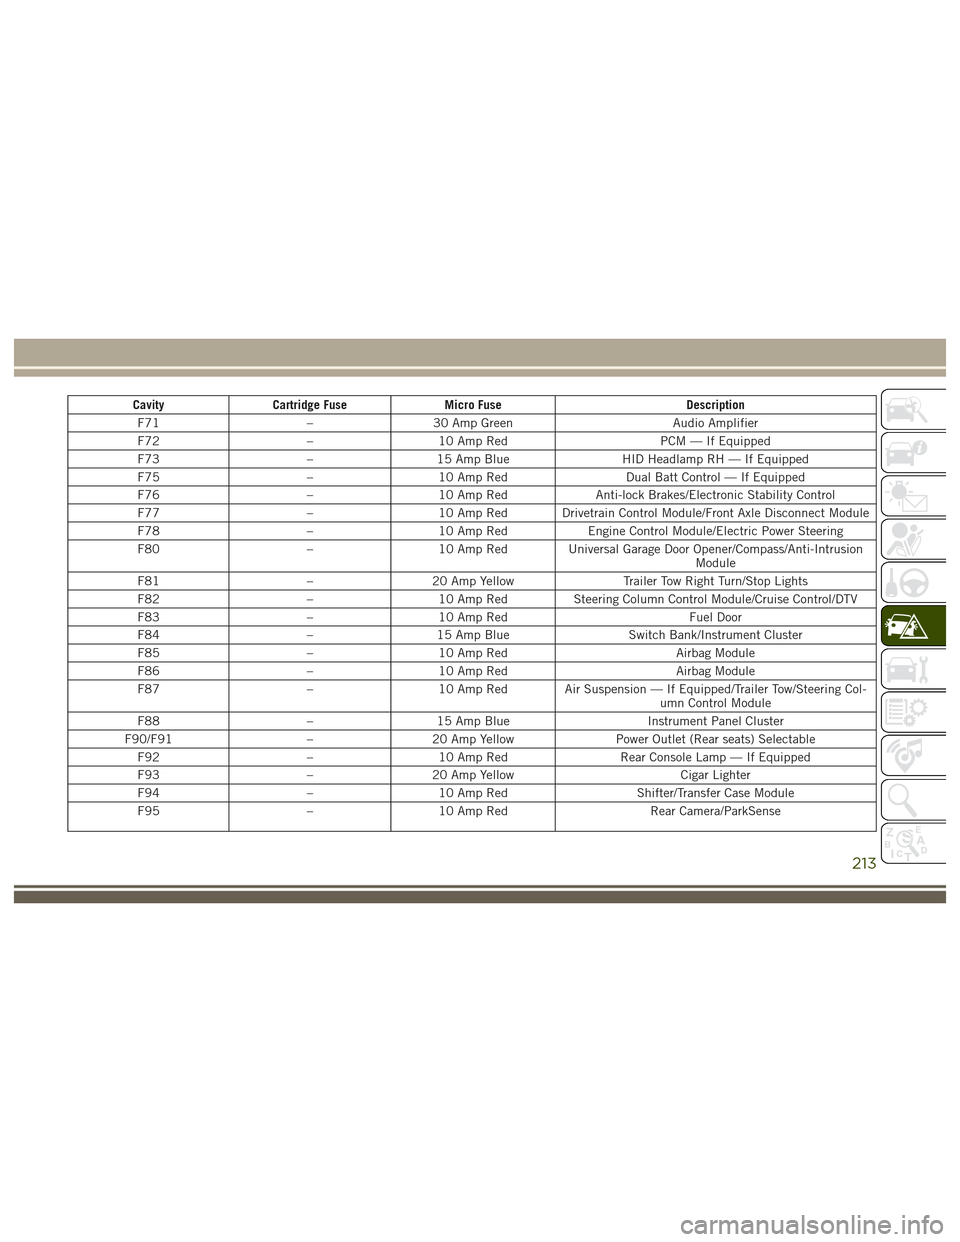
CavityCartridge Fuse Micro Fuse Description
F71 –30 Amp Green Audio Amplifier
F72 –10 Amp Red PCM — If Equipped
F73 –15 Amp Blue HID Headlamp RH — If Equipped
F75 –10 Amp Red Dual Batt Control — If Equipped
F76 –10 Amp Red Anti-lock Brakes/Electronic Stability Control
F77 –10 Amp Red Drivetrain Control Module/Front Axle Disconnect Module
F78 –10 Amp Red Engine Control Module/Electric Power Steering
F80 –10 Amp Red Universal Garage Door Opener/Compass/Anti-Intrusion
Module
F81 –20 Amp Yellow Trailer Tow Right Turn/Stop Lights
F82 –10 Amp Red Steering Column Control Module/Cruise Control/DTV
F83 –10 Amp Red Fuel Door
F84 –15 Amp Blue Switch Bank/Instrument Cluster
F85 –10 Amp Red Airbag Module
F86 –10 Amp Red Airbag Module
F87 –10 Amp Red Air Suspension — If Equipped/Trailer Tow/Steering Col-
umn Control Module
F88 –15 Amp Blue Instrument Panel Cluster
F90/F91 –20 Amp Yellow Power Outlet (Rear seats) Selectable
F92 –10 Amp Red Rear Console Lamp — If Equipped
F93 –20 Amp Yellow Cigar Lighter
F94 –10 Amp Red Shifter/Transfer Case Module
F95 –10 Amp Red Rear Camera/ParkSense
213
Page 287 of 372

MULTIMEDIA
CYBERSECURITY............287
OFFROADPAGES—IF
EQUIPPED................ .288
Off Road Pages Status Bar........288
Drivetrain ...................288
Suspension ..................289
Accessory Gauges ..............289
Selec-Terrain .................289
TIPS CONTROLS AND GENERAL
INFORMATION ............ .290
Steering Wheel Audio Controls ......290
Reception Conditions ............290
Care And Maintenance ...........290
Anti-theft Protection ............291
UCONNECT ACCESS .........291
Uconnect Access — If Equipped (Available
On Uconnect 8.4/8.4 NAV — U.S.
Residents Only)...............291
Uconnect Access Registration (Uconnect
8.4/8.4 NAV, U.S. 48 Contiguous States,
Alaska And Hawaii) ............293
Download The Uconnect Access App . .293 Via Mobile Apps — If Equipped
.....294
Vehicle Finder ................295
Send&Go ..................296
Renewing Subscriptions And
Purchasing 3G Wi-Fi Hotspot (Uconnect
8.4/8.4 NAV, U.S. 48 Contiguous States,
Alaska And Hawaii) .............296
Getting Started With Apps ........297
Maintaining Your Uconnect Access
Account ....................298
Built-In Features ..............298
Vehicle Health Report/Alert ........301
Uconnect Access Remote Features . . .301
UCONNECT 5.0 .............305
Controls On The Front Panel .......305
Clock Setting .................306
Equalizer, Balance And Fade .......306
Radio Mode ..................307
Media Mode .................307
Bluetooth Source ..............310
iPod/USB/SD Card/AUX/Media Player
Control Support ...............311 USB/Audio Jack (AUX)/Bluetooth
Operation
...................311
Phone Mode .................312
SiriusXM Premier Over 160 Channels . .315
UCONNECT 8.4/8.4 NAV ......316
Uconnect 8.4/8.4 NAV At A Glance . . .316
Personalized Menu Bar...........318
Radio Mode ..................318
SiriusXM Premier Over 160 Channels .319
UCONNECT TOUCH SETTINGS . .322
IPOD/USB/SD CARD/MEDIA
PLAYERCONTROL ..........322
Audio Jack (AUX) ..............323
USB Port ...................323
SD Card ....................323
Bluetooth Streaming Audio ........323
Media Controls ................324
UCONNECT REAR SEAT ENTER-
TAINMENT (RSE) SYSTEM — IF
EQUIPPED................ .324
Getting Started...............324
MULTIMEDIA
285
Page 292 of 372

alter the image on the screen. The vehicle
must be in the ON/RUN position to display
Selec-Terrain information.
The selectable modes are as follows:
• Snow
• Sand
• Auto — Default
• Mud
• Rock — Vehicle Must Be In 4 Wheel DriveLow
NOTE:
While in the Selec-Terrain pages, the Off
Road Pages Status Bar will also display the
current Selec-Terrain mode.TIPS CONTROLS AND
GENERAL INFORMATION
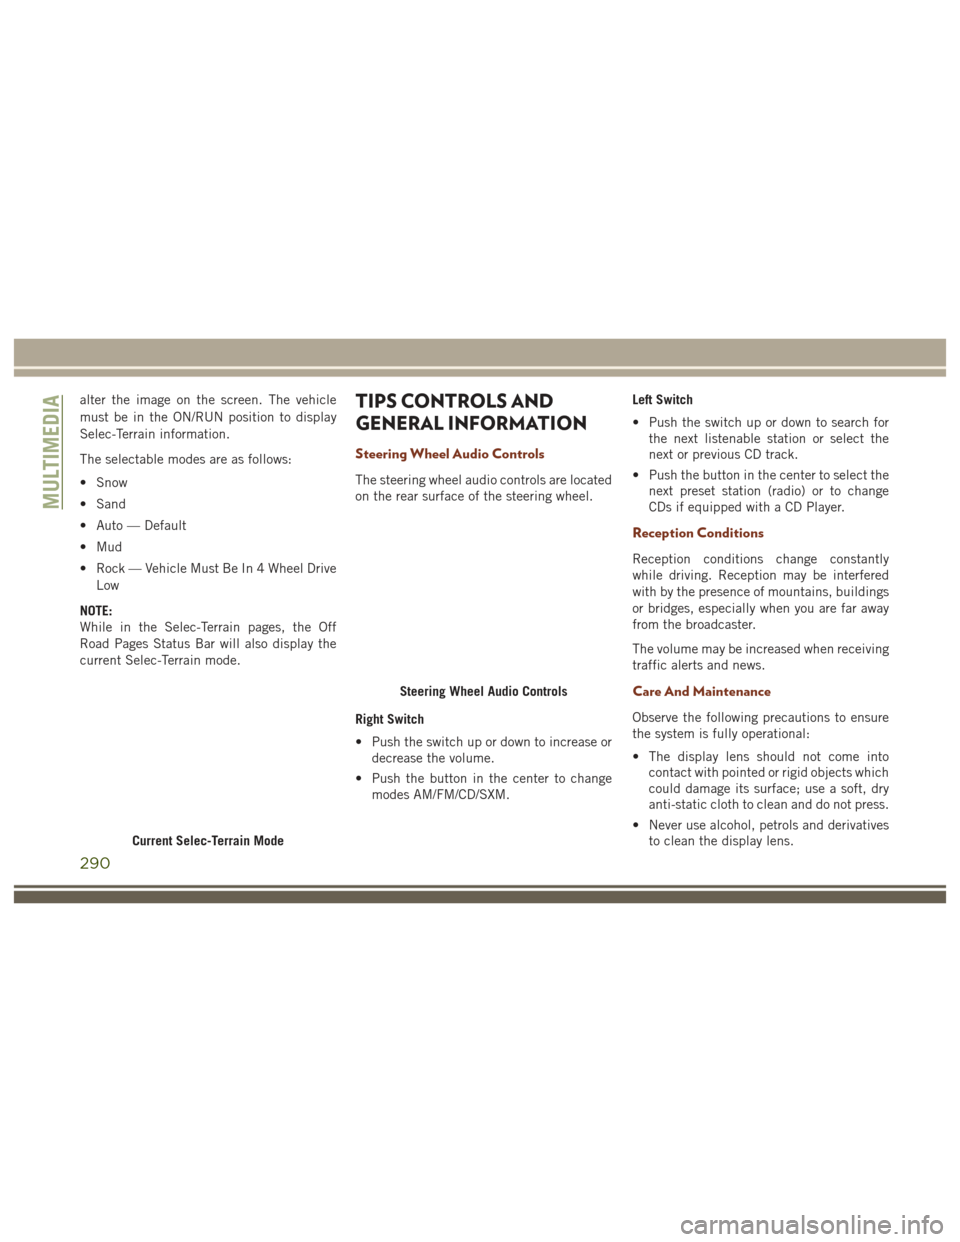
Steering Wheel Audio Controls
The steering wheel audio controls are located
on the rear surface of the steering wheel.
Right Switch
• Push the switch up or down to increase or decrease the volume.
• Push the button in the center to change modes AM/FM/CD/SXM. Left Switch
• Push the switch up or down to search for
the next listenable station or select the
next or previous CD track.
• Push the button in the center to select the next preset station (radio) or to change
CDs if equipped with a CD Player.
Reception Conditions
Reception conditions change constantly
while driving. Reception may be interfered
with by the presence of mountains, buildings
or bridges, especially when you are far away
from the broadcaster.
The volume may be increased when receiving
traffic alerts and news.
Care And Maintenance
Observe the following precautions to ensure
the system is fully operational:
• The display lens should not come intocontact with pointed or rigid objects which
could damage its surface; use a soft, dry
anti-static cloth to clean and do not press.
• Never use alcohol, petrols and derivatives to clean the display lens.
Current Selec-Terrain Mode
Steering Wheel Audio Controls
MULTIMEDIA
290
Page 296 of 372

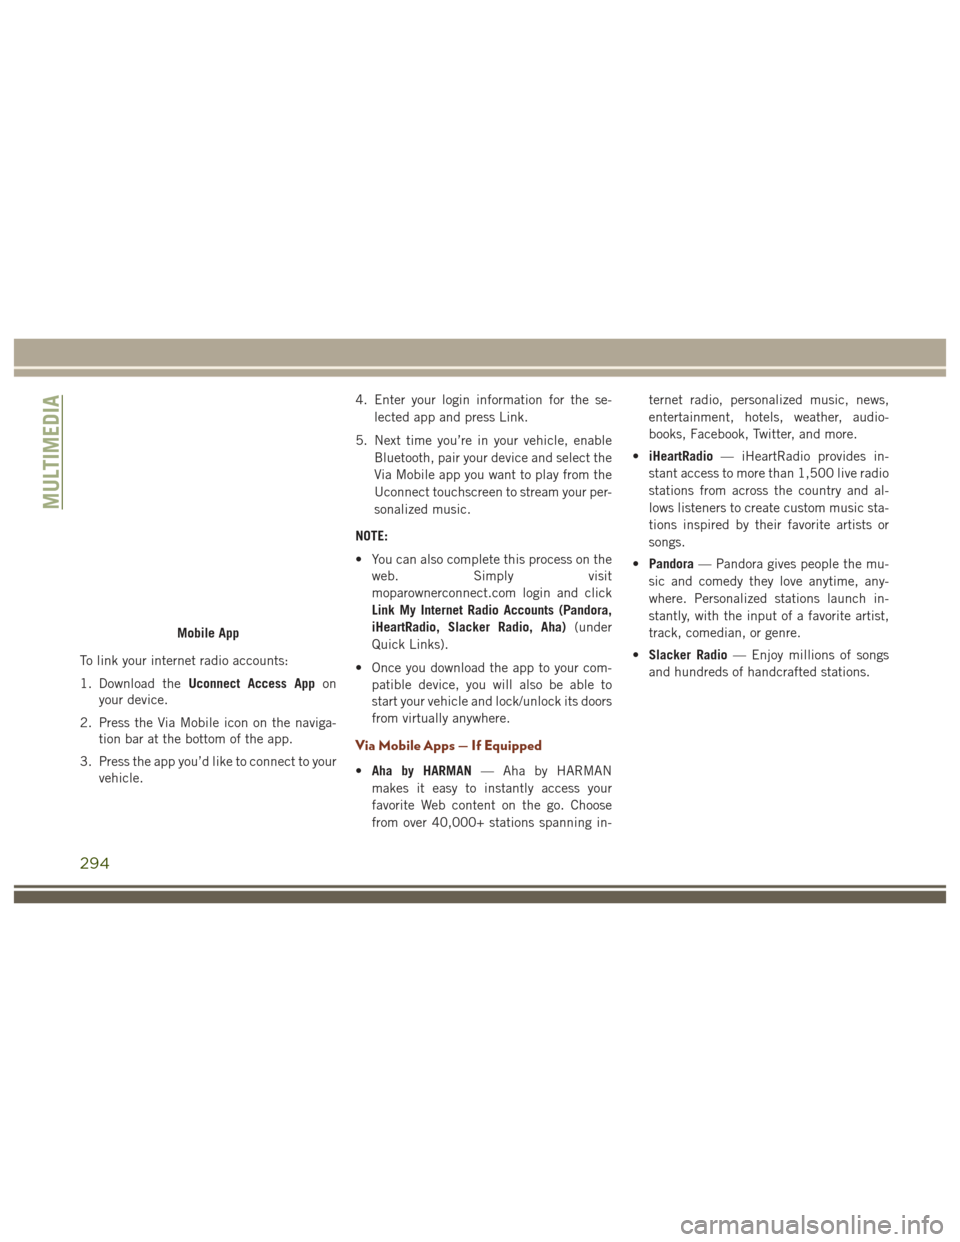
To link your internet radio accounts:
1. Download theUconnect Access App on
your device.
2. Press the Via Mobile icon on the naviga- tion bar at the bottom of the app.
3. Press the app you’d like to connect to your vehicle. 4. Enter your login information for the se-
lected app and press Link.
5. Next time you’re in your vehicle, enable Bluetooth, pair your device and select the
Via Mobile app you want to play from the
Uconnect touchscreen to stream your per-
sonalized music.
NOTE:
• You can also complete this process on the web. Simply visit
moparownerconnect.com login and click
Link My Internet Radio Accounts (Pandora,
iHeartRadio, Slacker Radio, Aha) (under
Quick Links).
• Once you download the app to your com- patible device, you will also be able to
start your vehicle and lock/unlock its doors
from virtually anywhere.
Via Mobile Apps — If Equipped
•Aha by HARMAN — Aha by HARMAN
makes it easy to instantly access your
favorite Web content on the go. Choose
from over 40,000+ stations spanning in- ternet radio, personalized music, news,
entertainment, hotels, weather, audio-
books, Facebook, Twitter, and more.
• iHeartRadio — iHeartRadio provides in-
stant access to more than 1,500 live radio
stations from across the country and al-
lows listeners to create custom music sta-
tions inspired by their favorite artists or
songs.
• Pandora — Pandora gives people the mu-
sic and comedy they love anytime, any-
where. Personalized stations launch in-
stantly, with the input of a favorite artist,
track, comedian, or genre.
• Slacker Radio — Enjoy millions of songs
and hundreds of handcrafted stations.
Mobile App
MULTIMEDIA
294
Page 307 of 372

UCONNECT 5.0
Controls On The Front Panel
Uconnect 5.0 Radio
1 — Radio Mode Button
2 — Reverse Seek Button
3 — Forward Seek Button
4 — Compass Information Button
5 — Climate Controls Button
6 — MORE Functions Button7 — Audio Button
8 — Information Button
9 — Tune Button
10 — AM/FM/SXM Button
11 — Browse/Enter Button Tune/Scroll
Knob12 — Back Function Button
13 — Screen Off Button
14 — Mute Button/Rotate Volume Knob
15 — Uconnect Phone Button
16 — Media Mode Button
305