2017 JEEP GRAND CHEROKEE turn signal
[x] Cancel search: turn signalPage 207 of 372

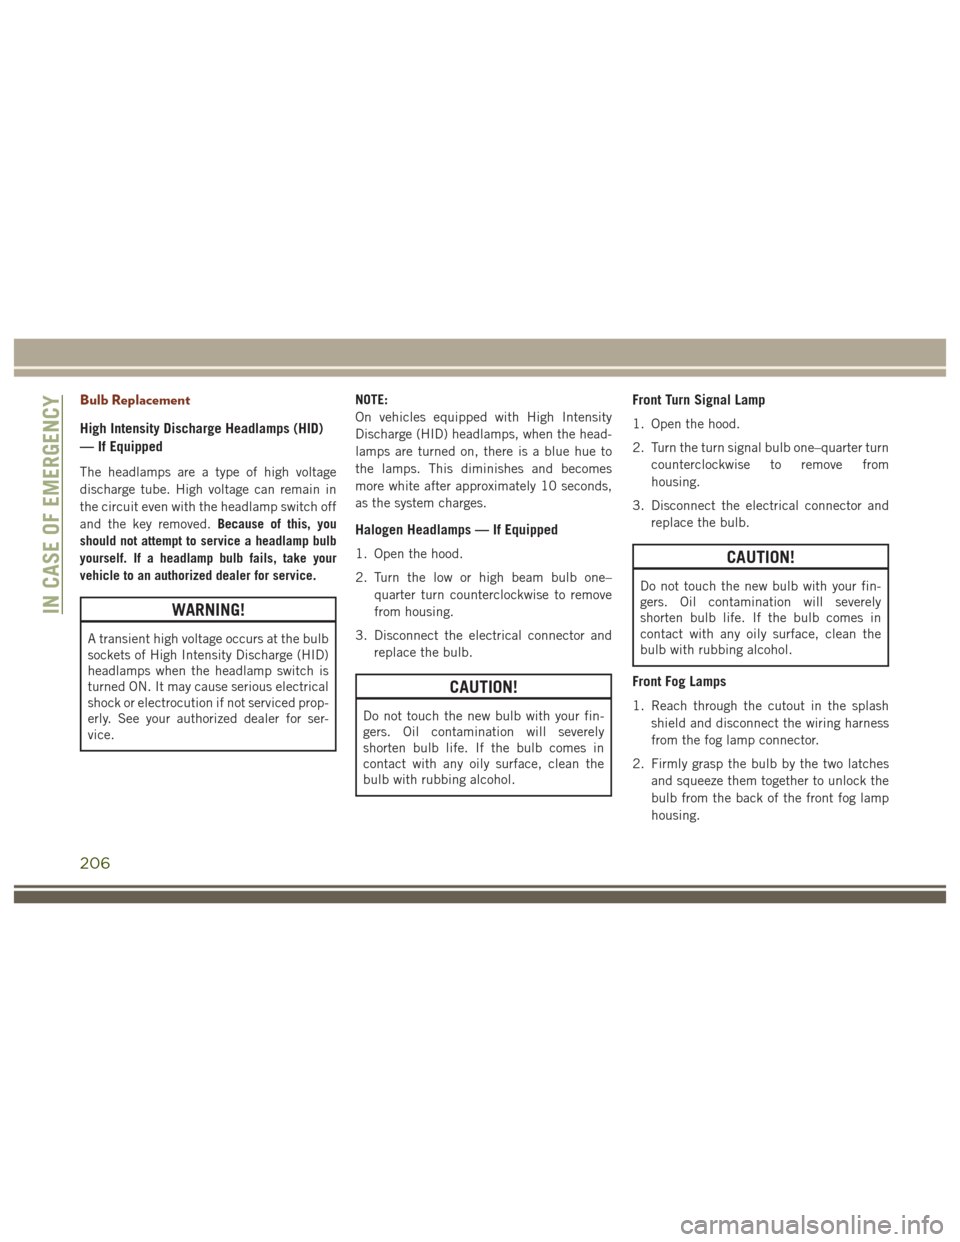
Exterior Bulbs
Bulb Number
Headlamps (Low Beam) — If Equipped H11
Premium Headlamps (Low/High Beam) D3S (Service at Authorized Dealer)
Headlamps (High Beam) — If Equipped 9005
Premium Park/Turn Signal Lamp LED - (Service at Authorized Dealer)
Premium Daytime Running Lamp (DRL) LED - (Service at Authorized Dealer)
Front Fog Lamps H11
Front Side Marker — If Equipped W5W
Premium Front Side Marker — If Equipped LED - (Service at Authorized Dealer)
Front Park/Turn Lamp — If Equipped 7444NA (WY27/8W)
Rear Body Side Turn Signal Lamps 7440NA (WY21W)
Auxiliary Liftgate Tail Lamps LED - (Service at Authorized Dealer)
Liftgate Backup Lamps 921 (W16W)
Rear License Lamps LED - (Service at Authorized Dealer)
Rear Body Side Stop Lamps 3157KRD LCP
Rear Body Side Tail Lamps LED - (Service at Authorized Dealer)
CHMSL - Center High Mounted Stop Lamp LED - (Service at Authorized Dealer)
NOTE:
Numbers refer to commercial bulb types that can be purchased from your authorized dealer.
If a bulb needs to be replaced, visit your authorized dealer or refer to the applicable Service Manual.
205
Page 208 of 372

Bulb Replacement
High Intensity Discharge Headlamps (HID)
—
If Equipped
The headlamps are a type of high voltage
discharge tube. High voltage can remain in
the circuit even with the headlamp switch off
and the key removed. Because of this, you
should not attempt to service a headlamp bulb
yourself. If a headlamp bulb fails, take your
vehicle to an authorized dealer for service.
WARNING!
A transient high voltage occurs at the bulb
sockets of High Intensity Discharge (HID)
headlamps when the headlamp switch is
turned ON. It may cause serious electrical
shock or electrocution if not serviced prop-
erly. See your authorized dealer for ser-
vice. NOTE:
On vehicles equipped with High Intensity
Discharge (HID) headlamps, when the head-
lamps are turned on, there is a blue hue to
the lamps. This diminishes and becomes
more white after approximately 10 seconds,
as the system charges.
Halogen Headlamps — If Equipped
1. Open the hood.
2. Turn the low or high beam bulb one–
quarter turn counterclockwise to remove
from housing.
3. Disconnect the electrical connector and replace the bulb.
CAUTION!
Do not touch the new bulb with your fin-
gers. Oil contamination will severely
shorten bulb life. If the bulb comes in
contact with any oily surface, clean the
bulb with rubbing alcohol.
Front Turn Signal Lamp
1. Open the hood.
2. Turn the turn signal bulb one–quarter turncounterclockwise to remove from
housing.
3. Disconnect the electrical connector and replace the bulb.
CAUTION!
Do not touch the new bulb with your fin-
gers. Oil contamination will severely
shorten bulb life. If the bulb comes in
contact with any oily surface, clean the
bulb with rubbing alcohol.
Front Fog Lamps
1. Reach through the cutout in the splashshield and disconnect the wiring harness
from the fog lamp connector.
2. Firmly grasp the bulb by the two latches and squeeze them together to unlock the
bulb from the back of the front fog lamp
housing.
IN CASE OF EMERGENCY
206
Page 209 of 372

3. Pull the bulb straight out from the keyedopening in the housing.
CAUTION!
•Do not touch the new bulb with your
fingers. Oil contamination will severely
shorten bulb life. If the bulb comes in
contact with any oily surface, clean the
bulb with rubbing alcohol.
• Always use the correct bulb size and type for replacement. An incorrect bulb size
or type may overheat and cause damage
to the lamp, the socket or the lamp
wiring.
4. Align the index tabs of the front fog lamp bulb with the slots in the collar of the bulb
opening on the back of the front fog lamp
housing.
5. Insert the bulb into the housing until the index tabs are engaged in the slots of the
collar.
6. Firmly and evenly push the bulb straight into the lamp housing until both tabs snap
firmly into place and are fully engaged. 7. Connect the wiring harness to the front fog
lamp connector.
Rear Tail, Stop, and Turn Signal Lamps
1. Raise the liftgate.
2. Remove the two push-pins from the taillamp housing.
3. Grasp the tail lamp and pull firmly rear- ward to disengage the lamp from the ap-
erture panel. 4. Twist socket counter clockwise and re-
move from lamp.
5. Pull the bulb to remove it from the socket.
6. Replace the bulb, reinstall the socket, and reattach the lamp assembly.
Tail Lamp Push Pins
Rear Of Tail Lamp
1 — Rear Stop Lamp Bulb Socket
2 — LED Tail Connector – Do Not Re-
move
3 — Rear Turn Signal Bulb Socket
207
Page 300 of 372

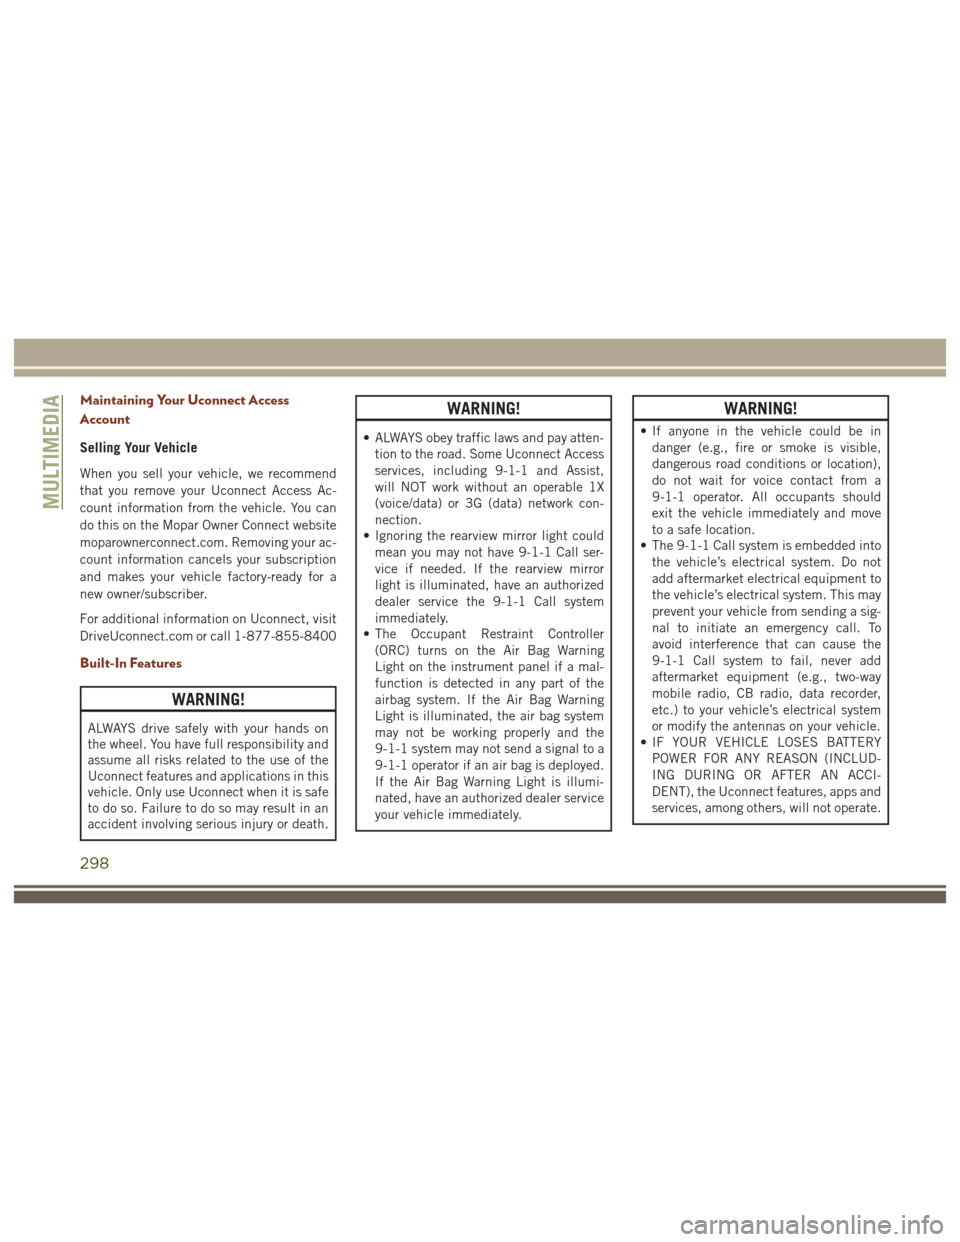
Maintaining Your Uconnect Access
Account
Selling Your Vehicle
When you sell your vehicle, we recommend
that you remove your Uconnect Access Ac-
count information from the vehicle. You can
do this on the Mopar Owner Connect website
moparownerconnect.com. Removing your ac-
count information cancels your subscription
and makes your vehicle factory-ready for a
new owner/subscriber.
For additional information on Uconnect, visit
DriveUconnect.com or call 1-877-855-8400
Built-In Features
WARNING!
ALWAYS drive safely with your hands on
the wheel. You have full responsibility and
assume all risks related to the use of the
Uconnect features and applications in this
vehicle. Only use Uconnect when it is safe
to do so. Failure to do so may result in an
accident involving serious injury or death.
WARNING!
• ALWAYS obey traffic laws and pay atten-tion to the road. Some Uconnect Access
services, including 9-1-1 and Assist,
will NOT work without an operable 1X
(voice/data) or 3G (data) network con-
nection.
• Ignoring the rearview mirror light could
mean you may not have 9-1-1 Call ser-
vice if needed. If the rearview mirror
light is illuminated, have an authorized
dealer service the 9-1-1 Call system
immediately.
• The Occupant Restraint Controller
(ORC) turns on the Air Bag Warning
Light on the instrument panel if a mal-
function is detected in any part of the
airbag system. If the Air Bag Warning
Light is illuminated, the air bag system
may not be working properly and the
9-1-1 system may not send a signal to a
9-1-1 operator if an air bag is deployed.
If the Air Bag Warning Light is illumi-
nated, have an authorized dealer service
your vehicle immediately.
WARNING!
• If anyone in the vehicle could be indanger (e.g., fire or smoke is visible,
dangerous road conditions or location),
do not wait for voice contact from a
9-1-1 operator. All occupants should
exit the vehicle immediately and move
to a safe location.
• The 9-1-1 Call system is embedded into
the vehicle’s electrical system. Do not
add aftermarket electrical equipment to
the vehicle’s electrical system. This may
prevent your vehicle from sending a sig-
nal to initiate an emergency call. To
avoid interference that can cause the
9-1-1 Call system to fail, never add
aftermarket equipment (e.g., two-way
mobile radio, CB radio, data recorder,
etc.) to your vehicle’s electrical system
or modify the antennas on your vehicle.
• IF YOUR VEHICLE LOSES BATTERY
POWER FOR ANY REASON (INCLUD-
ING DURING OR AFTER AN ACCI-
DENT), the Uconnect features, apps and
services, among others, will not operate.
MULTIMEDIA
298
Page 303 of 372

3G Wi-Fi Hotspot
3G Wi-Fi Hotspot is an in-vehicle feature that
connects your device to an operable 1X
(voice/data) or 3G (data) network using
Uconnect Access and is ready to go where
ever you are. Once your vehicle is registered
for Uconnect Access, you can purchase a 3G
Wi-Fi Hotspot subscription at the Uconnect
Store. After you've made your purchase, turn
on your signal and connect your passengers’
devices. It's never been easier to bring your
home or office with you.
WARNING!
NEVER use the 3G Wi-Fi Hotspot when
you are driving the vehicle. As the driver,
you should only use the 3G Wi-Fi Hotspot
when the vehicle is parked in a safe loca-
tion. Failure to do so may result in an
accident involving serious injury or death.
Vehicle Health Report/Alert
Your vehicle will send you a monthly email
report, which summarizes the performance of
your vehicle’s key systems so you can stay ontop of your vehicle’s maintenance needs.
Your vehicle will also send you Vehicle Health
Alerts when it detects issues with its key
systems that need your attention. For further
information, go to the Mopar Owner Connect
website moparownerconnect.com.
Uconnect Access Remote Features
If you own a compatible iPhone or Android
powered device, the Uconnect Access App
allows you to remotely lock or unlock your
doors, start your engine or activate your horn
and lights from virtually anywhere. Your ve-
hicle must be equipped with remote start and
your vehicle must have an operable 1X (voice/
data) or 3G (data) network connection). Ser-
vices can only be used where coverage is
available; see coverage map for details. You
can download the App from Mopar Owner
Connect or from the App Store (iPhone) or
Google Play Store (Android). Visit
UconnectPhone.com to determine if your de-
vice is compatible. For Uconnect Phone cus-
tomer support and to determine if your device
is compatible.
U.S. residents - visit UconnectPhone.com or
call 1-877-855-8400.
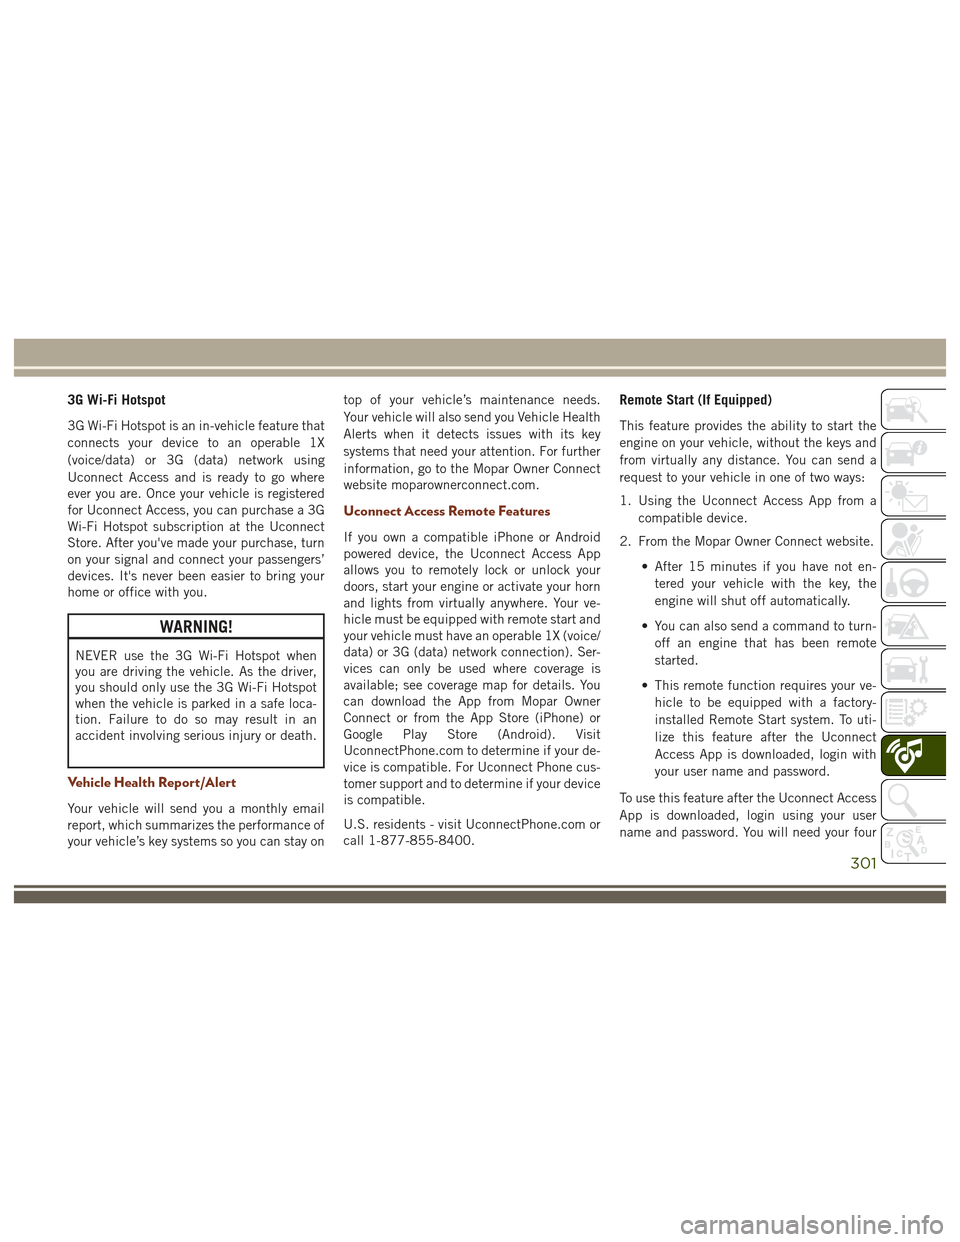
Remote Start (If Equipped)
This feature provides the ability to start the
engine on your vehicle, without the keys and
from virtually any distance. You can send a
request to your vehicle in one of two ways:
1. Using the Uconnect Access App from a
compatible device.
2. From the Mopar Owner Connect website.
• After 15 minutes if you have not en-tered your vehicle with the key, the
engine will shut off automatically.
• You can also send a command to turn- off an engine that has been remote
started.
• This remote function requires your ve- hicle to be equipped with a factory-
installed Remote Start system. To uti-
lize this feature after the Uconnect
Access App is downloaded, login with
your user name and password.
To use this feature after the Uconnect Access
App is downloaded, login using your user
name and password. You will need your four
301
Page 311 of 372

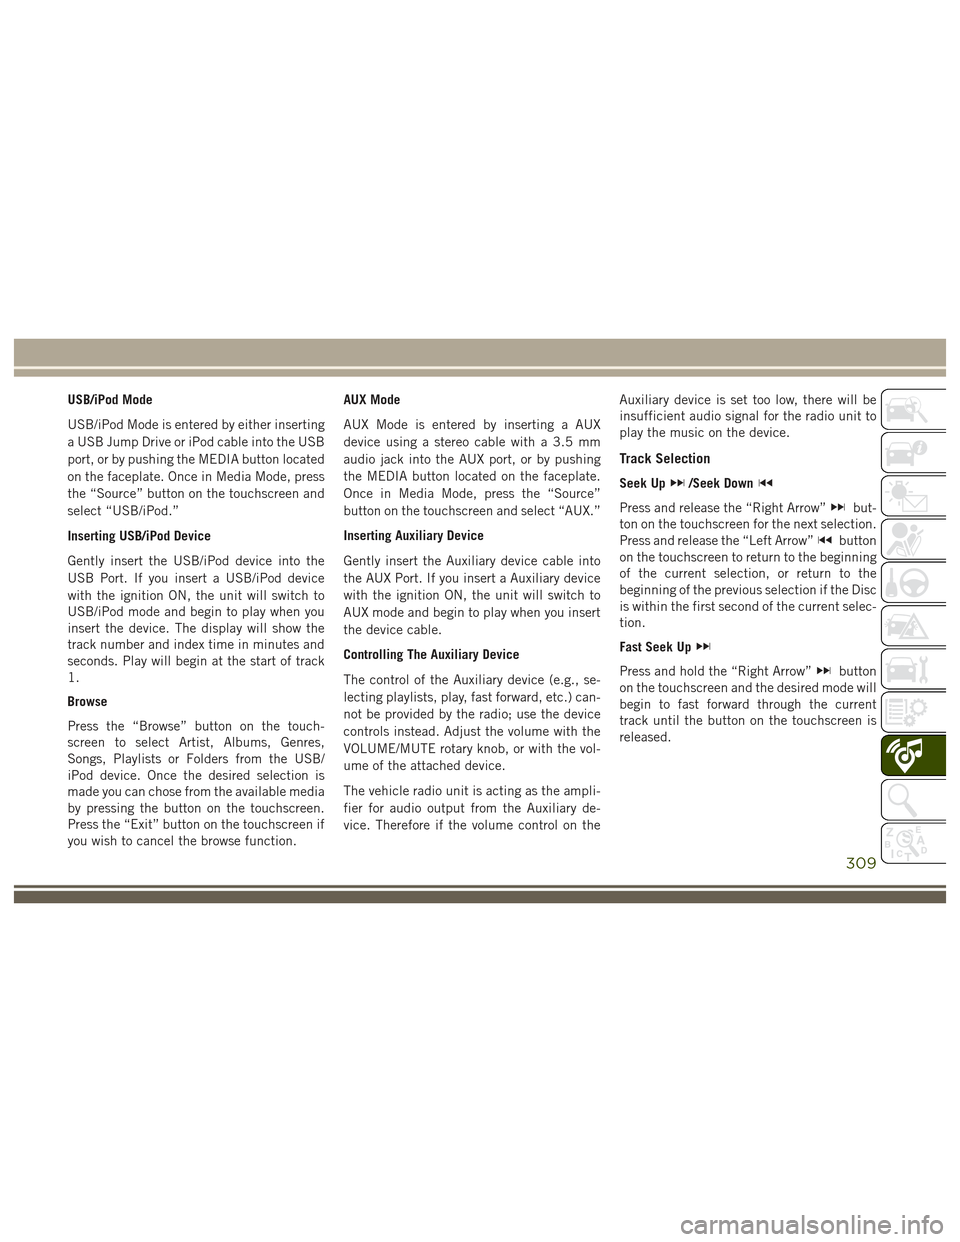
USB/iPod Mode
USB/iPod Mode is entered by either inserting
a USB Jump Drive or iPod cable into the USB
port, or by pushing the MEDIA button located
on the faceplate. Once in Media Mode, press
the “Source” button on the touchscreen and
select “USB/iPod.”
Inserting USB/iPod Device
Gently insert the USB/iPod device into the
USB Port. If you insert a USB/iPod device
with the ignition ON, the unit will switch to
USB/iPod mode and begin to play when you
insert the device. The display will show the
track number and index time in minutes and
seconds. Play will begin at the start of track
1.
Browse
Press the “Browse” button on the touch-
screen to select Artist, Albums, Genres,
Songs, Playlists or Folders from the USB/
iPod device. Once the desired selection is
made you can chose from the available media
by pressing the button on the touchscreen.
Press the “Exit” button on the touchscreen if
you wish to cancel the browse function.AUX Mode
AUX Mode is entered by inserting a AUX
device using a stereo cable with a 3.5 mm
audio jack into the AUX port, or by pushing
the MEDIA button located on the faceplate.
Once in Media Mode, press the “Source”
button on the touchscreen and select “AUX.”
Inserting Auxiliary Device
Gently insert the Auxiliary device cable into
the AUX Port. If you insert a Auxiliary device
with the ignition ON, the unit will switch to
AUX mode and begin to play when you insert
the device cable.
Controlling The Auxiliary Device
The control of the Auxiliary device (e.g., se-
lecting playlists, play, fast forward, etc.) can-
not be provided by the radio; use the device
controls instead. Adjust the volume with the
VOLUME/MUTE rotary knob, or with the vol-
ume of the attached device.
The vehicle radio unit is acting as the ampli-
fier for audio output from the Auxiliary de-
vice. Therefore if the volume control on the
Auxiliary device is set too low, there will be
insufficient audio signal for the radio unit to
play the music on the device.
Track Selection
Seek Up/Seek Down
Press and release the “Right Arrow”but-
ton on the touchscreen for the next selection.
Press and release the “Left Arrow”
button
on the touchscreen to return to the beginning
of the current selection, or return to the
beginning of the previous selection if the Disc
is within the first second of the current selec-
tion.
Fast Seek Up
Press and hold the “Right Arrow”button
on the touchscreen and the desired mode will
begin to fast forward through the current
track until the button on the touchscreen is
released.
309
Page 363 of 372

Electronic Throttle Control WarningLight .....................82
Emergency, In Case Of Freeing Vehicle When Stuck .....226
Hazard Warning Flasher ........204
Jacking ..................258
Jump Starting ..............221
Engine ..............244, 246, 247
Block Heater ...............152
Break-In Recommendations .....155
Checking Oil Level ...........248
Compartment . . . .244, 245, 246, 247
Compartment Identification . .244, 245
Coolant (Antifreeze) . . . .277, 280, 281
Cooling ..................257
Exhaust Gas Caution ..........143
Fails To Start ...............150
Flooded, Starting ............150
Identification ..............247
Jump Starting ..............221
Oil ..........276, 277, 280, 281
Oil Filler Cap ..............244
Oil Selection ..............276
Overheating ...............224
Starting .................149
Enhanced Accident Response Feature ...............128, 229 Exhaust Gas Caution
............143
Exhaust System ...............143
Exterior Lights ................145
Filters Air Conditioning ..........51, 252
Engine Oil .........277, 280, 281
Flashers ....................204
Hazard Warning .............204
Turn Signal .........87, 145, 206
Flooded Engine Starting ..........150
Fluid, Brake ..........279, 281, 283
Fluid Capacities ...........276, 277
Fluid
Leaks ..................145
Fluid Level Checks Brake ...................249
Folding Rear Seat ...............25
Forward Collision Warning .........105
Four-Way Hazard Flasher ..........204
Four Wheel Drive ...........161, 170
Operation ................161
Systems .................161
Four Wheel Drive Operation ........161
Freeing A Stuck Vehicle ..........226
Front And Rear ParkSense System . . . .180
Front ParkSense System ..........180
Fuel ...................273, 275 Adding
...............186, 188
Additives .................274
Diesel ...............275, 281
Economy Mode .............158
Gasoline .................273
Light ....................86
Materials Added ............274
Octane Rating .......273, 277, 280
Requirements ..............275
Specifications .......275, 277, 280
Tank Capacity ..........276, 277
Fueling .................186, 188
Garage Door Opener (HomeLink) ......62
Gasoline (Fuel) ................273
Hands-Free Phone (Uconnect) ......332
Hazard Warning Flasher ..........204
Headlights Cleaning .................268
Passing ..................38
Washers ..................42
Headlight Washers ..............42
Head Restraints ................29
Heated Mirrors .................36
Hill Descent Control ............100
Hill
Descent Control Indicator ......100
361
Page 364 of 372

Hill Start Assist................94
HomeLink (Garage Door Opener) ......62
Hood Release .................57
Inside Rearview Mirror ............34
Instrument Cluster .........82, 86, 87
Instrument Cluster ............75
Instrument Panel Lens Cleaning .....270
Interior Appearance Care .........269
Intervention Regeneration Strategy ....76
Introduction ...................1
In Vehicle Features Uconnect Access ............298
Inverter Outlet (115V) ............67
Inverter, Power ................67
iPod/USB/MP3 Control Bluetooth Streaming Audio ......332
Jacking Instructions ............217
Jack Location .............214, 215
Jack Operation ............217, 258
Jump Starting ................221
Key Fob Arm The Alarm ..............18
Disarm The Alarm ............18
Key-In Reminder ...............15 Keyless Enter-N-Go
..............20
Key, Replacement ...............13
Keys .......................13
Lane Change Assist ..............40
LaneSense ..................183
Lap/Shoulder Belts .............113
Latches ....................145
Leaks, Fluid .................145
Liftgate ..................58, 59
Liftgate Window Wiper/Washer .......42
Light Bulbs ..................145
Lights .....................145
AirBag ............80, 121, 144
Brake Assist Warning ..........98
Brake Warning ..............80
Cargo ....................61
Cruise ...................88
Daytime Running ............38
Dimmer Switch, Headlight .......37
Engine Temperature Warning .....82
Exterior ..................145
Hazard
Warning Flasher ........204
Hill Descent Control Indicator . . . .100
Low Fuel ..................86
Malfunction Indicator (Check Engine) .83
Park ....................87 Passing
..................38
Seat Belt Reminder ...........80
Security Alarm ..............81
Side Marker ...............206
Tire Pressure Monitoring (TPMS) . . .84
Traction Control .............98
Turn Signal .......37, 87, 145, 206
Warning (Instrument Cluster
Description) .............82, 87
Loading Vehicle Tires ...................261
Locks Automatic Door ..............23
Child Protection .............23
Power Door ................20
Lug Nuts ...................272
Maintenance Free Battery .........250
Maintenance Schedule . . . .232, 235, 239
Malfunction Indicator Light (Check Engine) ...................83
Manual, Service ...............357
Manual Transmission Lubricant Selection ..........283
Marker Lights, Side .............206
Media Hub ..................342
Memory Feature (Memory Seat) ......27
INDEX
362