Page 96 of 580

WARNING!
There is no anti-pinch protection when the window is
almost closed. To avoid personal injury be sure to clear
your arms, hands, fingers and all objects from the
window path before closing.
Reset Auto-Up
Should the Auto-Up feature stop working, the window
probably needs to be reset. To reset Auto-Up:
1. Pull the window switch up to close the window com-pletely and continue to hold the switch up for an
additional two seconds after the window is closed.
2. Push the window switch down firmly to open the window completely and continue to hold the switch
down for an additional two seconds after the window is
fully open.
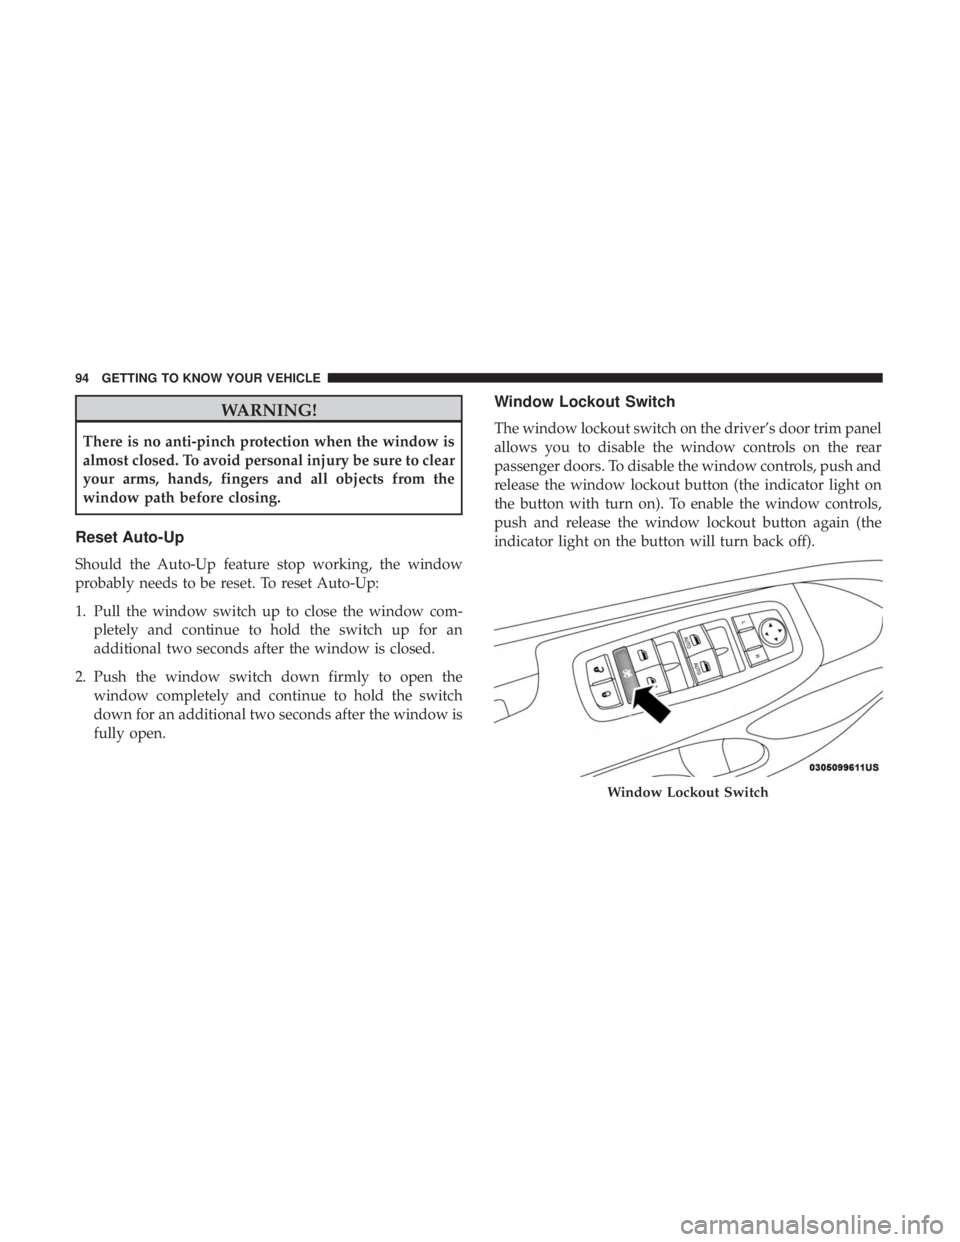
Window Lockout Switch
The window lockout switch on the driver’s door trim panel
allows you to disable the window controls on the rear
passenger doors. To disable the window controls, push and
release the window lockout button (the indicator light on
the button with turn on). To enable the window controls,
push and release the window lockout button again (the
indicator light on the button will turn back off).
Page 98 of 580

WARNING!(Continued)
children, can become entrapped by the power sun-
roof while operating the power sunroof switch. Such
entrapment may result in serious injury or death.
• In a collision, there is a greater risk of being thrown
from a vehicle with an open sunroof. You could also
be seriously injured or killed. Always fasten your
seat belt properly and make sure all passengers are
also properly secured.
• Do not allow small children to operate the sunroof.
Never allow your fingers, other body parts, or any
object, to project through the sunroof opening. In-
jury may result.
Opening Sunroof
Express
A comfort stop position and full open position are the
programmed automatic stops for the sunroof open posi-
tions. The comfort stop position has been optimized to
minimize wind buffeting.
Push the switch rearward and release it within one-half
second. The sunroof will open automatically to the comfort
stop position (if the sunshade is in the closed position when the operation is initiated the sunshade will automati-
cally open to the half open position prior to the sunroof
opening). Push the switch rearward and release it again,
the sunroof will open to the full open position and auto-
matically stop. This is called “Express Open”. During
Express Open operation, any movement of the sunroof
switch will stop the sunroof.
Manual Mode
A comfort stop position is a programmed automatic stop
for the sunroof open position. The comfort stop position
has been optimized to minimize wind buffeting.
To open the sunroof, push and hold the switch rearward.
The sunroof will stop automatically at the comfort stop
position (if the sunshade is in the closed position when the
operation is initiated the sunshade will automatically open
to the half open position prior to the sunroof opening).
Push and hold the switch rearward again, the sunroof will
open to the full open position and automatically stop. Any
release of the switch will stop the movement. The sunroof
and sunshade will remain in a partially opened condition
until the switch is pushed and held rearward again.
96 GETTING TO KNOW YOUR VEHICLE
Page 105 of 580
WARNING!(Continued)
loose. A child could be badly injured. Use only the
anchors provided for child seat tethers.
• To help protect against personal injury, passengers
should not be seated in the rear cargo area. The rear
cargo space is intended for load carrying purposes
only, not for passengers, who should sit in seats and
use seat belts.
The weight and position of cargo and passengers can
change the vehicle center of gravity and vehicle han-
dling. To avoid loss of control resulting in personal
injury, follow these guidelines for loading your vehicle:
•Do not carry loads that exceed the load limits de-
scribed on the label attached to the left door or left
door center pillar.
• Always place cargo evenly on the cargo floor. Put
heavier objects as low and as far forward as possible.
• Place as much cargo as possible in front of the rear
axle. Too much weight or improperly placed weight
over or behind the rear axle can cause the vehicle to
sway.
(Continued)
Page 113 of 580
WARNING!
Do not operate this vehicle with a console compart-
ment lid in the open position. Driving with the console
compartment lid open may result in injury in a colli-
sion.
Cupholders
There are two cupholders for the front seat passengers,
located in the center console.
Page 117 of 580
WARNING!
To avoid serious injury or death:
•Only devices designed for use in this type of outlet
should be inserted into any 12 Volt outlet.
• Do not touch with wet hands.
• Close the lid when not in use and while driving the
vehicle.
• If this outlet is mishandled, it may cause an electric
shock and failure.
Page 136 of 580

— Brake Warning Light
This light monitors various brake functions, including
brake fluid level and parking brake application. If the
brake light turns on it may indicate that the parking brake
is applied, that the brake fluid level is low, or that there is
a problem with the anti-lock brake system reservoir.
If the light remains on when the parking brake has been
disengaged, and the fluid level is at the full mark on the
master cylinder reservoir, it indicates a possible brake
hydraulic system malfunction or that a problem with the
Brake Booster has been detected by the Anti-Lock Brake
System (ABS) / Electronic Stability Control (ESC) system.
In this case, the light will remain on until the condition has
been corrected. If the problem is related to the brake
booster, the ABS pump will run when applying the brake,
and a brake pedal pulsation may be felt during each stop.
The dual brake system provides a reserve braking capacity
in the event of a failure to a portion of the hydraulic
system. A leak in either half of the dual brake system is
indicated by the Brake Warning Light, which will turn on
when the brake fluid level in the master cylinder has
dropped below a specified level.
The light will remain on until the cause is corrected.NOTE:
The light may flash momentarily during sharp
cornering maneuvers, which change fluid level conditions.
The vehicle should have service performed, and the brake
fluid level checked.
If brake failure is indicated, immediate repair is necessary.
Page 139 of 580
— Door Open Warning Light
This indicator will illuminate when a door is ajar/open and
not fully closed.
NOTE:If the vehicle is moving, there will also be a single
chime.
Page 153 of 580

WARNING!(Continued)
•The capabilities of an ABS equipped vehicle must
never be exploited in a reckless or dangerous manner
that could jeopardize the user ’s safety or the safety of
others.
ABS is designed to function with the OEM tires. Modifica-
tion may result in degraded ABS performance.
Anti-Lock Brake Warning Light
The yellow “Anti-Lock Brake Warning Light” will turn on
when the ignition is turned to the ON/RUN mode and
may stay on for as long as four seconds.
If the “Anti-Lock Brake Warning Light” remains on or
comes on while driving, it indicates that the anti-lock
portion of the brake system is not functioning and that
service is required. However, the conventional brake sys-
tem will continue to operate normally if the “Anti-Lock
Brake Warning Light” is on.
If the “Anti-Lock Brake Warning Light” is on, the brake
system should be serviced as soon as possible to restore
the benefits of anti-lock brakes. If the “Anti-Lock Brake Warning Light” does not come on when the ignition is
turned to the ON/RUN mode, have the light repaired as
soon as possible.
Electronic Brake Control System
Your vehicle is equipped with an advanced Electronic
Brake Control system (EBC). This system includes Elec-
tronic Brake Force Distribution (EBD), Anti-Lock Brake
System (ABS), Brake Assist System (BAS), Hill Start Assist
(HSA), Traction Control System (TCS), Electronic Stability
Control (ESC), and Electronic Roll Mitigation (ERM). These
systems work together to enhance both vehicle stability
and control in various driving conditions.
Your vehicle may also be equipped with Trailer Sway
Control (TSC), Ready Alert Braking (RAB), Rain Brake
Support (RBS), Dynamic Steering Torque (DST), Hill De-
scent Control (HDC), and Selec-Speed Control (SSC).
Electronic Brake Force Distribution (EBD)
This function manages the distribution of the braking
torque between the front and rear axles by limiting braking
pressure to the rear axle. This is done to prevent overslip of
the rear wheels to avoid vehicle instability, and to prevent
the rear axle from entering ABS before the front axle.
5
SAFETY 151